Building a magic mirror that shows real-time weather, news, and travel info etc.
is a popular project.
That screen can be an Android tablet or a computer monitor.

Naturally, a monitor will make for a larger mirror.
It’s also a great way to repurpose an old LCD monitor.
But you’re free to’t cram a full computer in there, unless you use a Raspberry Pi.
Image Credit:Raspberry Pi
In fact, the smart mirror DIY community prefers the Pi over all other methods.
To make your search easier, and to stop repeating ourselves, here are the most important components.
The project requires a two-way mirror, which you might buy atTwoWayMirrors.comor head to your local hardware store.

LCD Monitor
Behind the mirror, you’ll be installing a screen.
Choose the product and distributor that’s best for you onthe official site.
Wooden Frame
Something to hold together that mirror and the monitor behind it.

Image Credit:Raspberry Pi
Your local hardware store should sort you out.
Along with these, you’ll need all the basic tools required to work with them.
So see to it you have a screwdriver, screws, sander, woodworking tools, and so on.

MagicMirror2: The Original Pi Smart Mirror
This is the MagicMirror2.
There are many like it, but this one is Michael Teeuw’s.
He was among the first to build and document the entire smart mirror process with a Raspberry Pi.
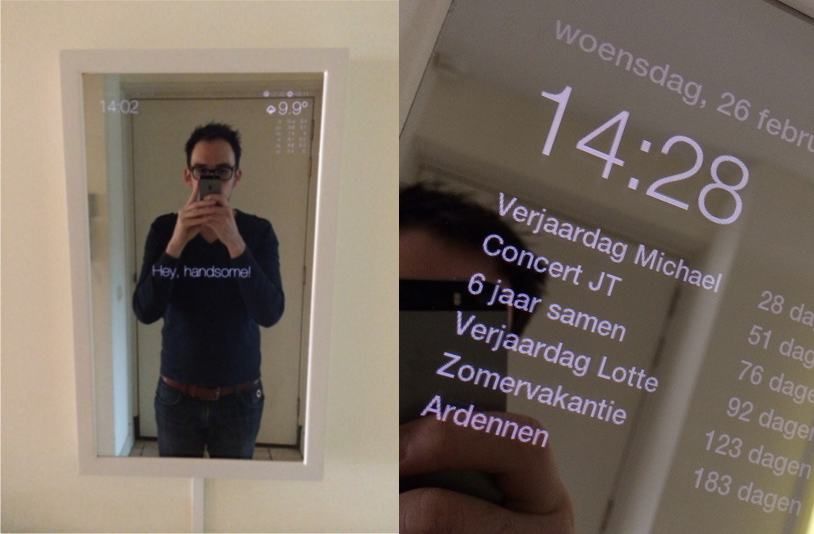
Michael has written a series ofMagicMirror2 tutorials, so you might read all about it on his blog.
He’ll take you through the full setup and build.
The best part is how easy he has made the process.

Run a simple Bash script from MagicMirror2, and your Raspberry Pi will be ready to go.
And people are buildingthird-party modulesthat you’ve got the option to install.
If you’re new to the world of smart mirrors, this is the project to start with.

It has a large community around it and you might ask for help on theMagicMirror2 forum.
Websites:Firmware|Full Guide|GitHub
2.
Mainly because Pierce’soriginal blog postis the best step-by-step guide to the actual building process.
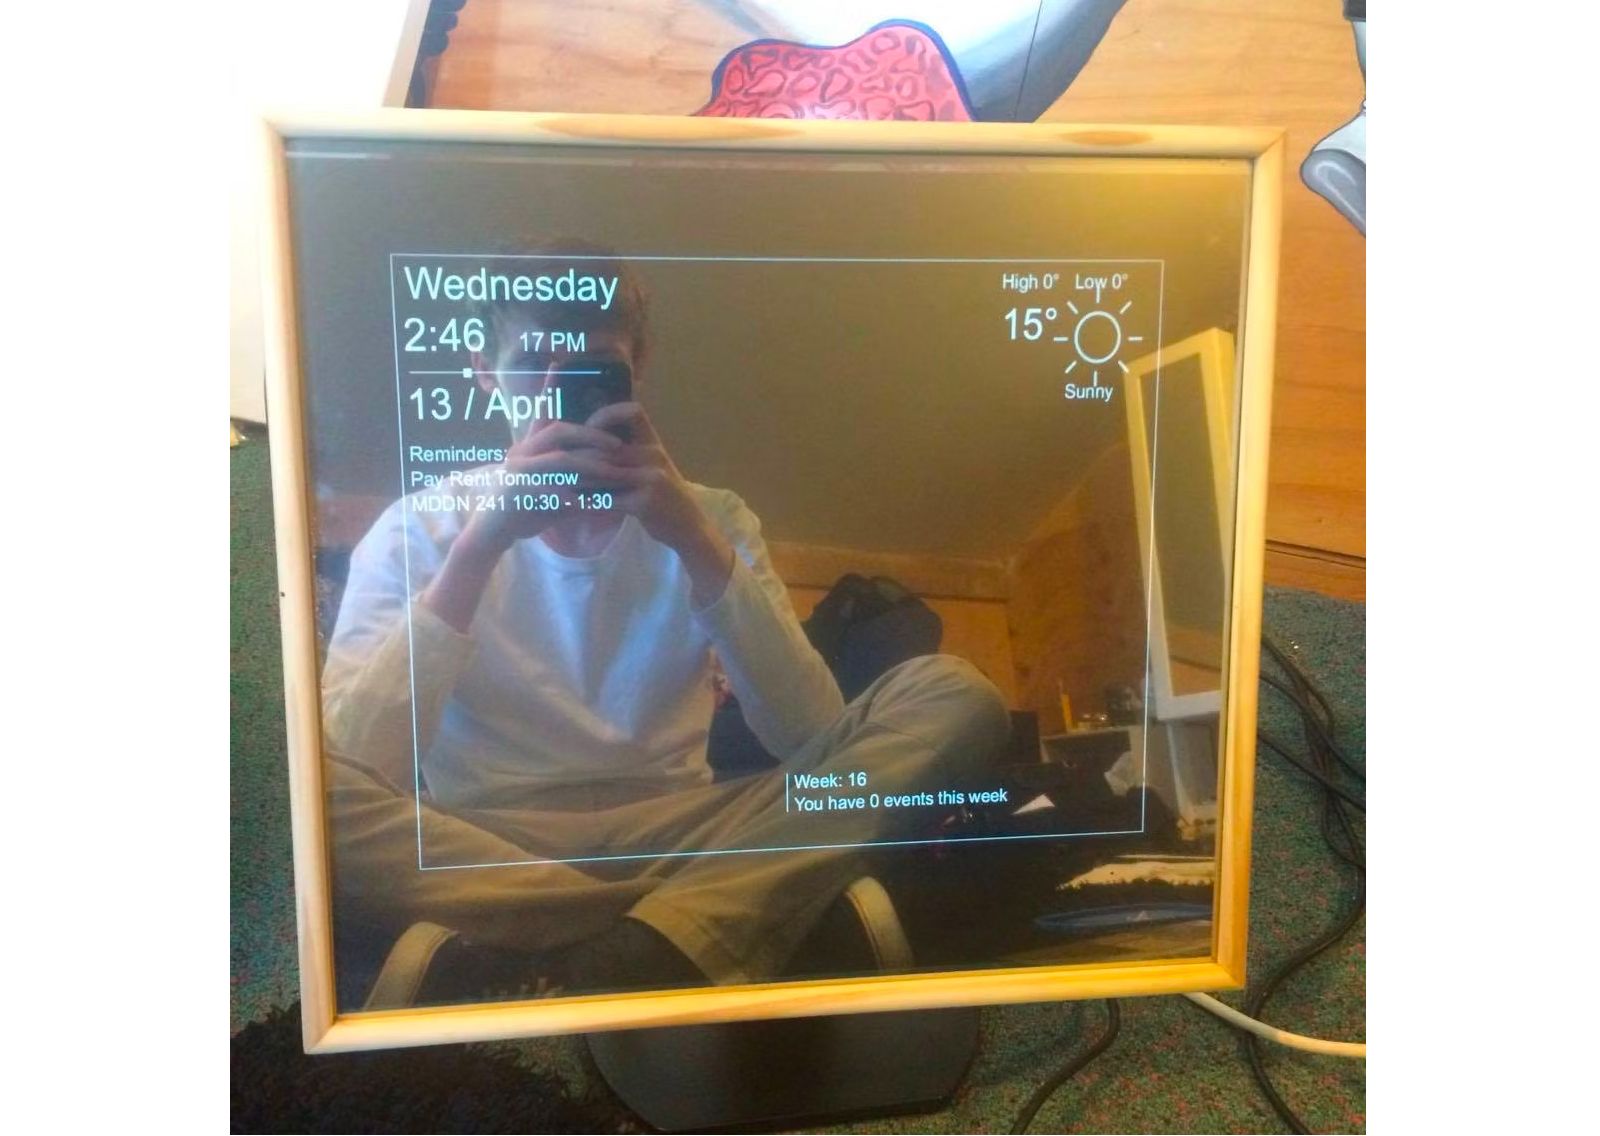
Finally, he made his own web page and server.
Before you make your own smart mirror, read the full post.
Pierce was building this smart mirror as a gift.
So he has taken care to ensure it looks brilliant.
But the jewel of the piece is in his woodworking.
Websites:Full Guide
3.
And yes, it still runs on a Raspberry Pi, so you don’t need an Android machine.
Cohen has provided the full documentation of how to build, install, and operate his smart mirror.
The video is really impressive, and it works with several third-party apps.
For example, you’re able to control smart LED lights by talking to your mirror.
This one too has a wonderful, detailed hardware guide.
If you’re planning to build it, use the provided guide instead of Pierce’s method.
Websites:Full Guide|GitHub
4.
Voice and Gesture-Controlled Smart Mirror
Can you make a touchscreen smart mirror?
Yes, it’s possible, as well see later.
Another way to interact with your magic mirror is to use gesture control or voice control.
So builder Josep Cumeras i Khan got to work.
This smart mirror has a few cool tricks.
To navigate inside an app, use simple gestures.
This project is among the more expensive magic mirrors out there, clocking in at 400 euros.
But when you see the result in the video, you know it’s worth it.
Websites:Guide|Additional Guide|GitHub
5.
A step-by-step build tutorial is available, which should eventually cover adding home automation and multiple user profiles.
Websites:Full Guide|Smart Touch GitHub|Face ID GitHub
6.
An on-screen avatar even mimics the users movements.
His entire aim in this project is to make it as cheap and thrifty as possible.
Salvaged iPad Magic Mirror
Another way to save money is to repurpose old devices.
A video driver board takes the HDMI output from the Pi and sends it to the LCD panel.
The final result is a convincing magic mirror, for very little cost.
Coupled with the MagicMirror2 OS, it makes smart mirror builds much easier.
