Related
This is by no means a new tip.
Many iPhone owners have been using this little “hack” to stream movies and music from iTunes.
I’ve also added a few tips of my own.
It can’t be that hard, I thought.
Turns out, it isn’t.
Heck, it isn’t even cheap at 20 ($25).

Allow me to explain what this hack is all about.
It enables a function on your Mac to turn it into a personal web server.
It can also be accessible outside your LAN over the internet (be careful about this).

It doesn’t have a gorgeous, graphical interface; it merely presents a list of your files.
What can this hack do?It can stream your iTunes library to iPhone.
They don’t even need to be formatted for the iPhone.

OK, let’s get started.
I’m writing this tutorial based on Leopard.
Navigation in Tiger and previous OSes may be slightly different.
Head over to System Preferences located on your Dock in Leopard.
Tiger users can get to System Preferences by clicking on the Apple icon at the top-left corner.
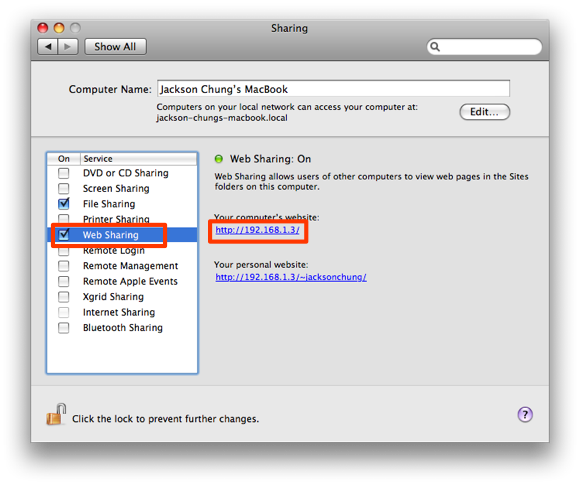
Once there, hit ‘Sharing’.
Check the box next to “Web Sharing” to enable it.
Note your IP address shown on the right side.
This is your internal IP if you have a router.
Depending on whether you are connected via DHCP, your IP may change.
Symbolic links differ from aliases created with Finder.
Now, you better create a symbolic link for this folder to get to share it.
There are 3 ways of doing this.
The easiest wayis to download and extract this droplet [Create Symbolic Link].
Take that link, drop it into the /Library/WebServer/Documents folder and remove the .sym from its name.
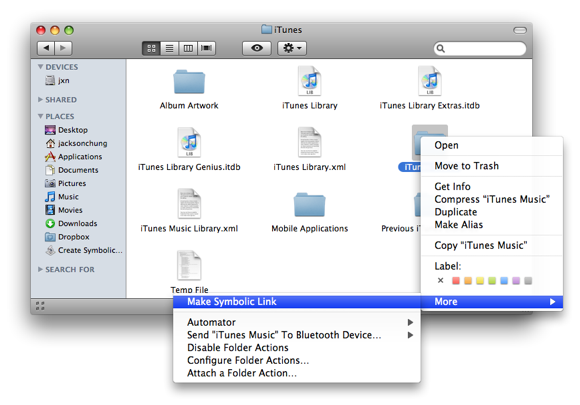
An alternative for thatis to download SymbolicLinker.
It adds a contextual menu that can easily create symbolic links by right-clicking on any folder.
Then select ‘Relaunch’.
A new symbolic link appears with a “symlink” added to its name.
Drag that link over to /Library/Webserver/Documents/ and remove “symlink” from its name.
That said, launch Terminal.
peek if the symbolic link has been created.
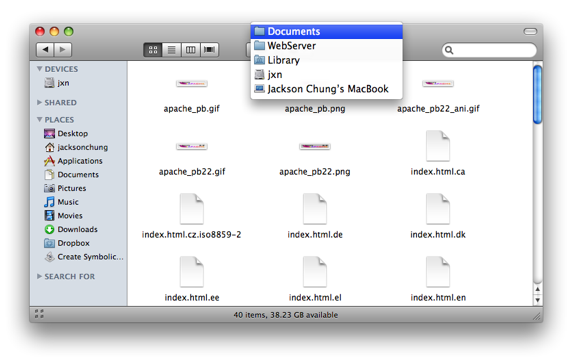
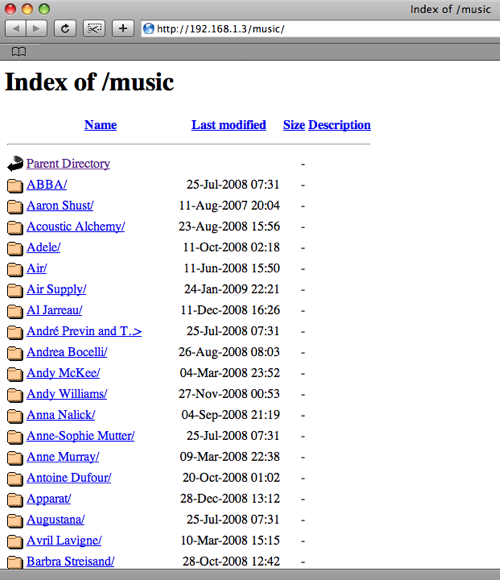
Now that you have the symbolic links, we need to make the iTunes Music folder web-accessible.
So, we make the ~/Music folder web-accessible.
Okay, symbolic links -Check.
Let’s try it out.
That was just a taster.
Now comes the sweet part - streaming movies to your iPhone!
The movies can be stored anywhere as along as they are formatted in h.264.
To be safe, I’ll just show you how to share your iTunes Movies folder.
Remember that .mov reference movies cannot be played.
If your movies aren’t formatted in h.264, iSquint is a great system for conversion.
It was developed by TechSpansion (which has shut down) but iSquint is still available for free.
Download it here and convert your files into iPod format to add into iTunes.
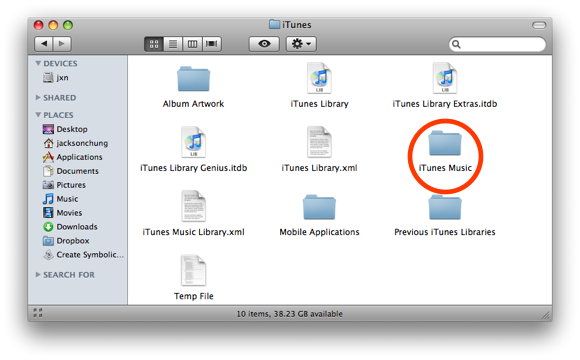
The iTunes movies folder is located within the iTunes Music folder, which means essentially it was already shared.
Just scroll down the list of your artist until you see Movies.
But to make it easier to call, we shall share the folder as well.
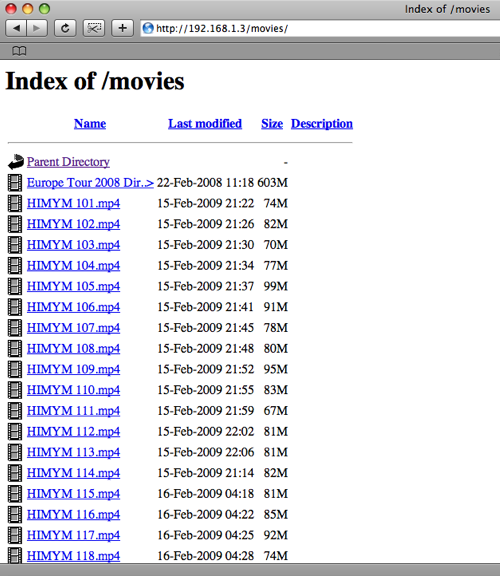
Create a symbolic link for ~/Music/iTunes/iTunes Music/Movies and place it in the server folder then rename it to Movies.
In your net web client, typehttp://[Your IP address]/Movies/
Great!
Now whip out your iPhone, connect to your home Wi-Fi data pipe and launch Safari.
type your internal IP followed by /Movies/ like above.
tap on any video, wait for it to buffer and it will start playing!
But what if you’re not connected to your local area connection?
There are a few variables here.
Port forwarding varies depending on your router’s make and model, for instructions,go here.
Second, even if your internal IP is static, your external IP may not be.
If it isn’t, then you’ll need to sign up forDynDNS.
If you received an error then check the variables: IP address, port forwarding, firewall.
Allowing access to port 80 on your Mac brings up security issues and unwanted intrusion.
Be sure to have your firewall enabled and allow port 80 to come through.
Also, be cautious when sharing your external IP address.
Like I said before, this is not a new tip.
I merely wanted to simplify the process for Switchers and new iPhone/iPod Touch owners to follow.
I hope you find this tip useful and you’re glad to finally stream videos to your iPhone.
