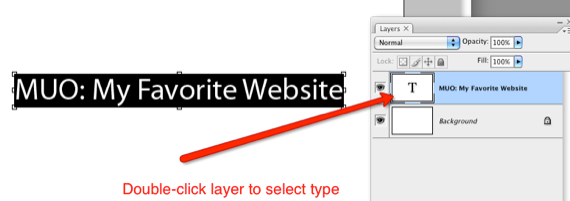
Like other tools in Photoshop, text is put on its own layer.
you might have several layers of text which can moved around, flipped, rotated, and scaled.
you’re able to add text on top of an image without destroying the original image itself.
If you’re totally new to Photoshop, you might want check out myintroductory tipsto Photoshop here on MUO.
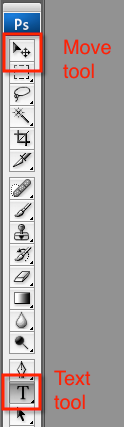
We’re going to be working with three tools: first there is theTypeandMovetools in the tool palette.
Next, we want to be familiar with theLayerspalette.
When you create text on a document, it automatically gets put in a layer.
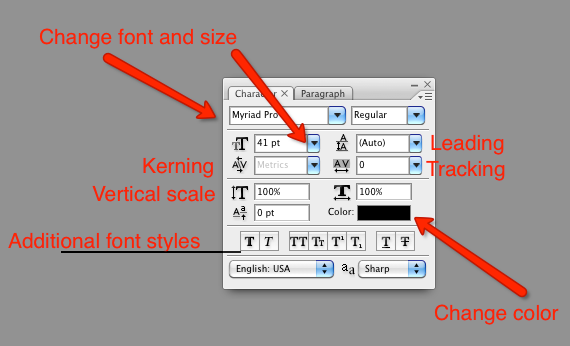
The Character Panel is found inWindow>Characterin the menu bar.
So go ahead and choose that menu item and let’s get started.
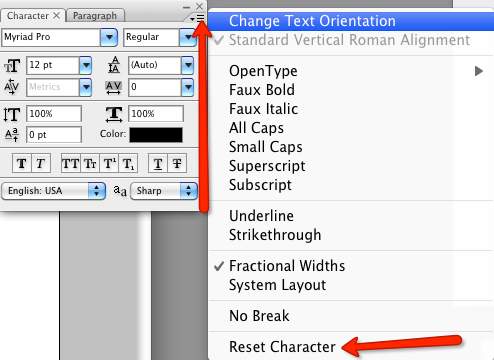
To confirm we start off on the same page, choose the upper right triangle of the Character Panel.
In the drop-down menu selectReset Character.
Notice also that this menu reflects many of the same tools you will find on the Panel itself.
There are entire books written on throw in design if want to learn more.
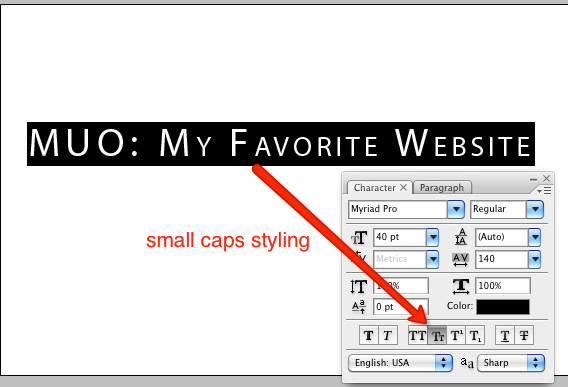
bold, underline, all capitals.
When you put the cursor over these individual tools, their names will pop-up.

But don’t worry so much about remembering the names, just have fun with them.
Create Text
Okay, let’s start off by creating some text.
Select theTypetool in the toolbar of Photoshop.
With the text select, make the changes in either in the Character Panel or under the menu bar.
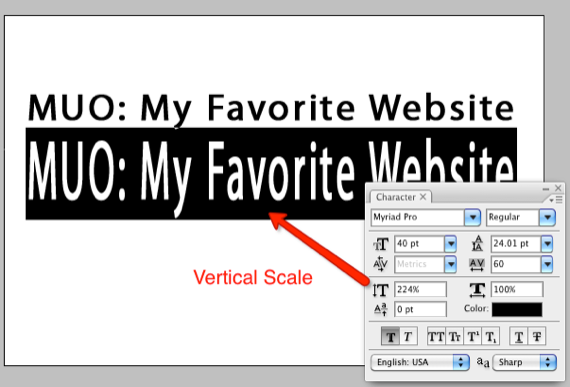
I’m using Myriad Pro, 40pt size.
For all tools we use, you’re gonna wanna grab the text to make changes.

Leading
Leading is basically the amount of space between letters.
This tool gives you more control over spacing.
Pulling individual letters apart or closer to one another may make them more readable or aesthetically appealing.
Kerning works in a similar fashion, but it’s a little more advanced for this tutorial.
It works differently for different font types.
Again, snag the tool and move your cursor right and left for changes.
bold lettering, capitalized text, small and large caps, underlining and strikethroughs.
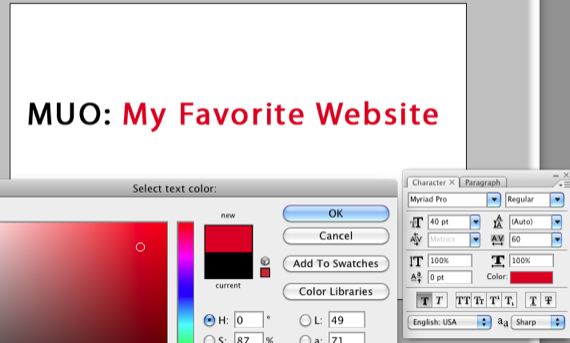
Simply hit the color tool and choose the color from the color palette.
You access it by selecting the Text tool in the Toolbar.

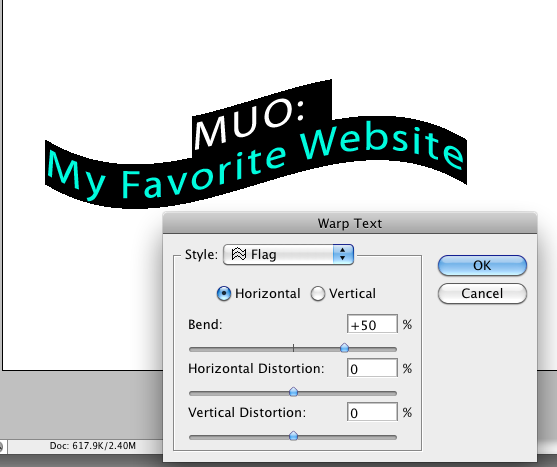
At the top under the Photoshop menu bar, the Warp Text tool is towards the middle.
Or you’re able to reset the entire changes you made as described above.
If you have never used the Character Panel in Photoshop, let us know how you like it.

If you have any questions, c’mon leave them in the comment section below.
![]()