AG-code fileis a contains the instructions for the 3D printer.
Cura supports Windows, macOS, and Linux.
When you finish downloading, install and launch the software.
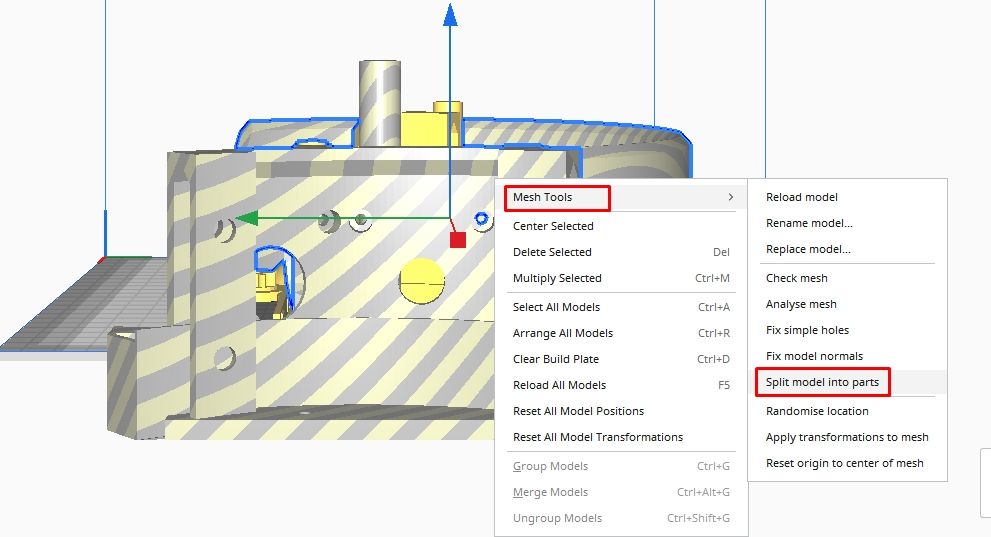
The plugin can detect the parts that were different and separate them.
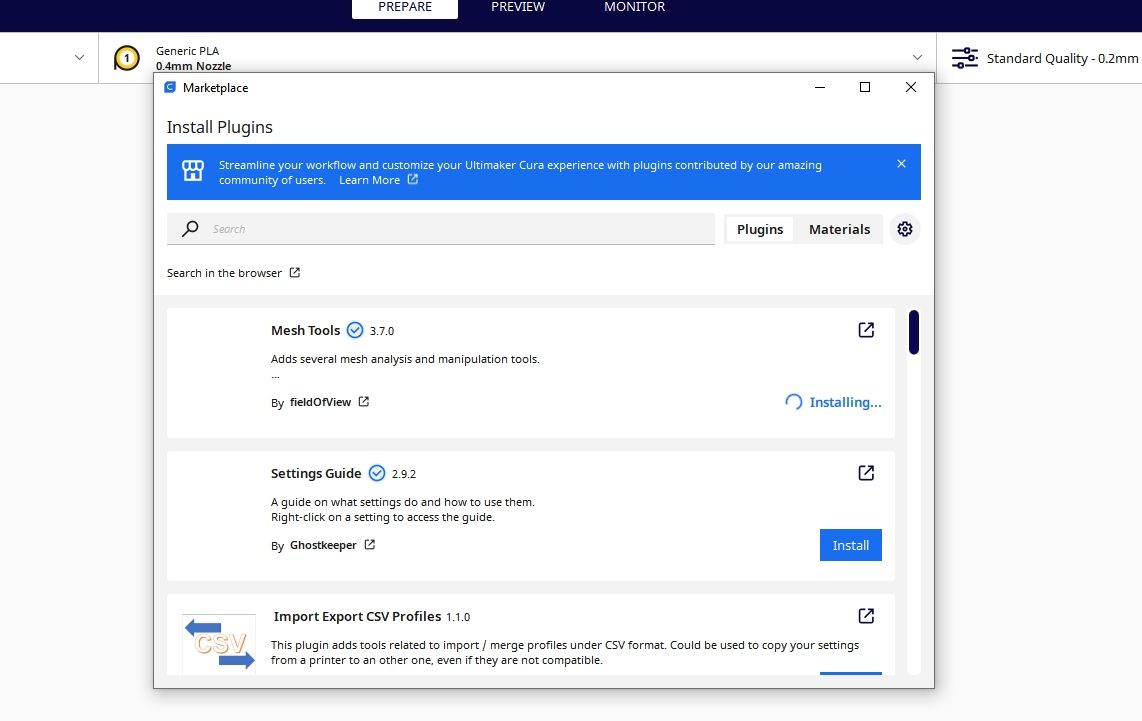
To install it, go toMarketplace > Mesh Tools,then selectInstall.
A pop-up window will appear, asking you to accept the plugin license.

Author Photo: Sammy Ekaran
ClickAgreeand restart the software and proceed to import your design.
Once the file is loaded, you will be ready to start splitting.
Wait a few seconds, and Cura will split the object into multiple parts.
To use these tools, you will begin by importing the file using the method we used above.
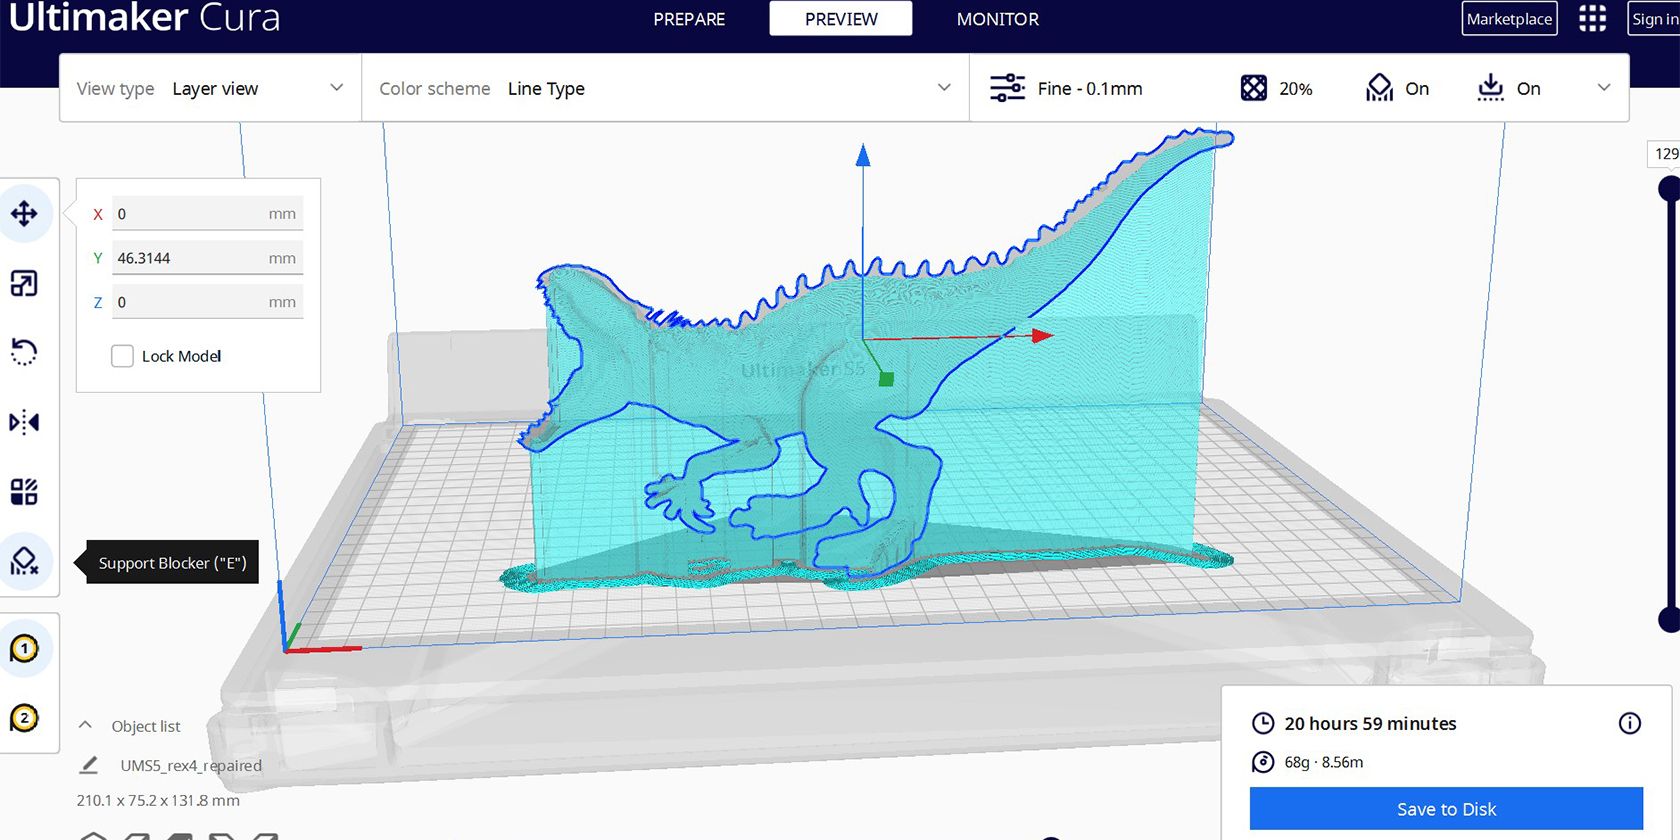
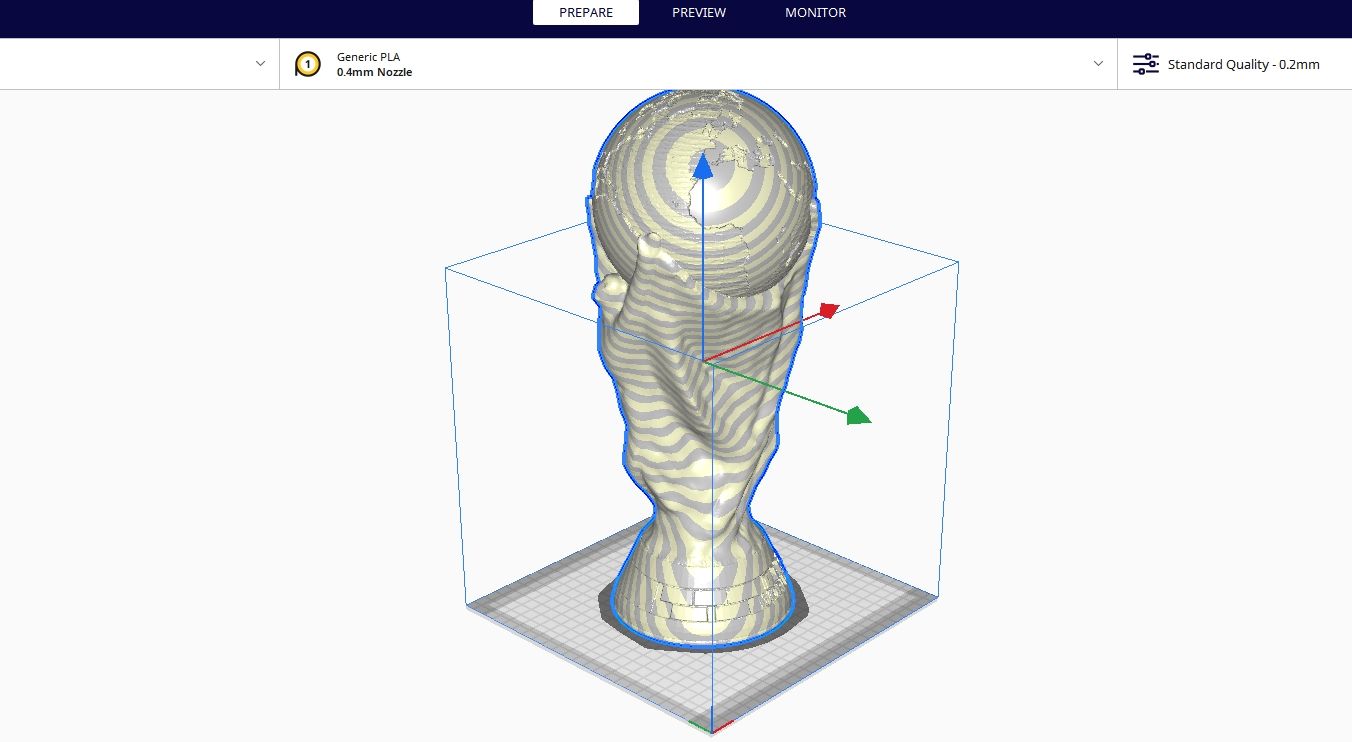
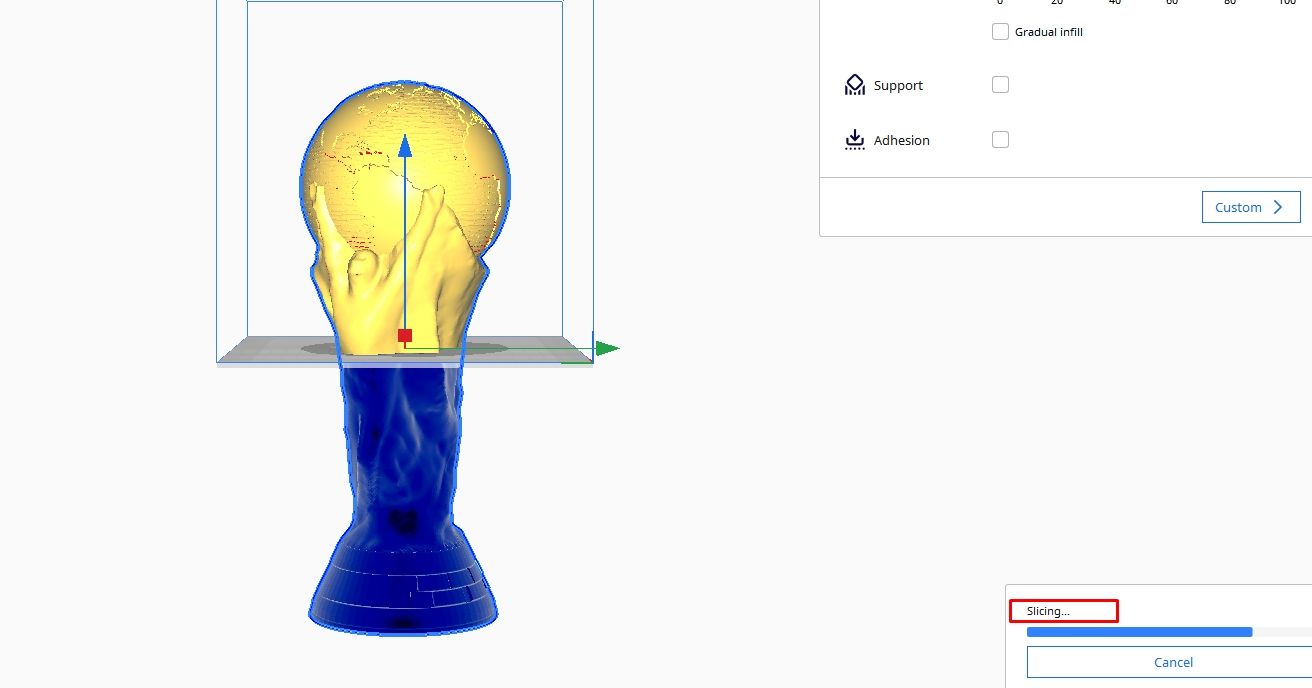
In our case, we are using the design shown below to show the process.
Once you import your 3D model, proceed to the next step.
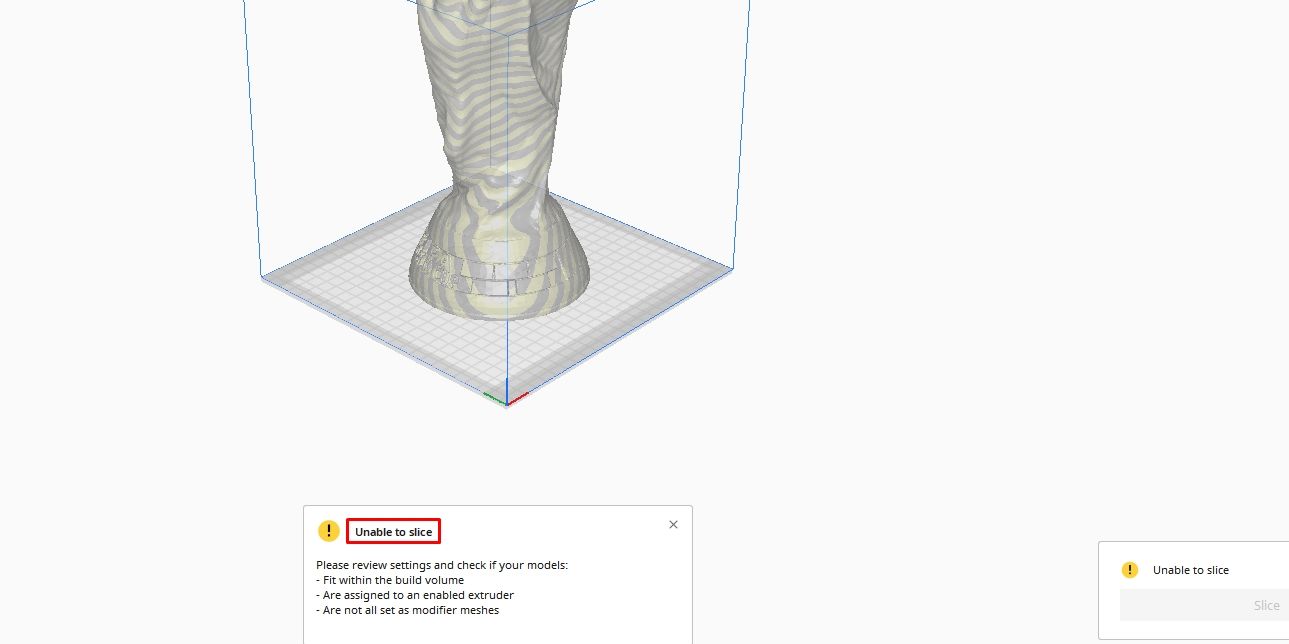
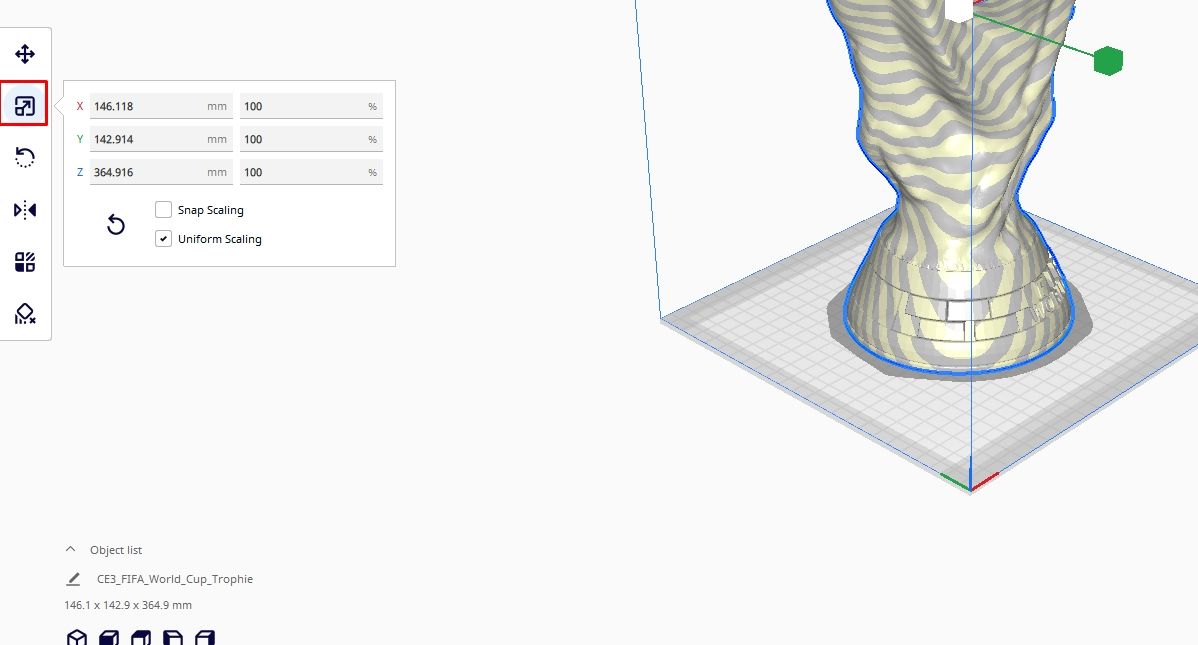
To make it easier to slice, you will need to split it into two parts.
In our case, X is 161.64mm, Y is 161.64mm, and Z is 364.916mm.
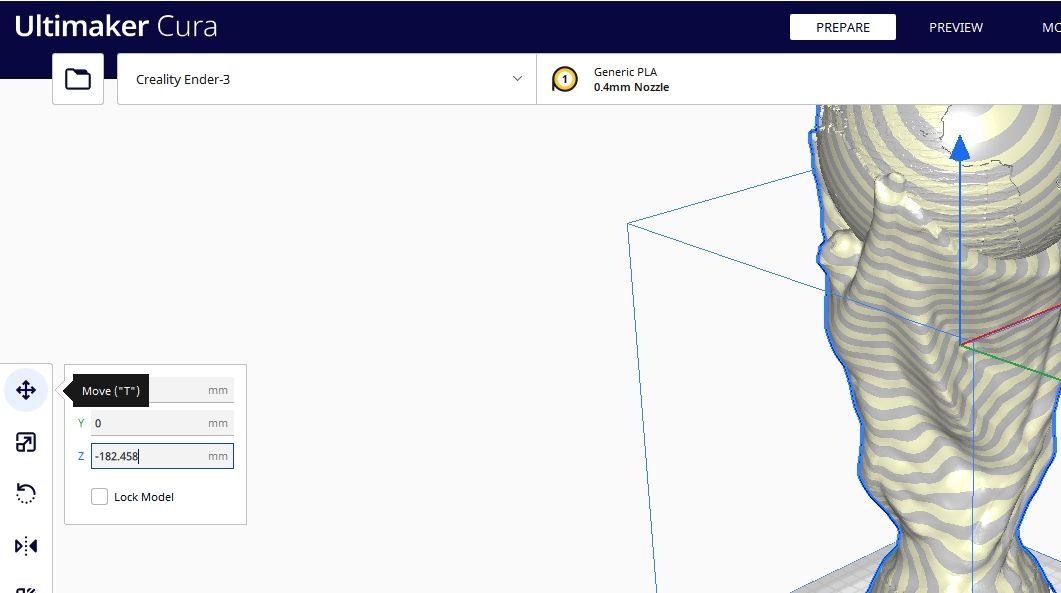
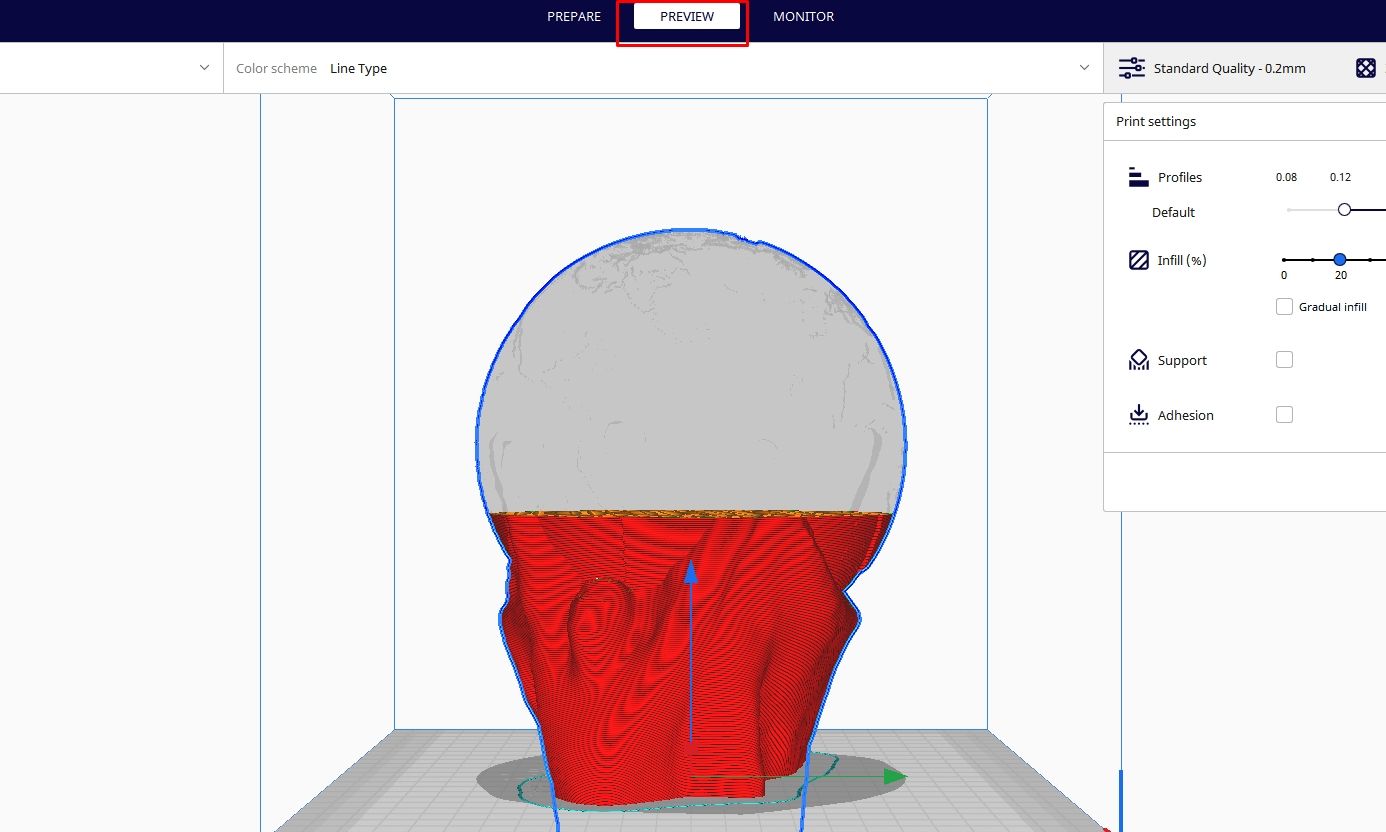
The model will be split into two partshalf on top and half below the build plate.

The next step will be saving your model and sending it to the 3D printer.
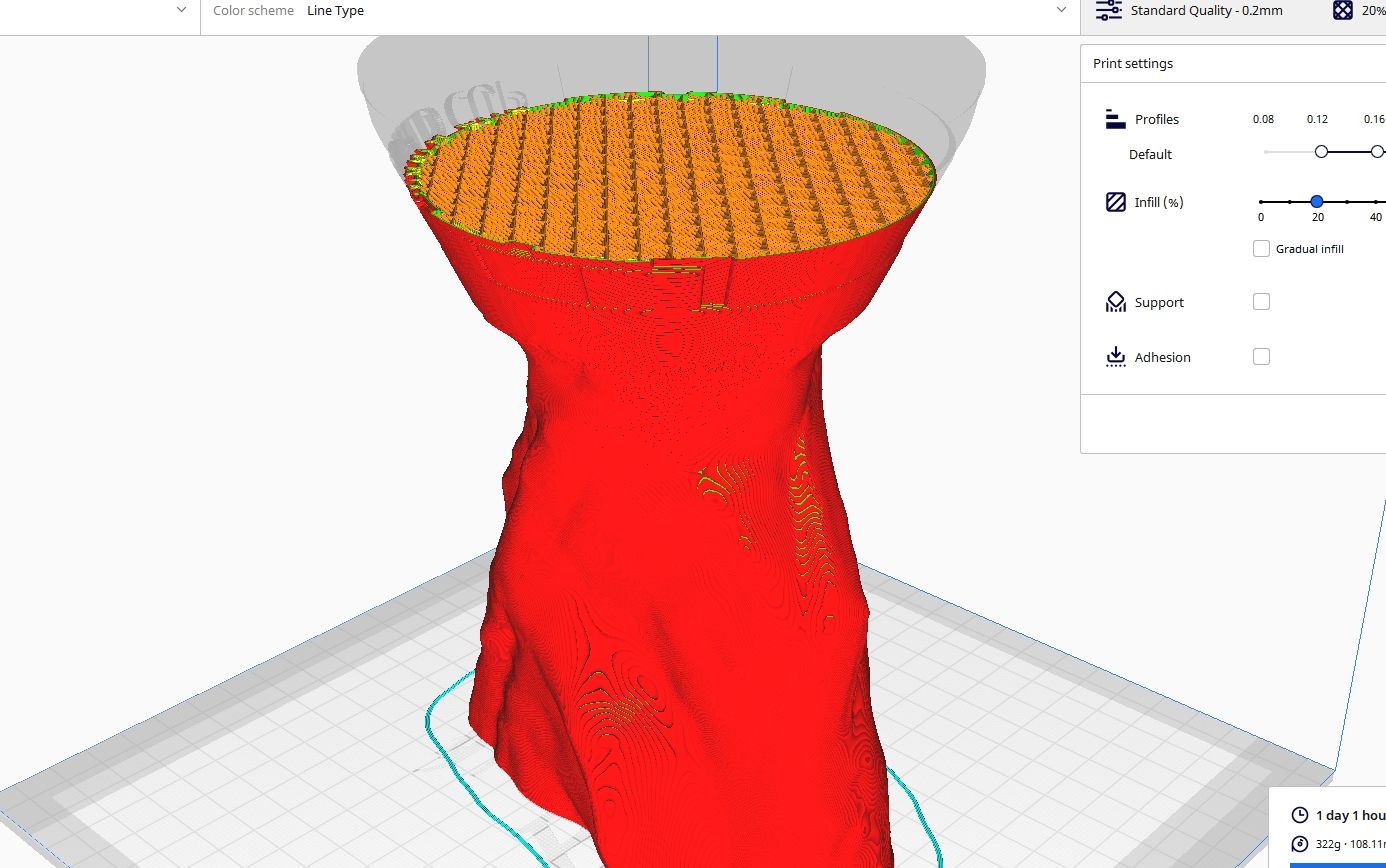
For our example, the part that we are previewing is the top half only.
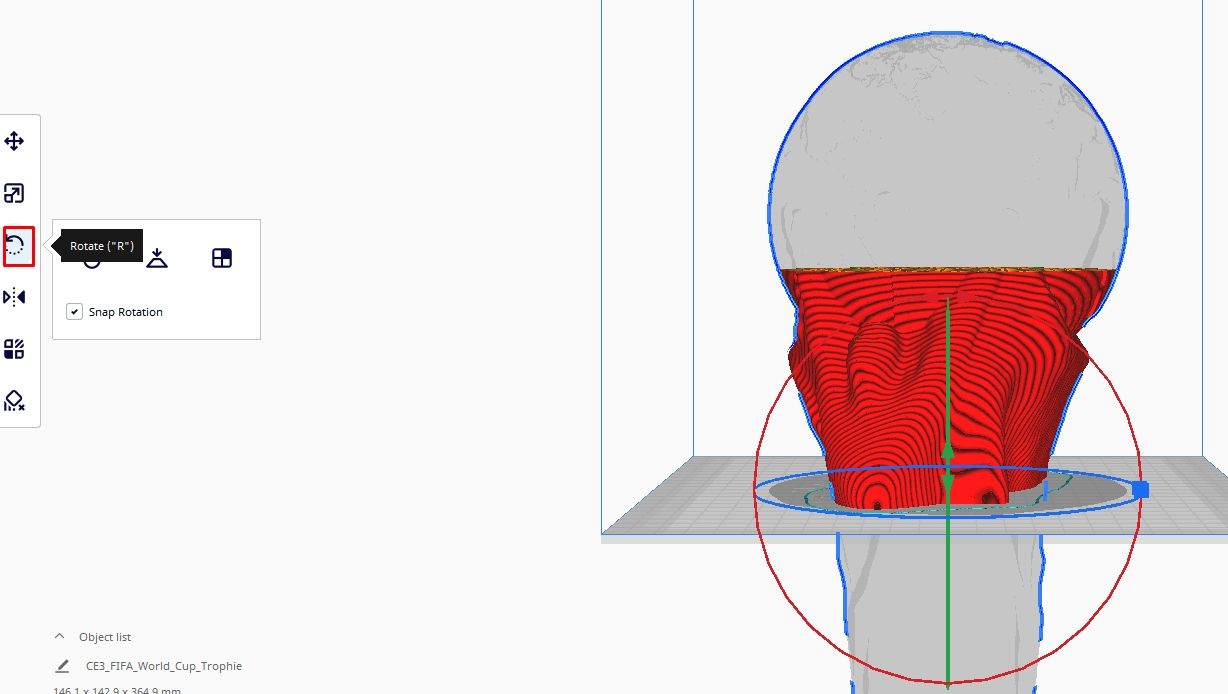
You will see rotation points appearing on the object.
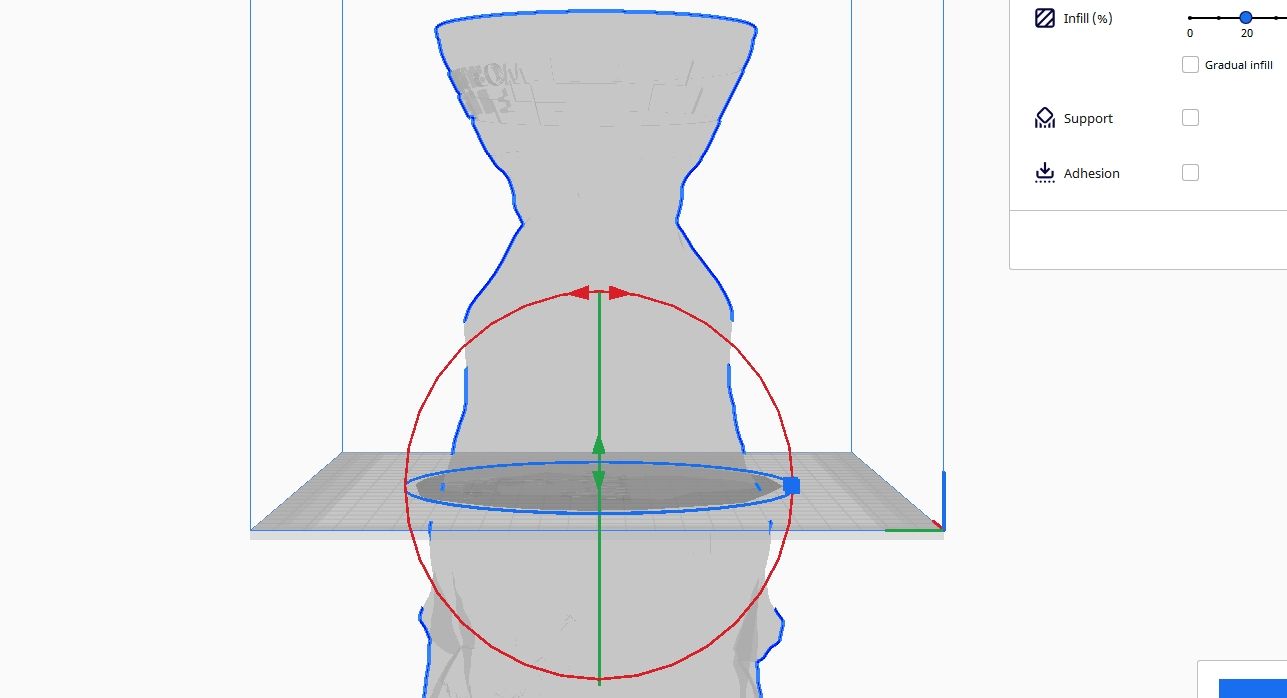
Rotate by 180 degrees so the bottom part may come on top, as shown below.
Next, clickSlice,secure your file, and you will have successfully split your object.
you could now send it now to your 3D printer.
After 3D printing both parts, you’re able to connect them.
The good thing is that it is free and has a user-friendly interface.

Author Photo: Sammy Ekaran
