Do you want to make a YouTube video with an extra punch?
Or you’re making a short instructional video for work that isn’t quite hitting the time stamp.
In such cases, you may want to speed up or slow down your videos in a video editor.
Thankfully, iMovie on your Mac makes creating fast and slow-motion videos easy.
Here, we’ll teach you how.
These functions do include the option to alter the speed of clips.

It’s straightforward and can be very fun to play with.
Otherwise, let’s get started with preparing your clip.
Upon launching iMovie, create a new project, and import the video.
Once done, drag the video to the timeline to start the editing process.
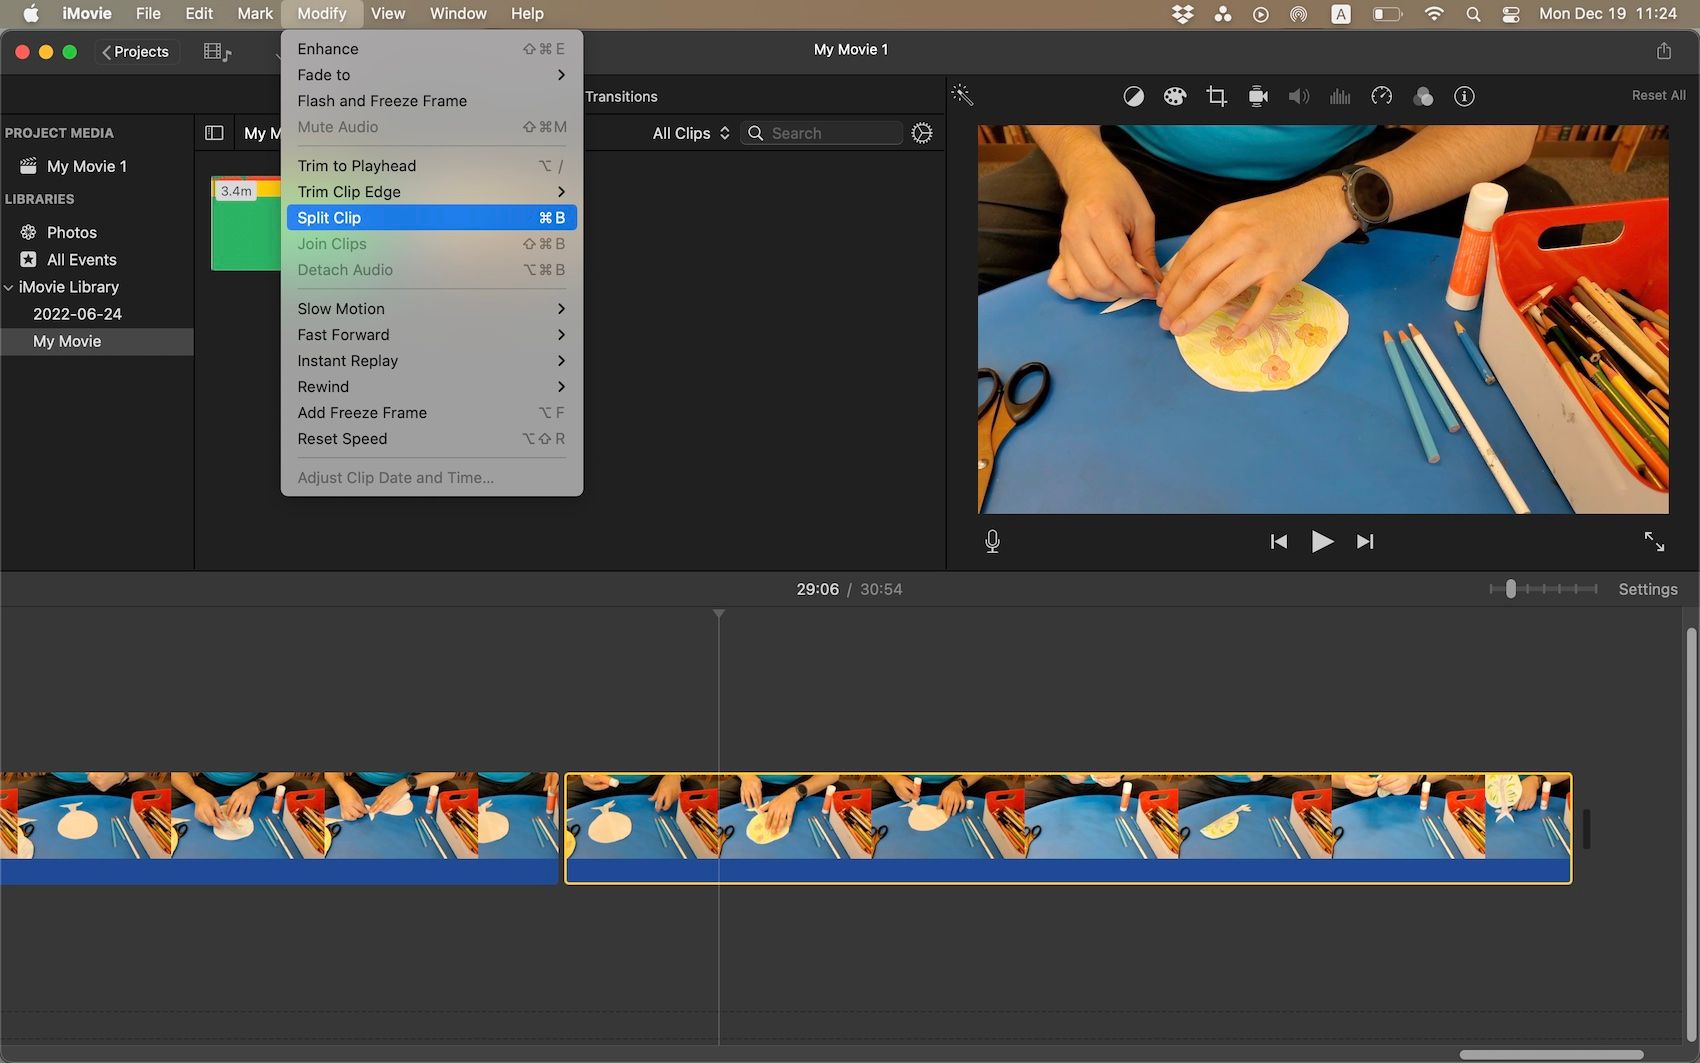
The next step is to segment the portion of the clip you wish to speed up or slow down.
Then either pressCommand-Bor click onModify > Split Clipfrom the menu bar.
This will create the first cut.
Next, find the point in the timeline at which you want the video to return to normal speed.
Cut here using the same method.
This will create a separate clip within the timeline.
You are now ready to apply the effect.
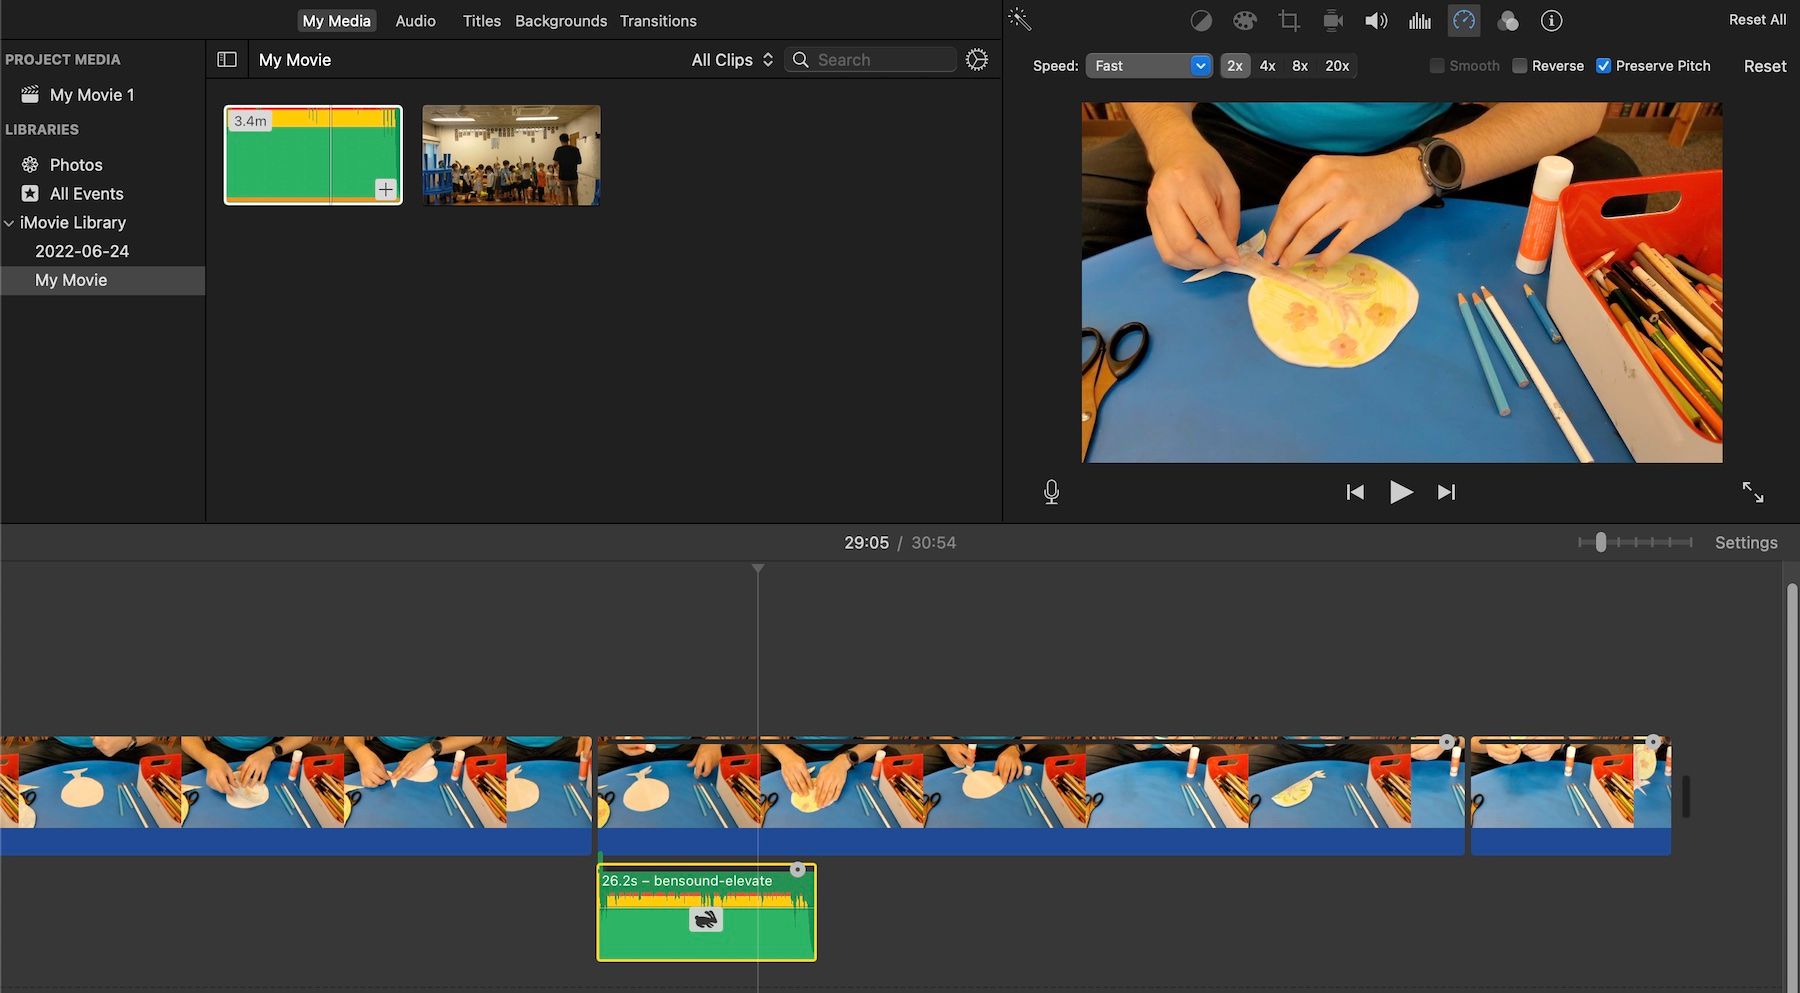
you’ve got the option to alter it by the designated speed tab or by a slider.
You have four options: slow, fast, freeze-frame, and custom.
Remember that 0-99% is slower, and any value over 100% is faster.
Simply choose theResetoption at the far right of the viewer (preview) window.
Doing this will clear all the speed alternations applied to a clip and allow you to start again.
Remember that altering the speed of an audio clip will also alter the pitch.
This can cause voices to sound high-pitched and squeaky or low-pitched and monster-like.
Fortunately, iMovie has a handy little function that allows the clip’s pitch to remain as it should.
Right next to the Reset button in the viewer, you’ll see an option calledPreserve Pitch.
Leaving this checked will allow the pitch of the audio clip to remain as per the original file.
When you’re done making all the adjustments, remember tosave your iMovie projectand then export the edited video.
So, have some fun and jump back to the start of the guide when you are ready.
