However, one major utility was overlooked in the announcement.
The Facebook account requirement limited one account to one headset.
With Meta accounts, users can have multiple accounts on a single headset.

So, how do you set up additional accounts on a Quest 2?
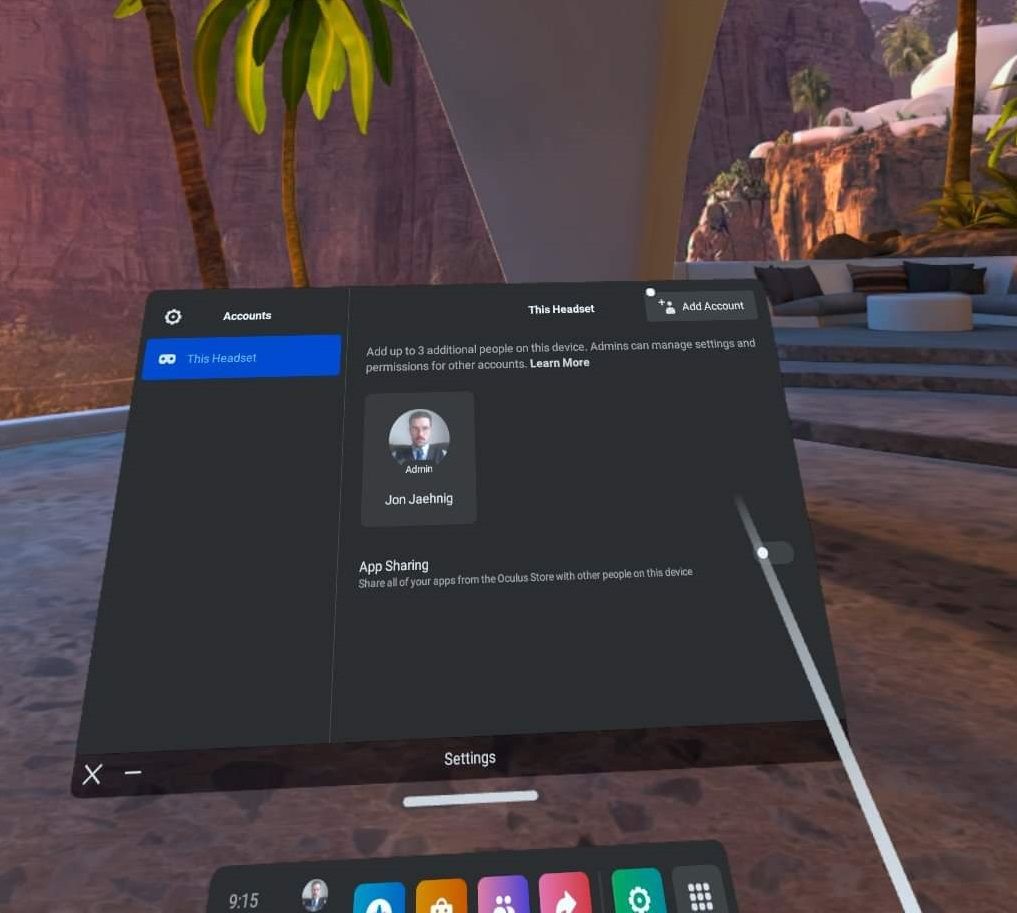
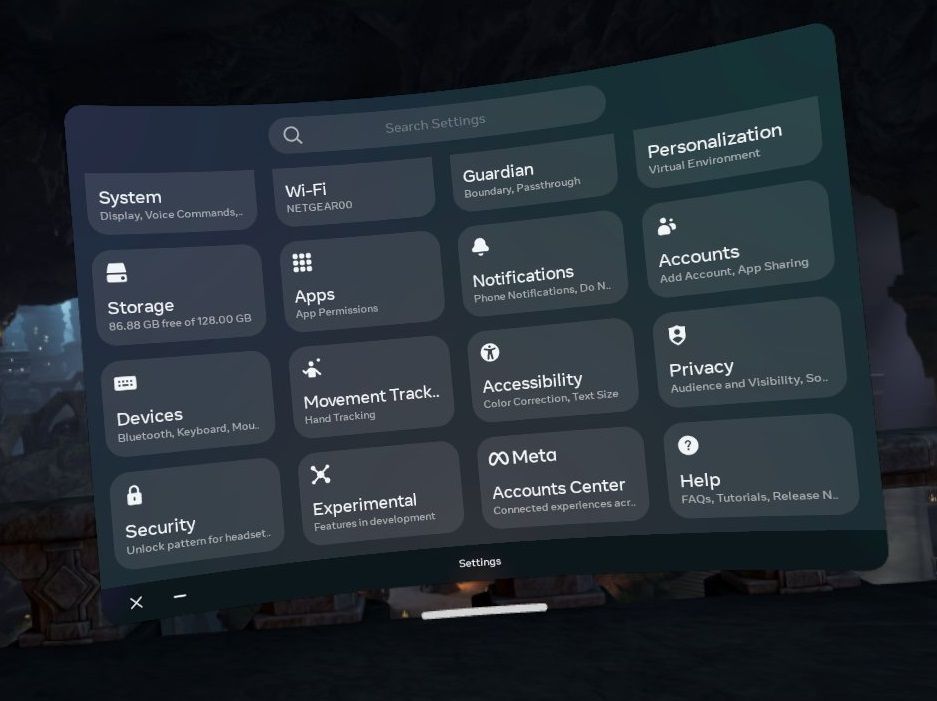
Once you’re in VR, use the menu to navigate toSettings, thenAccount, and then selectAdd Account.
This path will allow you to create a new account, routing you through the parameters.
It’s a bit easier if you don’t know your way around the Quest 2 well.
The new account can even have your real name and birthdate.
As long as the email is different, Meta doesn’t care.
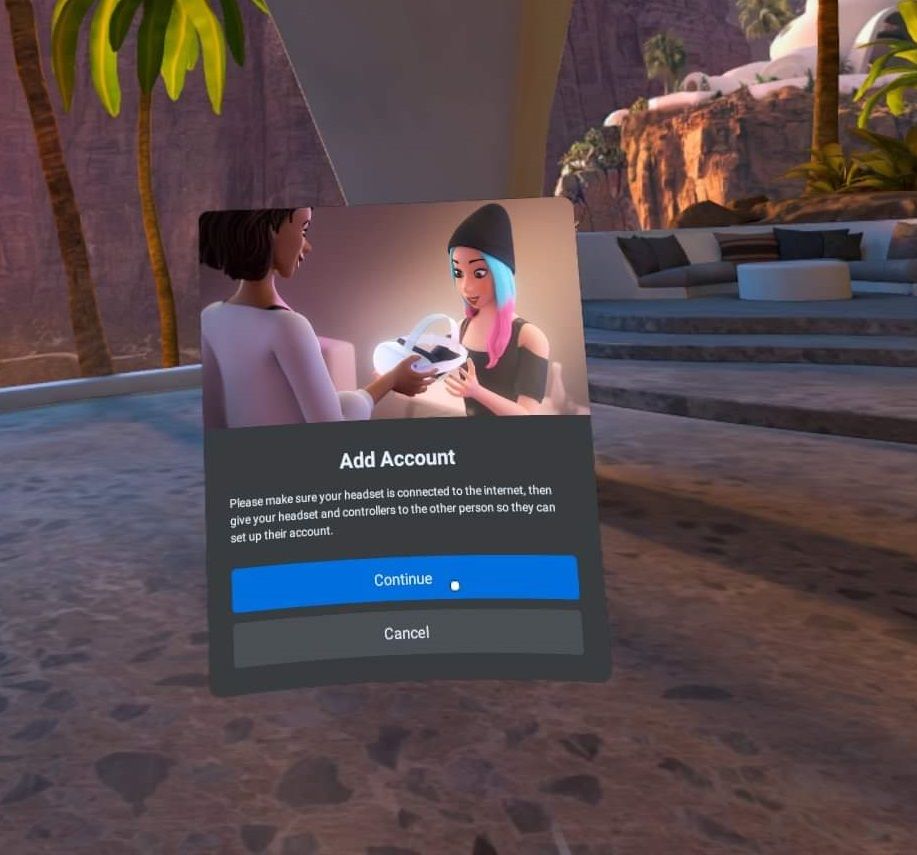
Yes, you have to watch the tutorial and safety videos.
Upon powering up the headset, users can go straight to their profile by entering their unique unlock pattern.
Once the headset is on, users can change between accounts through theSwitch Accountpathway described above.

Apps downloaded by the admin account before the additional accounts are created will be shared with subsequent accounts.
Although the newer accounts need to download the apps independently, they don’t need to purchase them again.
Furthermore, the other account holders can buy and download their own apps.
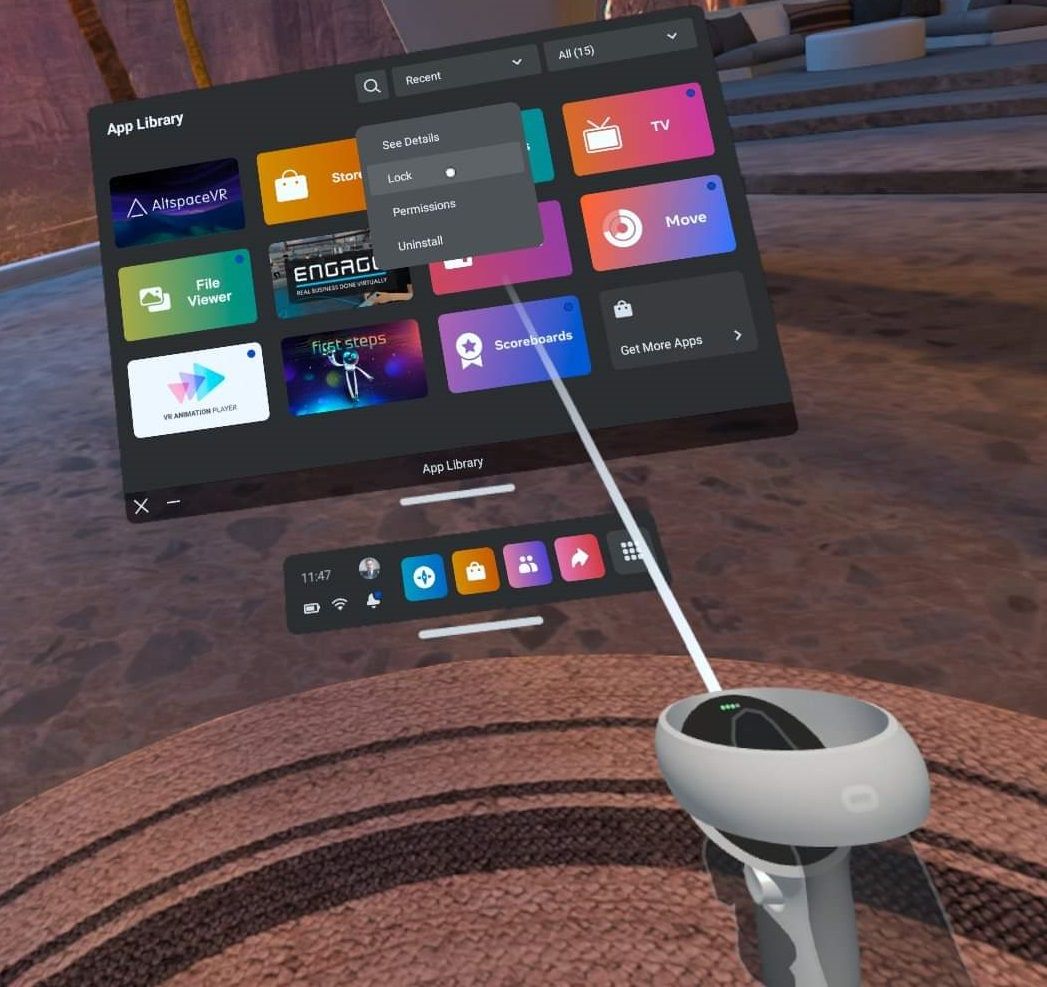
Locked apps appear on other accounts but require the owner’s unlock pattern for access.
To encourage app sharing, the admin can turn on theApp Sharingoption in their account parameters.
Personalizing Additional Quest 2 Accounts
Additional account holders have a lot of other personalization options as well.
More than that, each account has its own private content.
For example, payment methods are unique to each user.
Headsets are often shared within families, working groups, or classrooms.
Further, one individual can have multiple accounts to separate professional and personal apps on the same rig.
Whatever you might use it for, it’s an excellent option to have.
