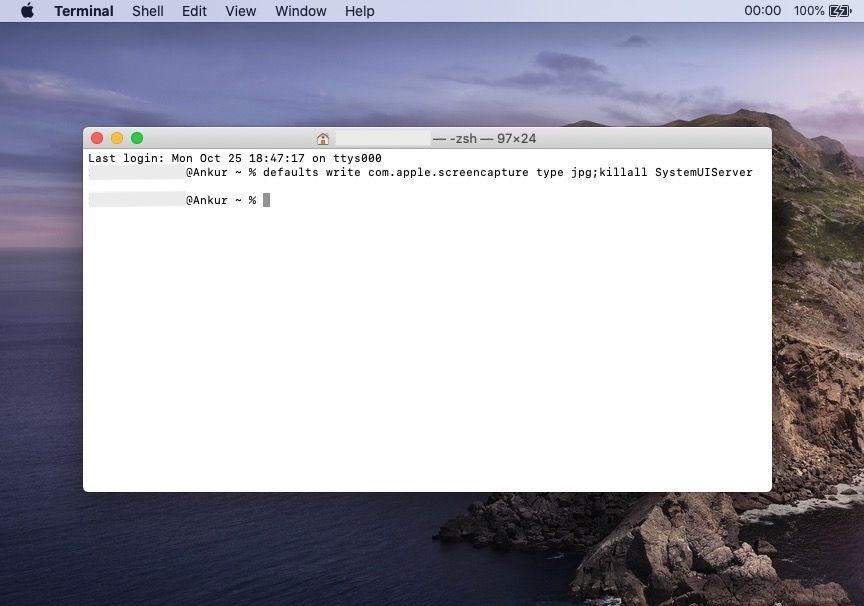
One makes a permanent change for all screenshots, and the works on a per-screenshot basis.
All you’re doing is replacingpngwithjpg,heic,pdf,gif, ortiff.
To test it, pressCmd + Shift + 3to take a screenshot.

Next, snag the saved file and pressCmd + Ito view its information.
As theImage Kind, you should see the new format you set.
This is useful if you don’t always want to have the screenshot in just one format.
For example, TIFF files are of high quality, but the file size is huge.
PDF, on the other hand, is tough to insert into blog posts or documents.
PNG is sharp, but its file size can be big.
And at times, JPEG or JPG can blur the text and offer a lower image quality.
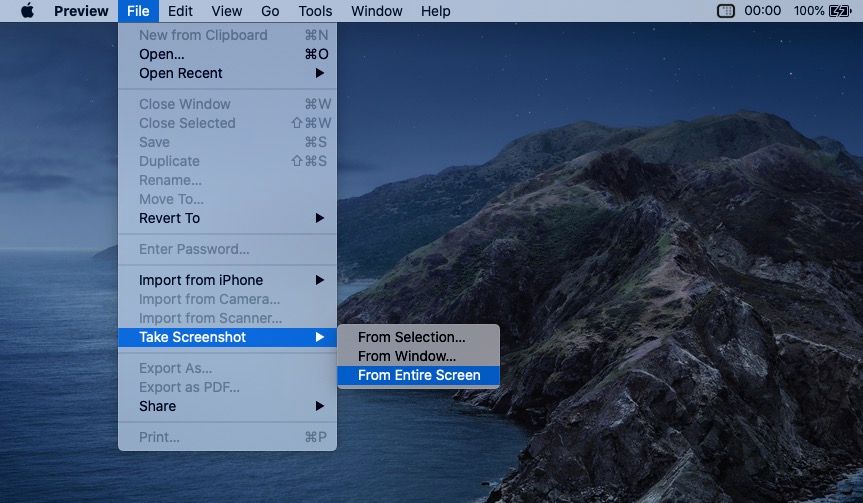
Once you get the basic idea, you could accelerate the process by pressingCmd + Sin the Preview window.
Now choose the desired image file format for that screenshot and clickSave.
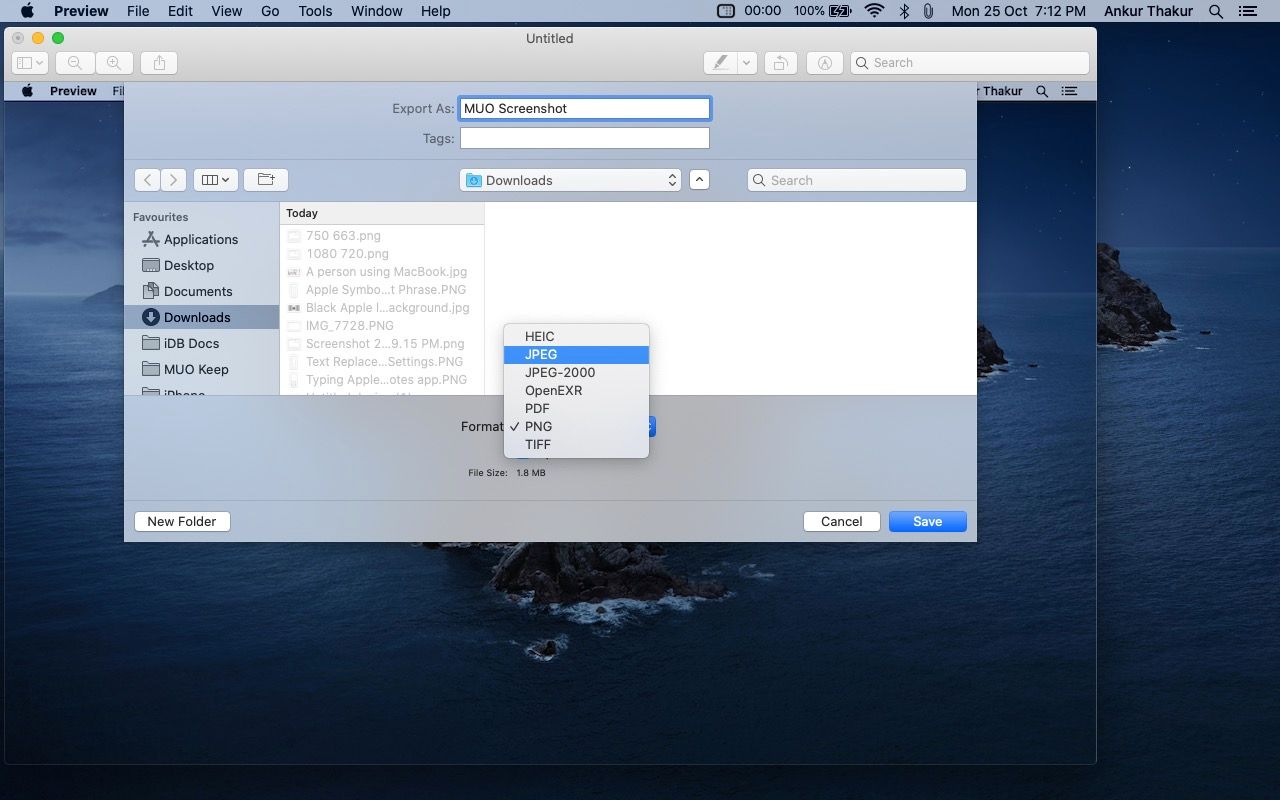
You’ve also learned how to save screenshots to any desired format on a case-by-case basis.
With this, it should give you the flexibility to use screenshots for different works and projects.
Still, suppose you change your mind after taking a screenshot in a particular format.
