Graphics card running hot?
Your GPU might need new thermal paste.
When and Why Should You Reapply Thermal Paste on Your Graphics Card?

Jhet Borja/MakeUseOf
Thermal paste closes the micro-gaps in between the GPU die and the heatsink.
Repasting will restore performance like it was new again, as it’s not overheating orthermal throttling.
This is a sign that it needs repasting and probably some dusting to get it back to its best.
Jhet Borja/MakeUseOf
Things You’ll Need
Before we begin, ensure you have everything you need.
We don’t suggest opening up your graphics card if you’re missing a few of these.
Now you’re prepped and ready to go, it’s reapply the GPU’s thermal paste.

Step 0: Check Your Graphics Card Temperatures
We urge you not to skip this step.
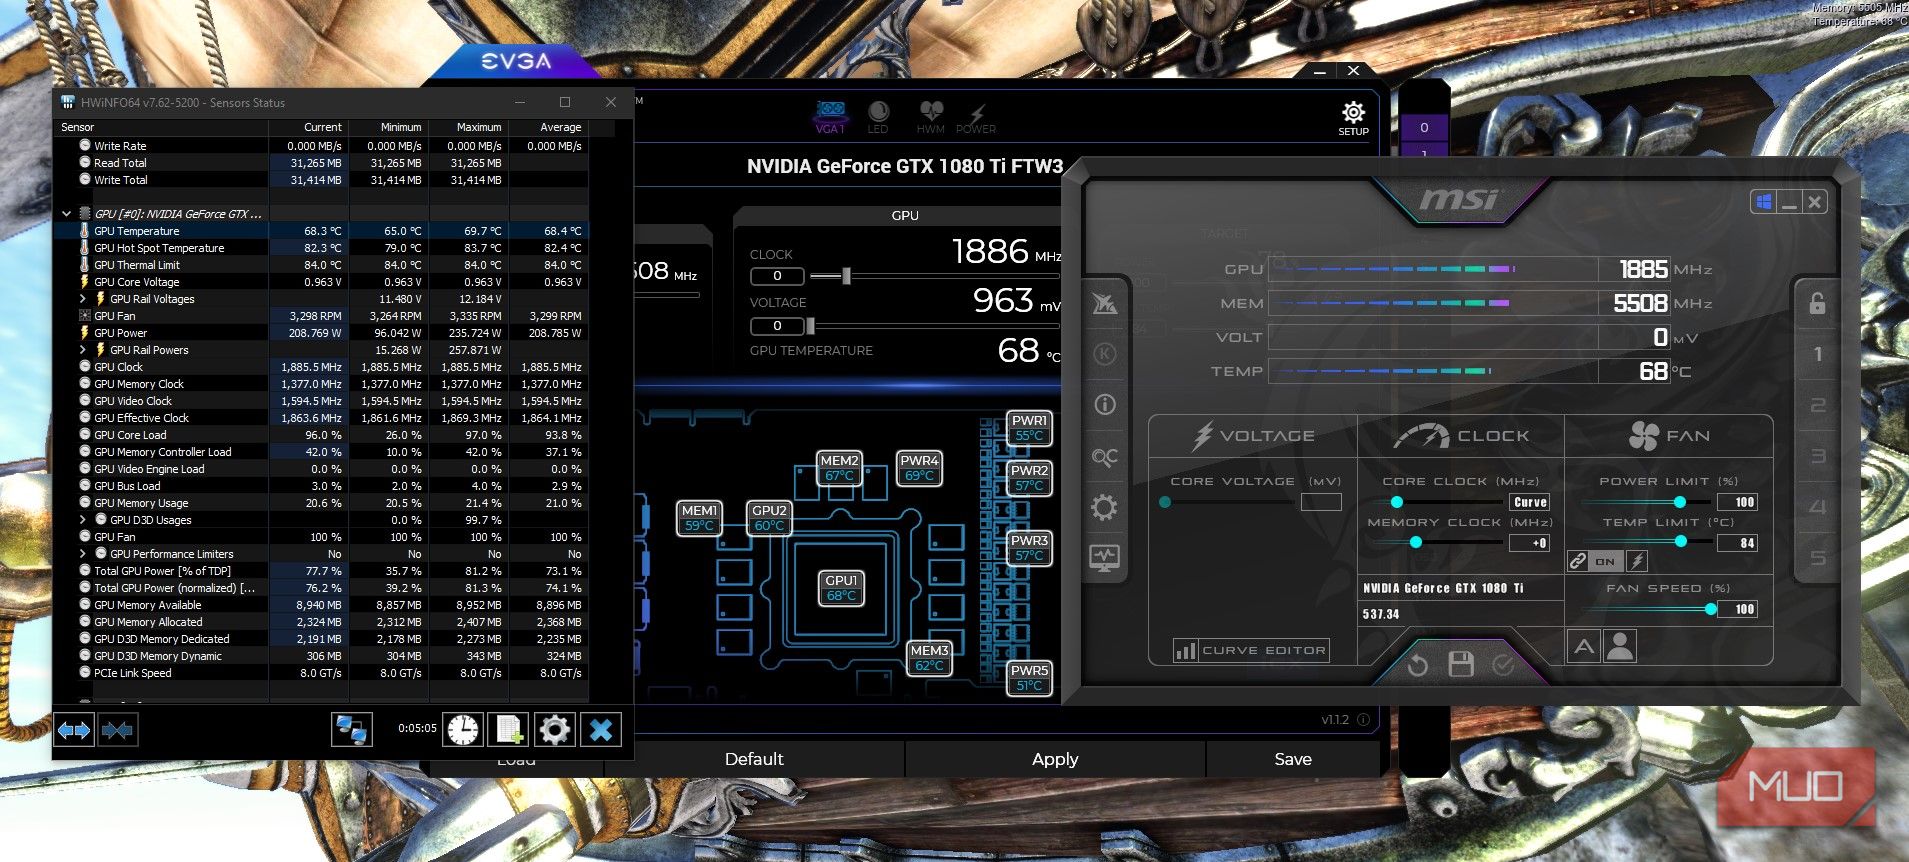
Always test and benchmark to see if you’ve improved or worsened your situation.
To perform the test, runUnigine Heaven Benchmarkin the background and use a hardware monitor likeHWiNFO.
Let the benchmark run for 10-15 minutes to ensure you’re reaching your maximum temperatures.
Keep an eye on the GPU temperatures during this time.
Ideally, it should stay below 80-85C, but we suggest you aim lower at around 76-78C.

Image Credit: Jhet Borja
Repasting should really only be a last resort.
Tryundervolting your GPUor theseGPU overheating solutionsfirst before repasting.
Next, open up your case and unscrew the graphics card from the case.

Image Credit: Jhet Borja
Unplug the power cables from your graphics card.
Gently pull it out.
Step 2: Open Up Your Graphics Card
Graphics cards can differ drastically.

Image Credit: Jhet Borja
This graphics card has plenty of thermal padsmore than the average.
Keeping the thermal pads in mind, unscrew your graphics card.
We’re starting with the backplates in this case.

Image Credit: Jhet Borja
Set aside the backplate/s as they have fragile thermal pads.
Next, we’ll unscrew the sprung screws pressing the GPU cooler to the GPU chip on the mainboard.
If you chip even just the corner of the die, you might kill it.

Image Credit: Jhet Borja
You don’t need to remove the spillover; cleaning the surface will be enough.
Unlike a CPU, the cooler is directly on the die and not an IHS, as previously mentioned.
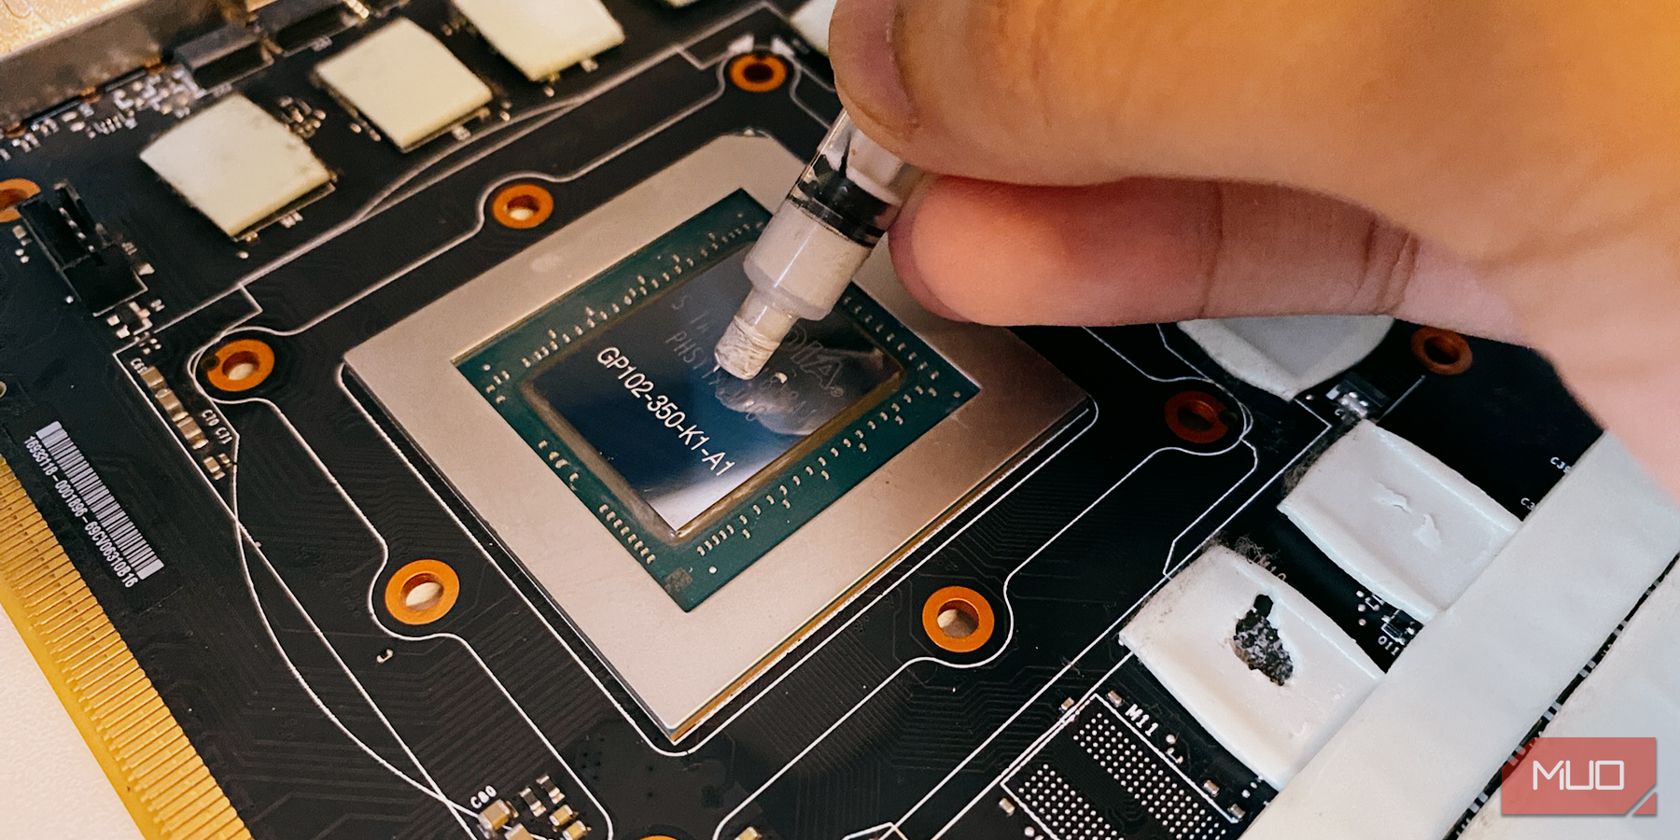
Apply a decently large amount of thermal paste onto the chip, definitely more than in the image above.
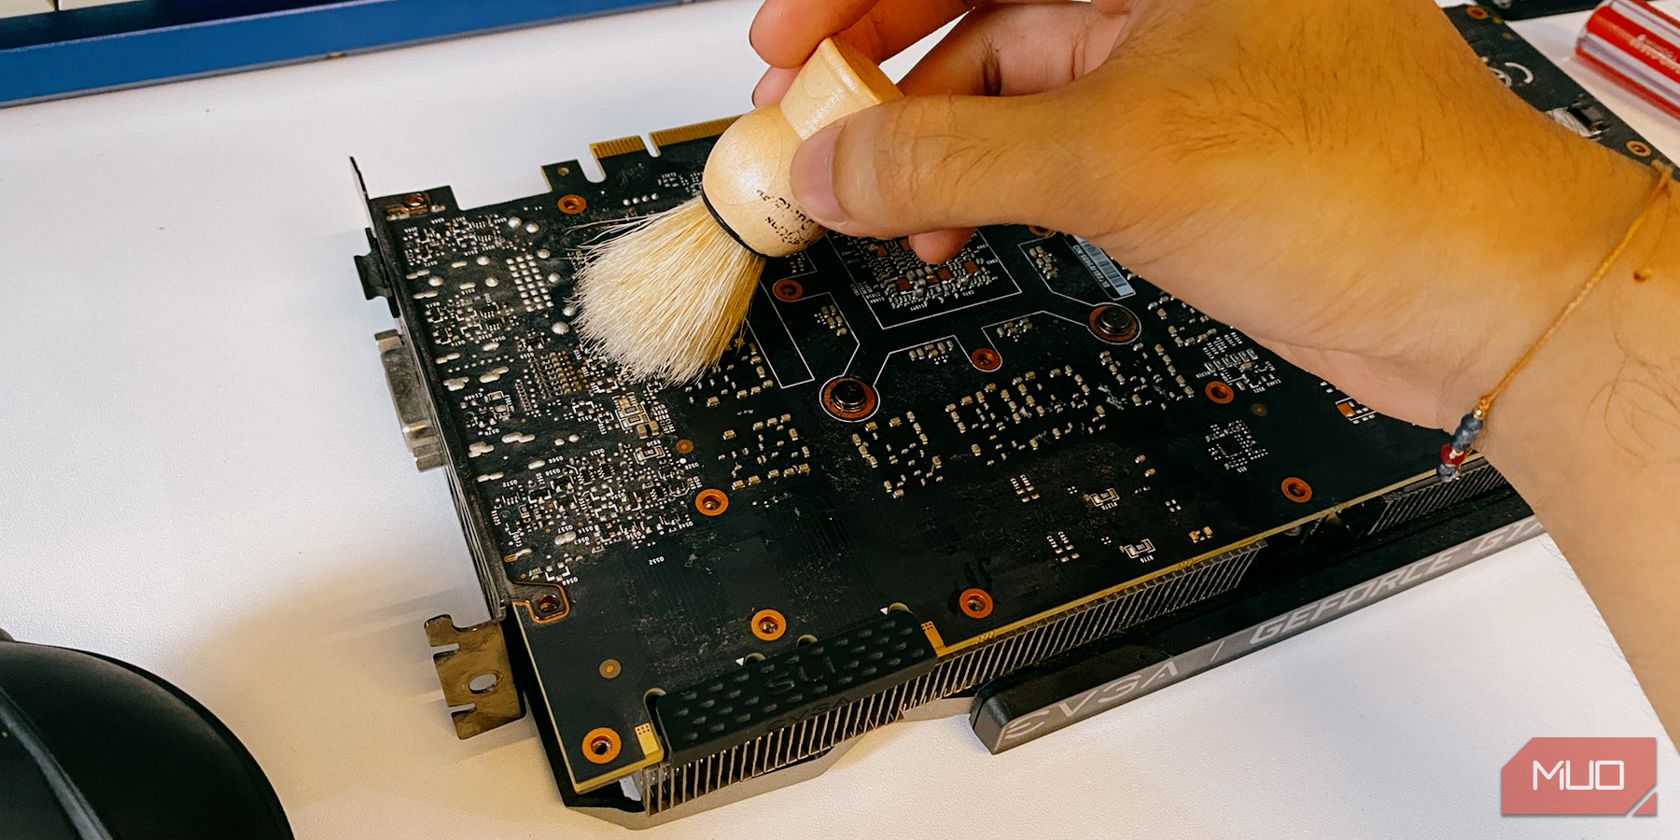
Image Credit: Jhet Borja
Preferably an X mark, but a large dot will also work.
Apply more than you think, but not too much.
Next, and most importantly, is to spread it out and reach the edges of the GPU die.

Image Credit: Jhet Borja
confirm the edges have a decent coating and are not thinned out.
Just in case you’ve messed up some thermal pads, now is the perfect time to replace them.
Tighten in a cross pattern to ensure even coverage.

Image Credit: Jhet Borja
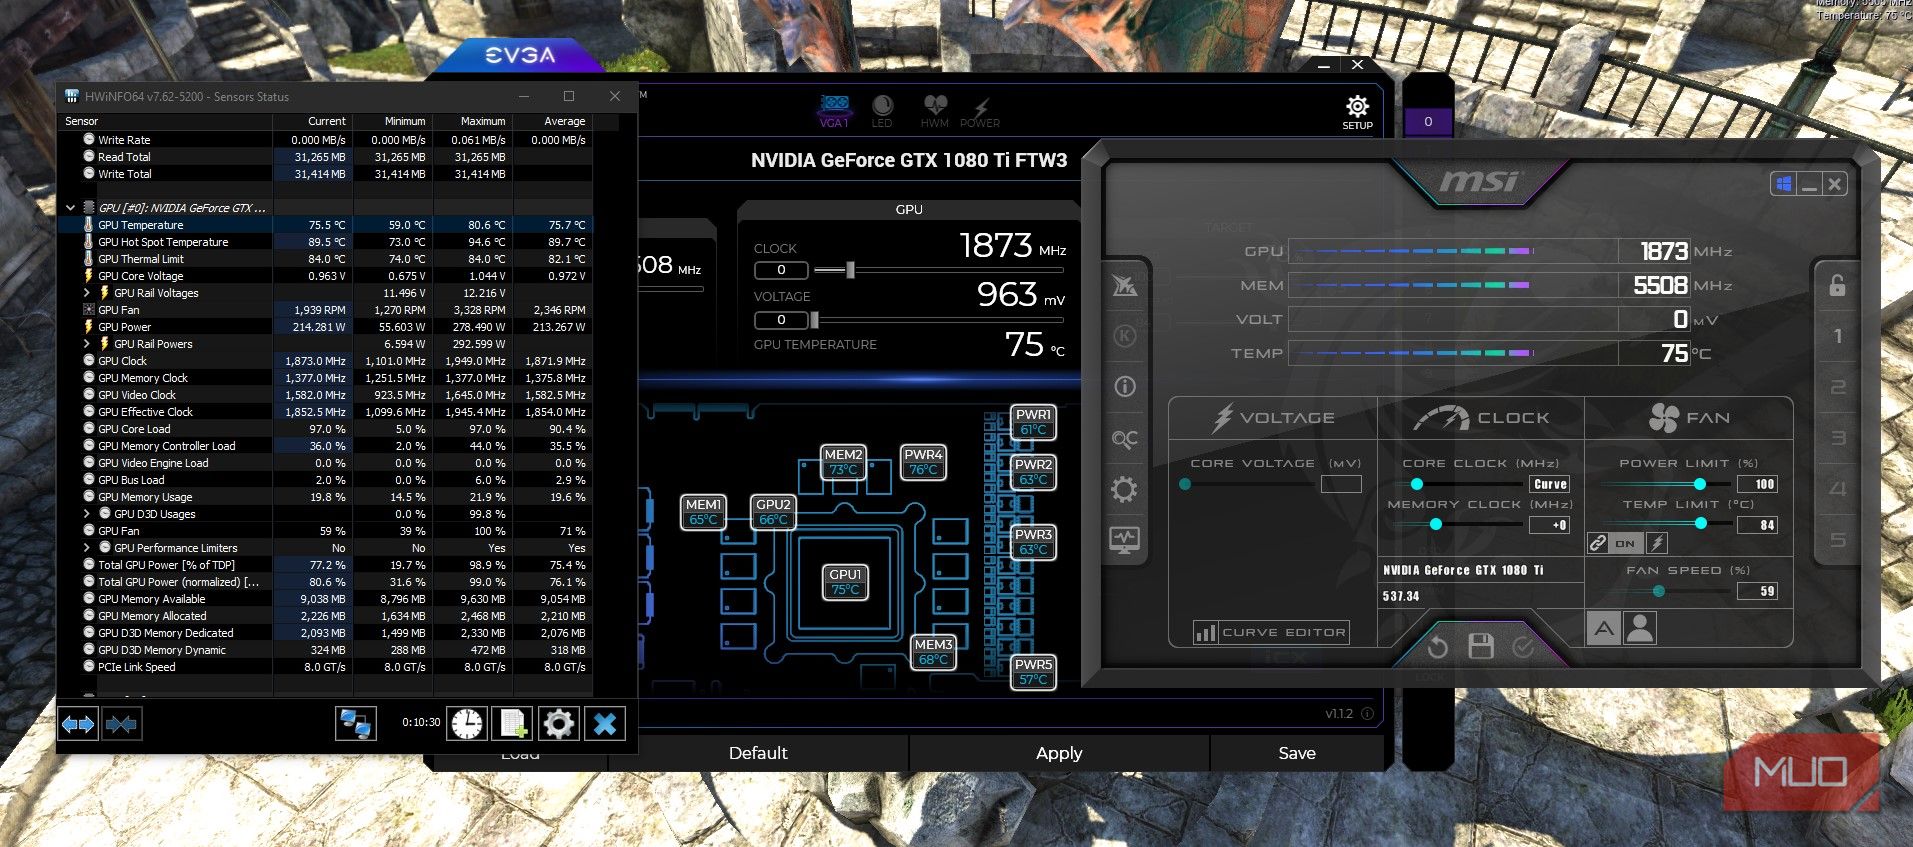
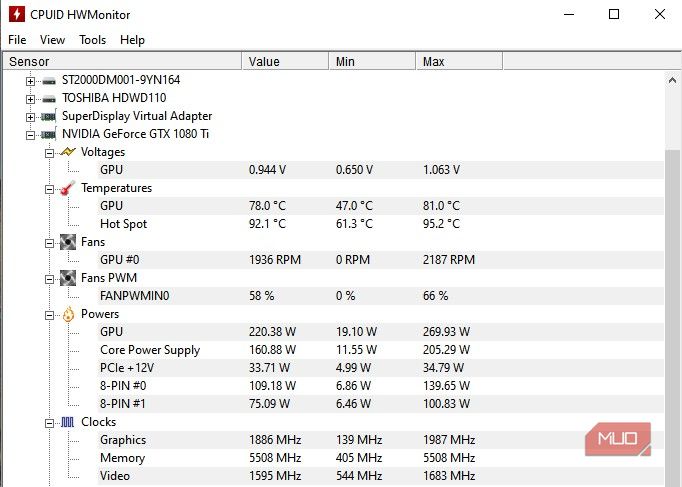
In my case, I’m also checking EVGA’s Precision X1 software since the FTW3 has iCX technology.
Despite the increased voltage, my temperatures averaged about 75.7C.
It will be quite loud, though.

Image Credit: Jhet Borja
Graphics cards can even last up to 10 or more years with regular maintenance.
We hope this guide has helped you get cooler temperatures and regain lost performance from your graphics card.
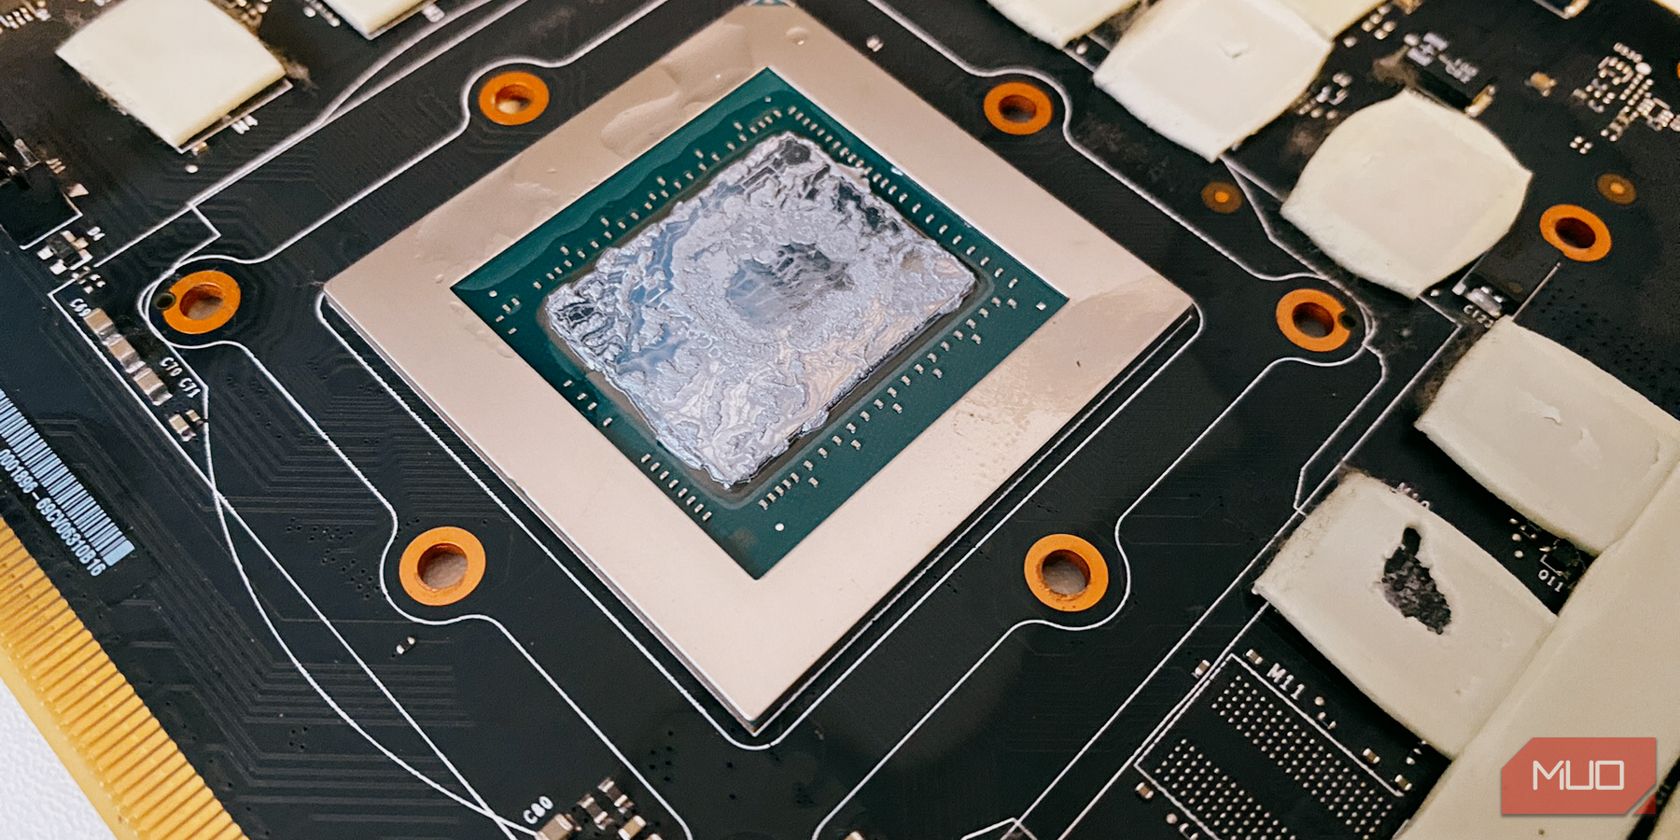
Image Credit: Jhet Borja

Image Credit: Jhet Borja

Image Credit: Jhet Borja

Image Credit: Jhet Borja