Looking for a quick and easy way to take screenshots on Windows?
If so, the Snipping tool is just what you need.
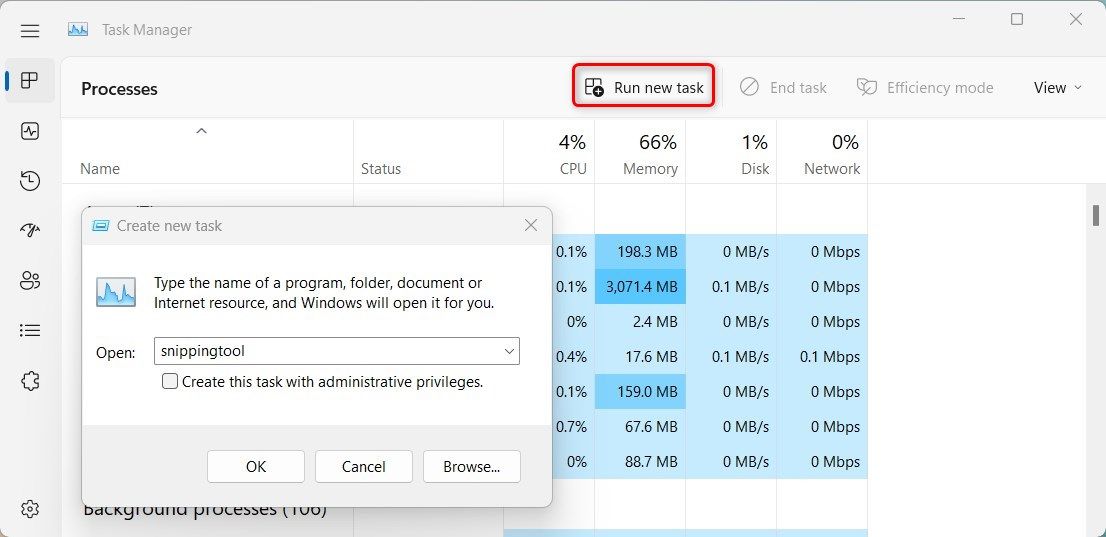
In this article, we’ll show you how to find and initiate the Snipping tool in Windows 11. you could find it in the Start menu or launch it from the Task Manager.

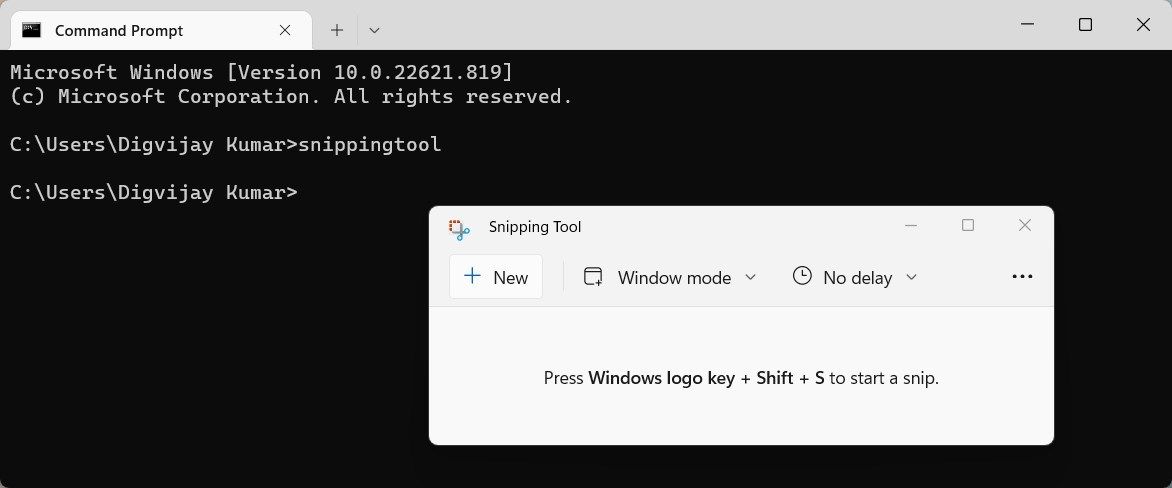
However, the quickest way to kick off the Snipping tool is to use a keyboard shortcut.
you’re free to also save snippets using theCtrl + Sshortcut key.
Now choose a location where you want to stash your snippet, and then clickSaveagain.

If you like using keyboard shortcuts, be sure to check out ourWindows keyboard shortcuts 101 guide.
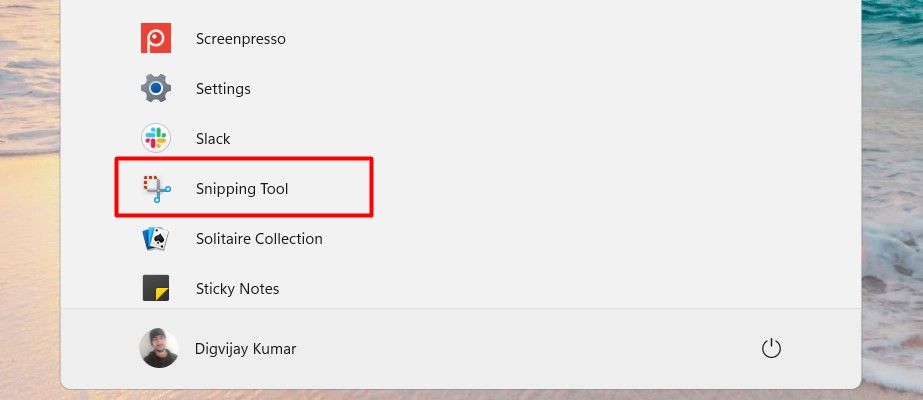
To launch the Snipping tool using the Start menu, go through this:
3.
This is a great way to save time and get exactly what you need.
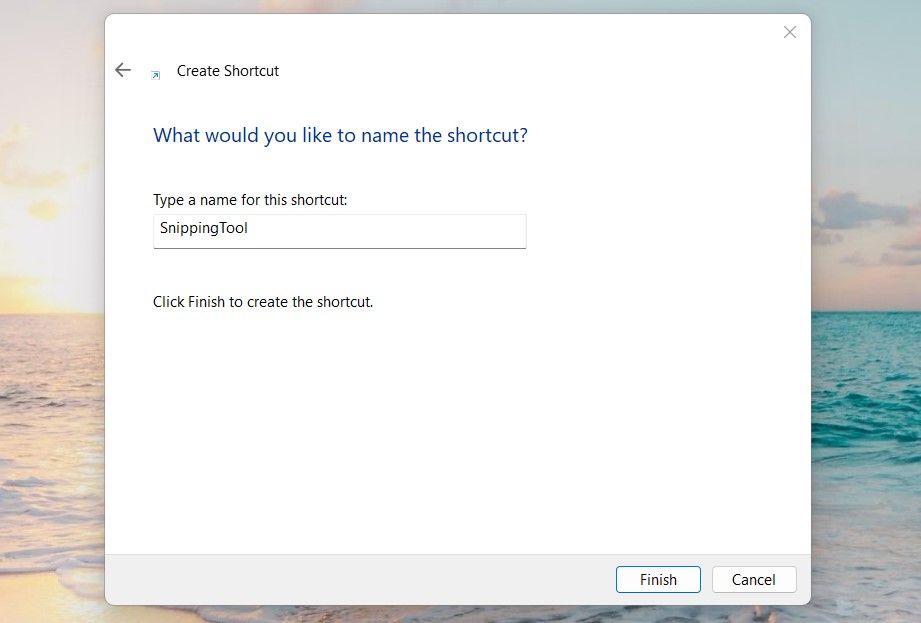
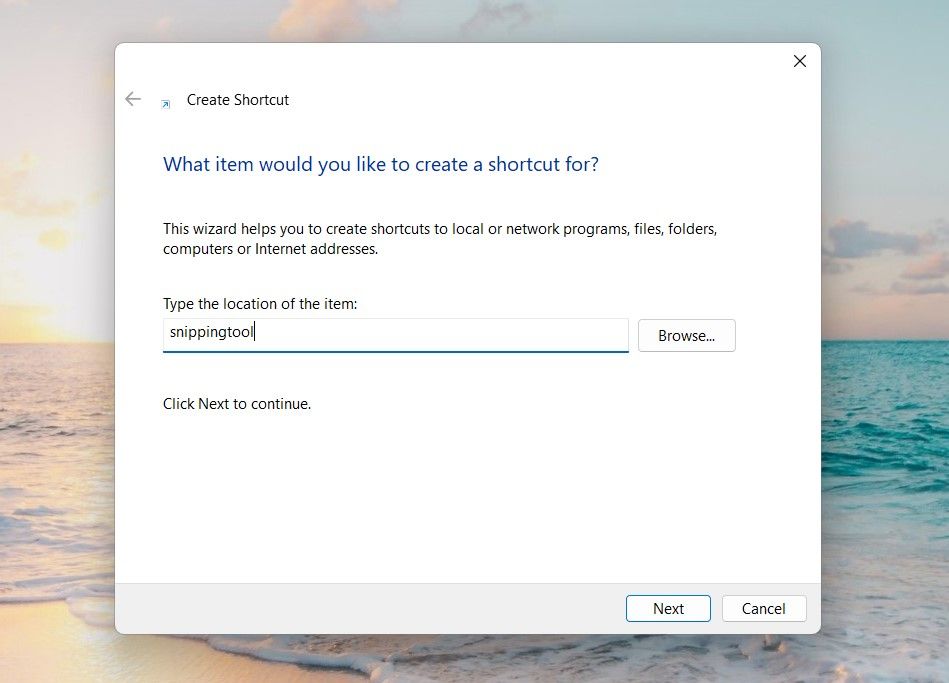
However, it may be more convenient to create a desktop shortcut for the Snipping tool.
It provides a graphical user interface for accessing the file system.
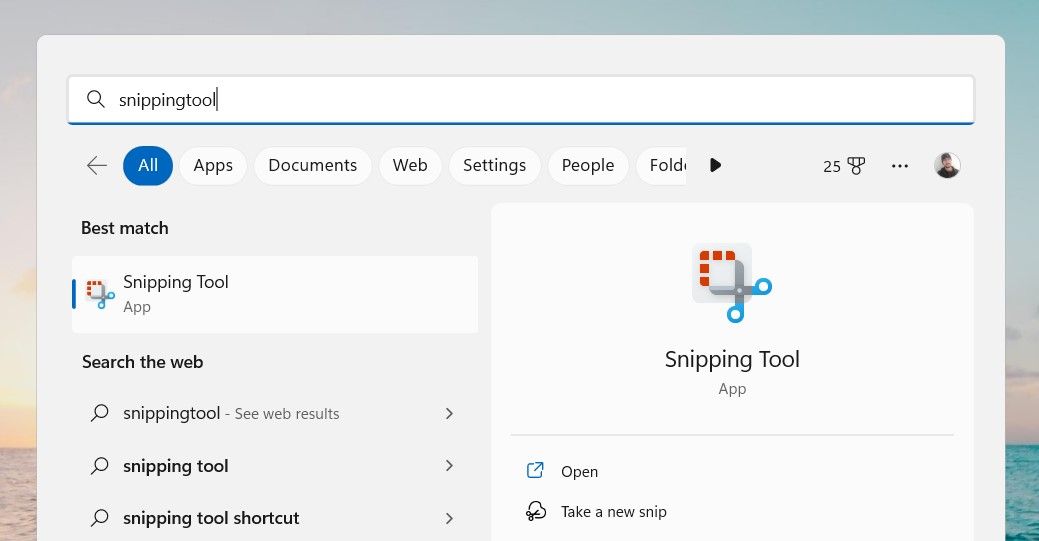
This allows you to quickly open applications by simply typing in the app’s name.
If you wish to launch the snipping tool via File Explorer, do the following:
7.
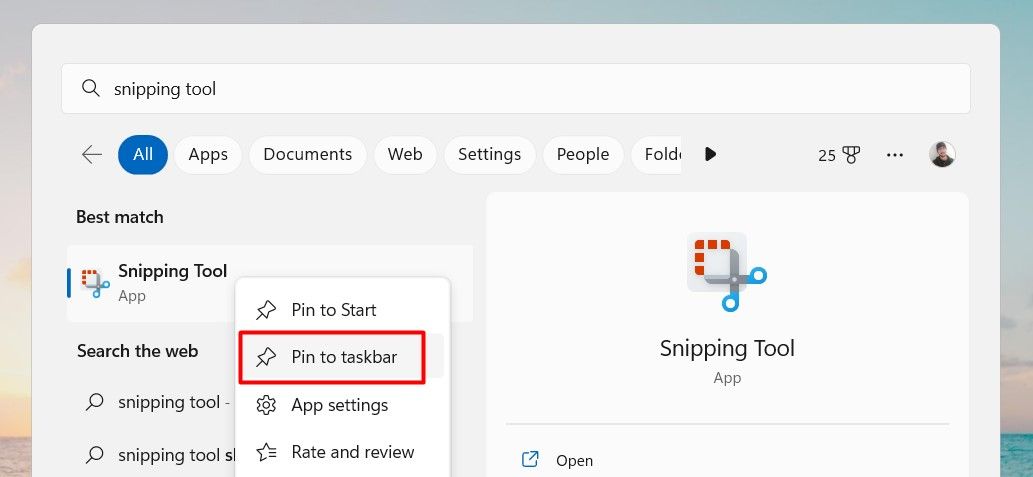
This will allow you a quick and easy way to jump into the tool.
Here’s how you do it.
Now, whenever you better take a screenshot, just choose the Snipping tool icon in your taskbar.
you’re free to also use the keyboard shortcutWin + Shift + Sto initiate the app.
It can also be used to capture full-screen images, active windows, and selected areas of your screen.