It also sends you alerts to your smartphone or Echo speakers.
You will also need aHome Assistant server setup on a Raspberry Pior any compatible hardware.
If interested, you canlearn everything about Home Assistantand see how it works before getting started.
Step 1: Compile the Firmware
To compile the firmware, install theESPHome add-onin Home Assistant.
Once installed, adhere to these instructions to compile the firmware for D1 Mini or NodeMCU.
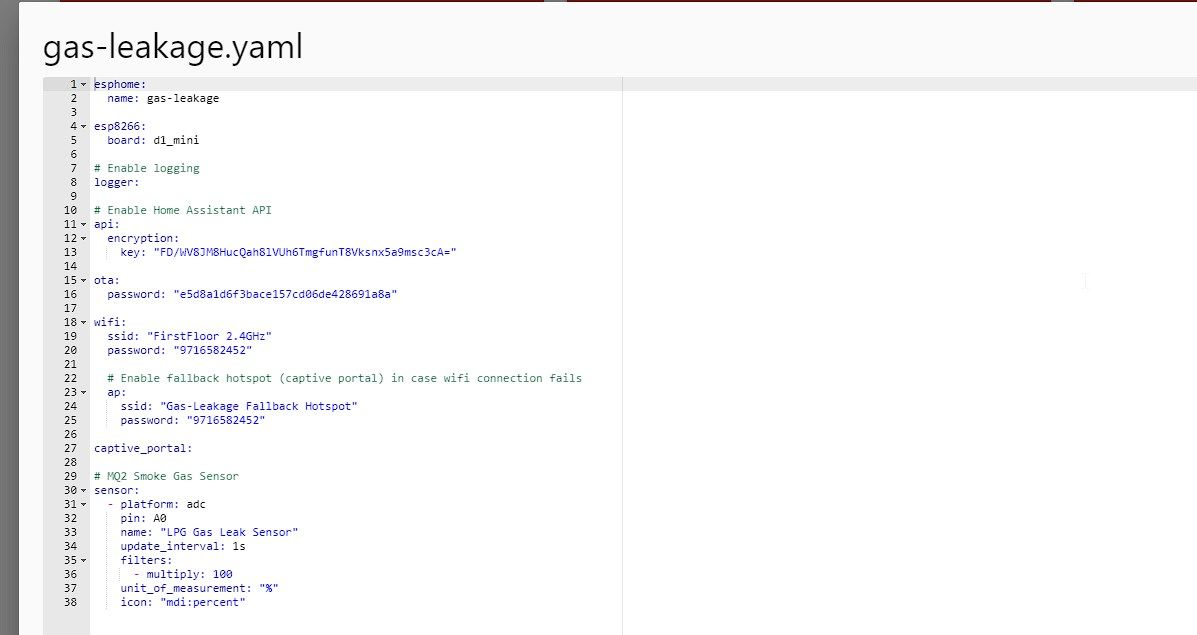
The code should look like the screenshot below.
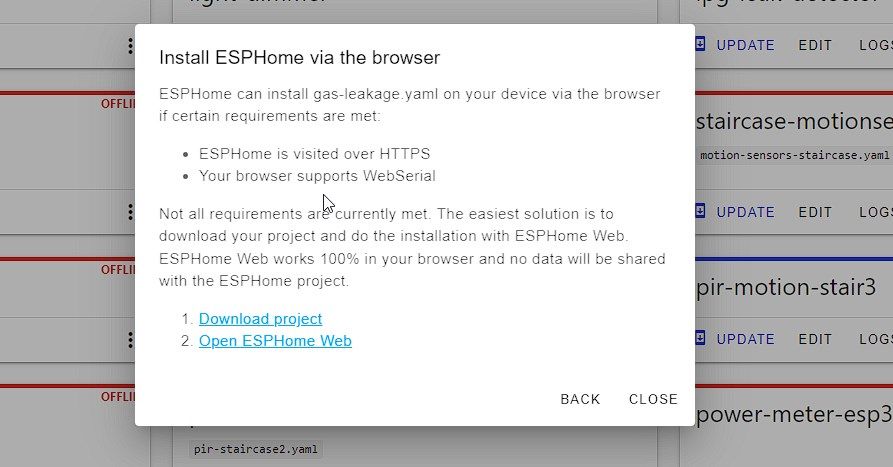
This will start compiling the firmware and may take roughly 10 minutes to finish.
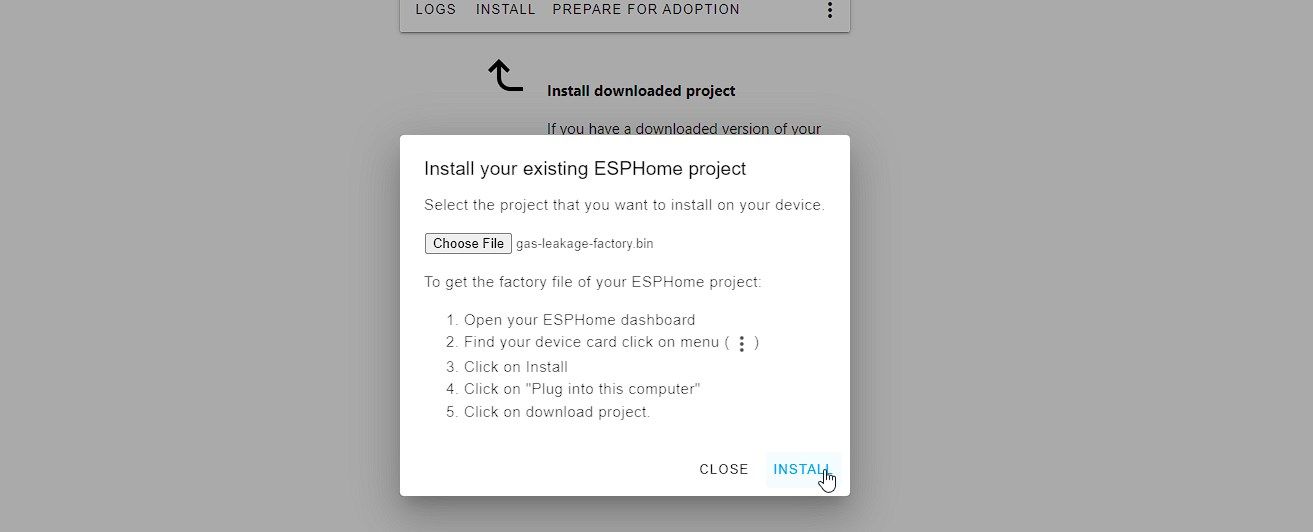
Once finished, clickDownload projectto download the compiledgas-leakage-factory.binfirmware file.
You may also download and use theESPHome Flashertool to flash thegas-leakage-factory.binfirmware file to your NodeMCU or D1 Mini board.
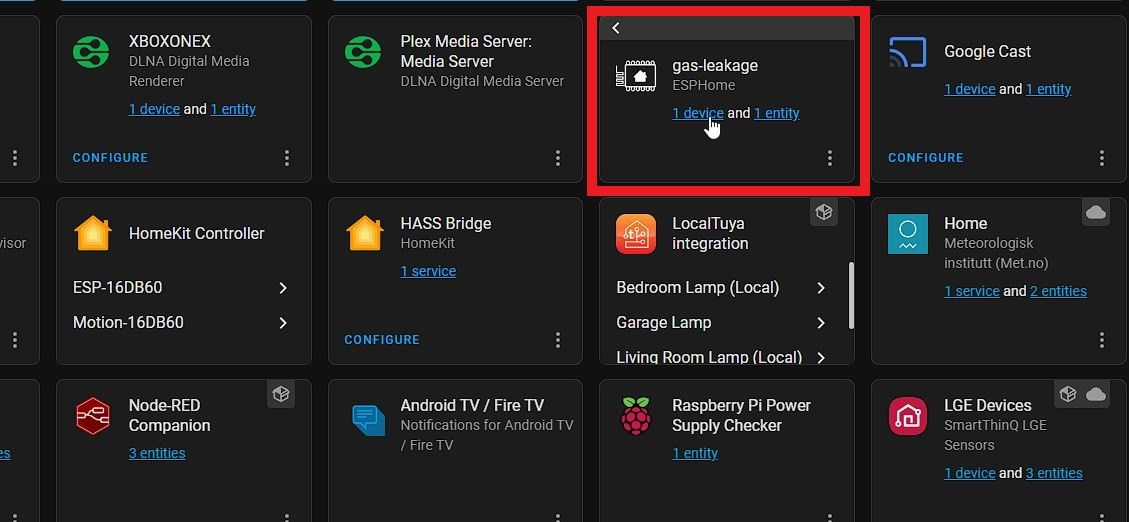
Step 3: Add Gas Leakage Sensor to Home Assistant Dashboard
That’s it.
The gadget will be added to the selected Home Assistant dashboard.
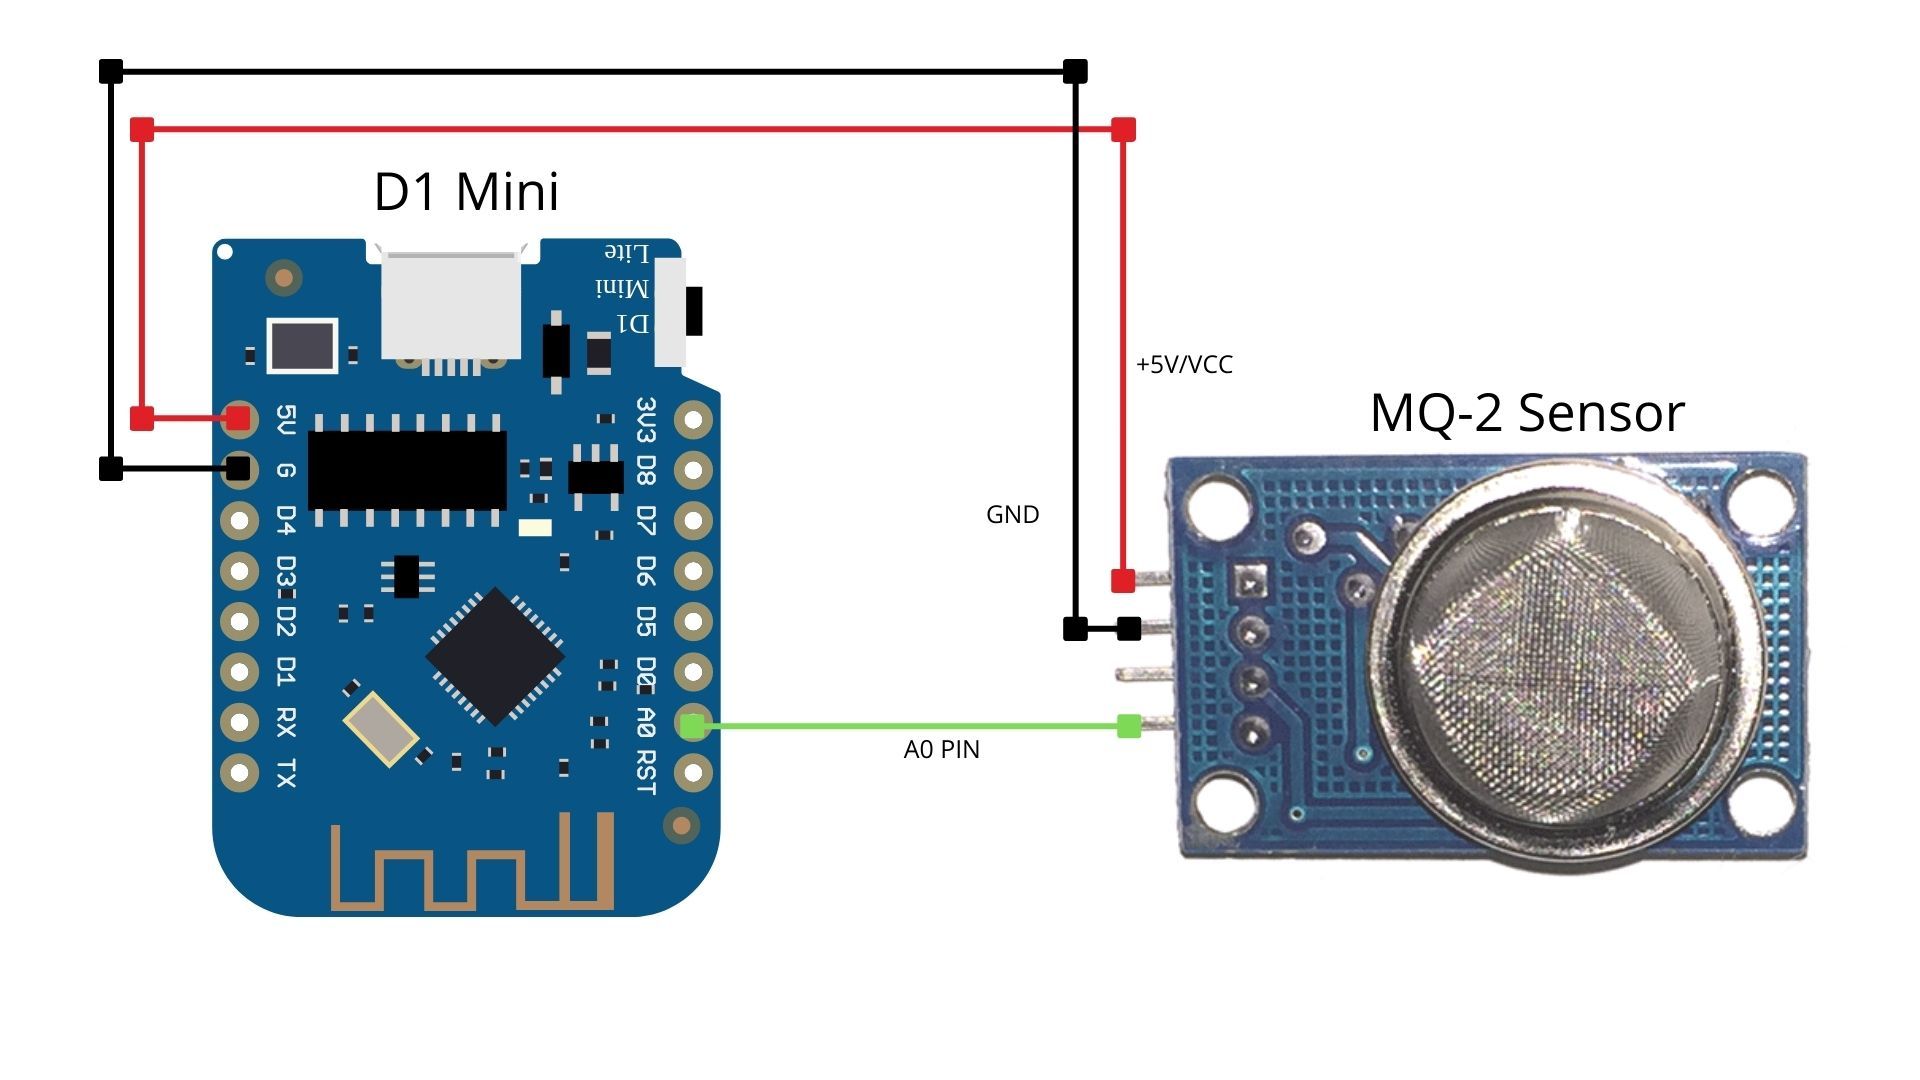
Next, you’re able to connect the MQ-2 gas sensor to the microcontroller.
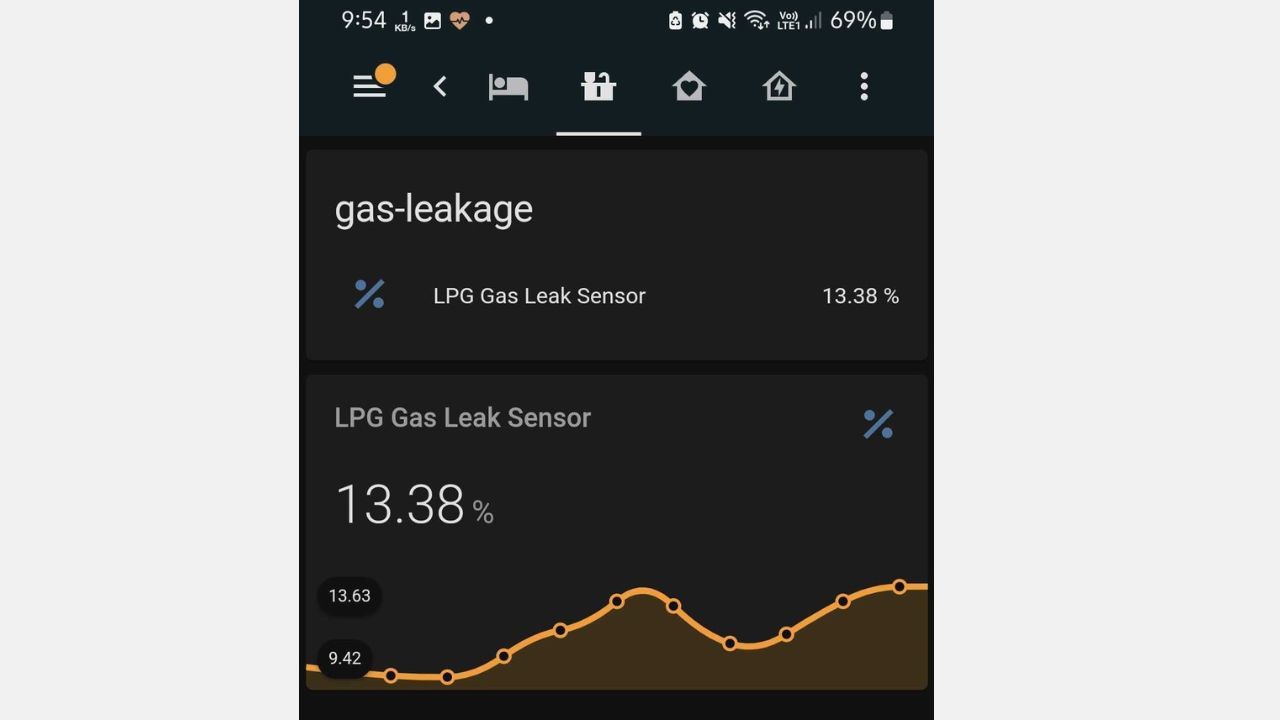
it’s possible for you to test the sensor by exposing it to smoke or gas.
Wear a mask and do not smell the gas or smoke.
The percent value should increase in the Home Assistant dashboard.
For example, the sensor we built normally shows 10-15%.
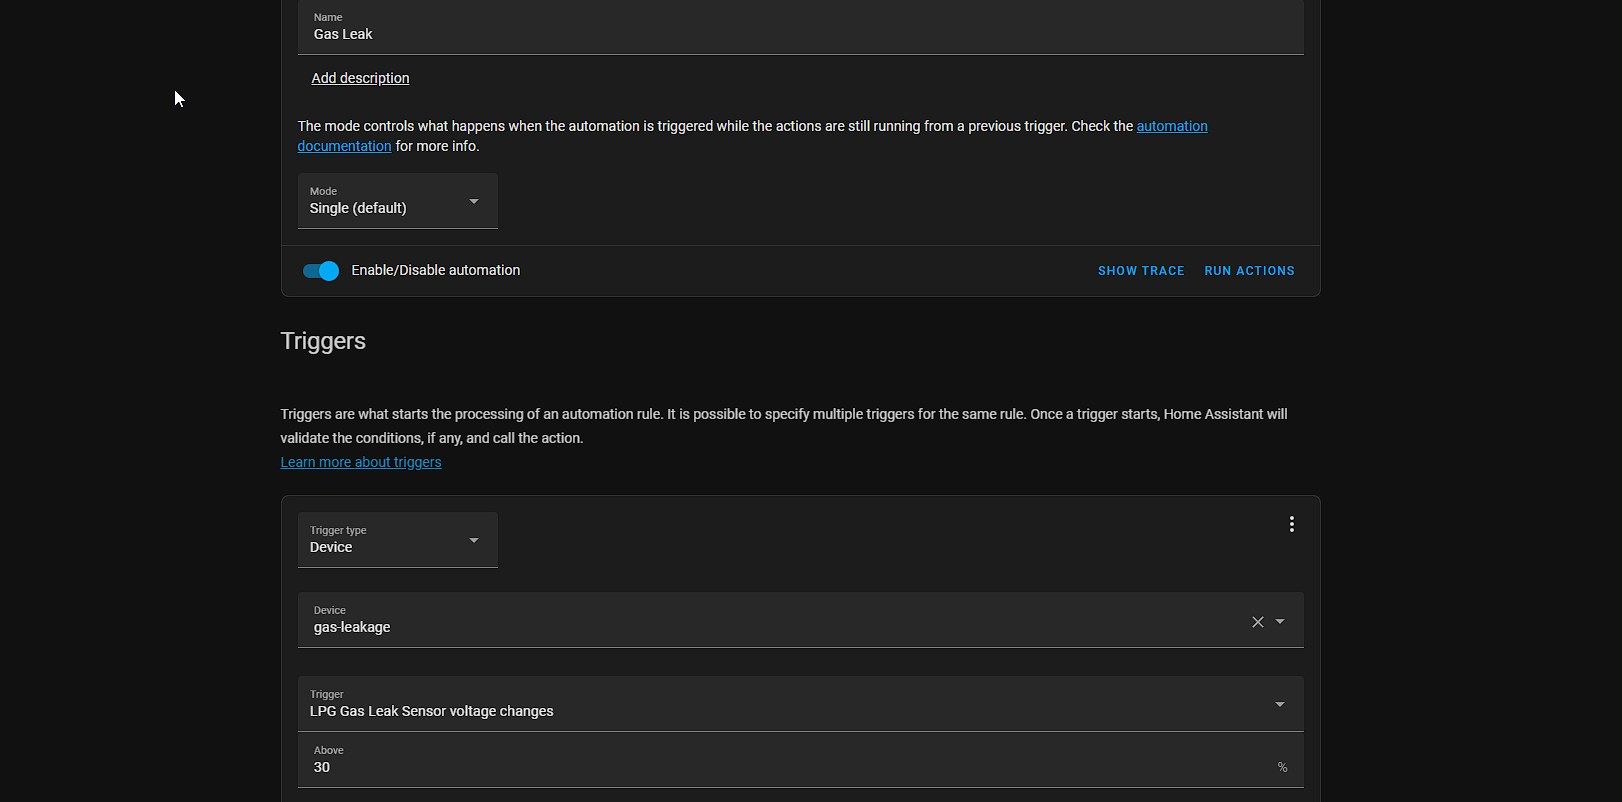
To create an automation, go toSettings > Automations & Scenesand clickCreate Automation.
ChooseStart with empty automationand then pick the three dots at the top left.
Now, chooseEdit in YAMLand paste the following code.
Next, click thethree dotsagain and chooseEdit in visual editor.
Usually, the sensor remains at 10-15%.