Ubuntu’s name pops up whenever you think of Linux.
In comparison, Ubuntu is lightweight and doesn’t need a jacked-up laptop or desktop to run smoothly.
But can you install and run Ubuntu from a USB drive?

You’ll use one USB drive as a bootable media.
The second USB drive will contain the actual Ubuntu installation.
Remember that you must use USB 3.0 drives.
If you use a USB 2.0 drive, it will have slow read and write speeds.
It could take a while to install Ubuntu on a USB 2.0 drive.
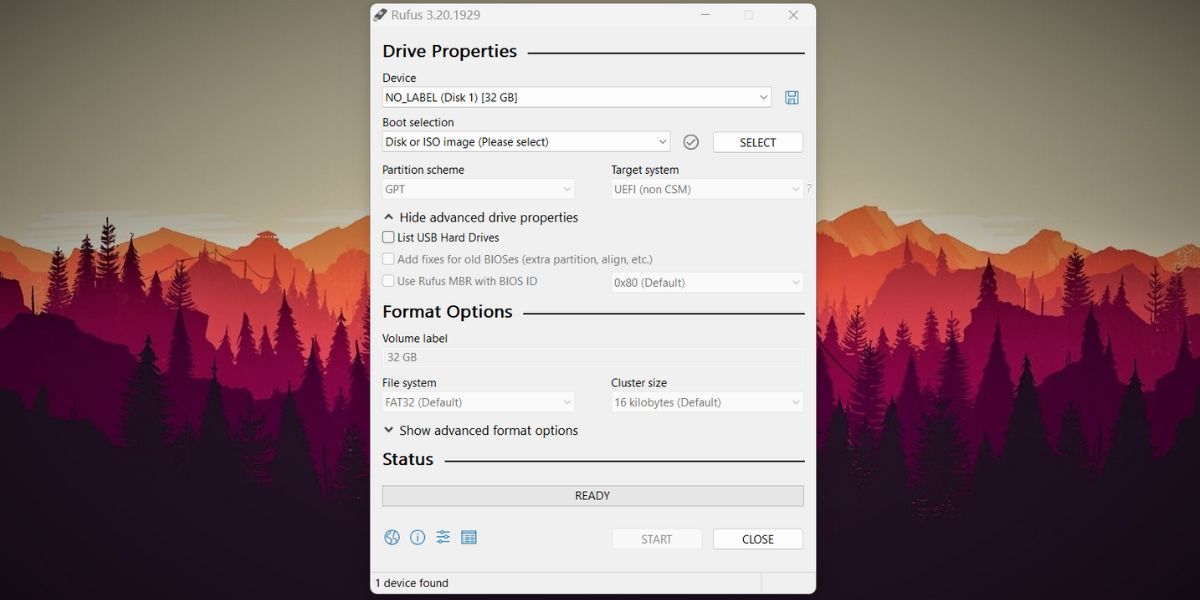
First, it’s crucial that you create a bootable Ubuntu USB drive using Rufus.
Then, you will have to load the operating system on USB Drive 2. it’s possible for you to now use it to install Ubuntu on any computer.
To begin, cycle your system.
Hastily pressF10to enter the boot rig menu.
Check our detailed guide onentering the BIOS on Windows 10/11for more information.
Now, selectUSB Drive 1using the arrow keys and pressEnterto boot.
The Ubuntu GRUB menu will appear.
SelectUbuntuand pressEnterto enter the setup.
Now, tap on theTry Ubuntutile.
Once you enter the Ubuntu desktop, click theInstall Ubuntushortcut.
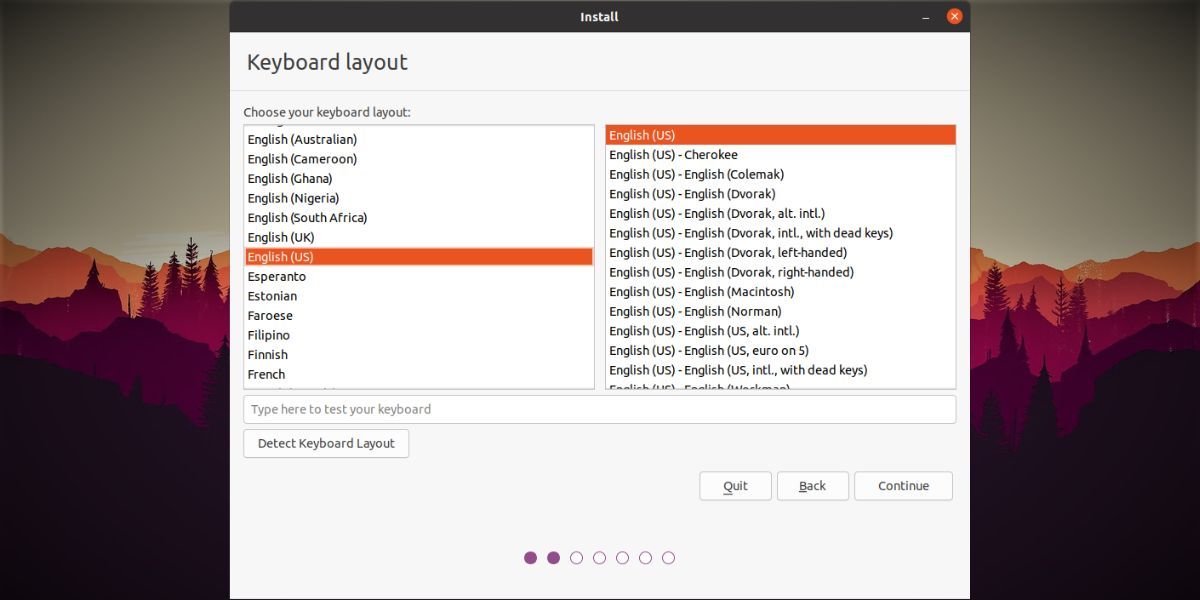
The Ubuntu installation window will launch.
Keep the default keyboard layout and choose theContinuebutton.
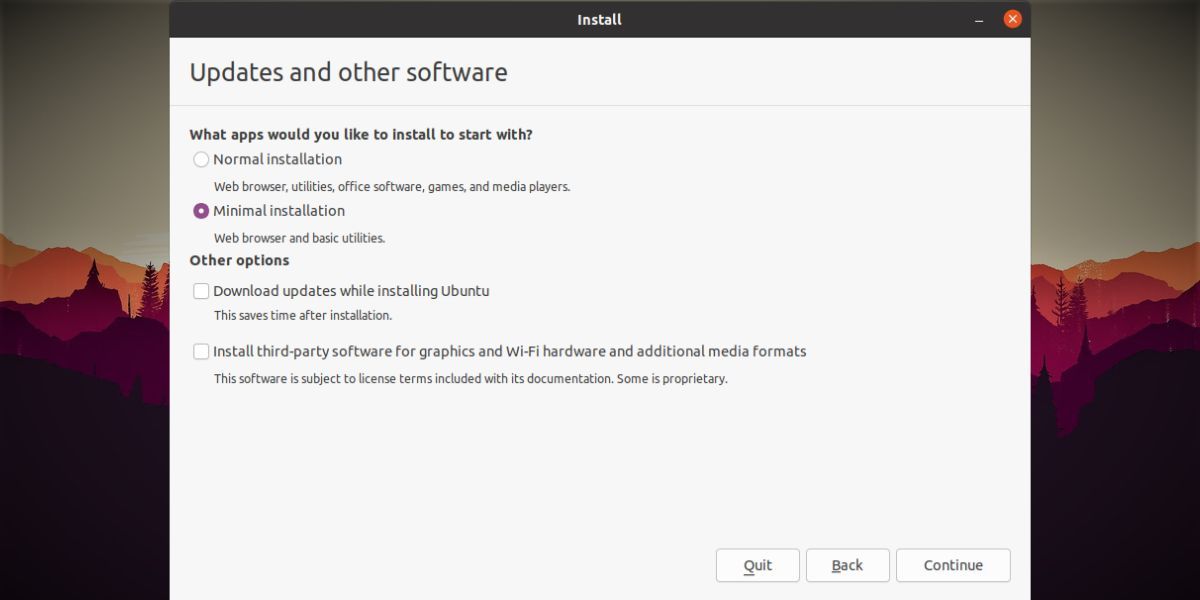
Choose theMinimal installationoption in the next window.
Uncheck theDownload updates while installing Ubuntuoption.
Now you should probably pick the installation bang out.
Since there are multiple storage drives, you cannot go with theErase disk and install Ubuntuoption.
Otherwise, it will wipe your hard disk clean and remove your primary operating system.
Select theSomething elseoption and then clickContinue.
Now, locate USB Drive 2 in the list of available devices.
verify you check its capacity and identify the correct drive.
Right-hit existing partitions on USB Drive 2 and select theDeleteoption.
Once you see the total free space listed under USB Drive 2, right-punch it and select theAddoption.
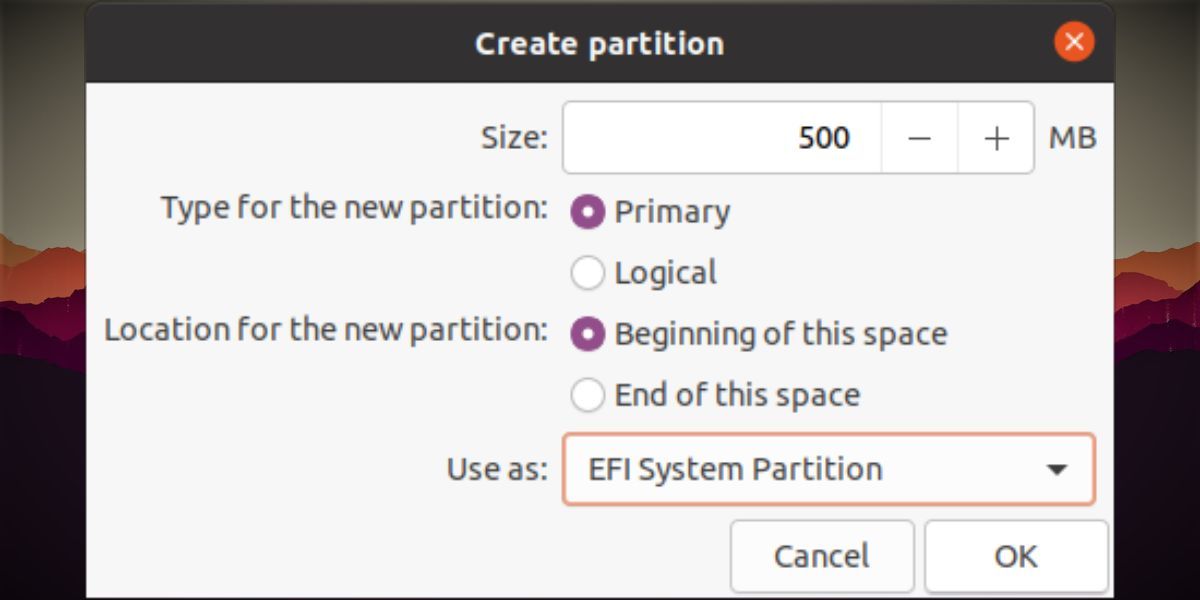
Keep the partition size 500MB and don’t change the rest of the configs.
press theUse asdrop-down menu and selectEFI System Partition.
Then, clickOkto create the partition.
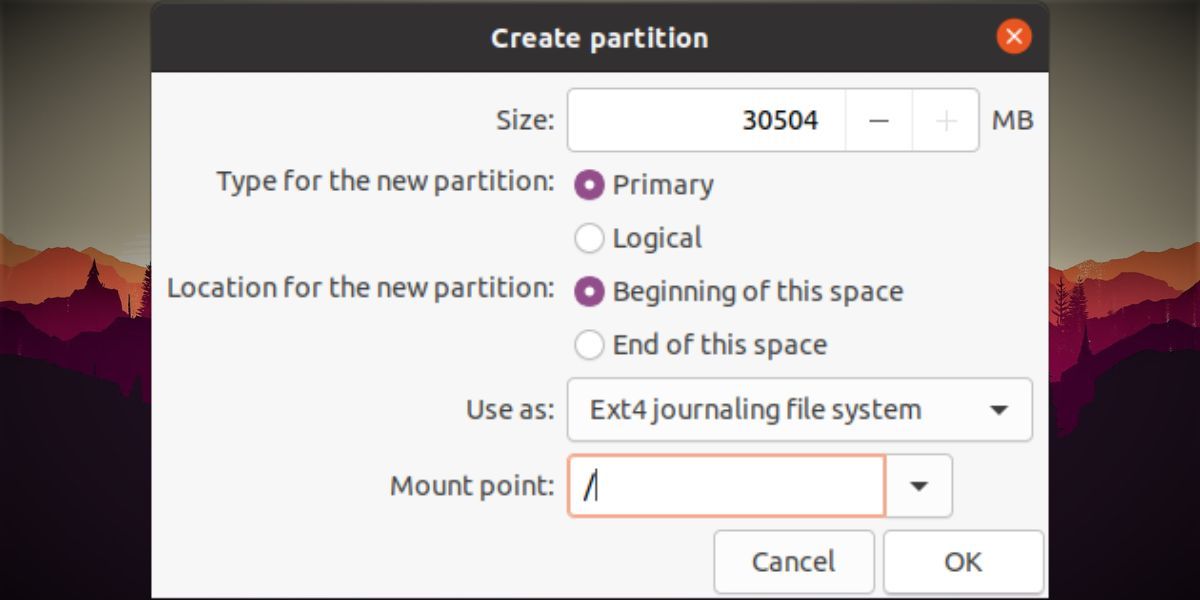
Right-choose the remaining free space and select theAddoption.
Dont change the size, punch in, or location.
Also, keep theUse asoption as theExt4 journaling file system.
Now, select/as the mount point and clickOk.
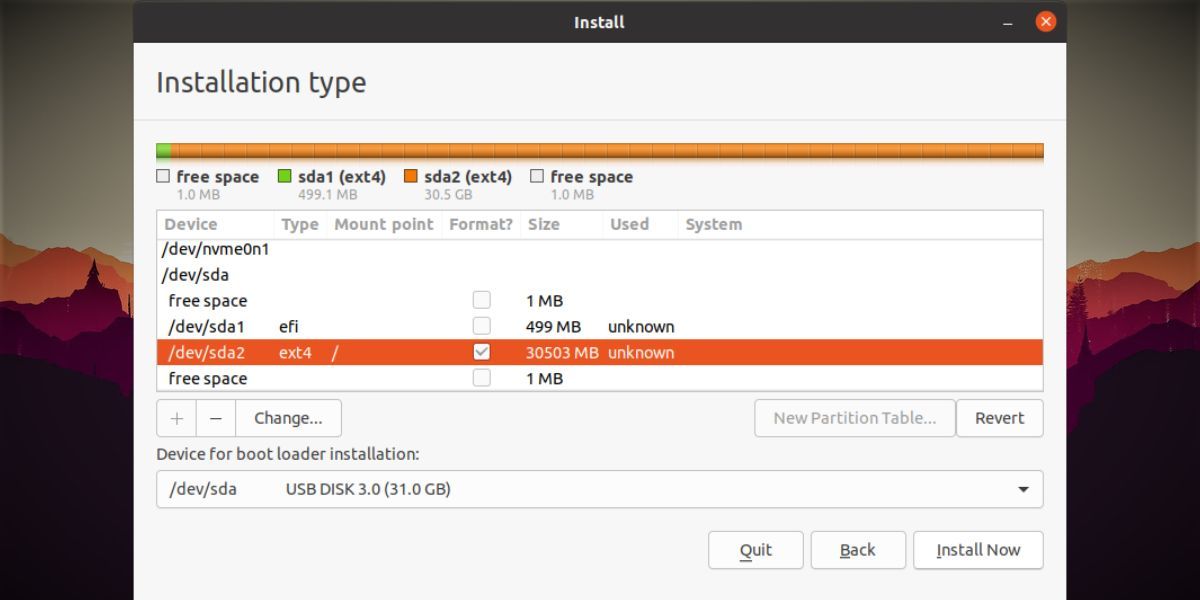
Go to theDevice for bootloader installationoption and select USB Drive 2 from the list.
Then, hit theInstall Nowbutton.
Select your geographical location, slide in your username and password, and clickContinue.
Wait patiently for the installation to complete.
Once the installation completes, clickContinue Testingbecause we still have to make changes to USB Drive 2.
While the new firmware has its advantages, there is a slight issue with it.
It can only contain one ESP partition on a system.
It wont be able to locate the ESP partition and will place all the EFI files for Ubuntu there.
But if you dont want to remove the hard disk, there is still a workaround.
After that, you might easily boot from the Ubuntu USB on any system.
You also need to copy some necessary boot files from the Ubuntu ISO file.
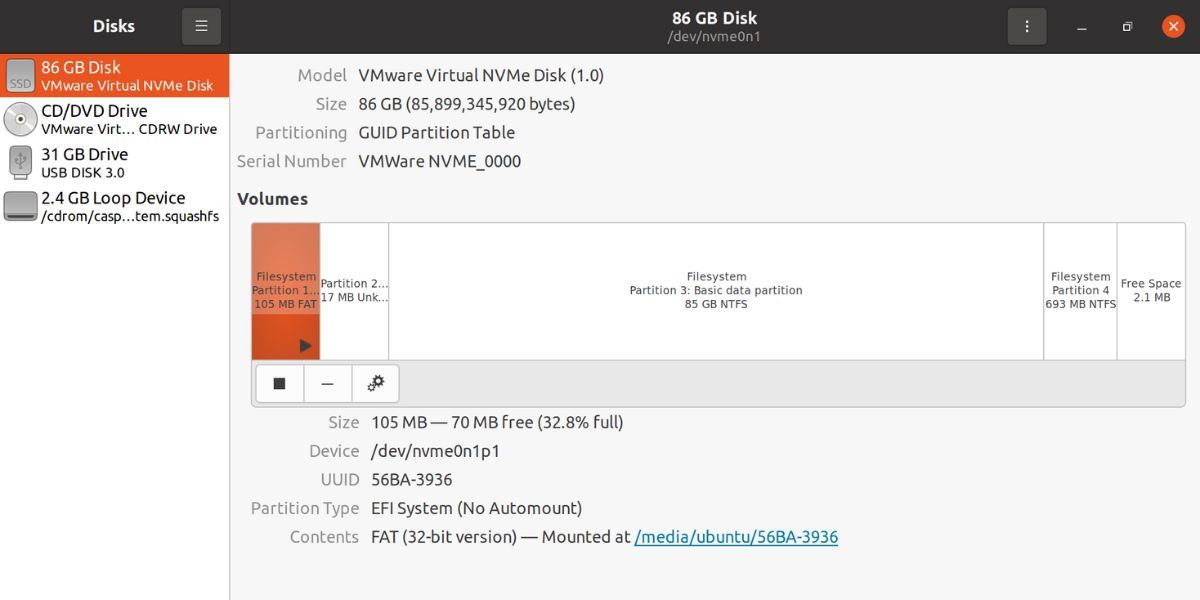
After clicking theContinue Testingbutton, press theSuperkey and search for theDisksutility.
Launch it and then locate the USB bootable drive.
You dont need to mount it.
Go to theContentsarea and snag the path mentioned after theMounted atlabel.
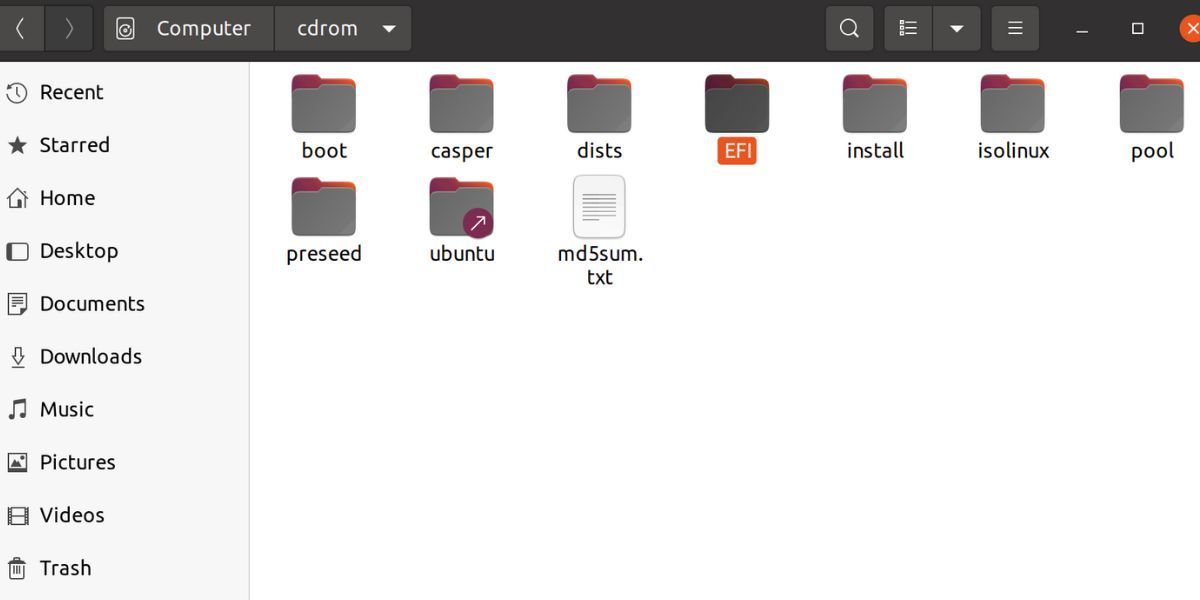
Copy the EFI folder.
Next, switch to the Disks utility and selectUSB Drive 2.
Mount its EFI partition by clicking thePlayicon.
pop launch the folder location by clicking on the path as you did in the previous step.
You will notice that the EFI partition is empty.
Paste the EFI folder which you copied in the second step.
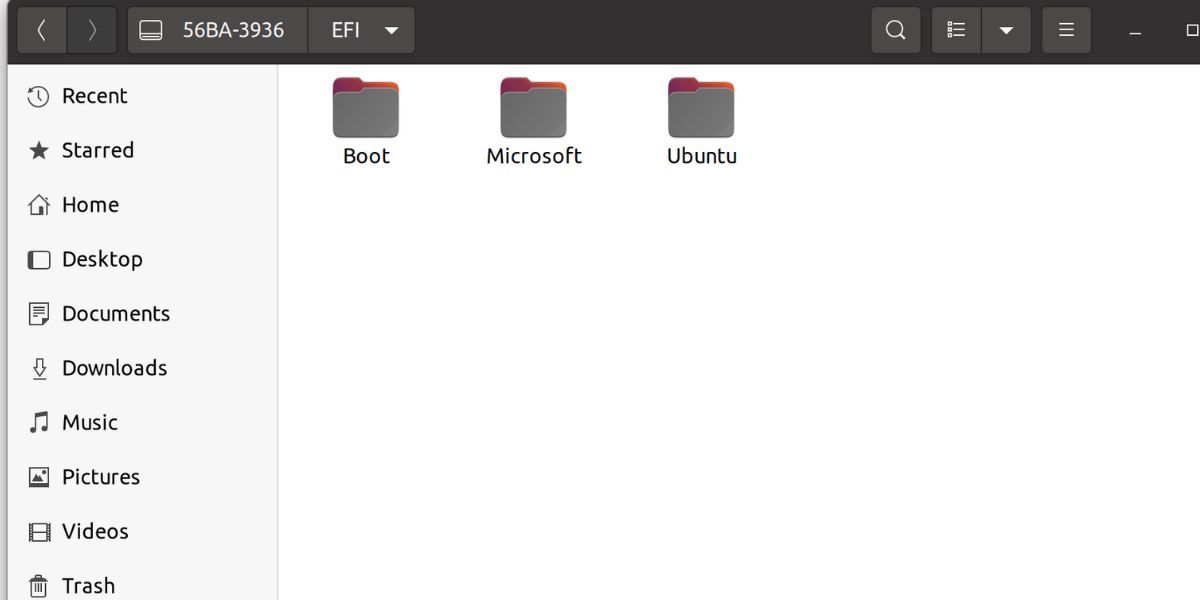
Again, initiate the Disks utility and go for the system disk drive containing the Windows installation.
hit theWindows EFI partitionand then click thePlayicon to mount it.
Now, go to the EFI folder location by clicking on the path mentioned after theMounted atlabel.
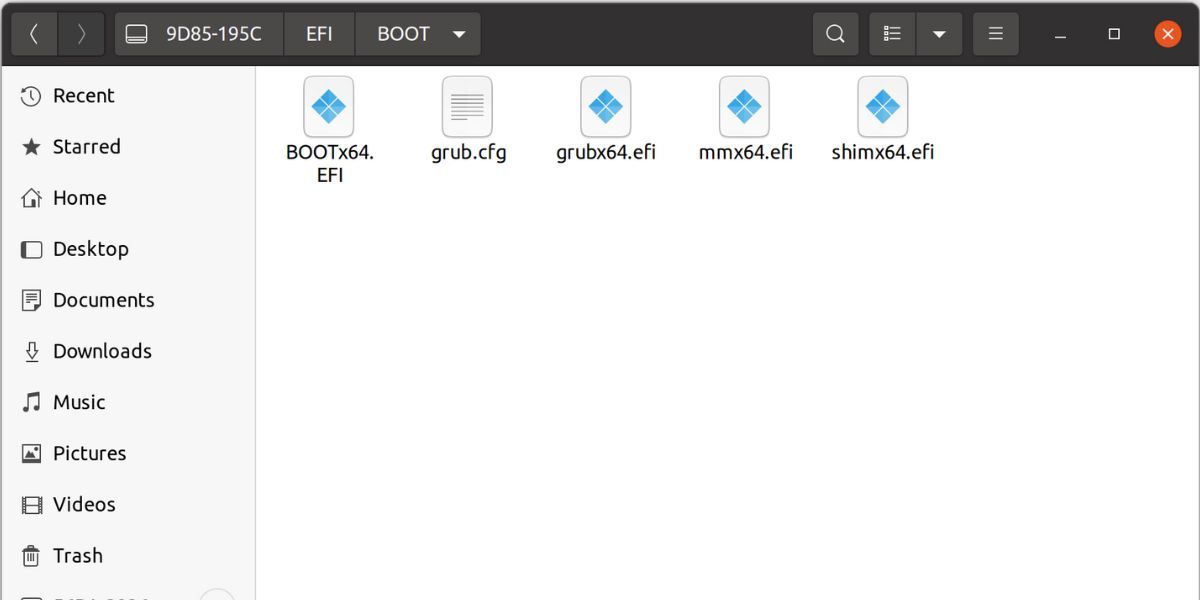
Navigate toEFI > Ubuntu.
Switch to the USB Drive 2 EFI folder window.
Paste the copied files into theBootfolder.
bring up the Windows EFI partition folder again and delete the Ubuntu folder from there.
Close all the open windows and reset your system.
Be extremely cautious while copying and making modifications to the EFI partition folder.
Do not delete any folder except Ubuntu from the system drive.
Now, jump into the boot menu and select USB Drive 2 as your current boot drive.
You will boot to the Ubuntu desktop in a couple of minutes.
Finish setting up the system and then use Ubuntu as you’d normally do on a desktop installation.
The overall usability of Ubuntu installed on a pen drive will be decent enough to carry out basic tasks.
see to it to use a USB 3.0 drive and port for this experiment.
