It lets you create virtual machines to install and spin up the guest OS on virtual hardware.
However, Hyper-V is only available for the Pro, Education, and Enterprise edition of the OS.
If you are using the Home edition, you have to rely on a third-party virtual machine manager.
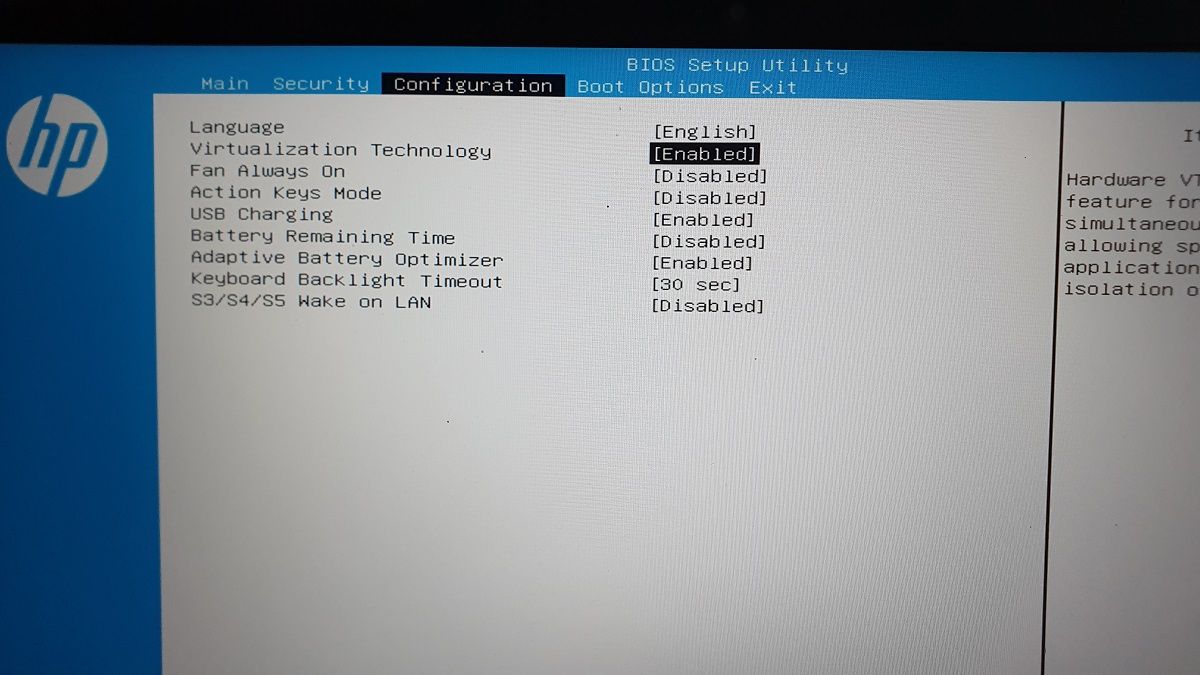
Most modern systems support Hardware Virtualization, and you’ve got the option to enable it in BIOS.
The below steps are for an HP laptop.
Refer to the user manual or Knowledge Base resources on the computer manufacturer’s website for other systems.
Before you proceed with the next set of steps,create a restore point.
This will help you restore your setup to its current state if something goes wrong during the process.
To enable Hyper-V in Windows 11 Home:
1.

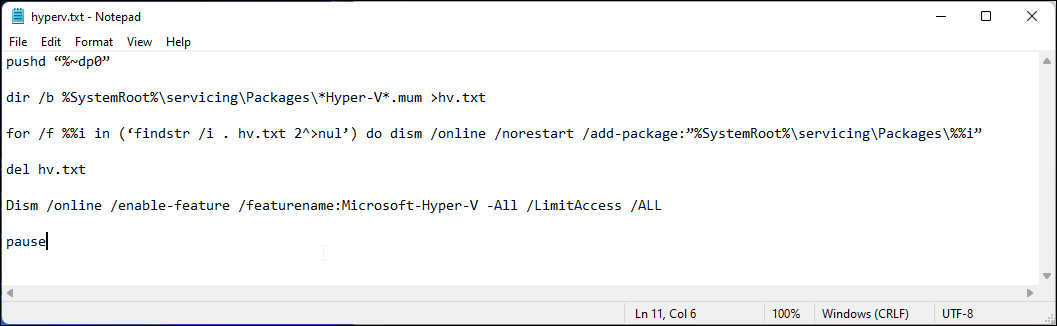
Open a new Notepad file.
To do this, pressWin + R, pop in notepad, and clickOK.
In the Notepad file, copy and paste the following script:
3.
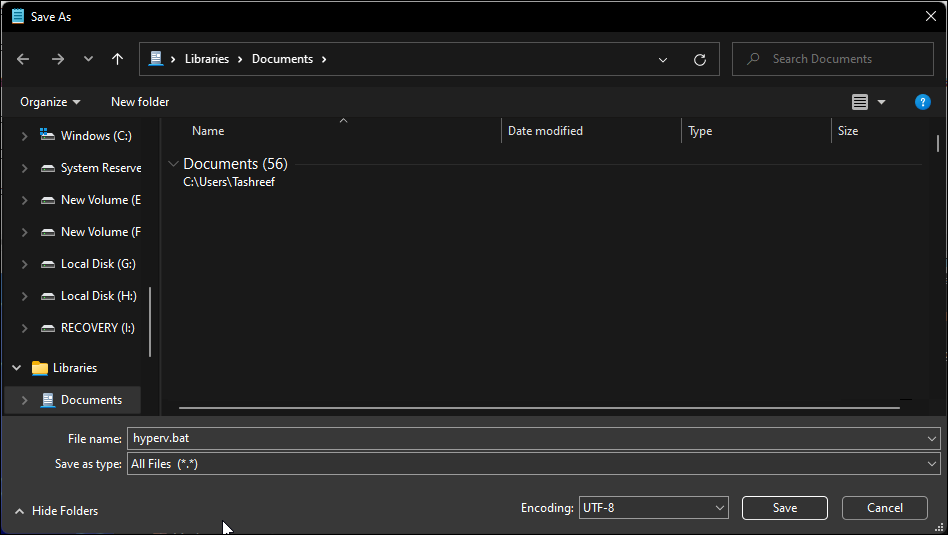
PressCtrl + Sto launch the save dialog.
Next, nudge the drop-down forSave as typeand selectAll Files.
Click theSavebutton to save the file.
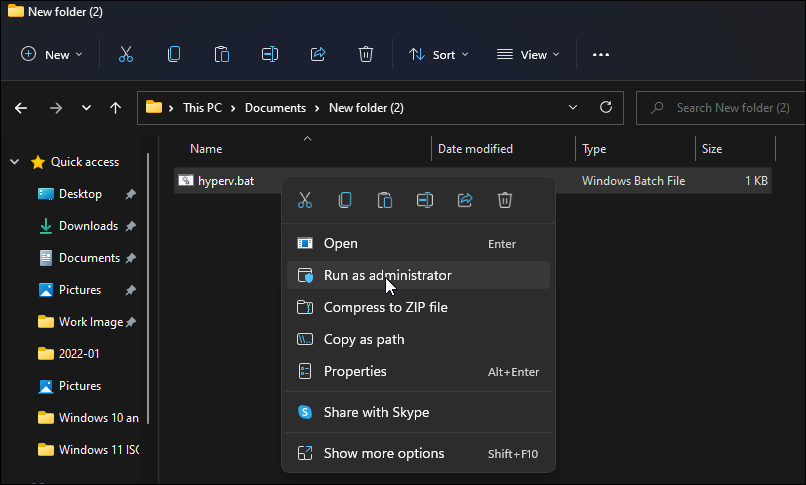
Next, right-punch thehyperv.batfile and selectRun as administrator.
ClickYesif prompted by User Account Control.
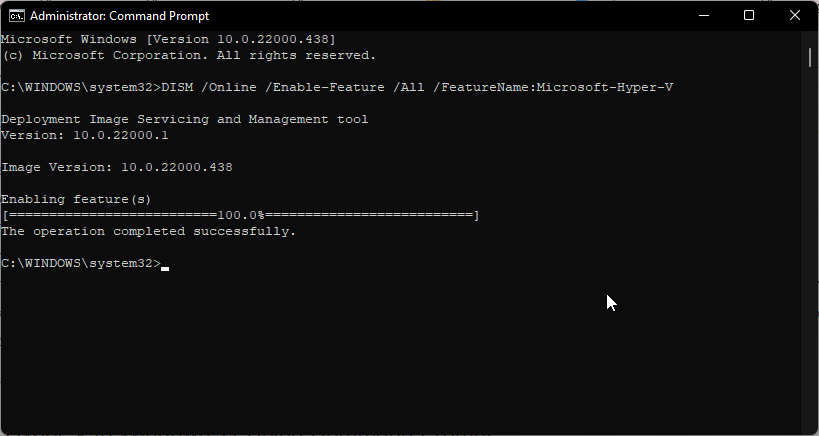
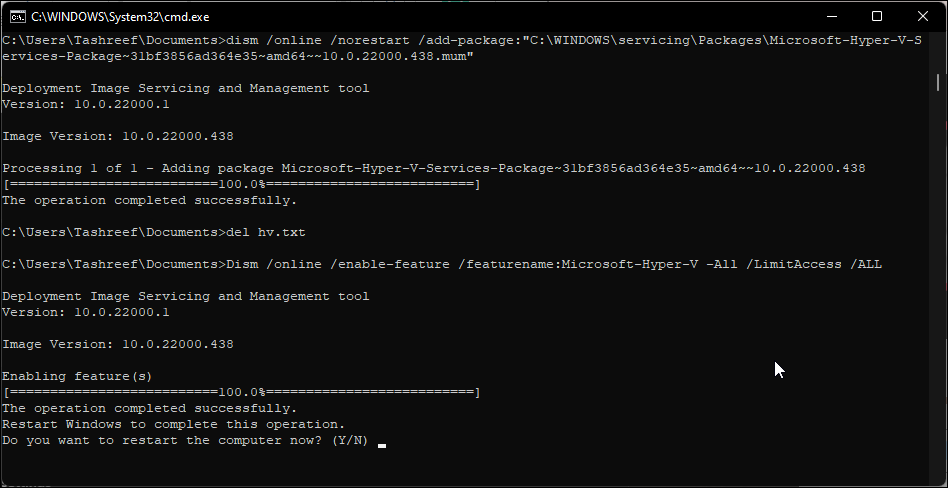
The scrip will start executing in the Command Prompt to install Hyper-V.
It may take a while, so wait till the process is complete.
9.Once completed, you will see the Operation completed successfully message.
TypeYto confirm and reset your PC.
If not, enter N to exit the Command Prompt.
Note that you will need to start your PC to apply the changes.
After the restart, you should have Hyper-V installed in Windows 11 Home.
pop in Hyper-V in Windows search and tap on Hyper-V Manager to create new a virtual machine.
You canenable Windows Sandbox from Windows Features, but only on the Pro and Enterprise edition of the OS.