Let’s use the following steps to remove the warning pop-up.
While we focus on Windows 11 here, similar steps should work for handling this error on Windows 10.
This forces Windows to check for driver updates again and fixes any temporary issues triggering the error.

Unsplash
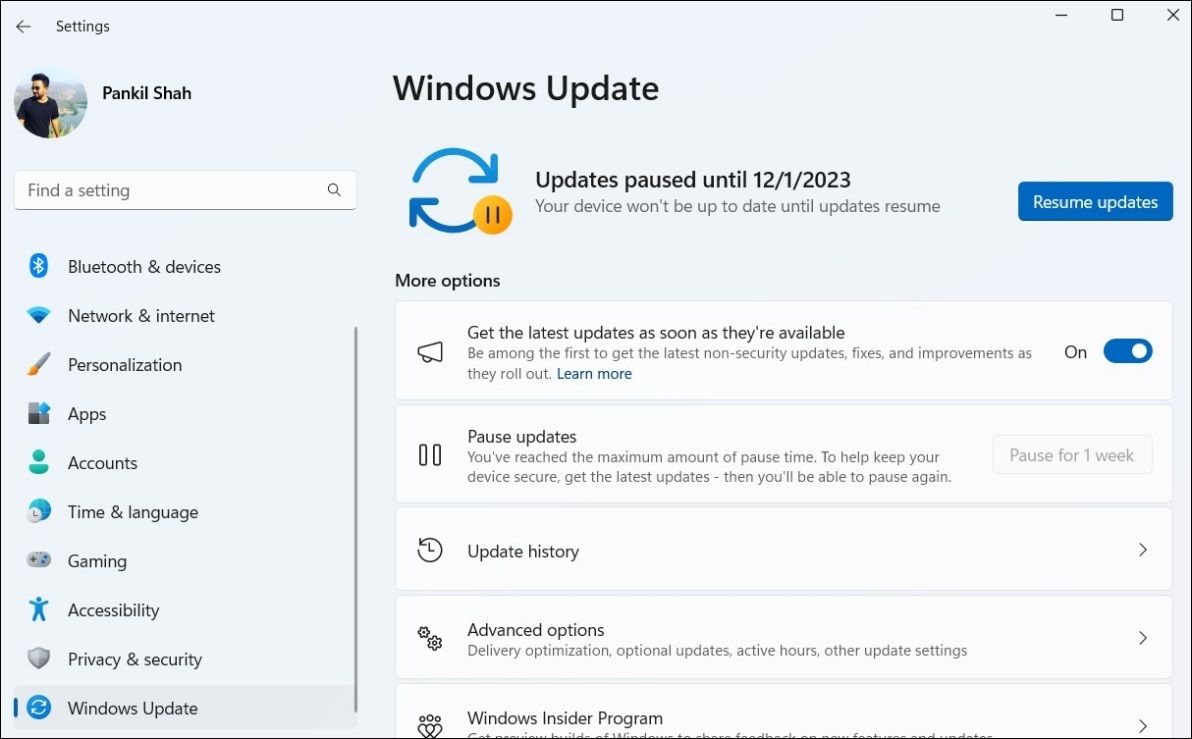
PressWin + Ito openSettingsand head to theWindows Updatetab.
Choose thePause for 1 weekbutton (next toPause updates) in the right pane.
Then, click theResume updatesbutton.
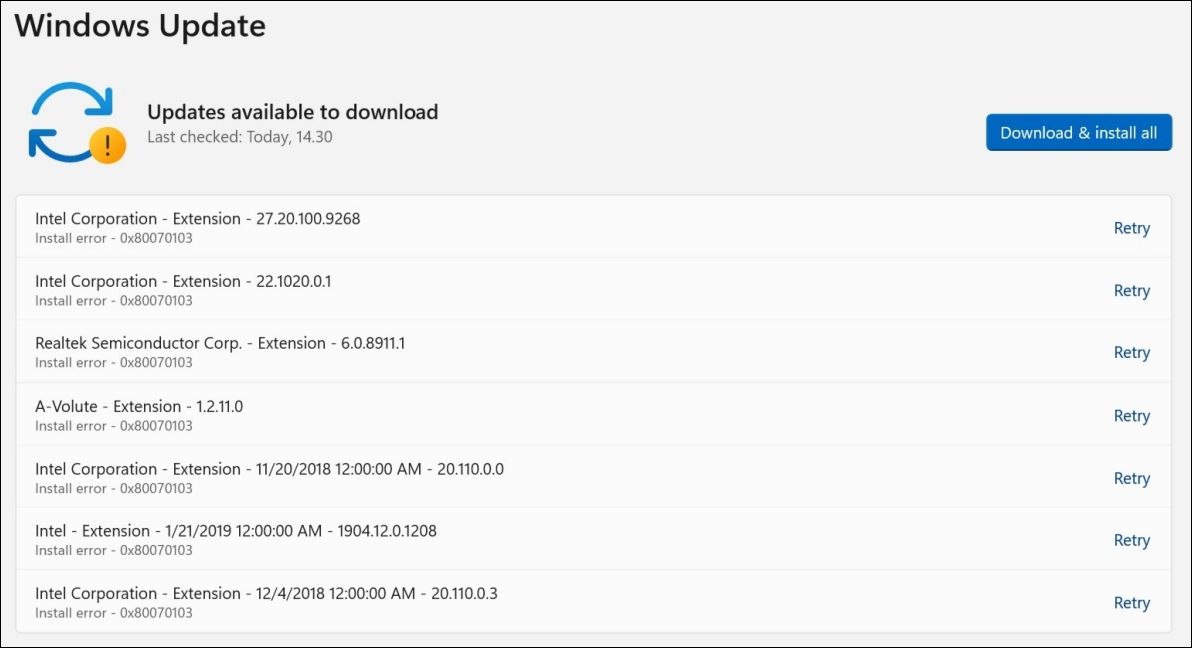
Wait for Windows to check for updates; it should no longer display the problematic driver update.
Hide the Problematic Update
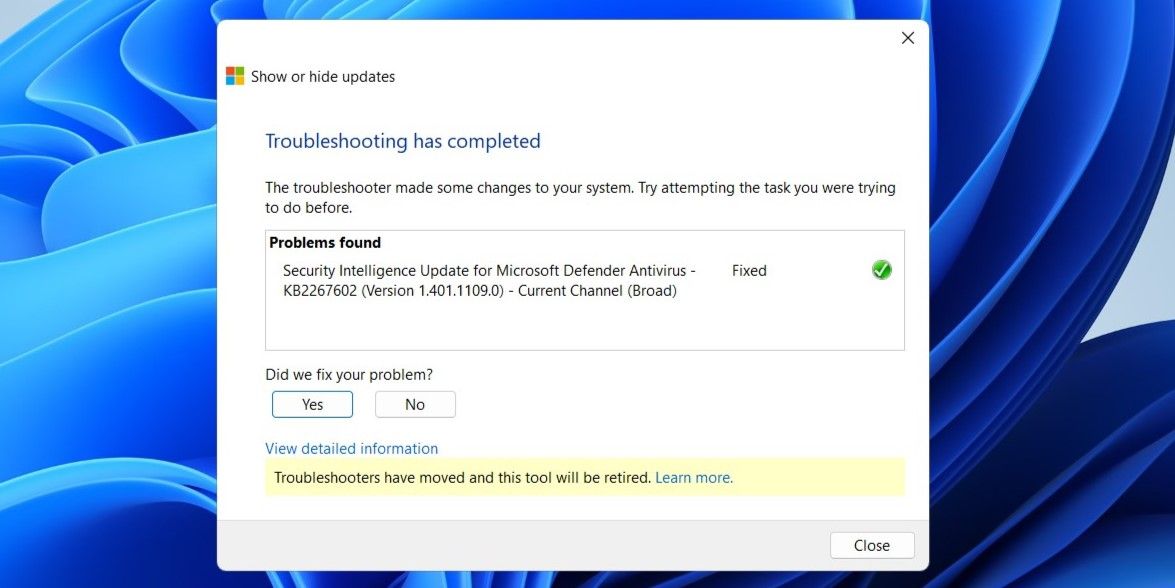
you’re able to hide the problematic update to fix the 0x80070103 error.
For that, you must use Microsoft’sShow or Hide Updatestool.
In its place, you canrun Windows troubleshootersto get into the same functions.
Go toSettings > System > Troubleshoot > Other troubleshooters > Windows Update.
Once you hide the problematic driver update, you wont see the 0x80070103 error in the Windows Update tab.
Reset Windows Update Components
Windows Update components on your PC are responsible for downloading and installing updates.
After that, the install error 0x80070103 should not bother you.
Try Other Generic Fixes
In most cases, one of the above tips should help fix the error.
But thanks to driver conflicts, the process may not always go as expected.
Hopefully, the above tips will sort out the 0x80070103 error and bring your PC back to normal.
