DNS servers are one of the most basic yet crucial parts of the internet infrastructure.
Your net internet ride then uses that address to locate and connect to the site you want to visit.
Here’s how you’re free to change your DNS server on Linux.

Why Should You Change Your DNS Server?
Slow DNS servers will cause delays every time you give a shot to connect to a site.
Misconfigured DNS servers can send you to sites you didnt intend to visit.
Changing the DNS servers that you are using can resolve all of these potential problems.
There are several trusted organizations that runfree public DNS servers.
If youre having trouble with your ISP’s default name servers, they are worth investigating.
How to Change DNS Server on Linux
Dont let all the web link lingo intimidate you.
Changing your DNS server is fast and easy with any version of Linux.
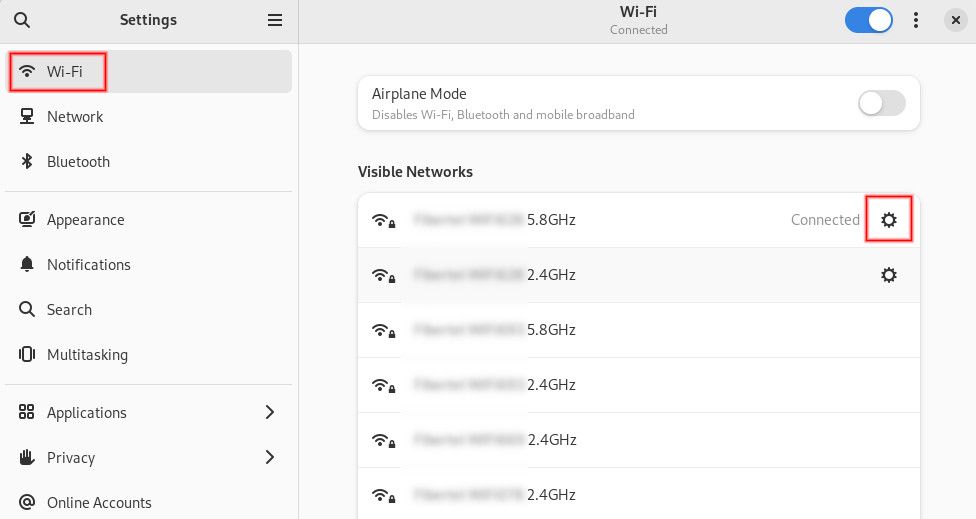
If connected through an Ethernet cable, click onNetworkinstead.
The steps to change the DNS server will be the same in both cases.
This will show you a list of all available data pipe connections.
To the right of the internet name, you will see a gear icon.
Go ahead and click that.
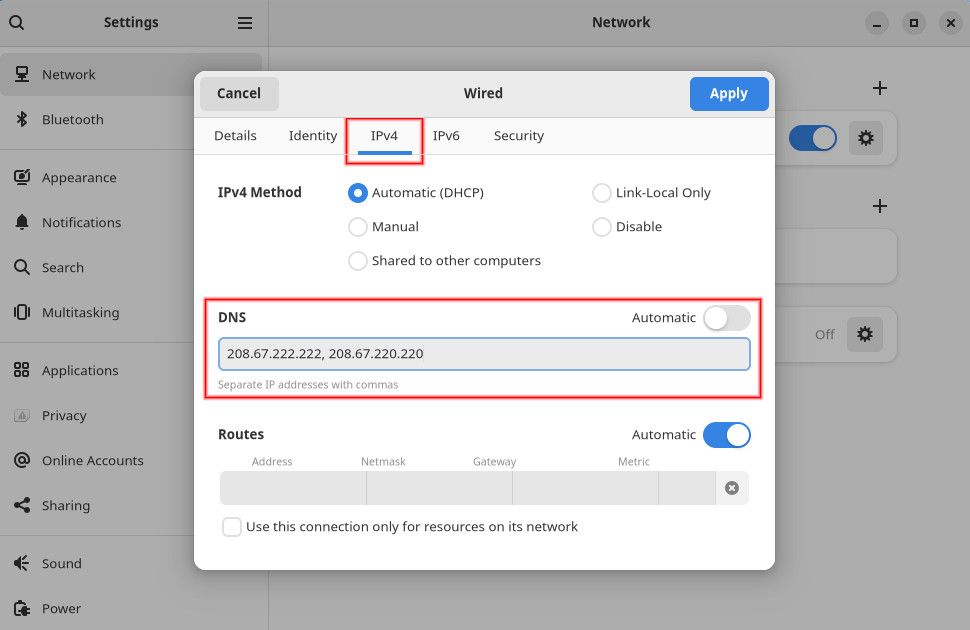
In the dialog box that opens, press the tab labeledIPv4.
In the middle of the dialog box, you will see space to put in your preferred DNS servers.
Just above the box is a toggle switch that saysAutomatic.
In most cases, your chosen DNS service will provide IP addresses for two servers.
You should enter them both.
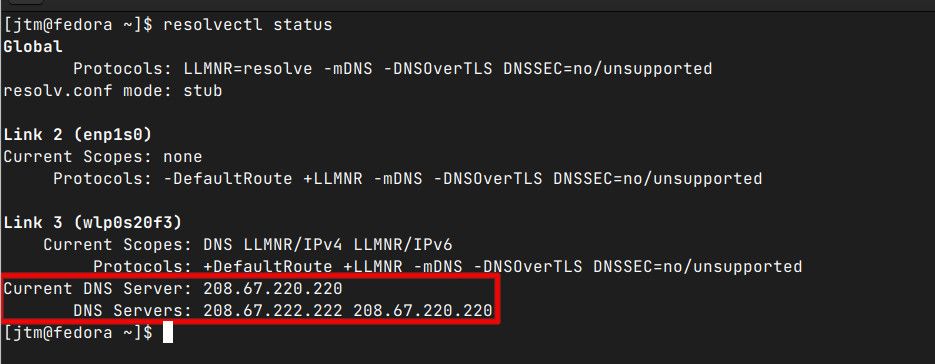
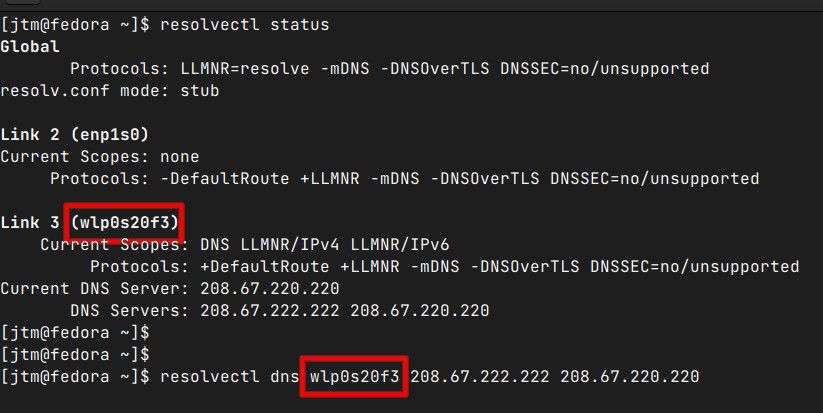
it’s possible for you to run theresolvectl statuscommand again to verify that the changes have taken effect.
bring up the system controls app and go to theNetworksection.
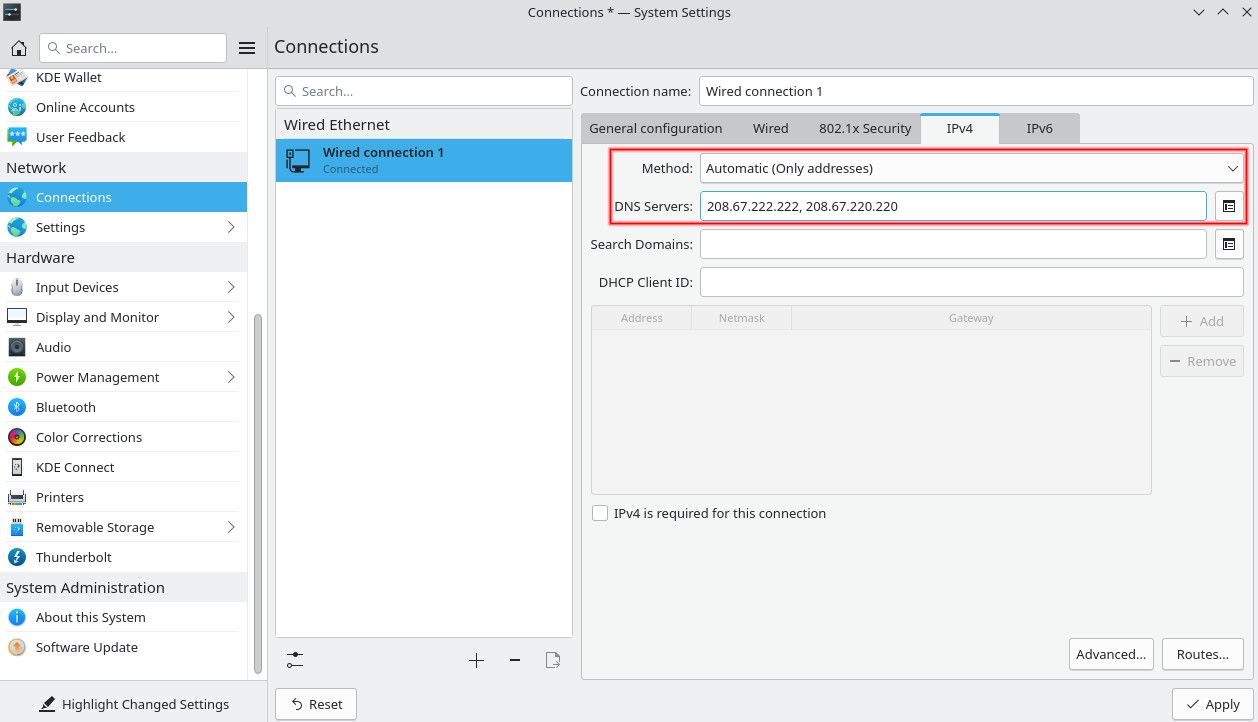
UnderNetwork, click onConnectionsand then select your current connection from the list.
From there, press the tab on the right labeledIPv4to open advanced parameters.
Here, you want to change the top two input fields.
The first, labeledMethod, will sayAutomaticby default.
tap on the drop-down menu and switch this setting toAutomatic (Only Addresses).
Now, input your DNS server IP addresses in the second field, separated by commas.
You should enter at least two servers, but you’re free to enter more if you like.
Finally, click onApplyon the bottom right and your system will start using the new DNS servers.
First, open your terminal and enter theresolvectl statuscommand.
In the output, the connection you are using should be the only one showing DNS server information.
The changes should take effect as soon as you hitEnter.
If you like, you might run theresolvectl statuscommand again to verify the new DNS server addresses.
