Podcasting is an excellent way to share your ideas with the world.
Youll find many tools to help you adjust volumes, add sound effects, and do much more.
Youll need to purchase an Adobe Creative Cloud subscription to use Adobe Audition.
Once youve done that, you’re able to edit as many episodes as you like.
This article will show you how to edit your podcast in Adobe Audition.
But ifyouve got an external microphone, youll get much crisper audio if you record directly on your machine.
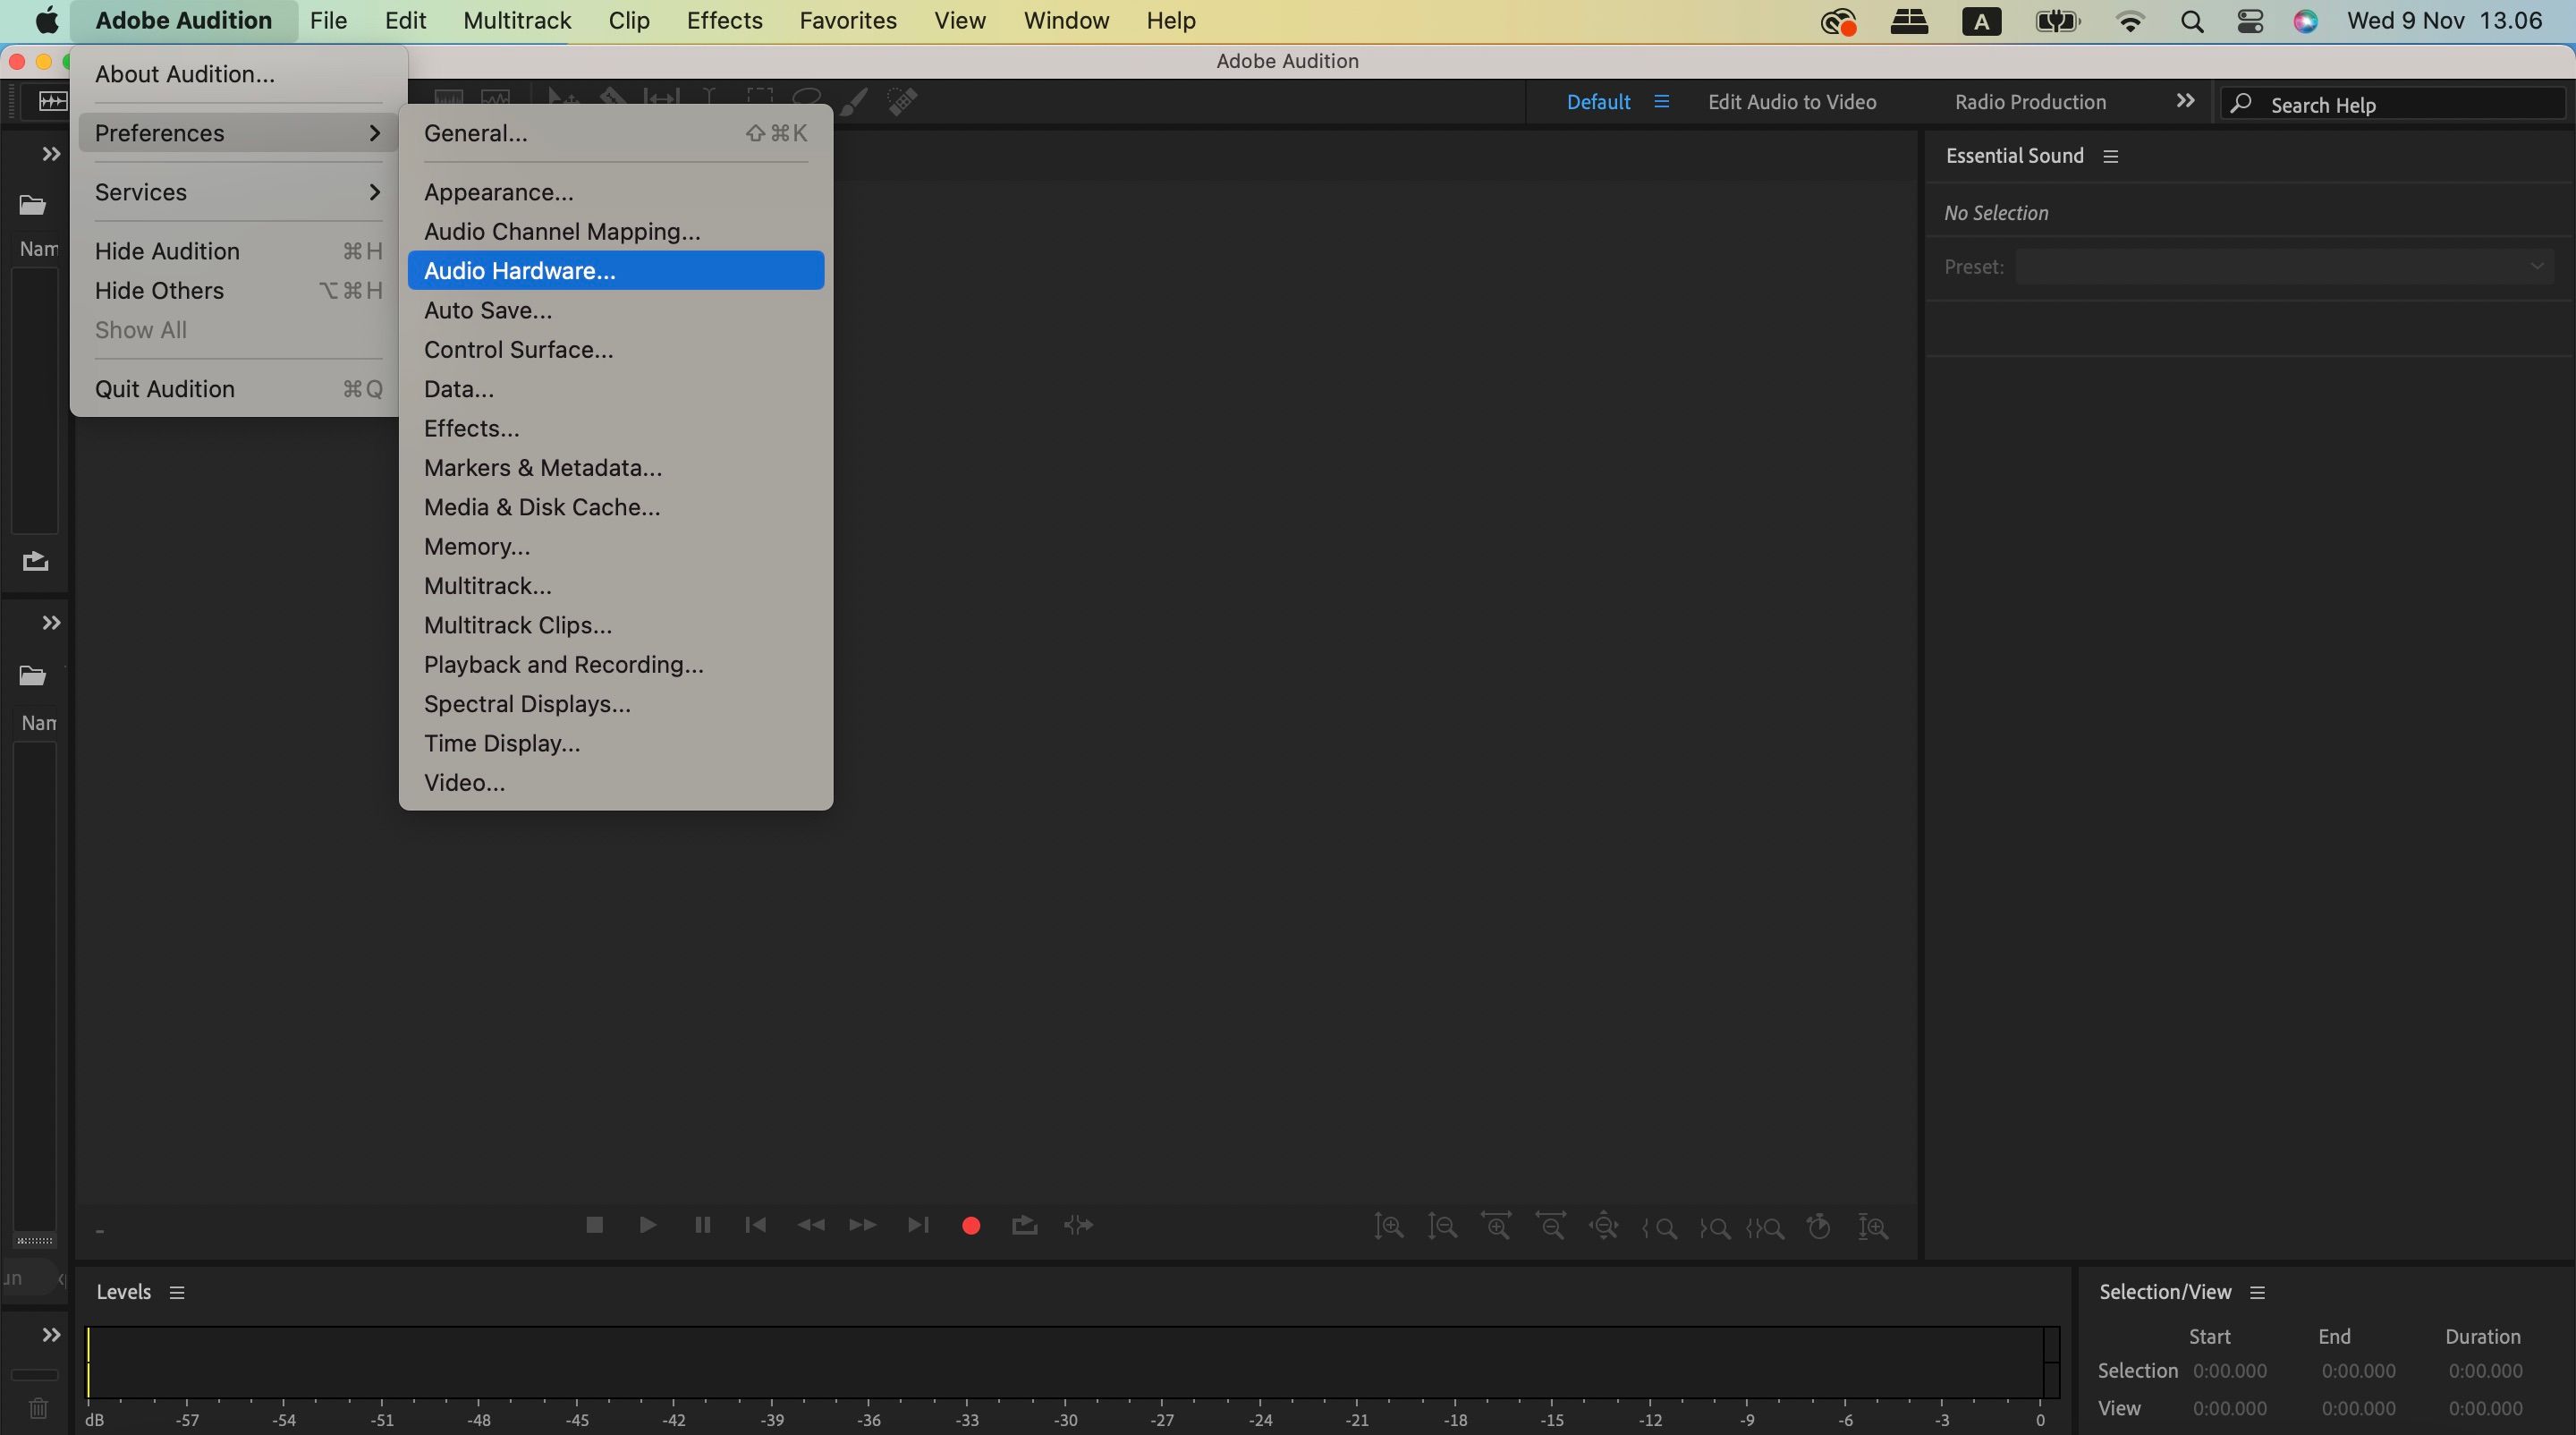
before you jump in recording in Adobe Audition, youll need to change your microphone input.
Go to theAdobe Auditionoption in the top toolbar before selectingPreferences.
In the Preferences section, go toAudio Hardware>Default Input.
Expand the dropdown menu and choose your external microphones name (e.g.
hit theOKbutton in the bottom right once youve completed these steps.
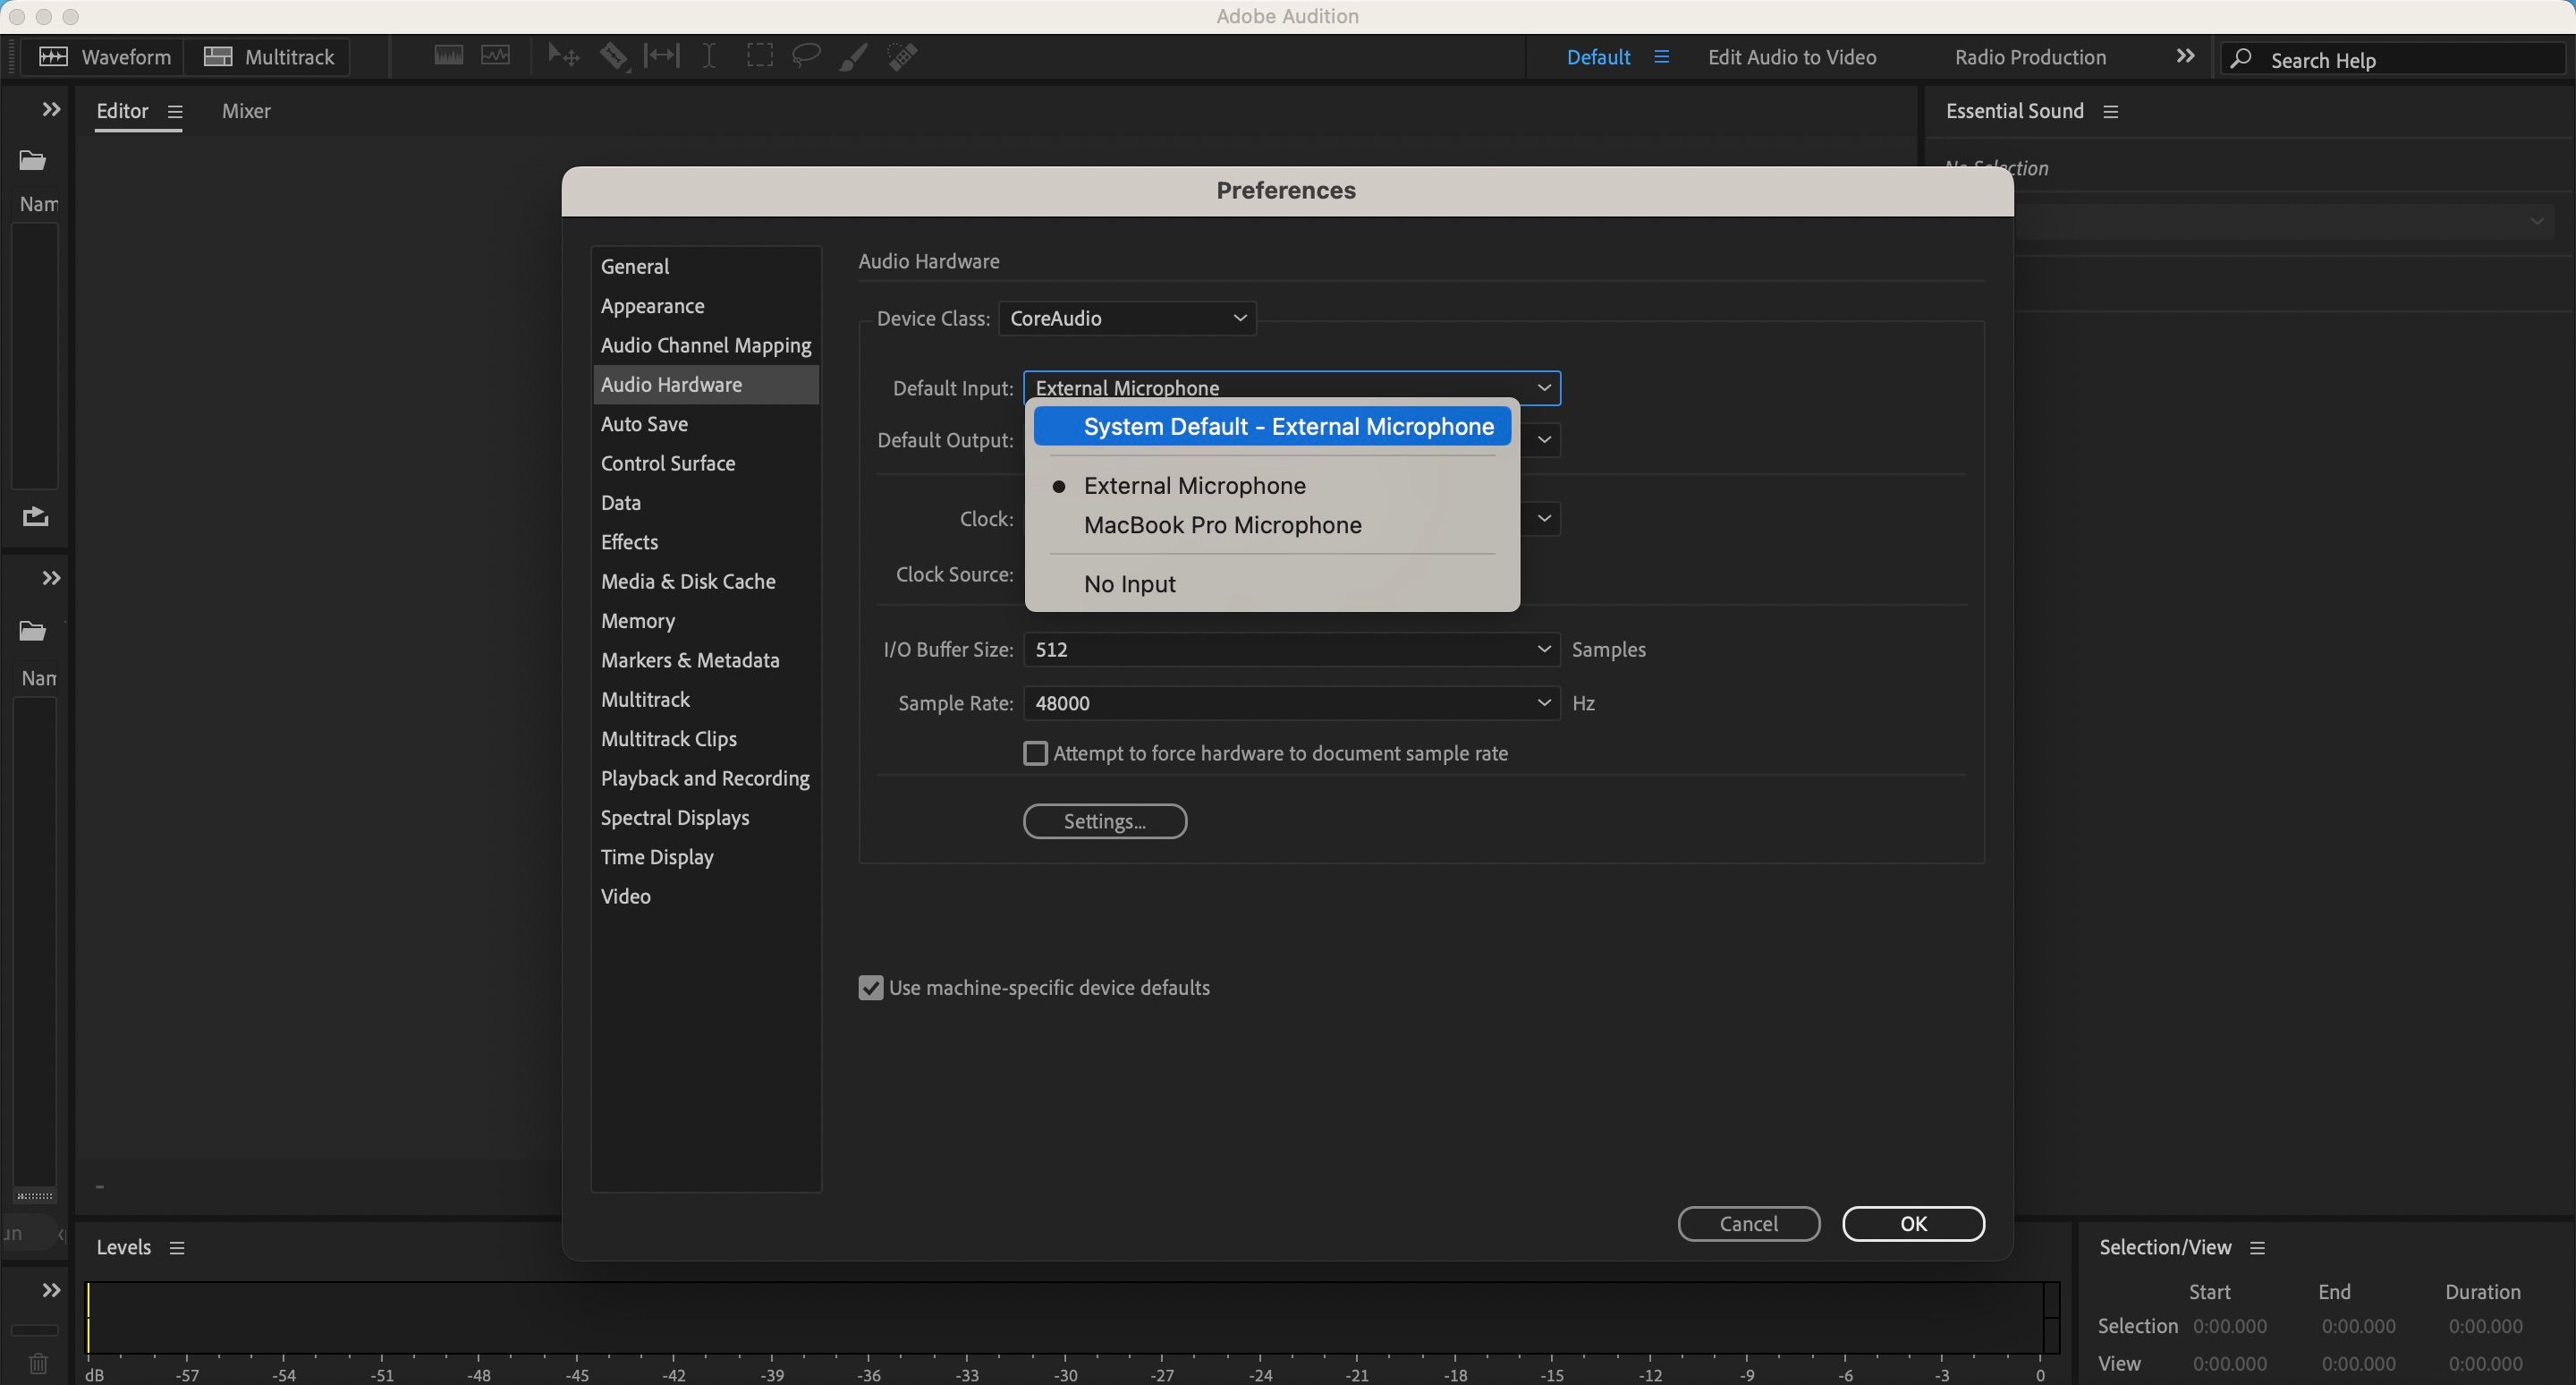
Hit thered circleon the main screen; when you do, youll see a popup window with multiple options.
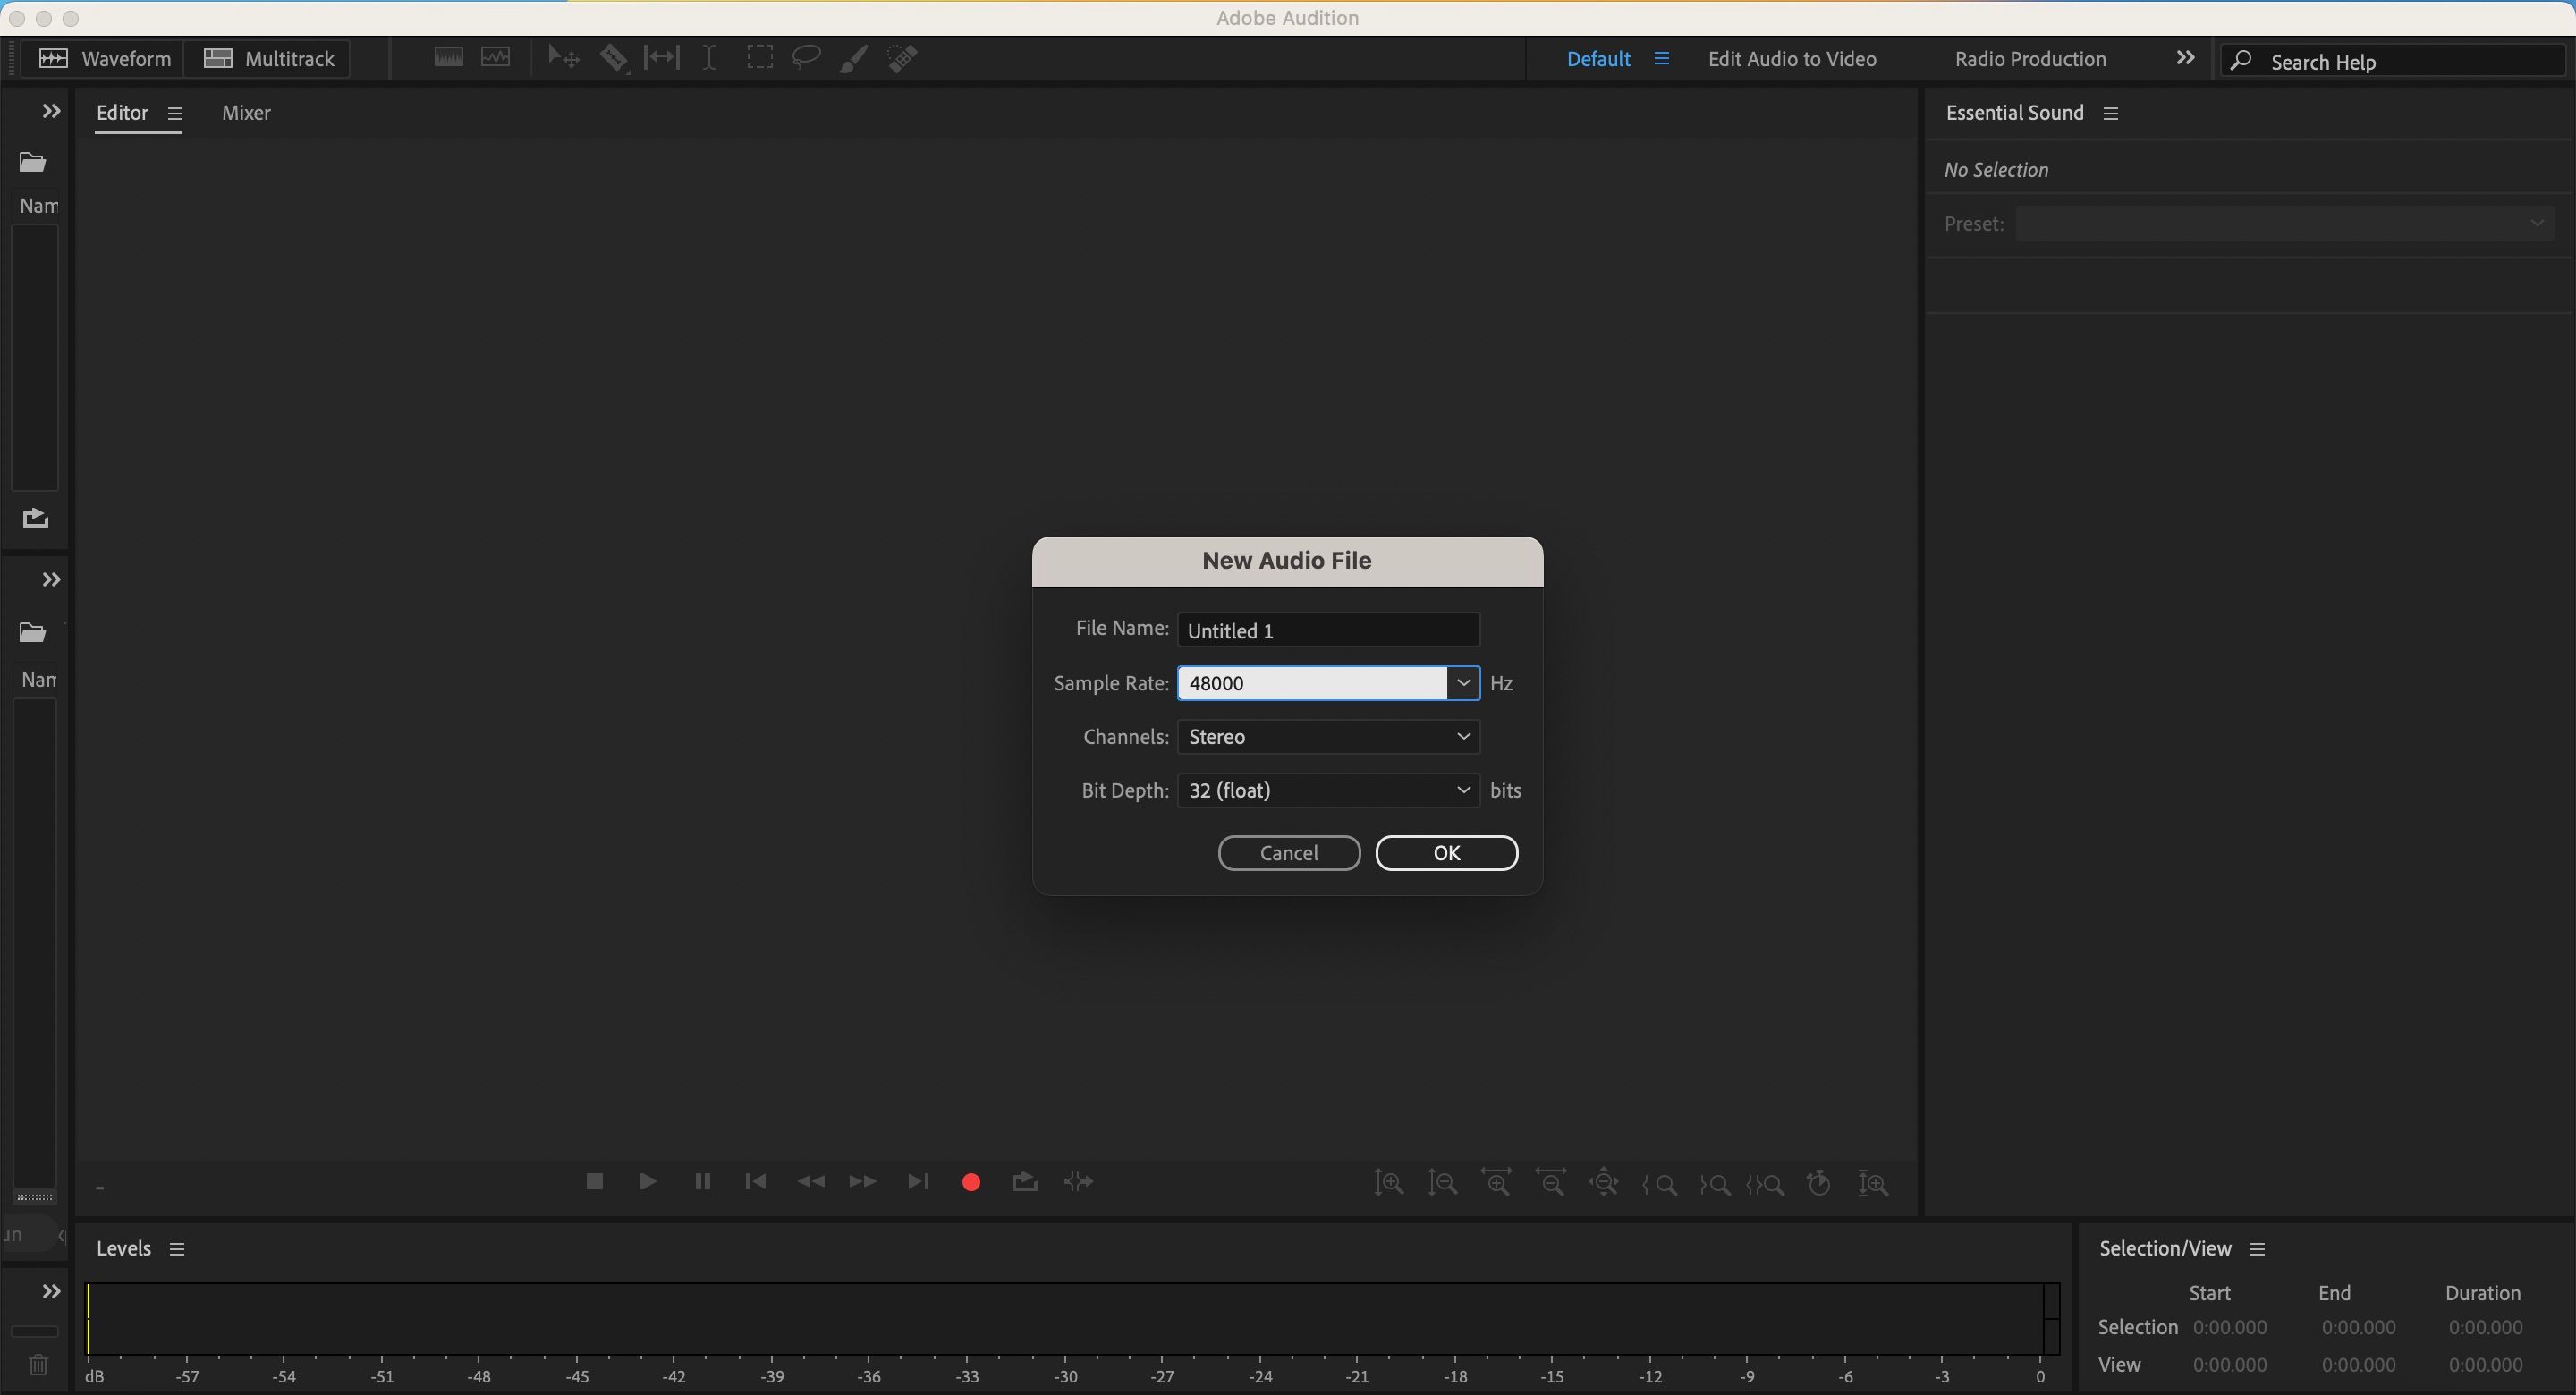
Youll also see aSample Ratetab.
Many podcasters record at 44,100 Hz, and you should consider doing the same.
As for theBit Depthsection, 32 (float) is the best option for recording high-quality podcast audios.
You will see 24 by default; expand the dropdown menu to change it.
When youve finished changing your tweaks, punch theOKbutton.
After that, youre ready to begin recording.
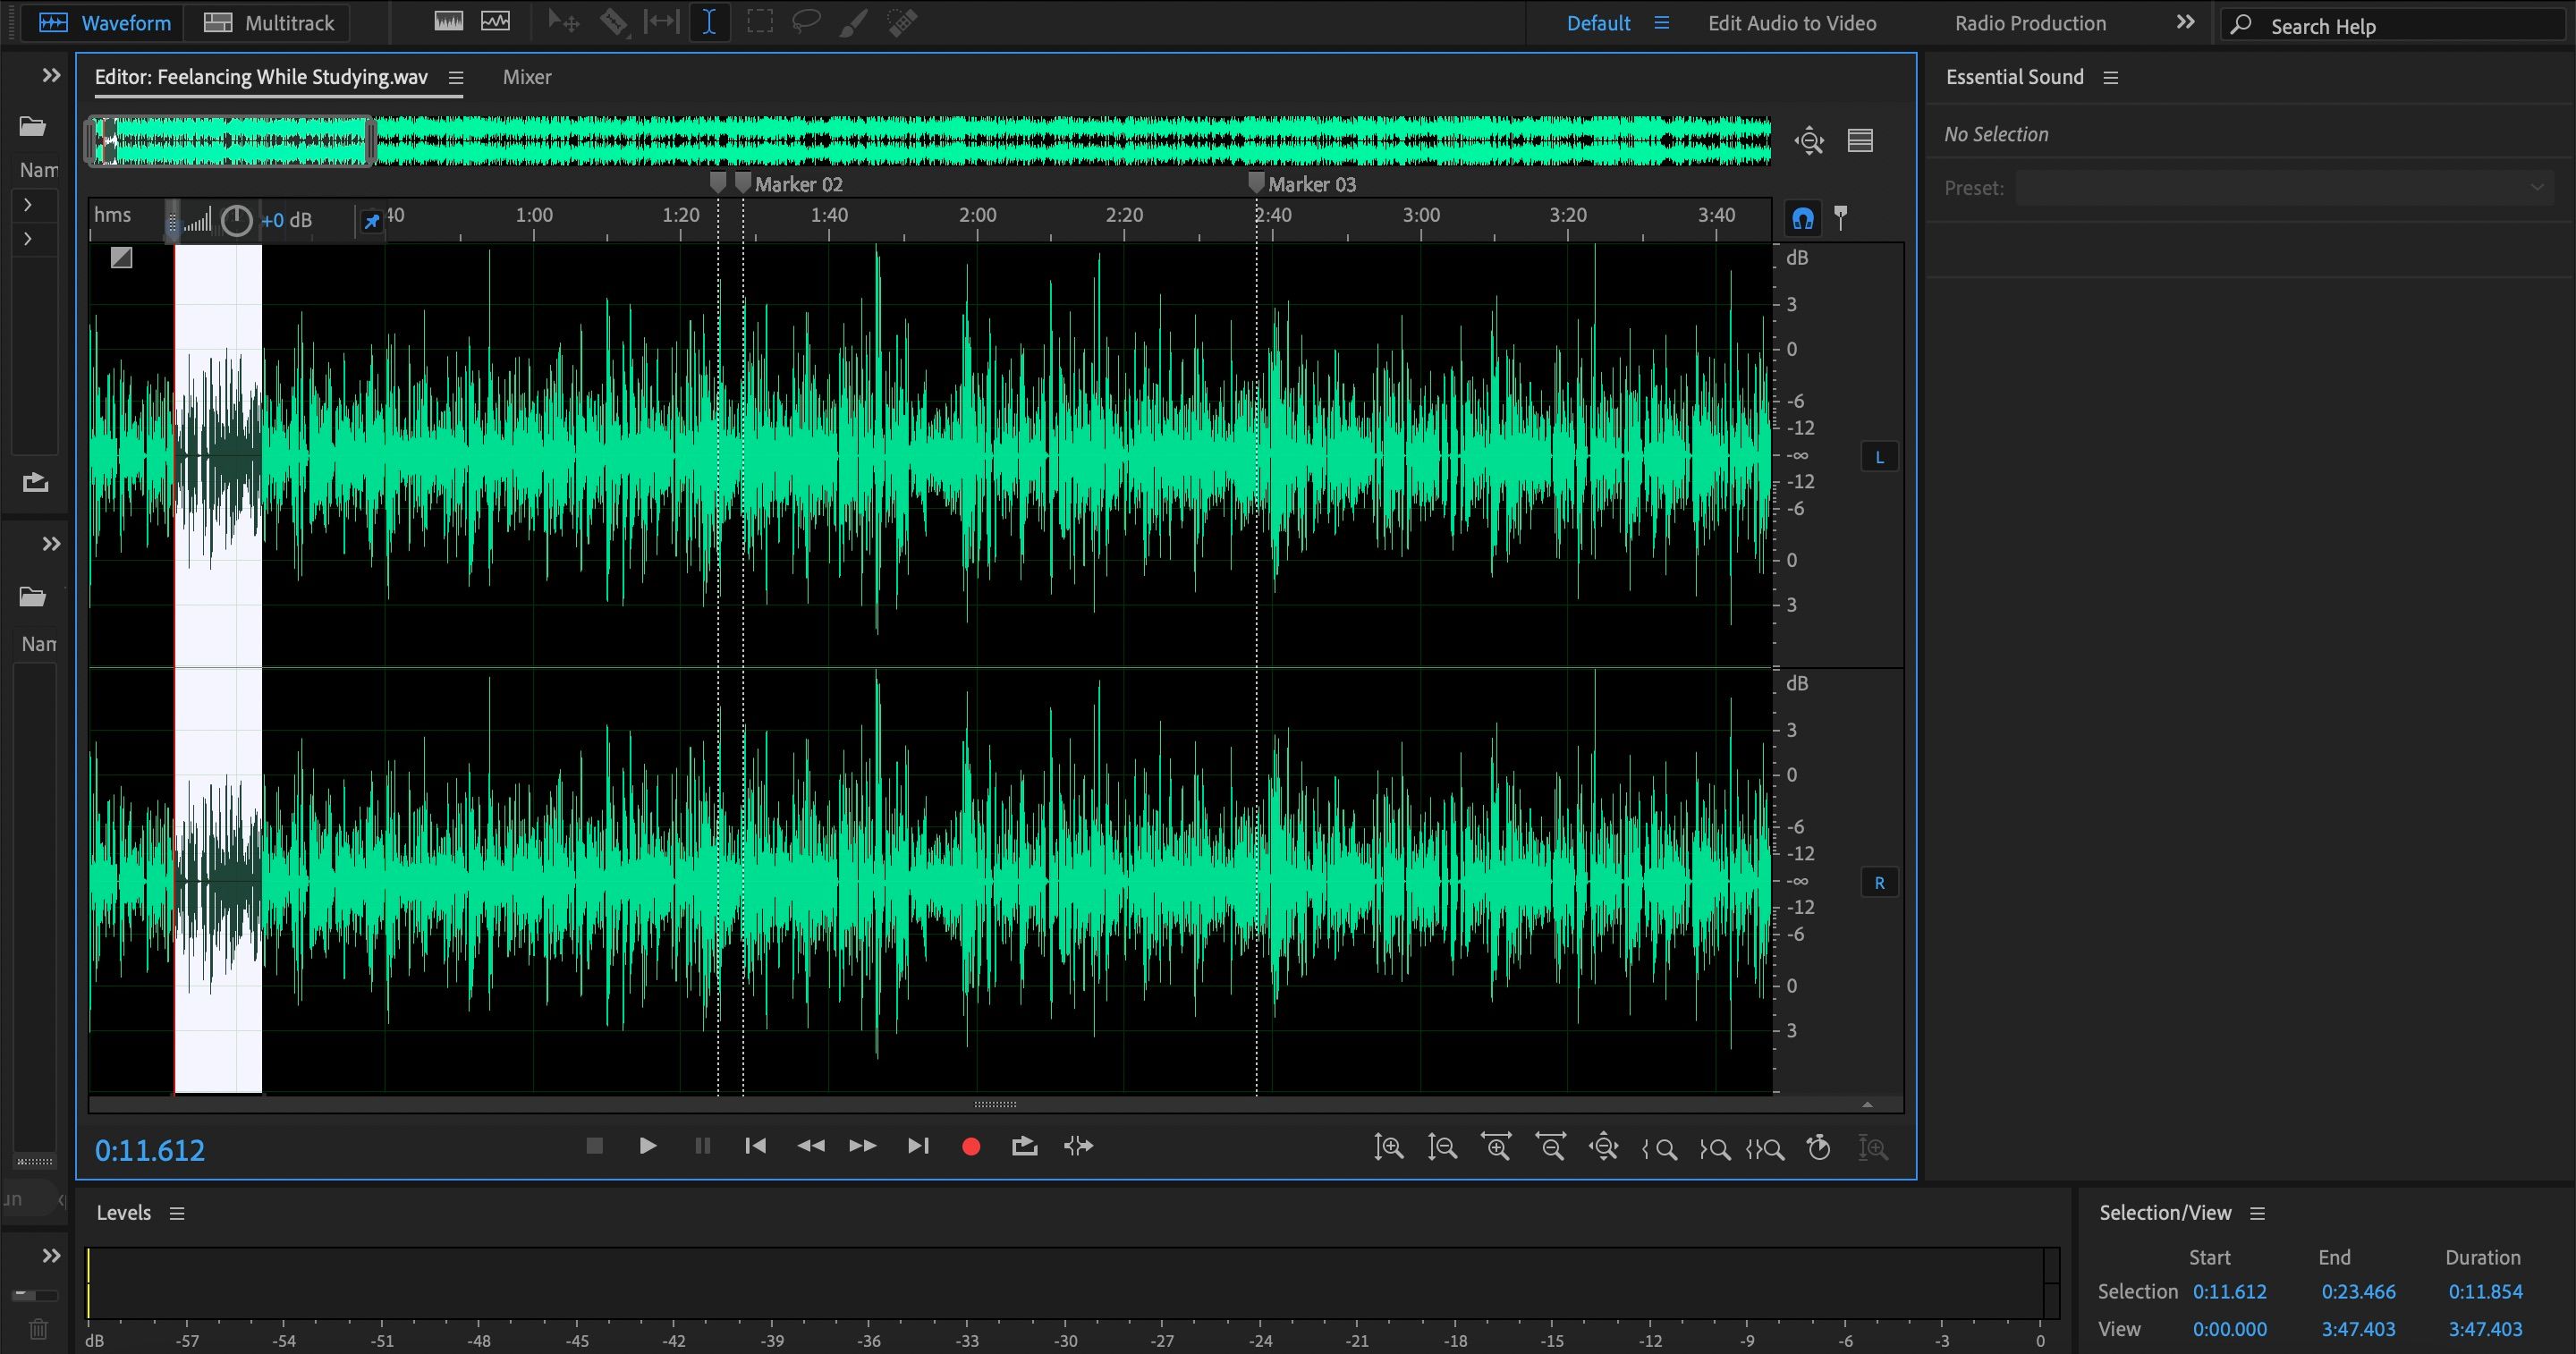
You will almost certainly have unwanted sections, such as when you say erm and uh.
Removing smaller soundbites is sometimes tricky in the default view.
Use themagnifying glassesto expand your audio and get to thosewithout getting rid of parts youd like to keep.
Its not uncommon for podcasters to feel like theyre not loud enough after listening to their recordings again.
Luckily, fixing this issue is not too much of a challenge.
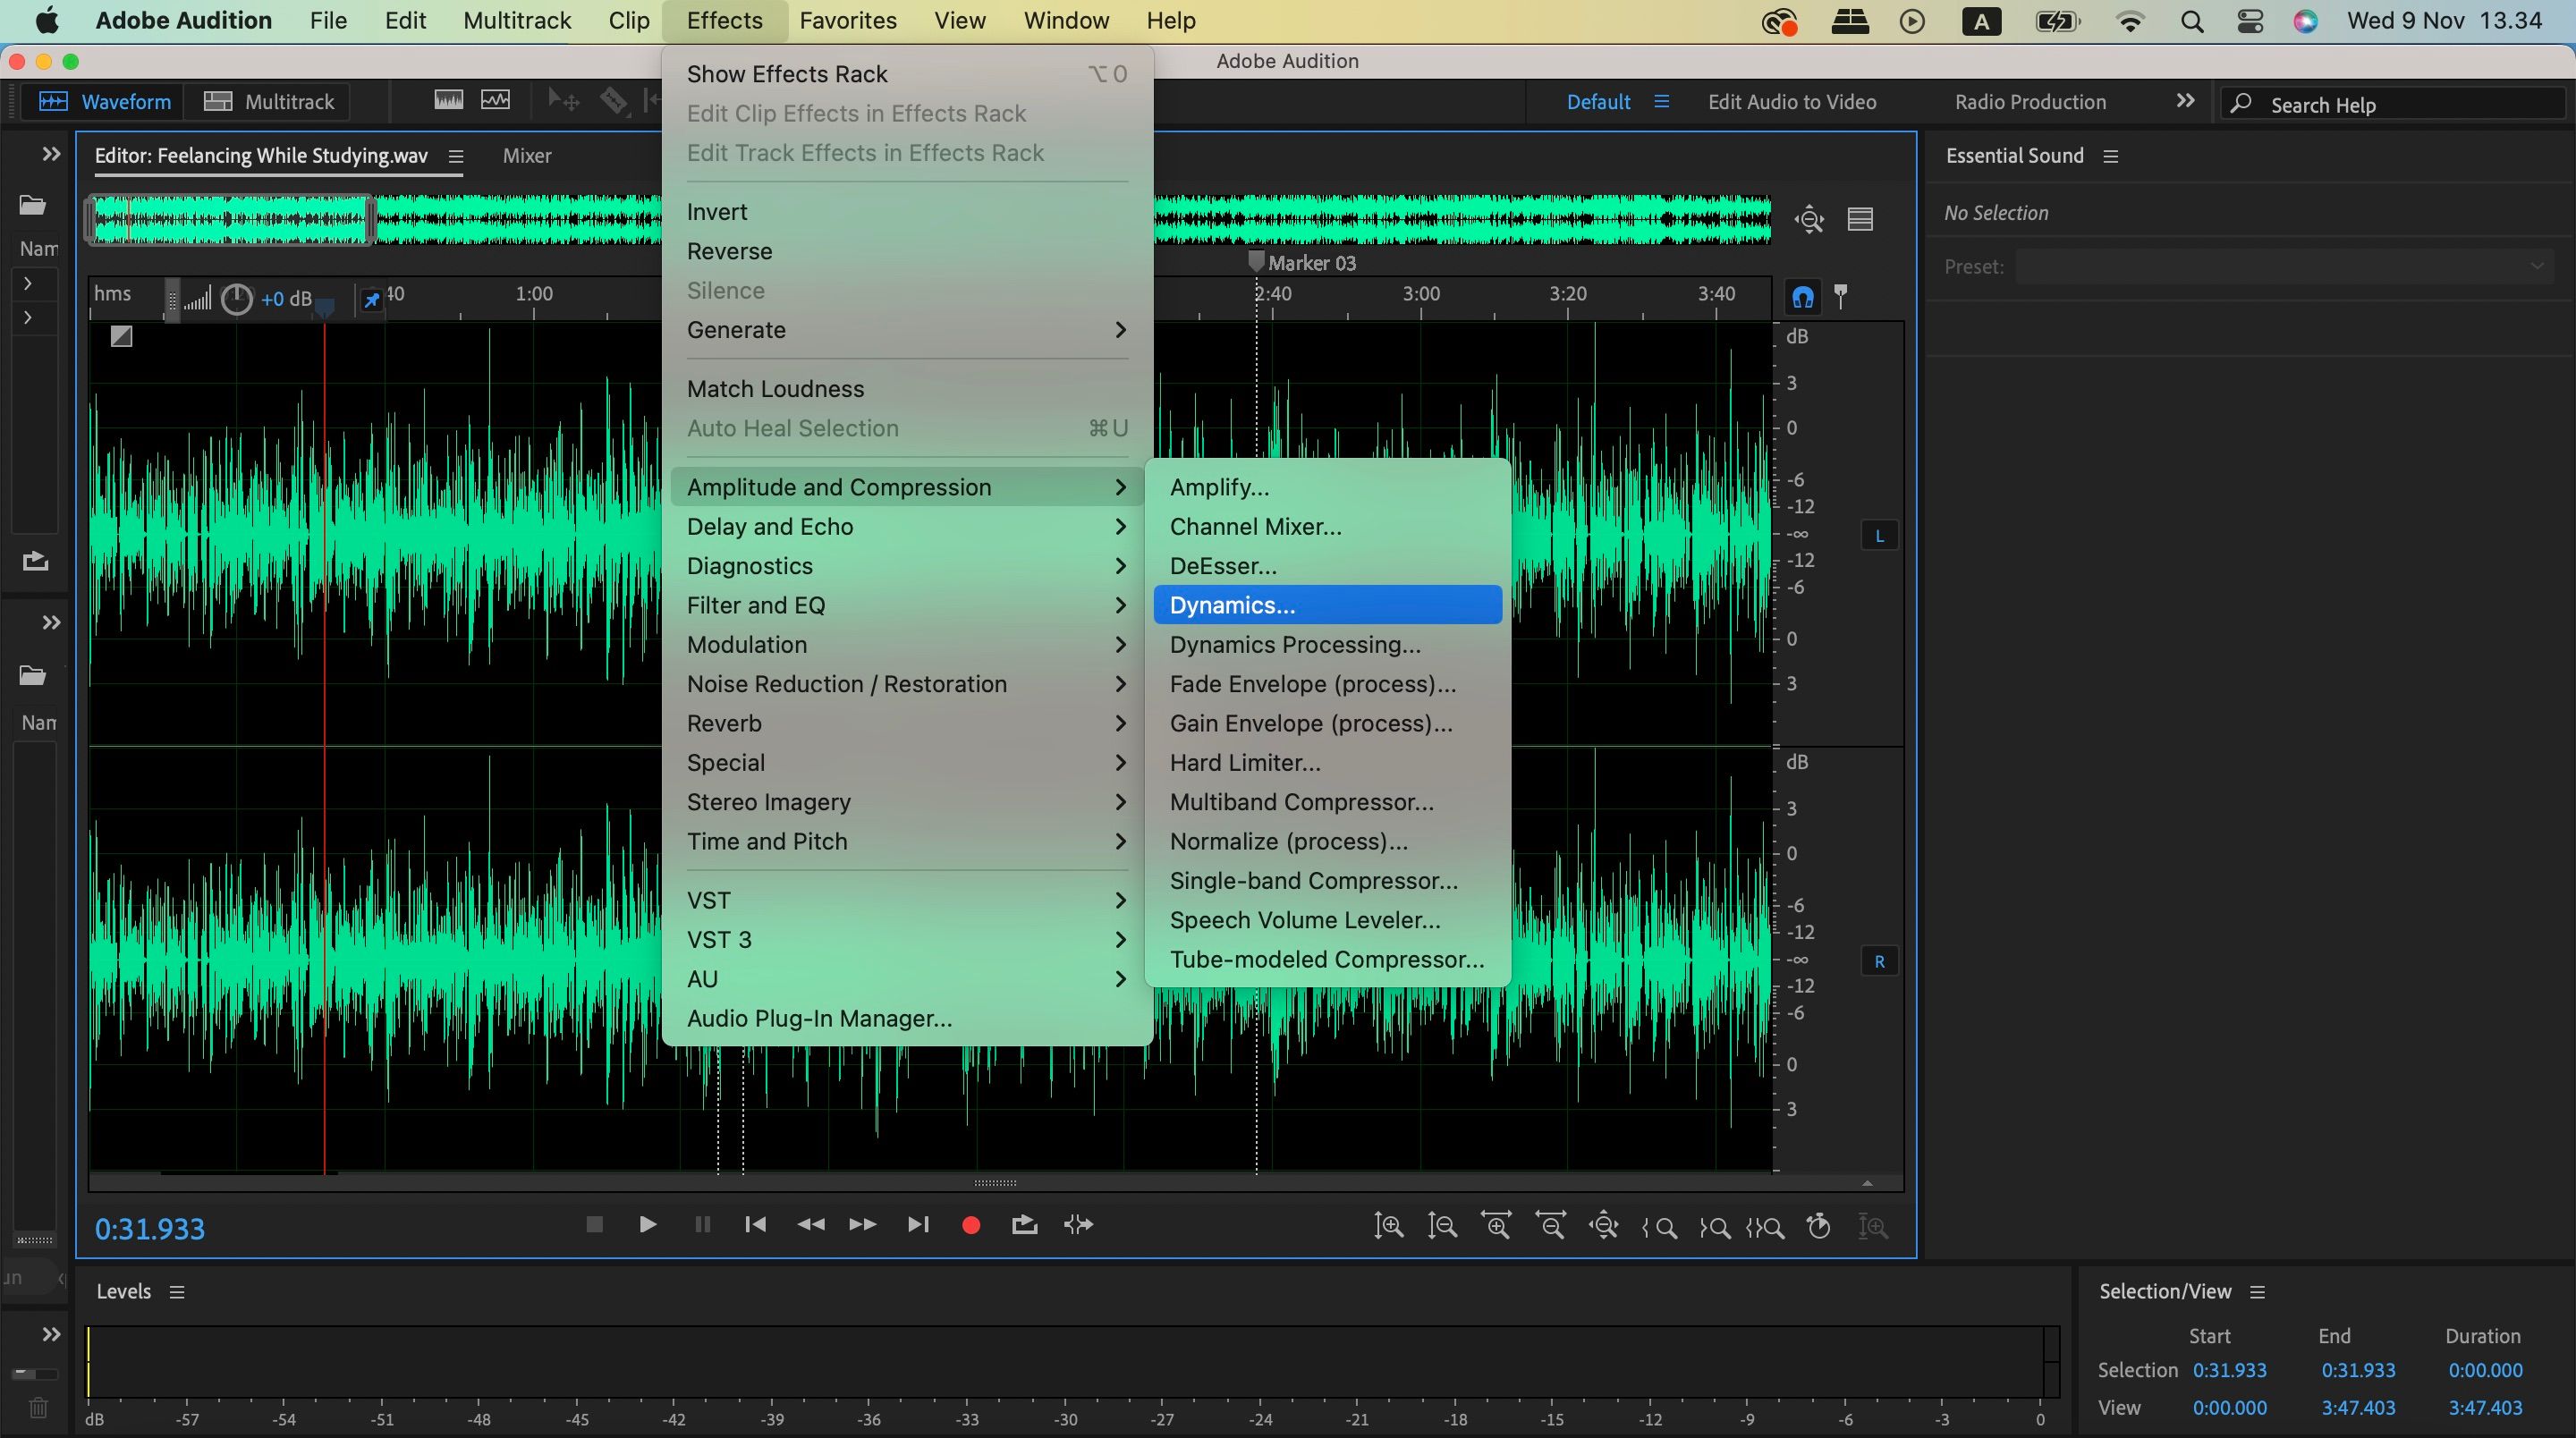
Adobe Audition also has more advanced tools to help your audio sound crisper.
To access these, go toEffects>Amplitude and Compression.
Then, click onDynamics.
Here, it’s possible for you to limit the maximum dB your audio is allowed to reach.

Moreover, you’ve got the option to use theCompressorandExpandertools to adjust how your voice sounds.
You will find plenty of other editing tools in the Effects dropdown menu.
Where Should You secure your Audio Files?
Once youve edited your voiceover recording, you have not yet finishedmaking the podcast.
However, saving the edited file is a good idea.
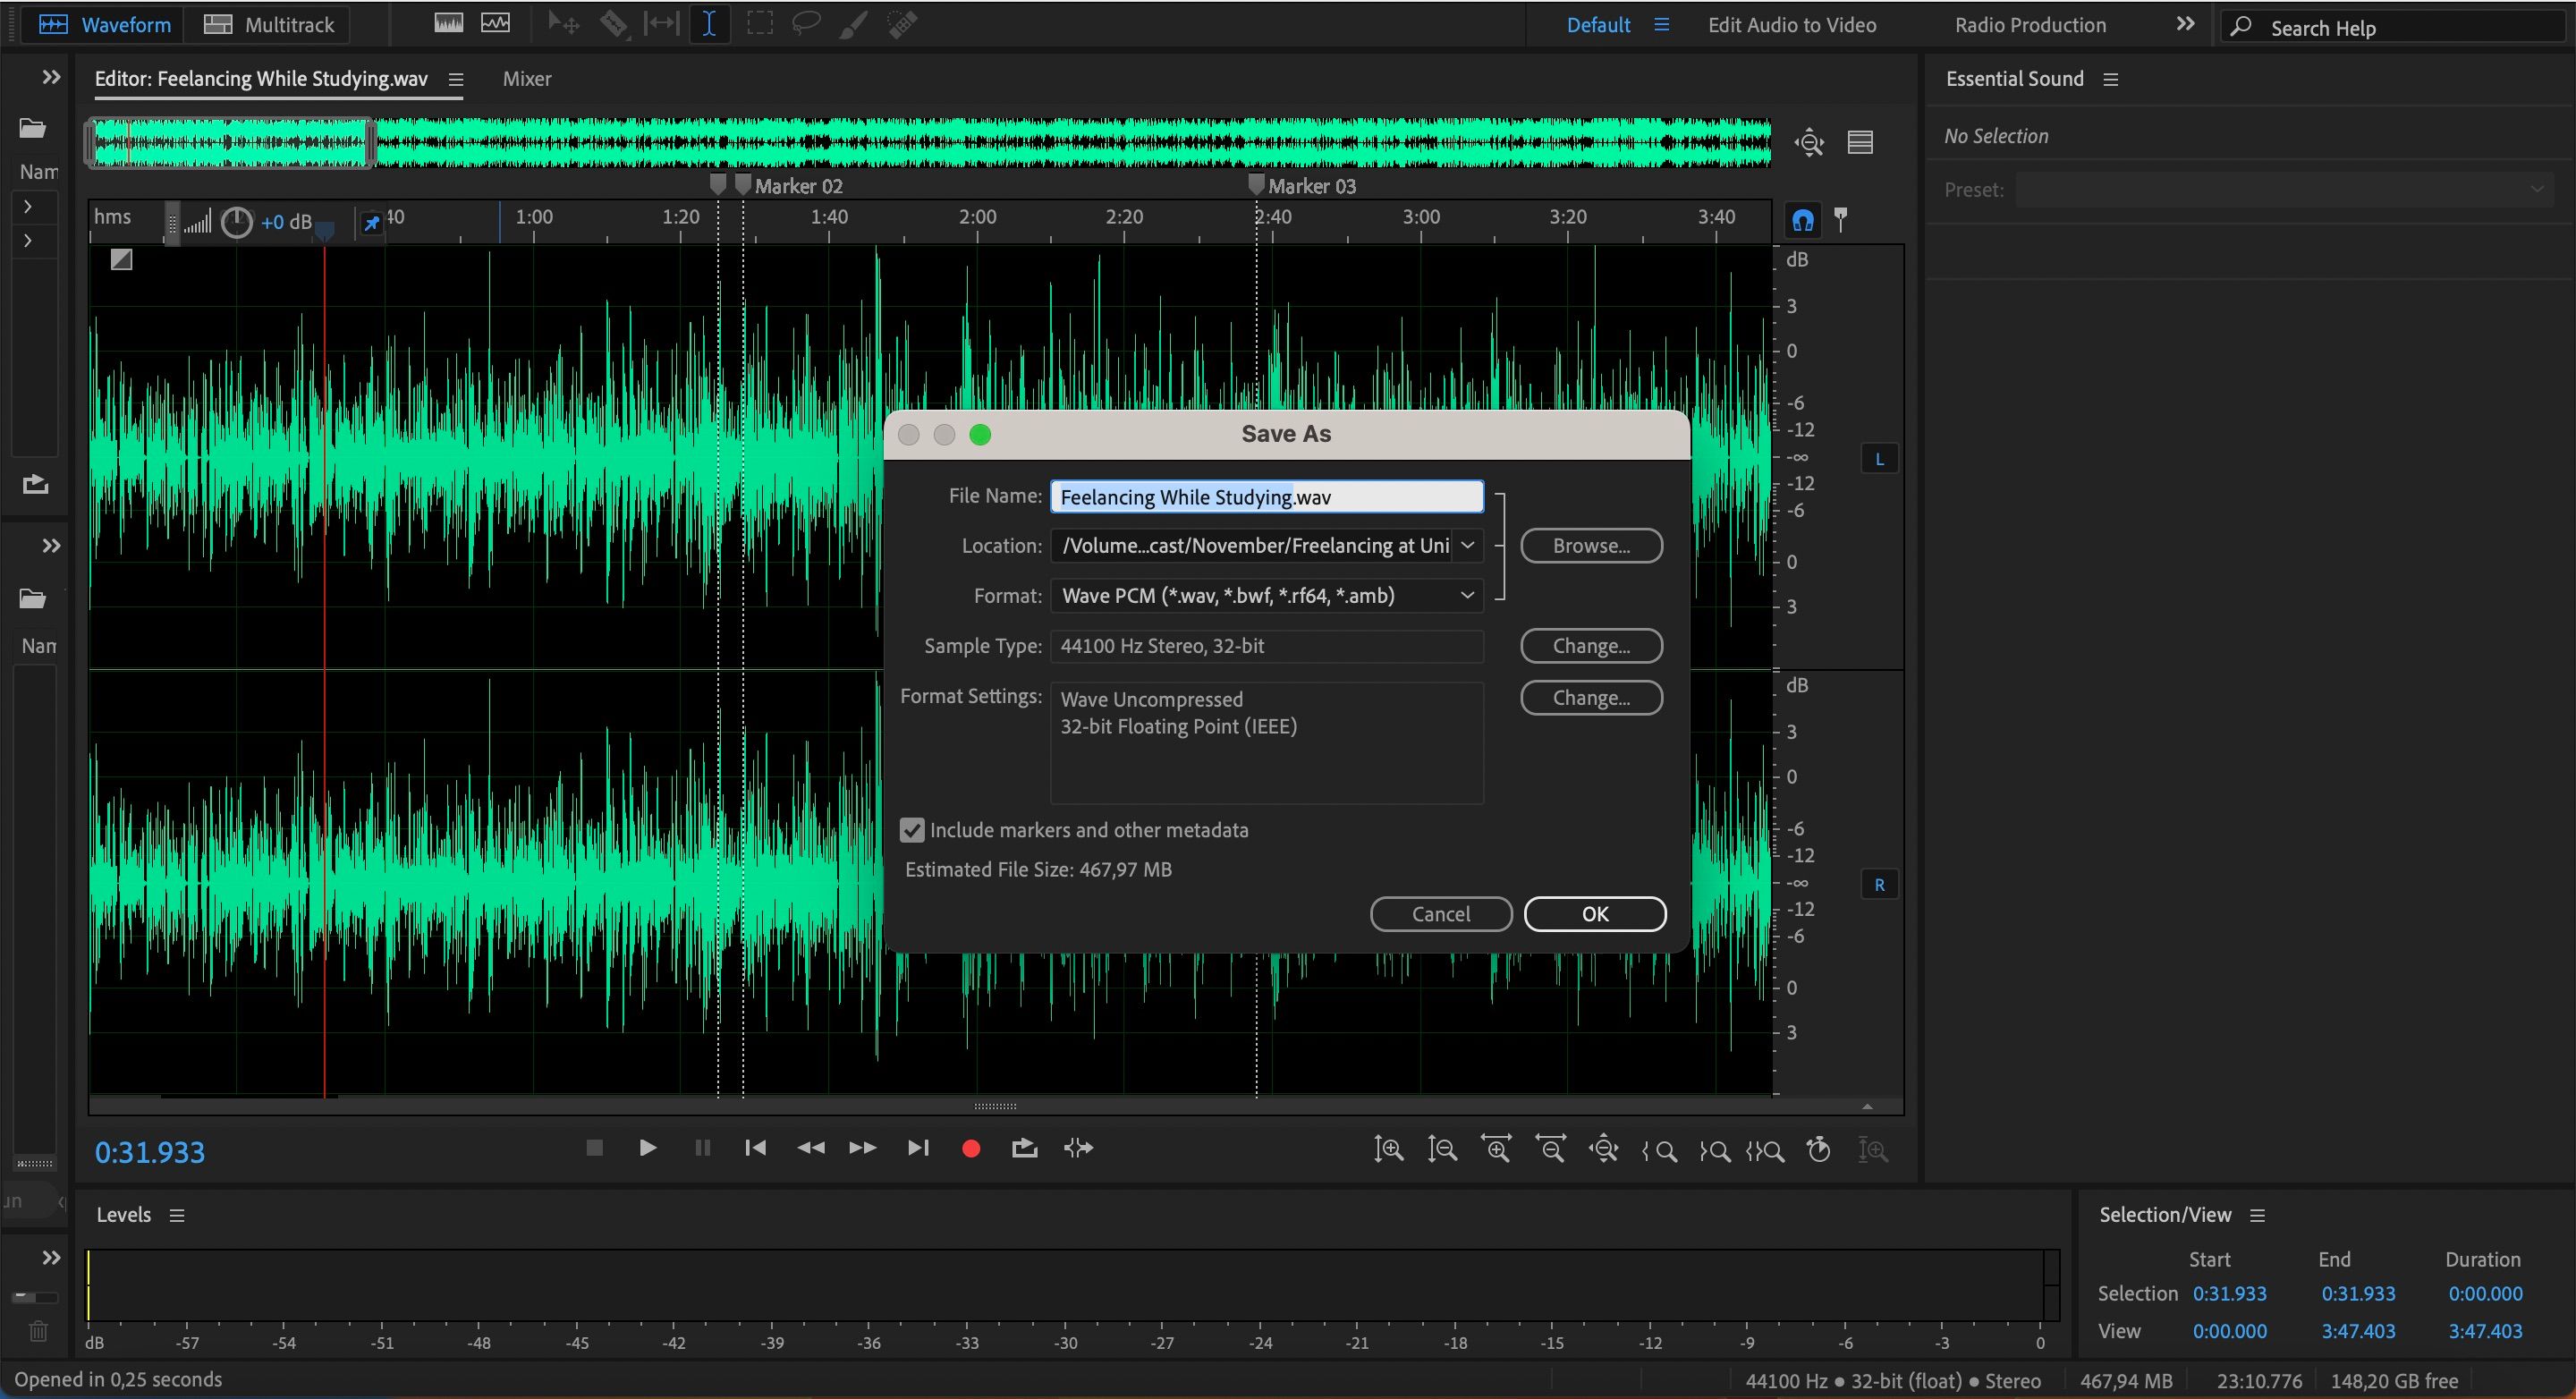
To save audio files, go toFile>Save As.
Go to theBrowsebutton to choose your preferred destination folder.
You will also need to pick the format for your audio file.
Since were not finished editing yet, pick.wav.
When you choose this format, your file will have better sound quality for the next steps.
PressOKonce youve chosen your options.
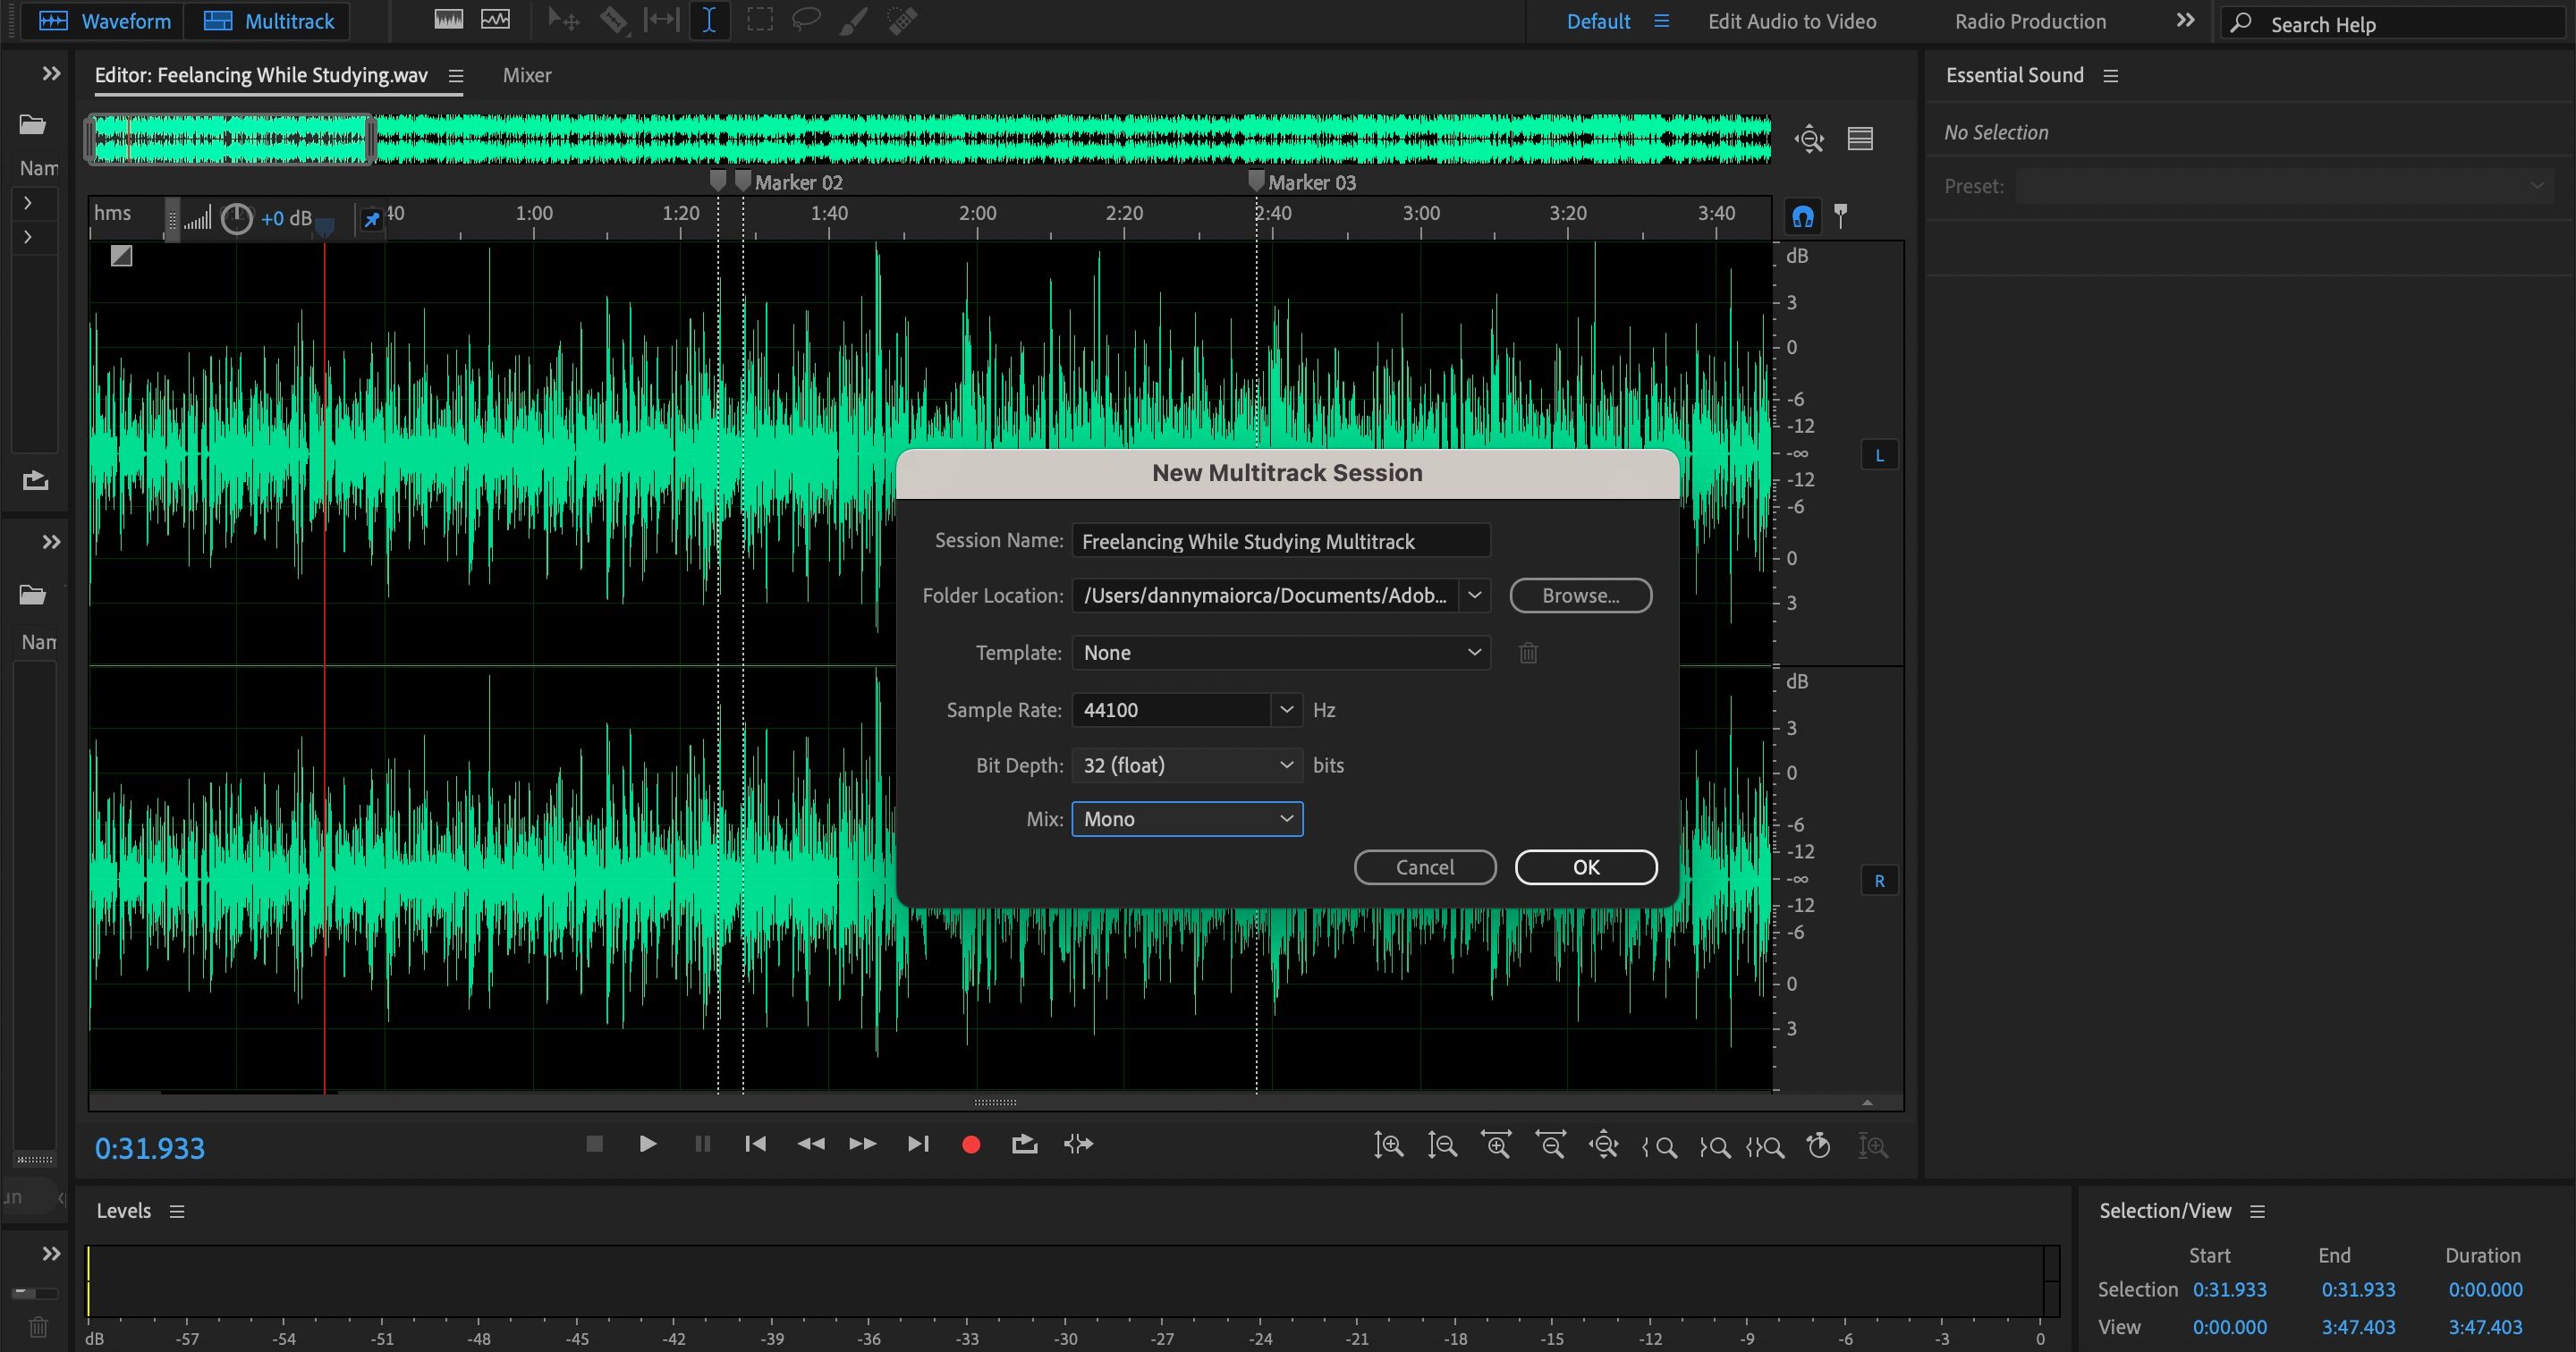
In your multitrack session, import the files youd like to form your podcast with.
Place them on different lines.
Alternatively, it’s possible for you to drag the front and end of your audio inwards.
To lower the decibels in a clip, drag theyellow bardown.
If you wish to increase it, do the opposite.
You will receive one combined piece of audio once youve done this, and itll be ready to publish.
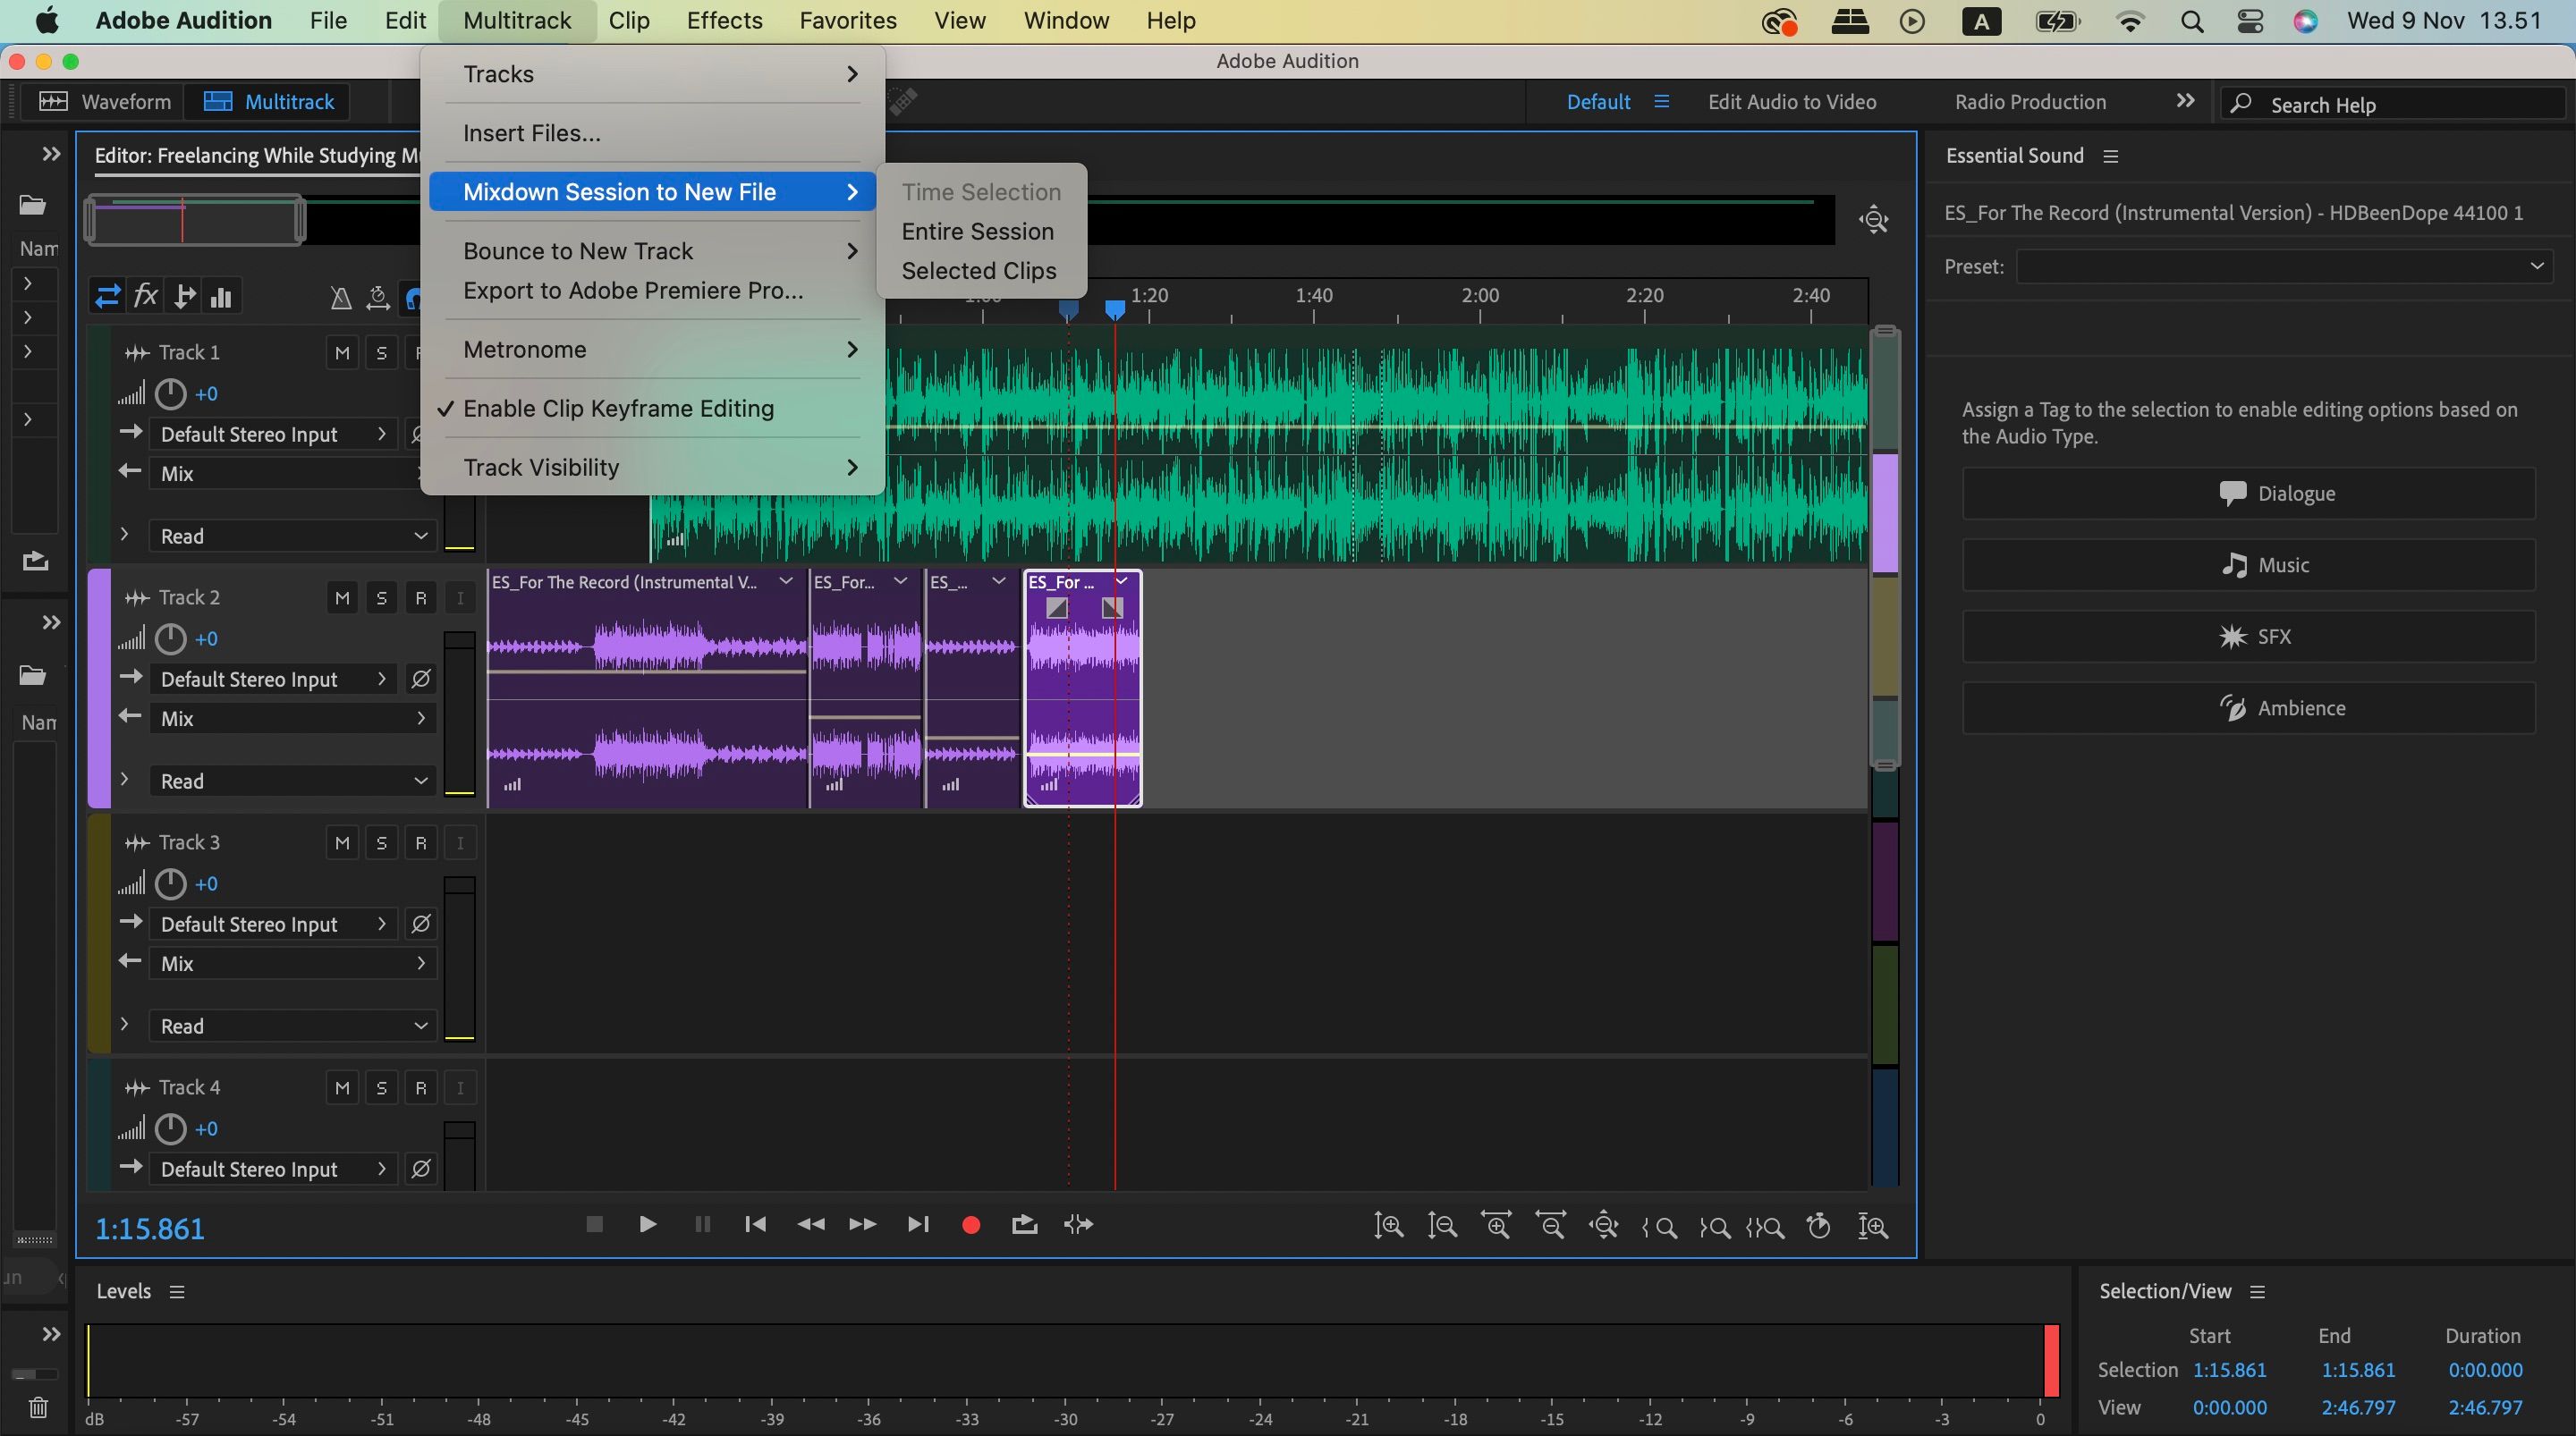
Go toMultitrack>Mixdown Session to New File>Entire Session.
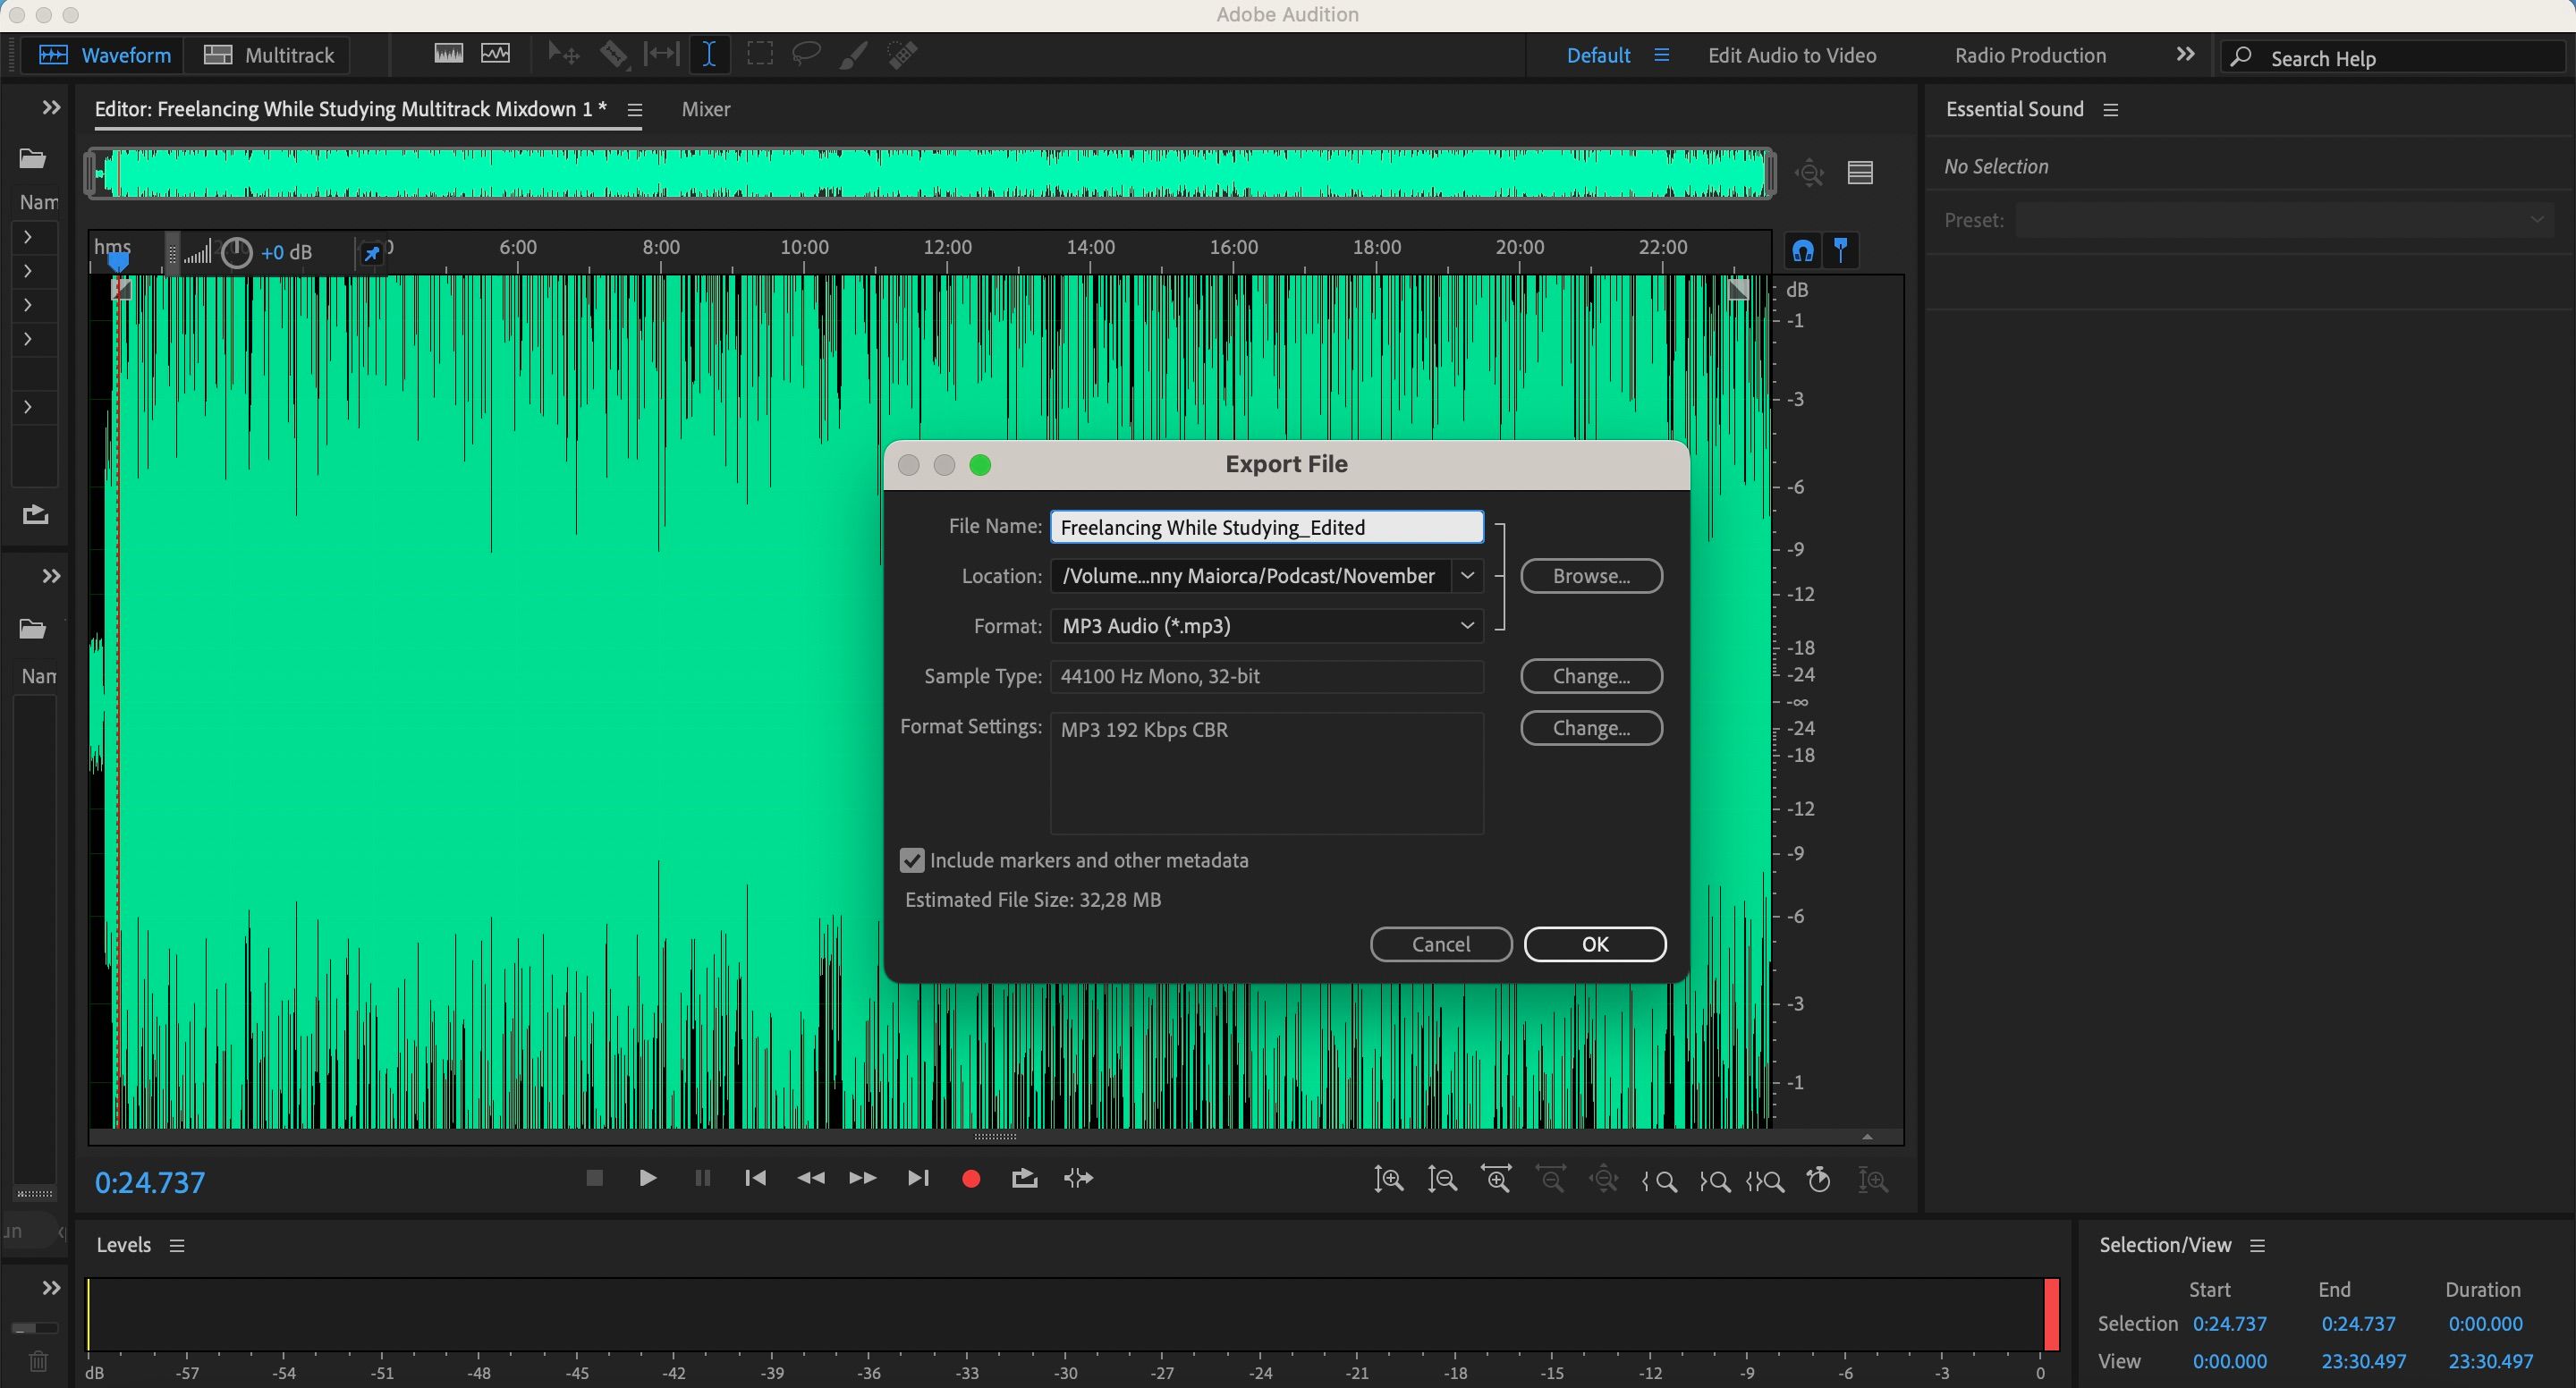
Go toFilein the top toolbar before clicking onExport>File.
Give your file a name and choose.mp3as the format for the completed version.
Again, it’s possible for you to click onBrowseto choose where to save the edited podcast episode.
When everything looks good to you, pressOK.
The file will save to the place you chose.
From there, you’re able to upload it to your preferredpodcast hosting platform.
How long it takes depends on the length of your podcast and how much you want to refine things.
Your editing speed will increase as you become more proficient with Adobe Audition.
These tools are easy to find and use, so the learning curve shouldnt take too long.
