Related
Who doesn’t want a little magic in life?
It’s always welcomed.
No prize for guessing - it’s Photoshop.
This article is about adding magic to your photos, literally,using Photoshopand some pixie dust!
Here is how to draw pixie dust in Photoshop.
We will be creating a new brush by combining the existing brushes that Photoshop offers.
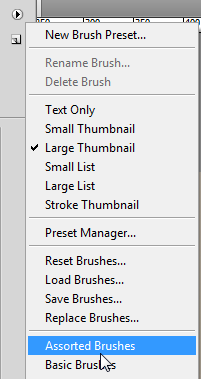
So go ahead and choose the brush tool from the toolbox.
In the options bar towards the top, choose the drop down arrow next to the brush shape.
This allows you to choose the key in of brush you want to work with.
As we are creating a pixie dust effect, the obvious ingredients would be stars and glowing specks!
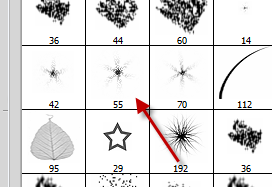
So go ahead and choose any brush shape that looks like it would fit nicely into the effect.
I use the Star brush, a soft round brush and the Starburst brush.
Additionally you’ve got the option to add even more stars by using the custom shape tool.
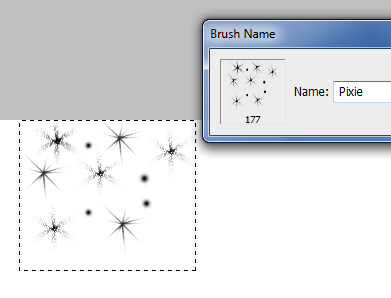
Just click two to three times at random spots with each of the brush/shape you choose to use.
Although we will take care of this in the steps that follow, a little planning never hurts.
Next up, we will be creating a new brush from the semi-mess we just created.
verify the background is white and go to Edit > Define brush preset.
Photoshop remembers the brush you just created across different documents.
Now its time to load up the image you want to add the pixie dust to.
I got this image from Stock Exchange
Create a new layer atop of the image you just opened.
Let’s call it ‘dust’.

Choose the brush tool and choose the brush you just created.
Choose white as the foreground color.
The brush requires a little more tinkering and its time to summon Photoshop’s powerful brush engine.
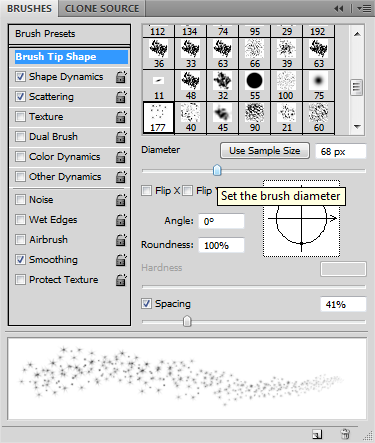
Click Window > Brushes or hit the F5 key to get to the brushes palette.
Place a check mark against Shape Dynamics and scattering.
Now hit Shape dynamics and play around with the controls.
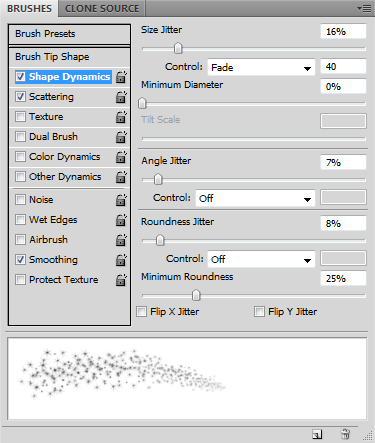
Here are my controls.
Next hit scattering and play with the sliders till you get what you are looking for.
Here are my controls.

The prefs would depend on the jot down of image you are using.
All that can be done from in here by playing around with the sliders.
Once the options are done, paint a stroke on a new layer.
you’ve got the option to add some glow to add a finishing touch.
Double-punch the dust layer and check Outer Glow from the Layer Styles dialog that opens.
Choose the color of the glow and its size.
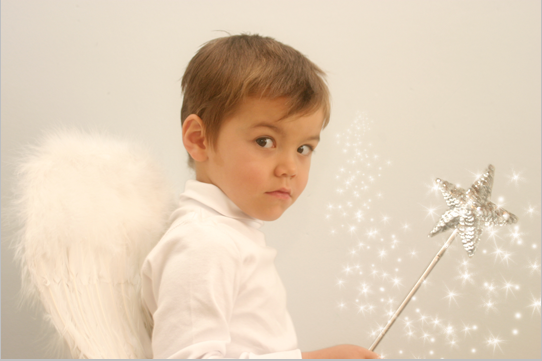
Here is the end result:
How did you find that tutorial.
Isn’t it easy to add a little pixie dust effect into your photos?
Tell us how your photos turn out!
