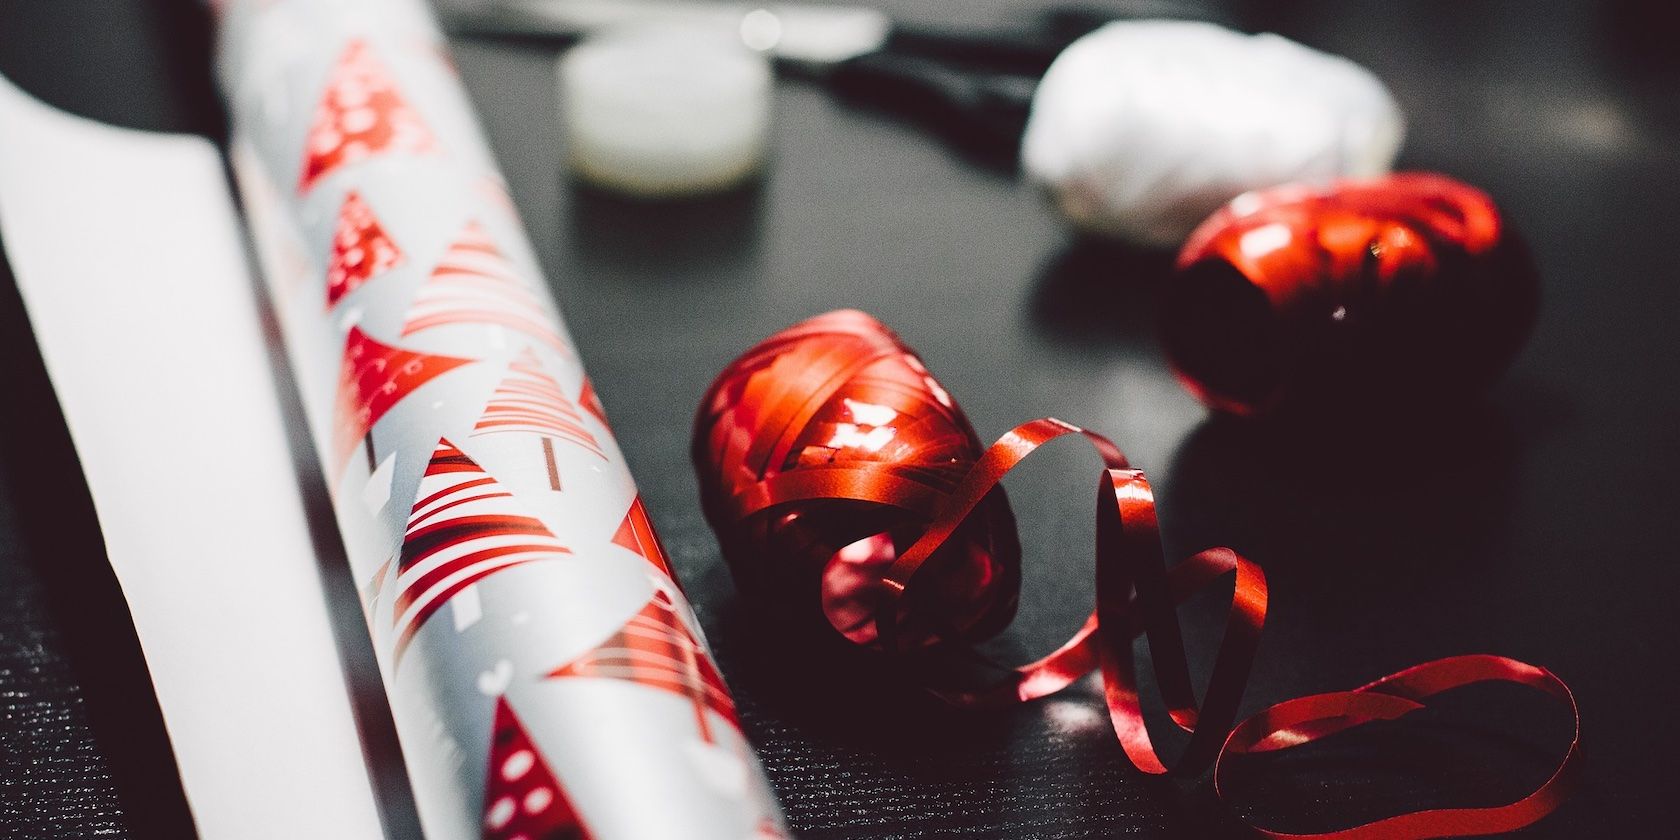
Want to make the season even more special for your loved ones?
Enter custom gift wrapping paper.
It is guaranteed to put a smile on your loved ones' faces.
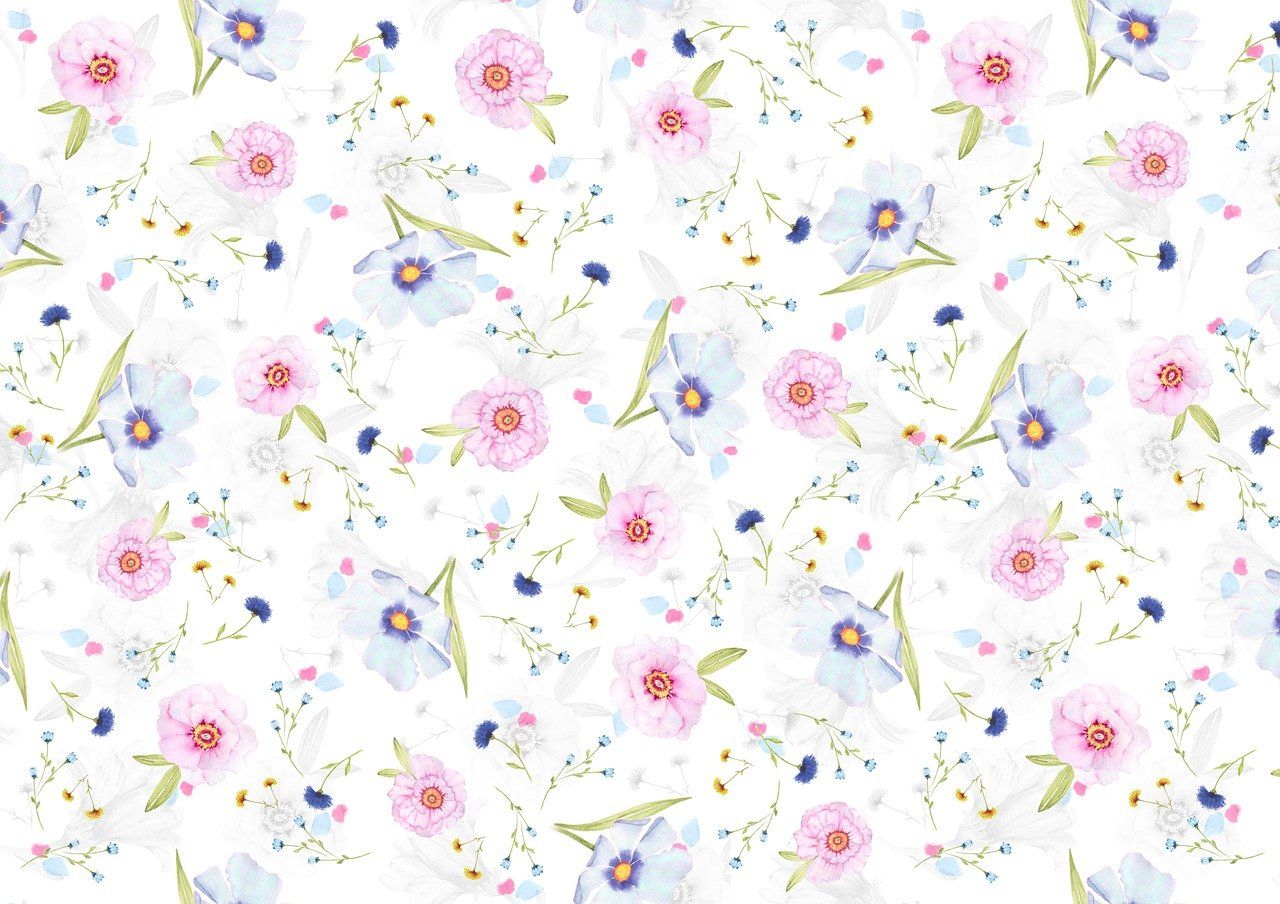
The quickest way to create wrapping paper is by using a repeating pattern.
The idea is to arrange a few design elements and repeat the pattern in your editing program.
You have the option to choose many types of elements to add to your wrapping paper.
If you’re short on time, you could find some free illustrations and art online.
If you’re an artist, you’re able to scan your hand-drawn art to make gift wrapping.
you’re free to also use photosthe options are endless.
This is the time to showcase your inner artist and creativity.
Remember, your images should be in PNG format with a transparent background to create the design.
Here’show to make the background of a PNG transparent.
In our example, we used Adobe Fresco to create some Christmas-related artwork and saved them as PNG files.
it’s possible for you to try the same.
It is an excellent app for newbies and seasoned artists alike.

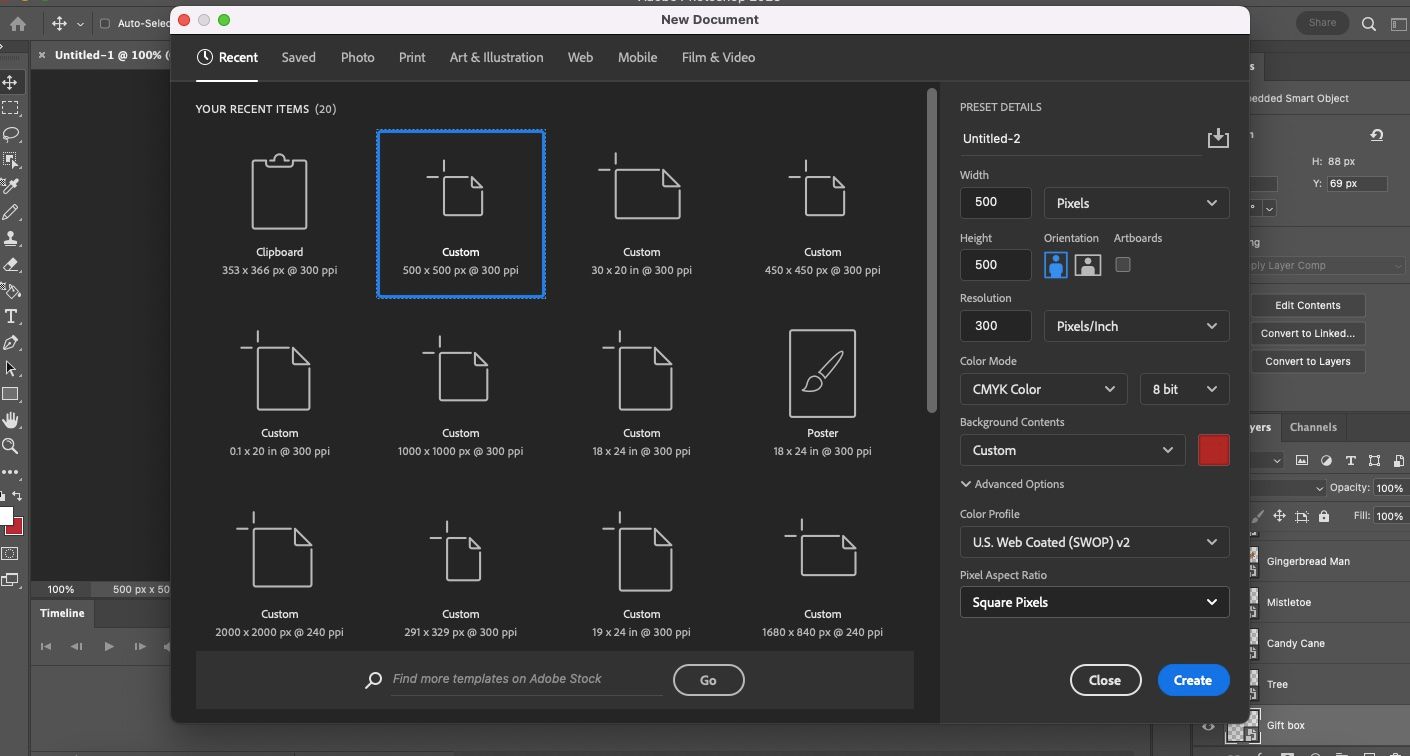
Step 1: Create a Background
Go toFile>New.
Choose aCustomsize of 500px x 500px.
Keep theResolutionas 300 and theColor Modeas CMYK Color.
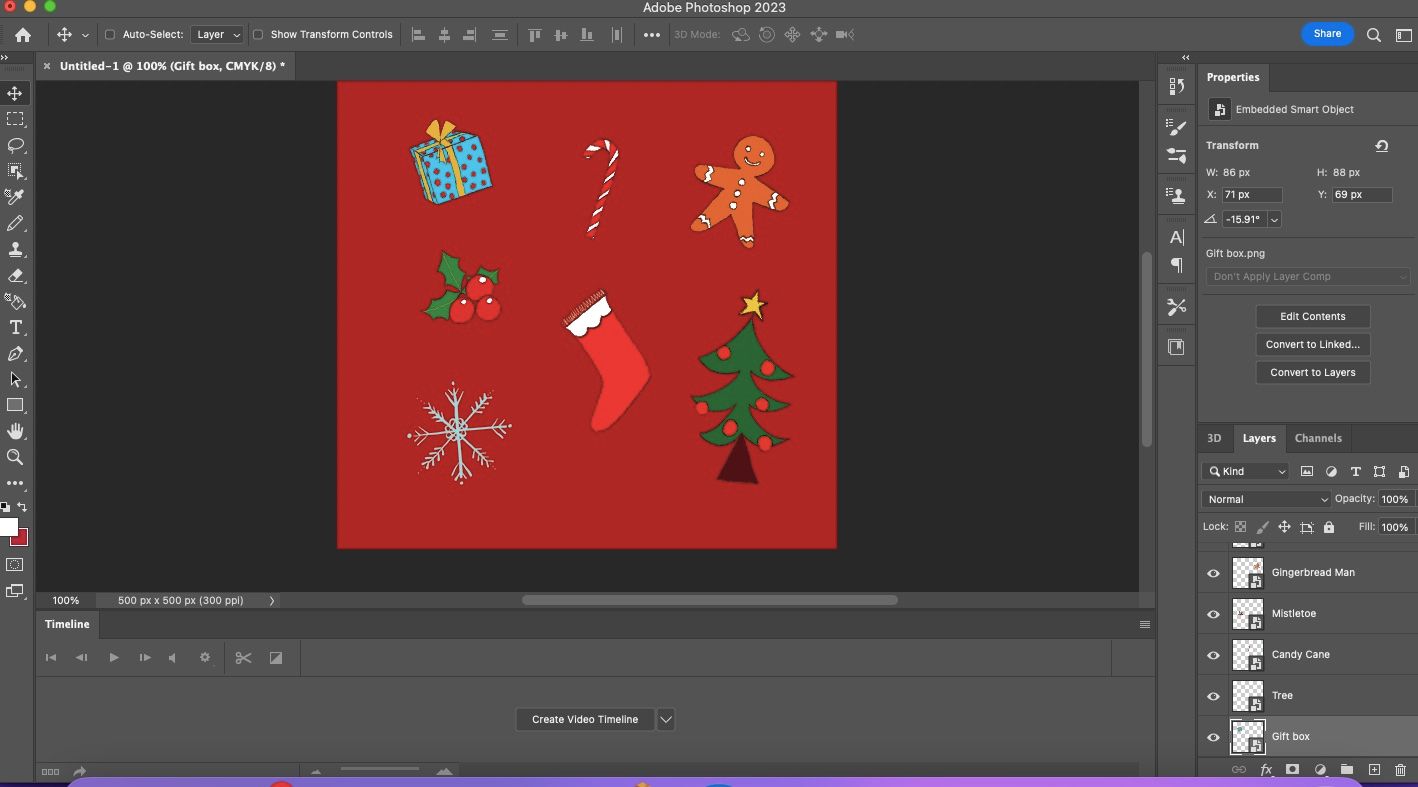
Step 2: Add Your Artwork
Go to the folder where you have your PNG images saved.
Drag them one by one onto your background.
Arrange them the way you want on your background.
Feel free to tilt or resize some of the elements.
opt for move button on the left side to move your images.
ClickCtrl+Tto resize your images.
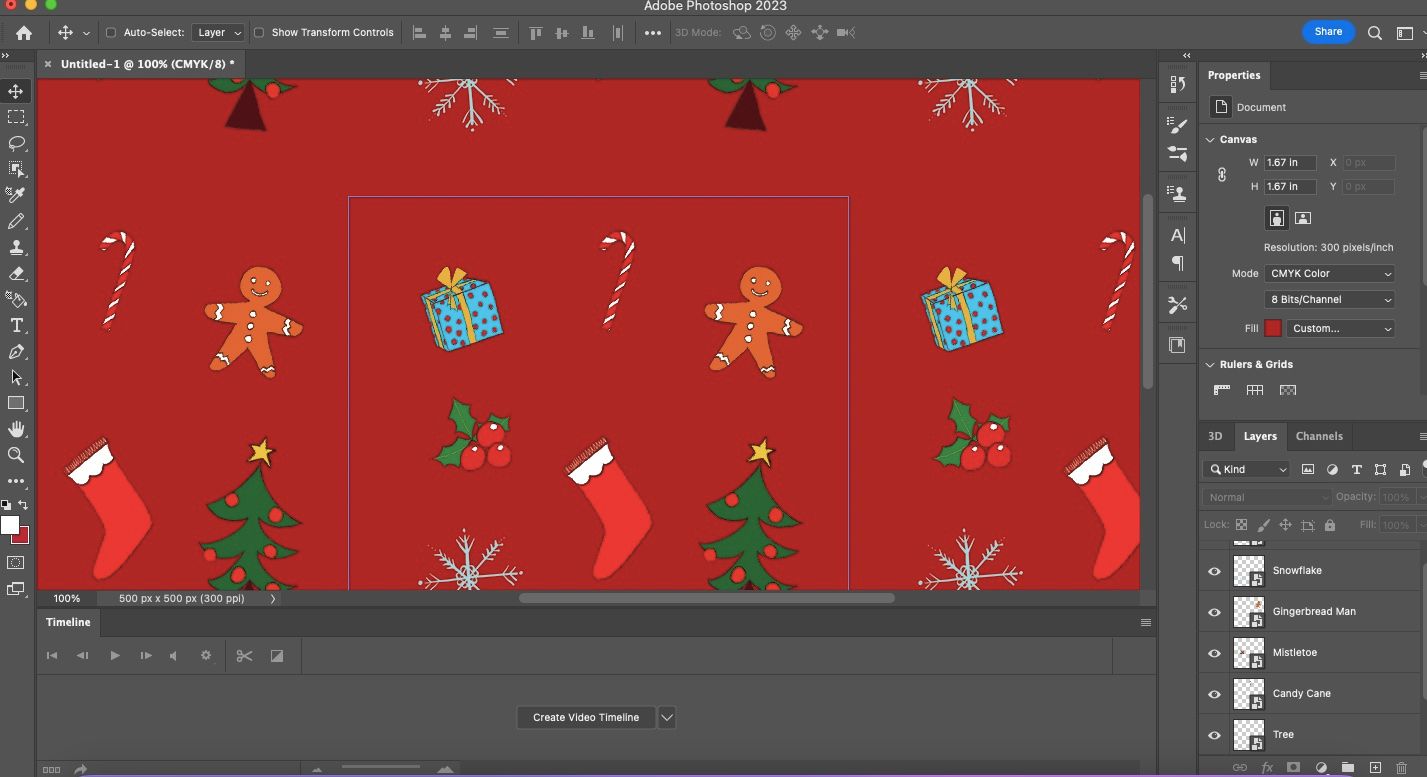
Go toView>Pattern Preview.
PressOKon the pop-up box.
You will now see the elements repeating as a pattern.
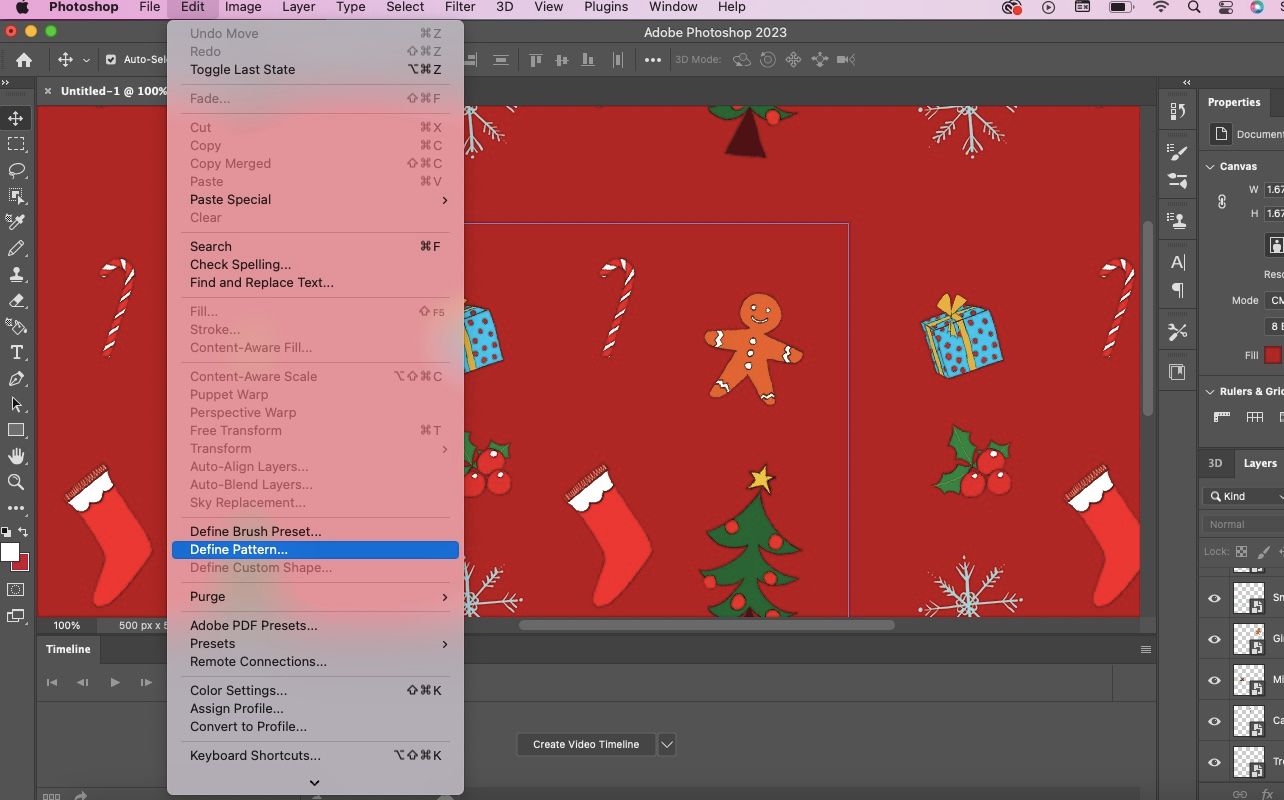
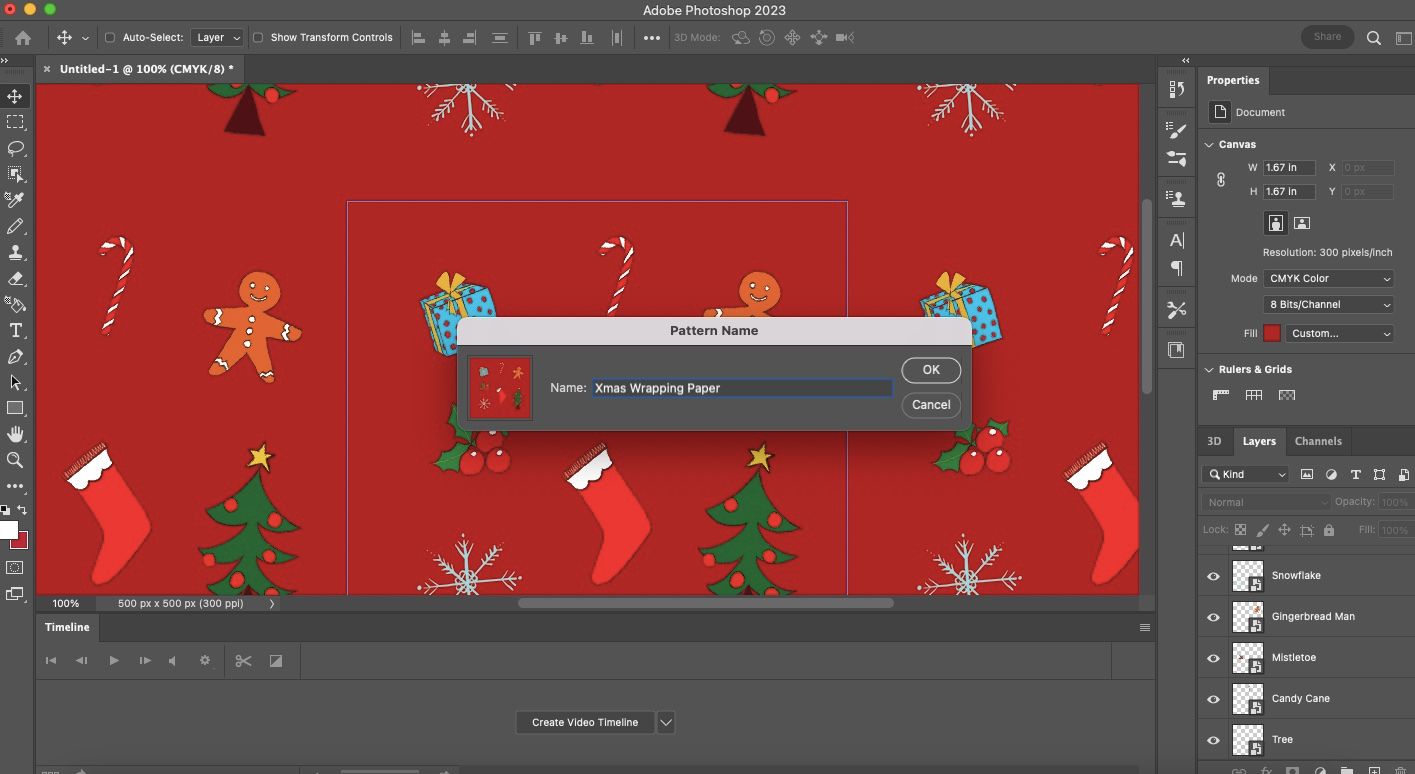
Once you’re happy, it’s time to define the pattern and save the design.
Go toEdit>Define Pattern.
input your preferred name in the Pattern Name dialog box.
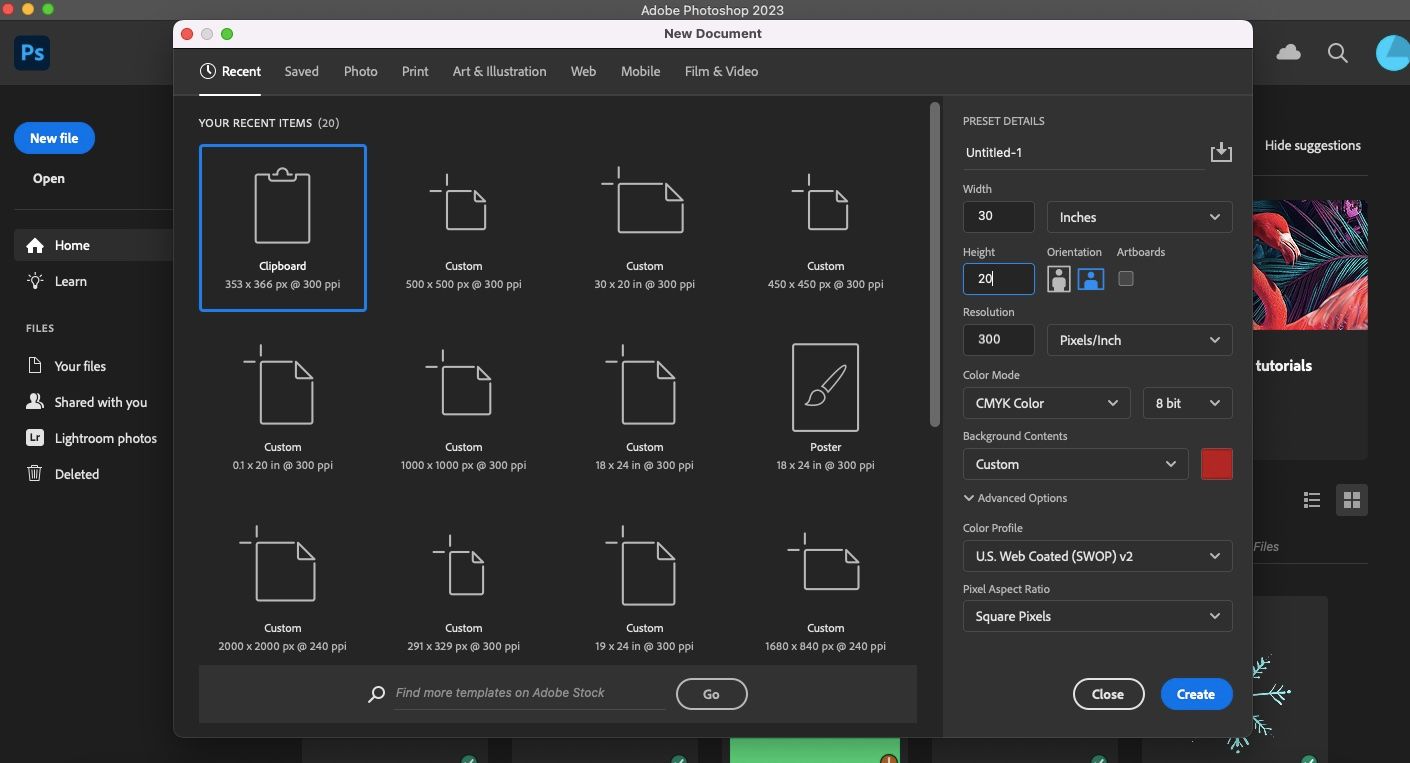
Step 5: Choose Your Wrapping Paper’s Size
Open a new file in Photoshop.
You have to choose the size based on your printing service’s requirements.
We are using 30 X 20 inches based on Printify’s size.
Go toFile>New.
Fill in the details in the dialog box.
Keep theResolutionat 300 and theColor Modeas CMYK.
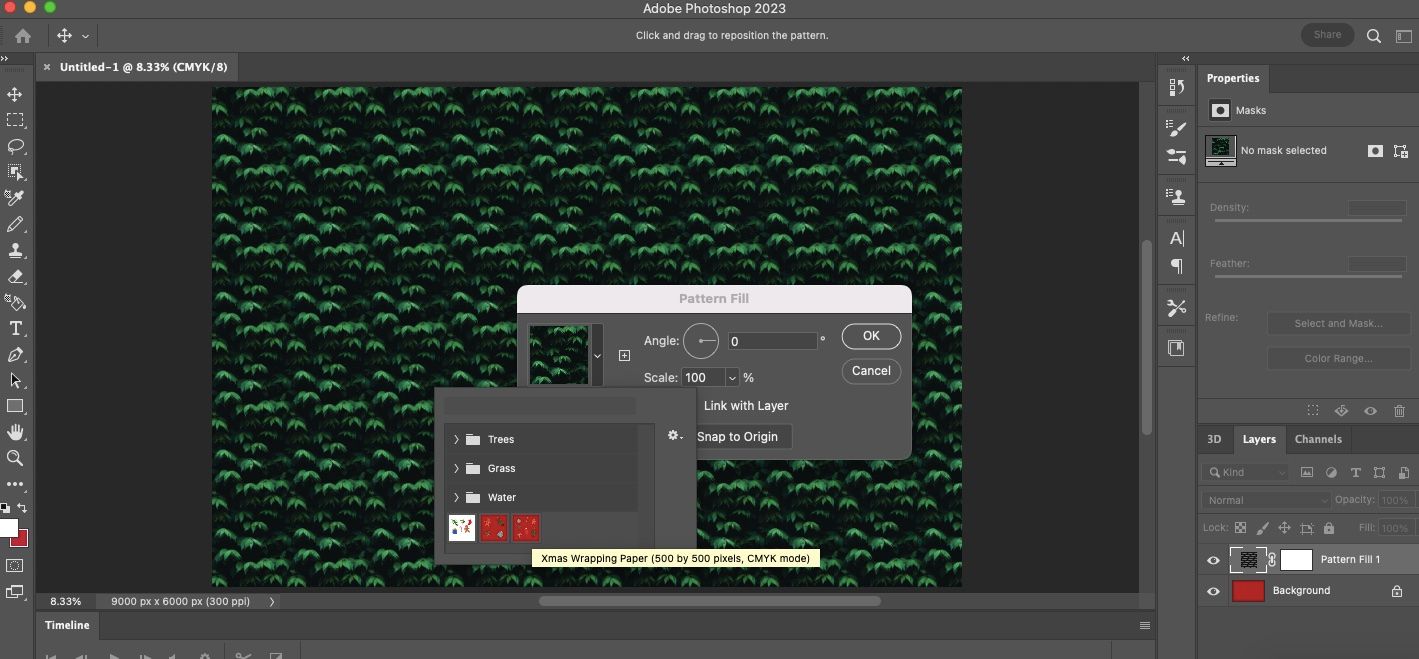
choose the color icon next toBackground Contentsto choose your background color.
For example, we have selected a shade of red in line with the holiday theme.
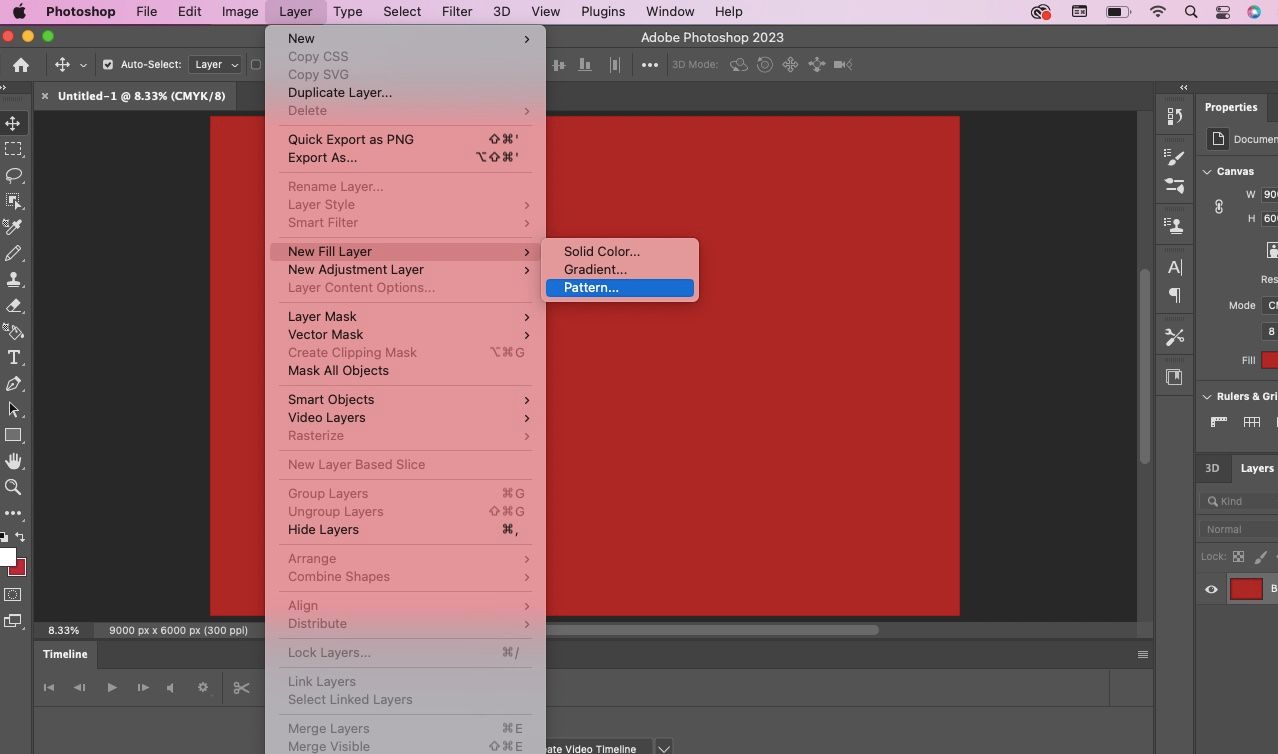
Go toLayer>New Fill Layer>Pattern.
ClickOKon the New Layer dialog box.
snag the pattern icon and choose your pattern.
you’re able to adjust theAngleandScaleif you wish.
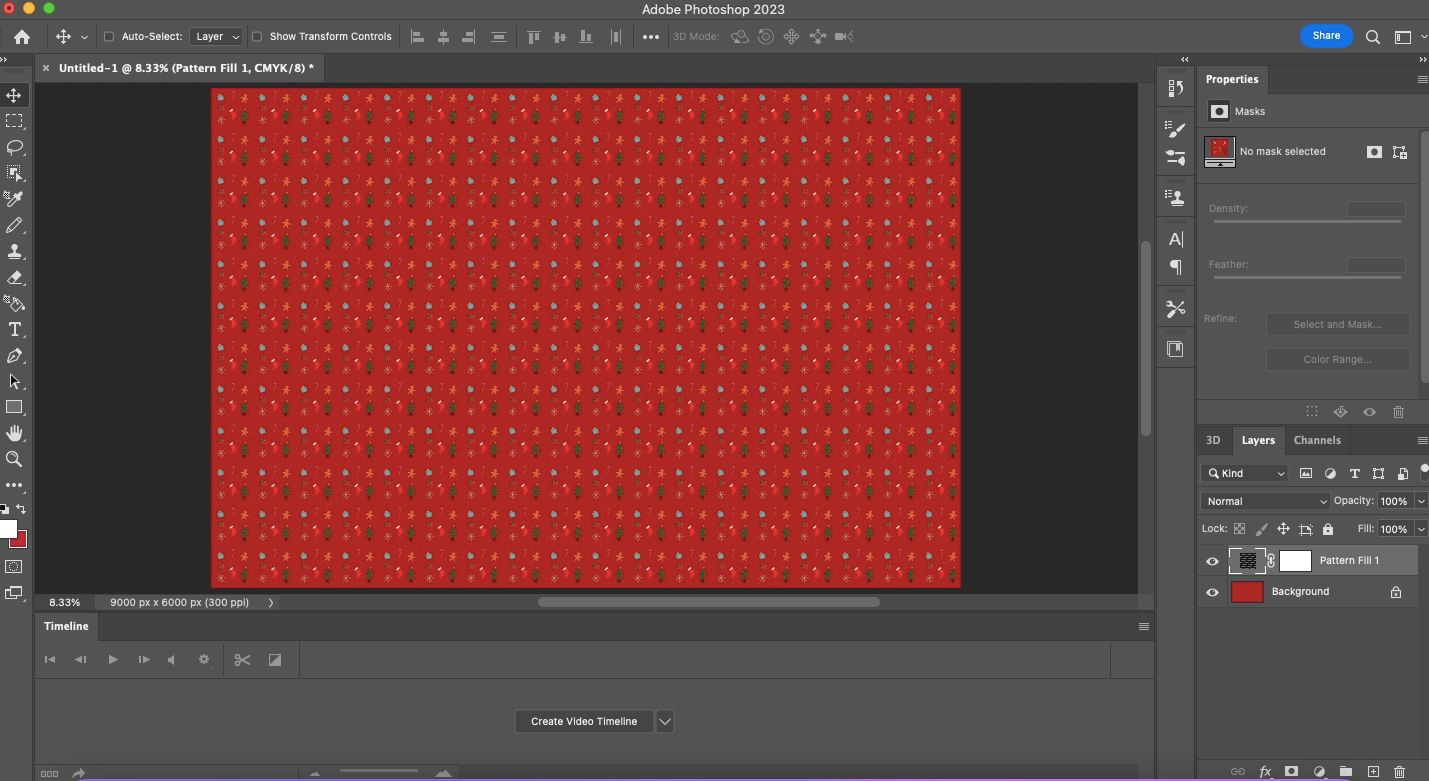
Your design is ready.
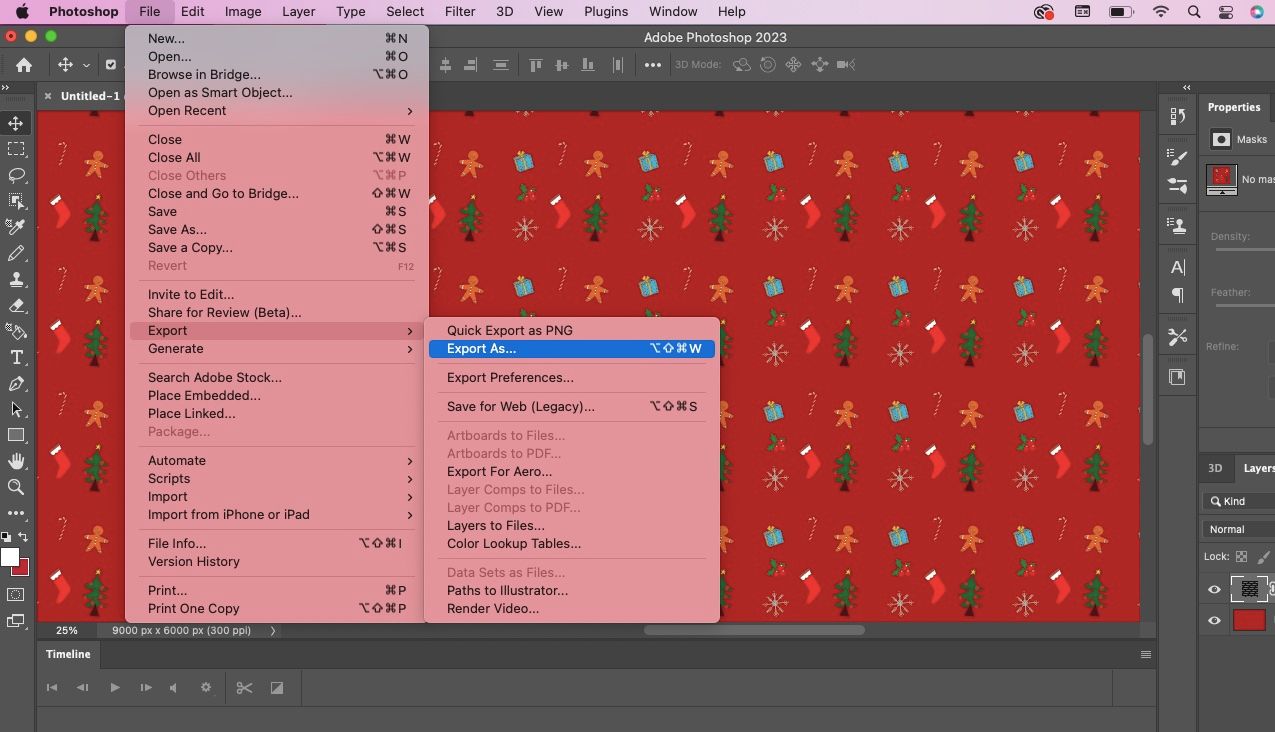
Step 7: secure your Pattern
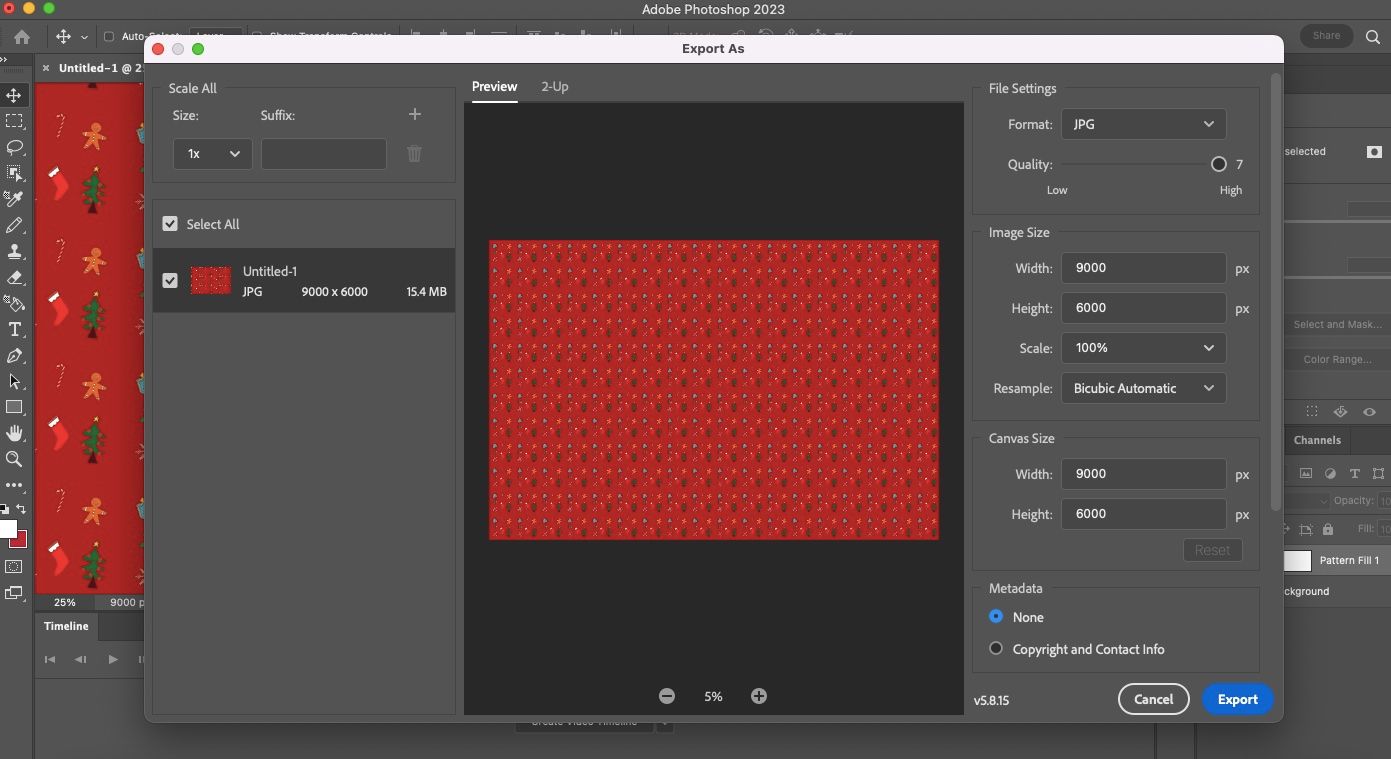
Go toFile>Export>Export As.
Set theFormatto JPG and set theQualityto High.
bang out your preferred name in the dialog box and clickSave.
Now, your pattern is ready for the final stepprinting.
Printing Your Custom Wrapping Paper
You have a handful of options when it comes to printing.
To start with, it’s possible for you to try your neighborhoodStaplesstore.
you’re free to also check outWalmart Photo.
You simply upload or send your file during the ordering process.
But not all of us are handy enough to make something nice.
This is where custom gift wrapping paper comes to your rescue.
Try making a gift wrapping todayyour loved ones will surely be impressed by it!
