Step 1
Launch Automator, found in your applications folder.
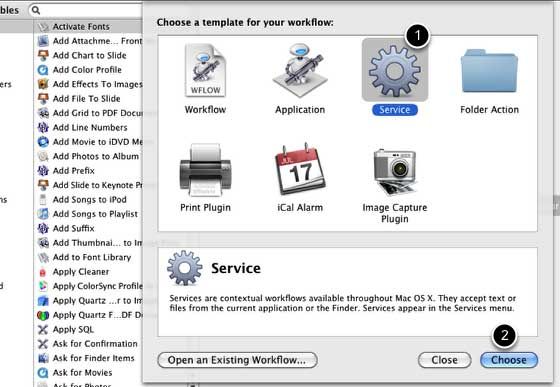
A drop-down window will appear with templates to help you get started.
Select theServicetemplate and clickChoose.
double-check “any software” is selected in the drop-down menu beside the first one.
These selections tell when and where this Services item can be used.
Step 3
1.
![]()
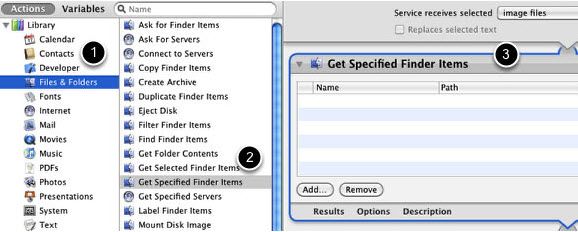
Now go to theActionslibrary of the first column of Automator.
In the next column, pick the actionGet Specified Finder Itemsand drag it into the workflow pane.
This action will grab your selected image on your machine.

Step 4
1.
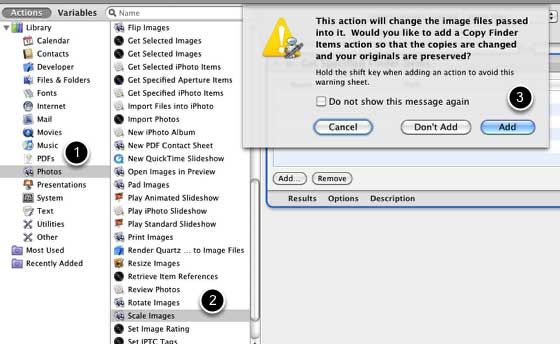
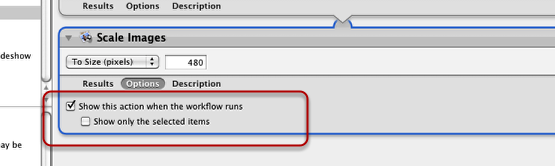
Select and addScale Imagesto the workflow pane.
ClickAddif you want images copied.
ClickDon’t Addif you don’t want images copied.
Step 5
1.
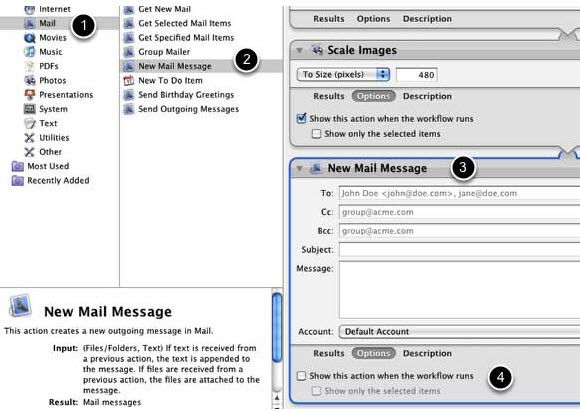
Select and addNew Mail Messageto the workflow pane.

Fill in any default information you like.
Same goes for the default subject and your selected account for email.
On other hand you might leave all this information blank and fill it in as the Service action runs.
Step 6
store your workflow with a name that will help you remember what it is.
You must save this action before it can run from the Services menu.
It will be updated in the Services menu.
Step 7
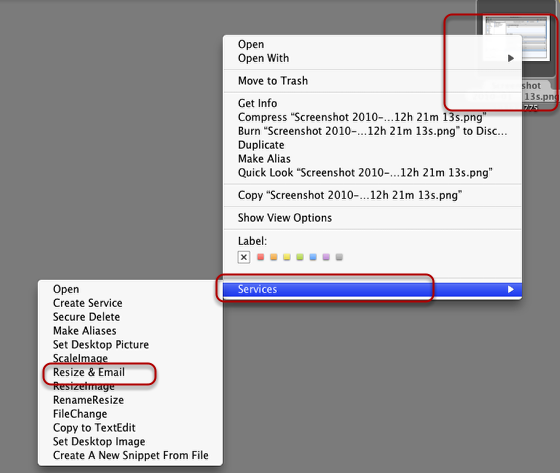
Now right or control-hit an image that you want to resize and email.
Click and let the automation run.
It will re-size the selected image and attach to a new email message.
LaunchSystem preferences, selectKeyboard, and then selectServices.
Locate the Services item you saved.
Double punch the item and assign a keyboard shortcut.
Be careful that you’re not assigning a shortcut that is already in use.
I’m also developing a series of video tutorials onVimeothat includesthisand other automation tutorials.
If you have any questions about this tutorial, ask it in the comment box.
Let us also know how you’re using Automator in your Mac related computer work.

