Panoramic photography is the technique of capturing a wider field of view that a single photograph cannot achieve.
With the help of Python, you might automate this process and create beautiful panoramas with ease.
Setting Up Your Python Environment
To follow through, you should have abasic understanding of Python.
Launch any Python IDE andcreate a new virtual environment.
Create a new Python file.
And on the terminal, launch the following command to install OpenCV.
You will use theopencv-contrib-pythonlibrary to load images and manipulate them.
It has thecv2.Stitcherclass which you will use to create the panoramas.
The full source code and sample images used in this article are available in thisGitHub repository.
Importing the Required Libraries
Import thecv2andosmodules into your script.
You will use OS to navigate through the system paths.
TheOS moduleis a built-in module of Python.
This is the reason you do not need to install it externally.
Loading the Images
Create a function for loading the images you want to stitch.
First, create an empty list that will store the initial images.
Then loop through each file in the folder path checking whether the file is an image.
If it is an image, load and append it to the list of images.
you’ve got the option to add more image file formats to diversify your program.
This code will only look for.jpgand.pngfile formats.
The function will loop through each image in the list and resize it.
Finally, append the resized images to a new list.
Resizing makes sure the stitching of the images is uniform.
It also reduces the file size for faster processing.
This technique is commonly known as creating a panorama.
The function will take a list of images as input.
Use theStitchermodule to stitch them together.
Finally, the function will return a stitched image and a status code.
Otherwise, it will returnNone.
First, convert the stitched image to grayscale.
Then apply a binary threshold to create a binary image.
Finally, find the largest contour in the binary image and calculate its bounding rectangle.
The stitched image is cropped using the bounding rectangle.
The panorama image is saved in the same folder that contains the original images.
Controlling the Flow of Your Program
Create a function that will control the flow of your program.
It will load all the images from the specified folder.
Resize and stitch them together.
Crop the stitched image, display its preview, and then save it to disk.
Pass the folder path containing the images you want to stitch.
The images that you use should contain overlapping features.
These features can be anything from prominent landmarks to texture patterns in the image.
OpenCV uses them as a reference point to align the images.
Without these features, it will be difficult for OpenCV to align the images and create a seamless panorama.
Testing Your Program
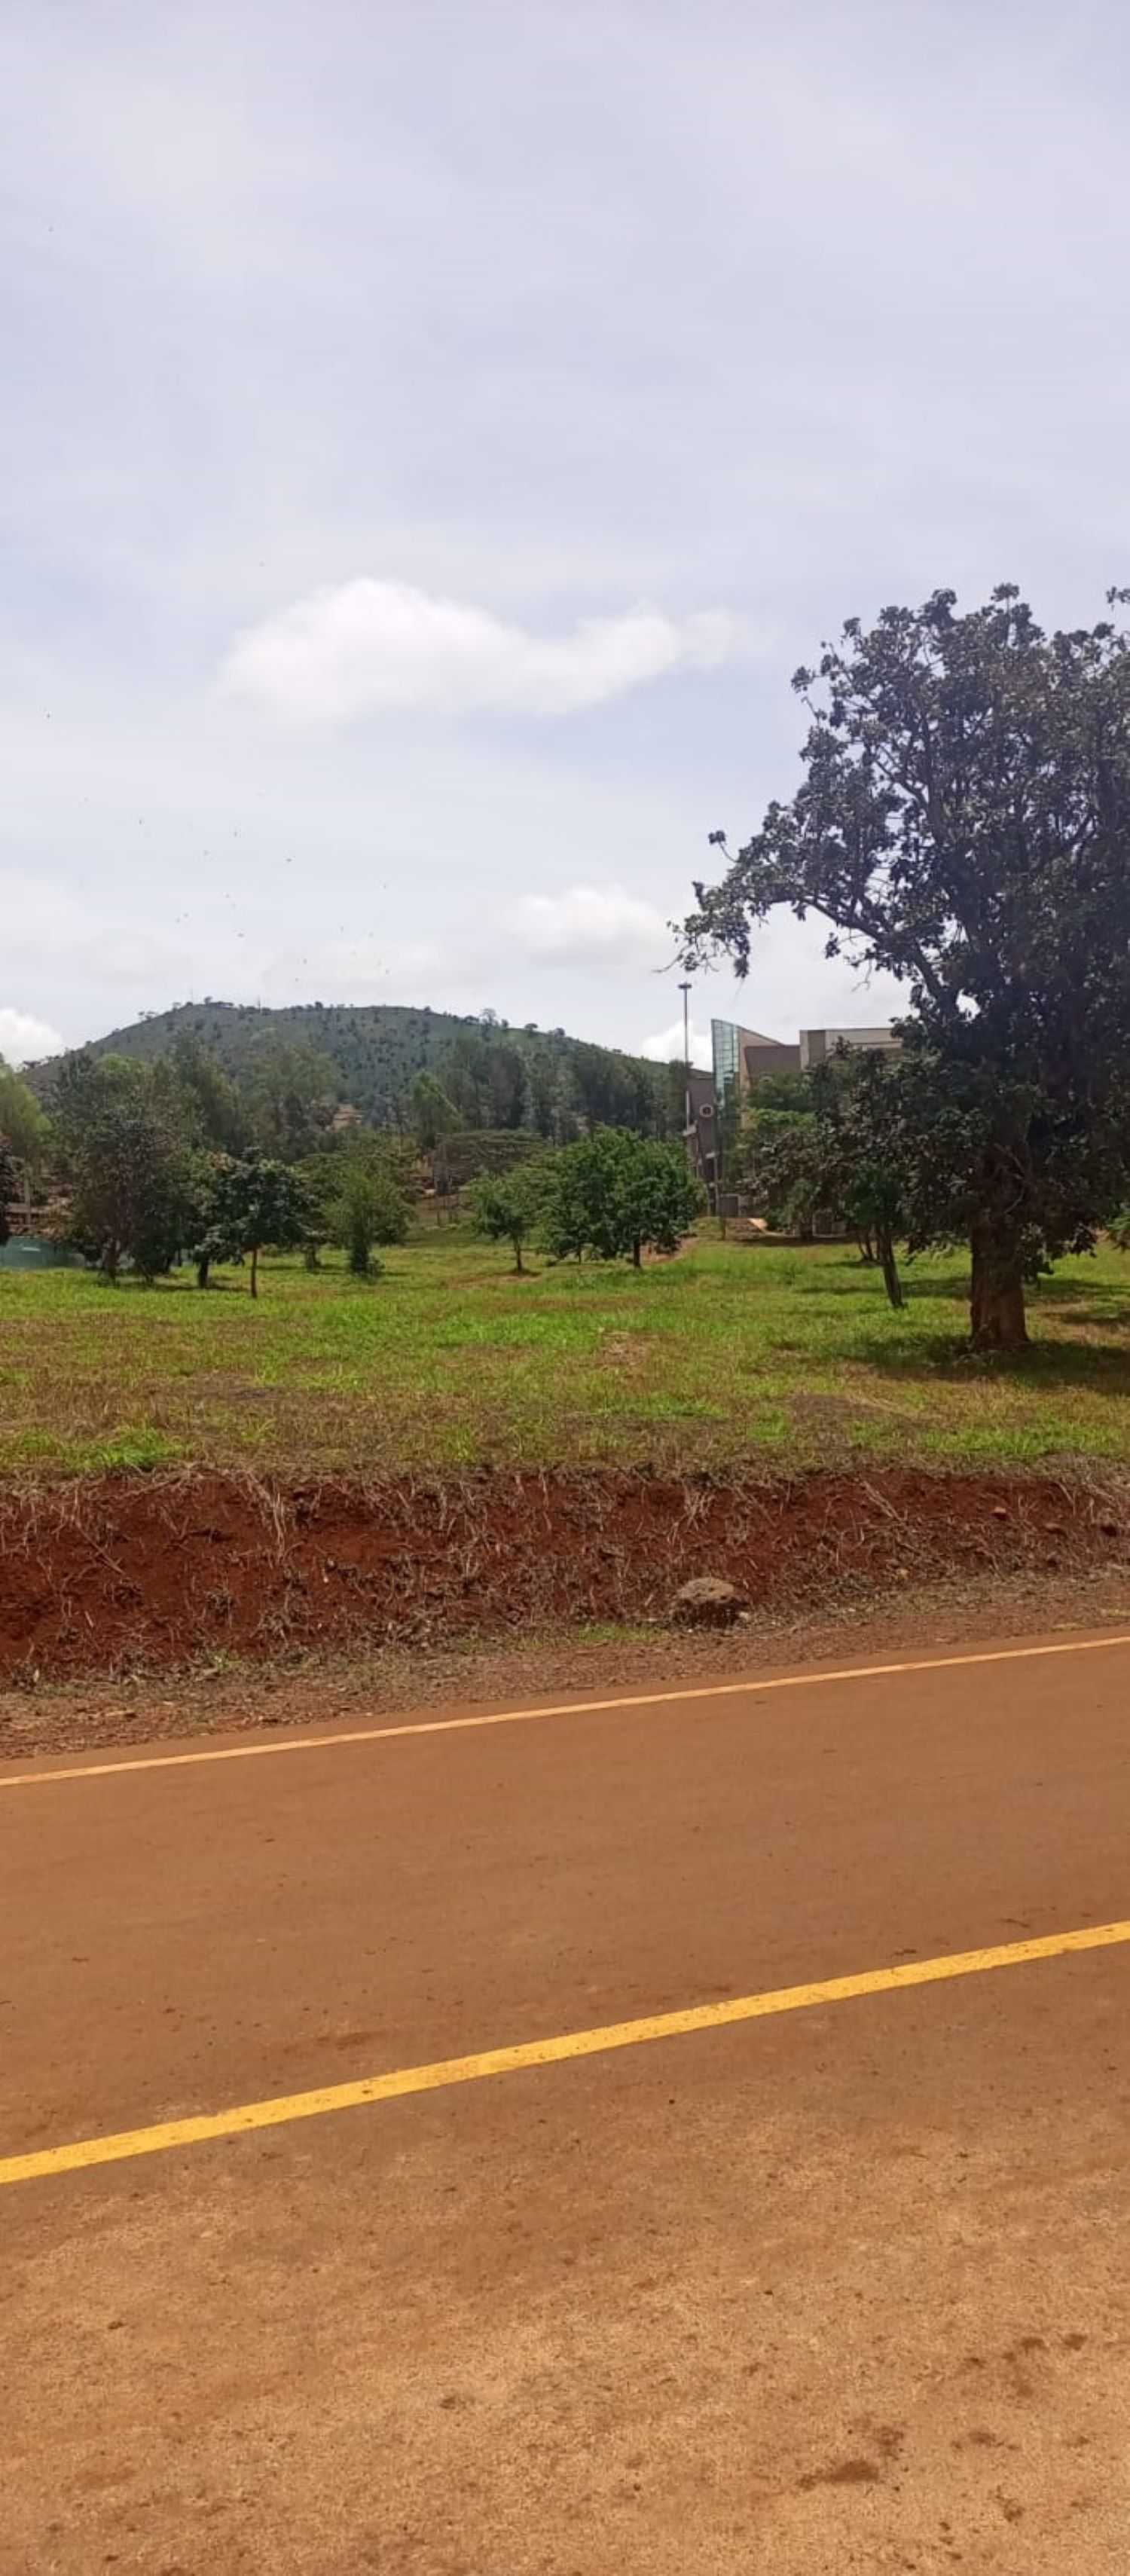
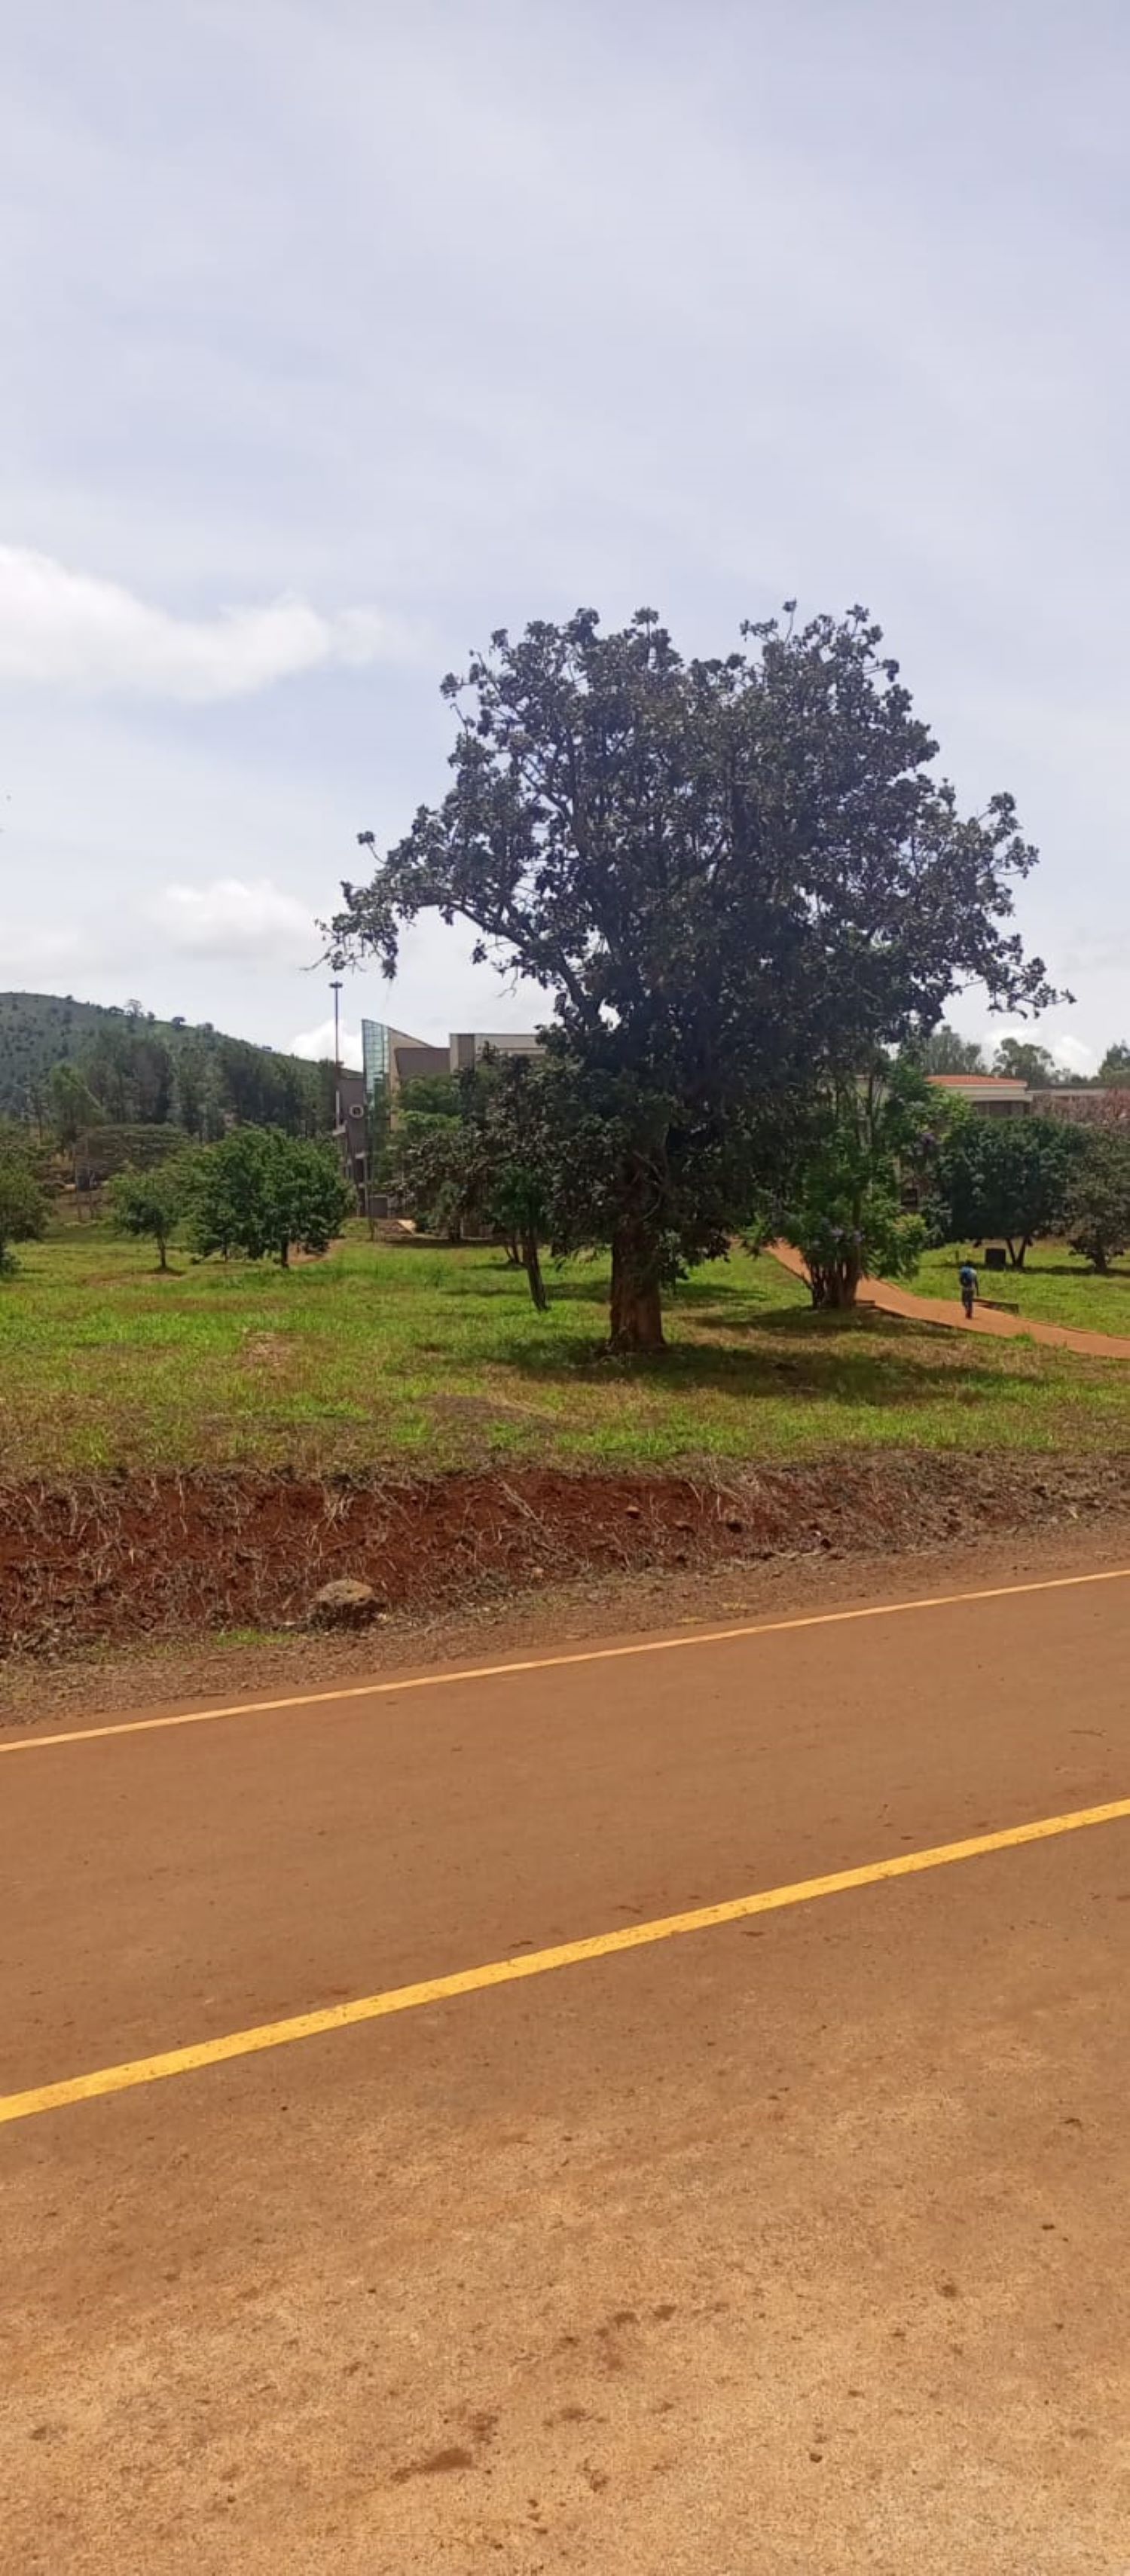
Collect the images that you want to transform into a panorama image.
Ensure that they have overlapping features.
Take a look at the hill in this first image.
In this second image, the hill is slightly visible.
This creates an overlapping feature.
Save the images to a folder.
Pass the folder path to thestitch_folderfunction for stitching.
And then launch the program.
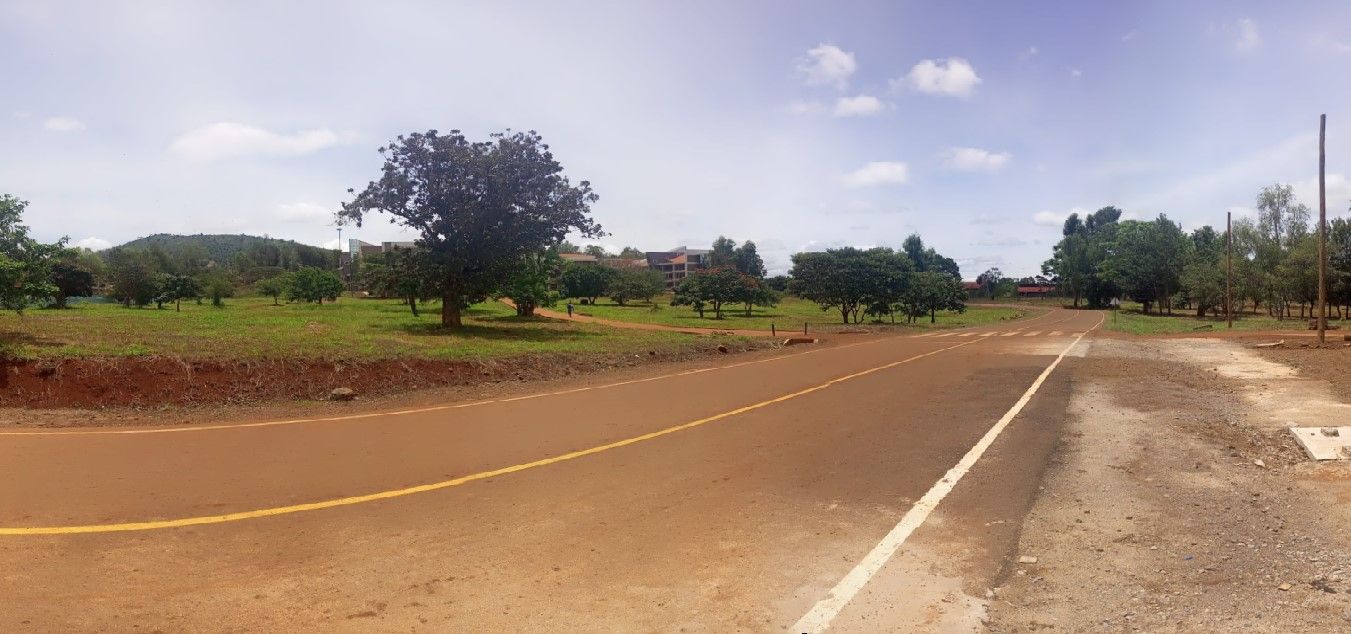
The program stitched the images together and created a panoramic image with a wider view of the scene.
There are more techniques you’re free to use to manipulate images to suit your need.
Working on more projects involving image manipulation will help you improve your box vision skills in general.
