Adjust Your Timeline parameters
Start with a blank timeline.
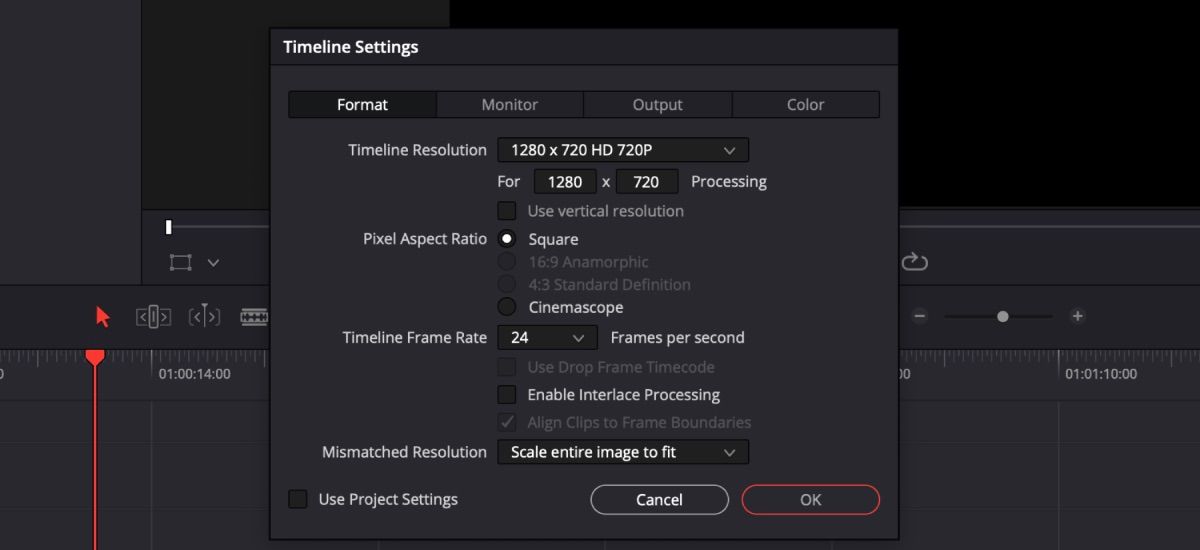
Before adding your still or video to the timeline, youll need to adjust the options.
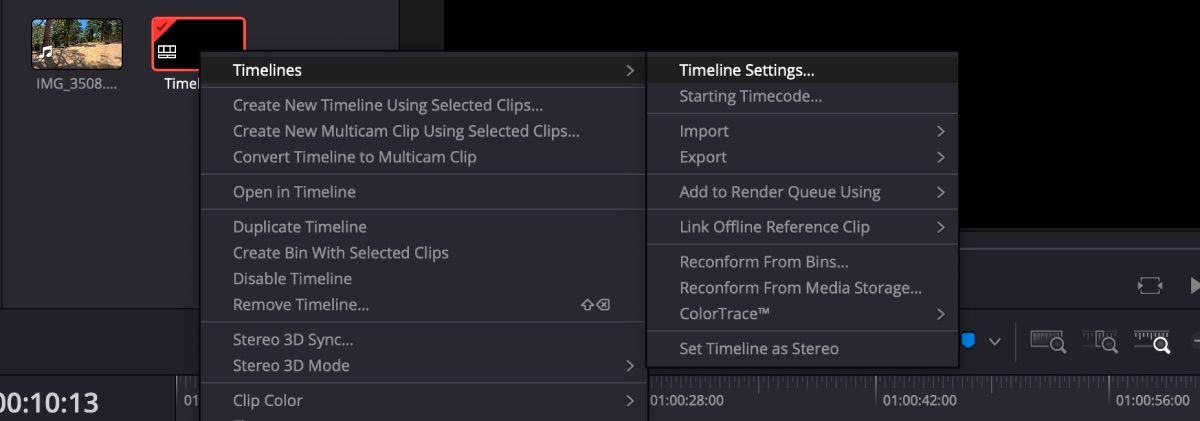
In yourMedia Pool, right-press the timeline clip, then go toTimelines>TimelineSettings.
UncheckUse Project parameters, change theTimeline Resolutionto1280 x 720 HD 720P, and clickOK.
Dont worry about creating an image from a video at this point.
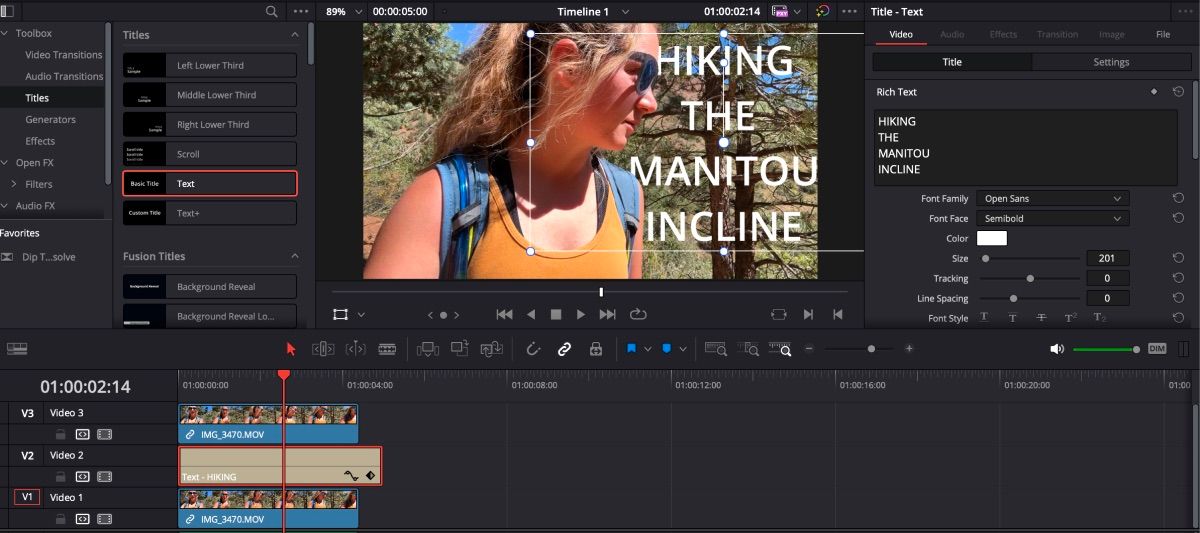
SinceDaVinci Resolve 18.5 came out of beta, the effects now remain attached when a still is exported.
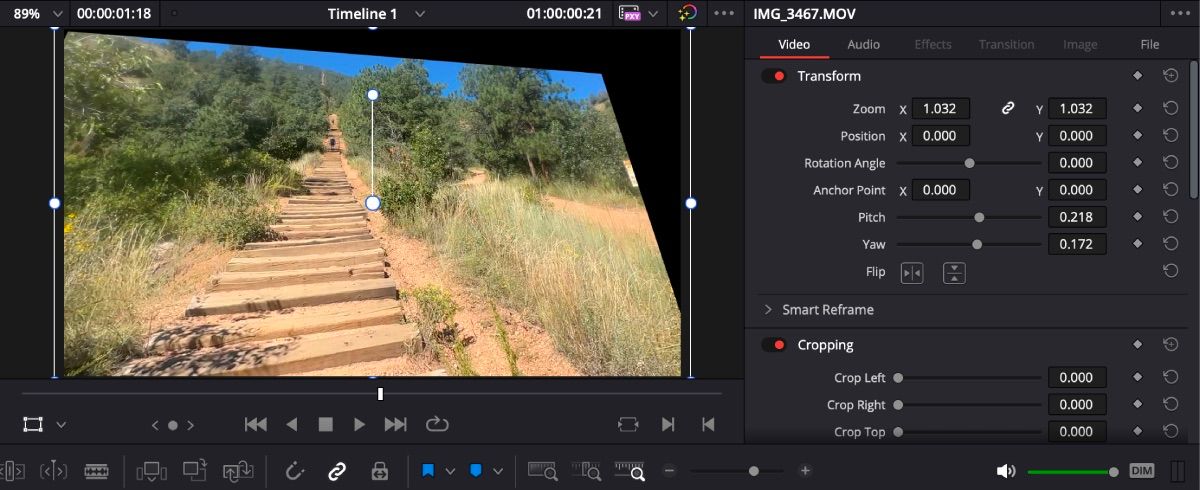
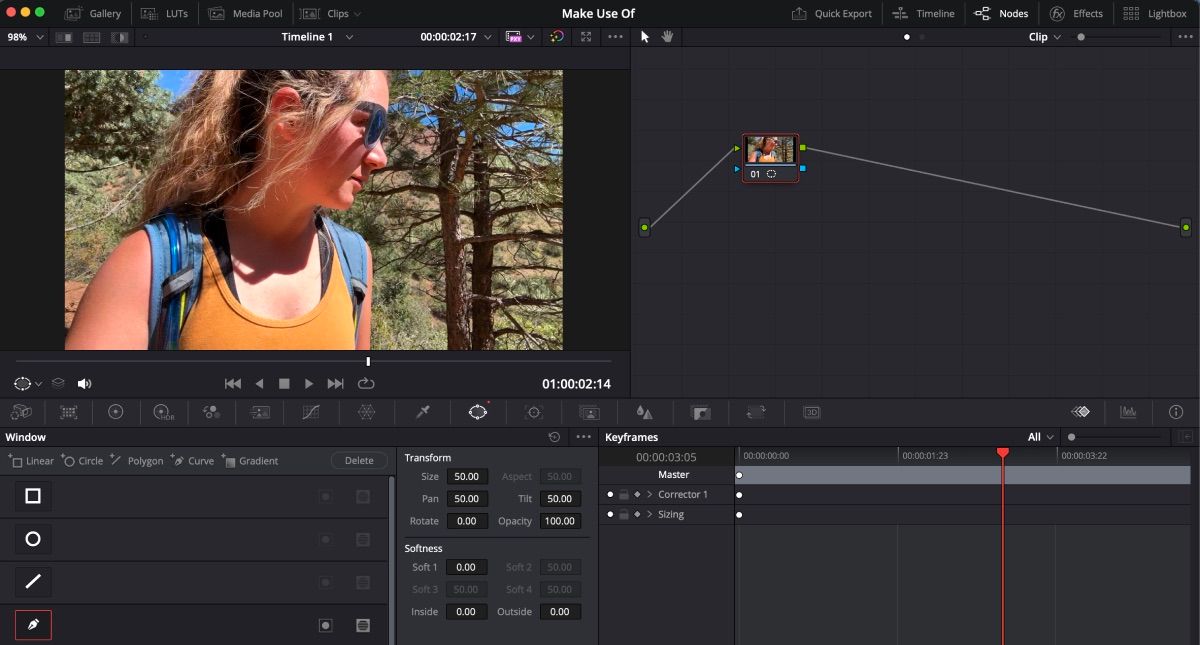
choose the clip and open theInspectortab.
Under Video, you will findPitchandYawnear the top.
Adjust the angles until you are happy with how the image looks.
Doing this for a thumbnail is less complicated thanblurring and tracking a moving object in DaVinci Resolve.
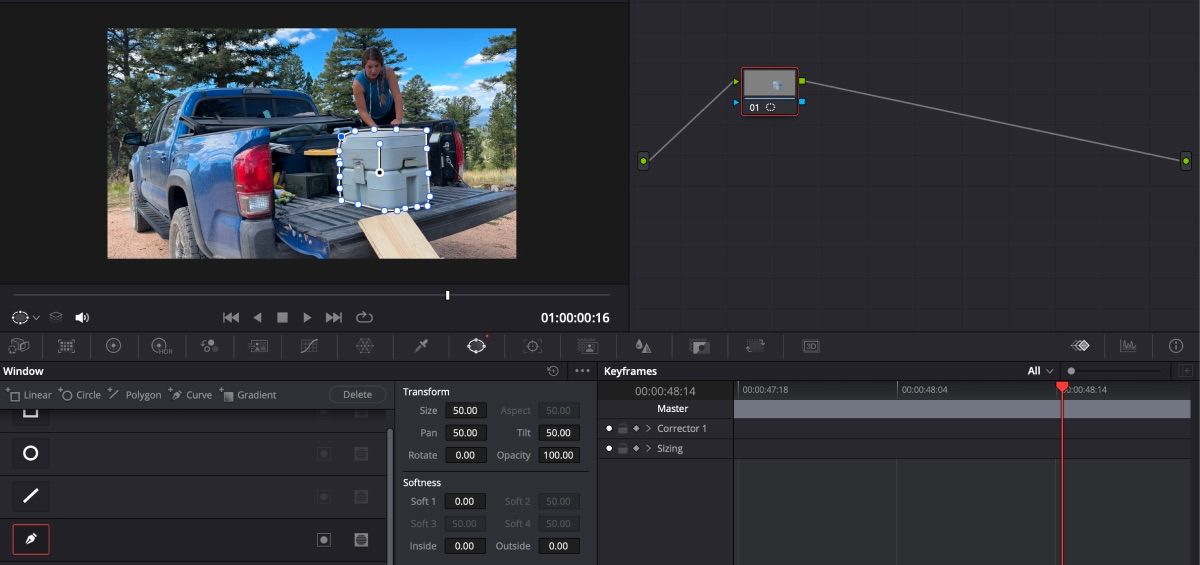
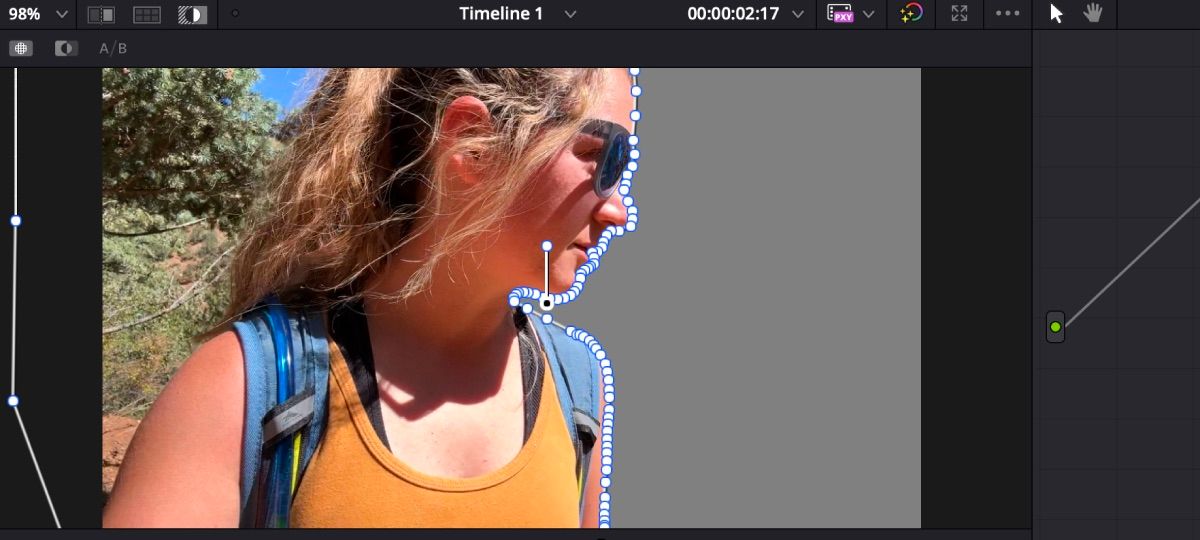
All you better do is grab the clip and open theColorpage.
hit theWindowicon in the toolbar under the preview window.
Select theCurvetool and trace the object you want to blurmake sure the beginning and end dots connect.
From there, open theBlurfeature on the toolbar and drag theRadiusoption as high as you want it to go.
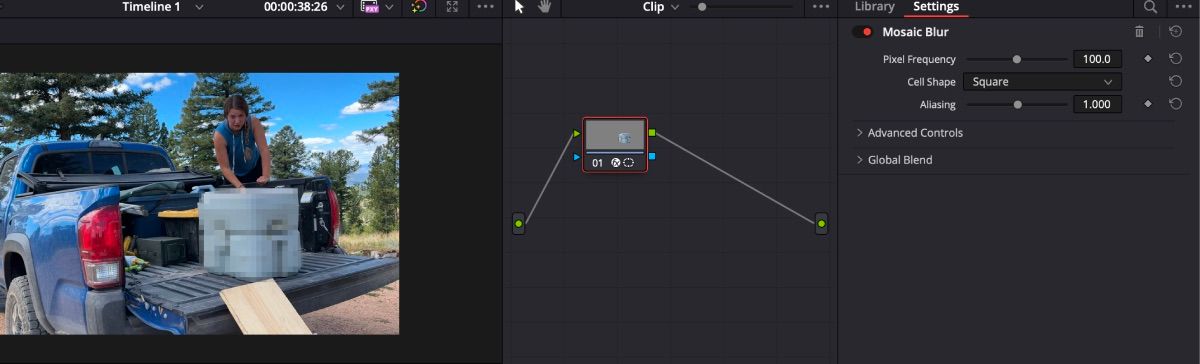
If youd rather have a mosaic blur, open theEffectstab and drag-and-drop theMosaic Blurfeature over the clips node.
From there, press the first clip and open theColortab.
ensure theNodestab is open on theColorpage.
snag the node, select theWindowicon on the toolbar, and select theCurvetool.
Zoom in on the clip and use theCurvetool to trace the object you want your text to go behind.
You will have to do this manually if you are working with the free version of DaVinci Resolve.
double-check you connect the mask all the way around.
Click theHighlighticon again to turn it off.
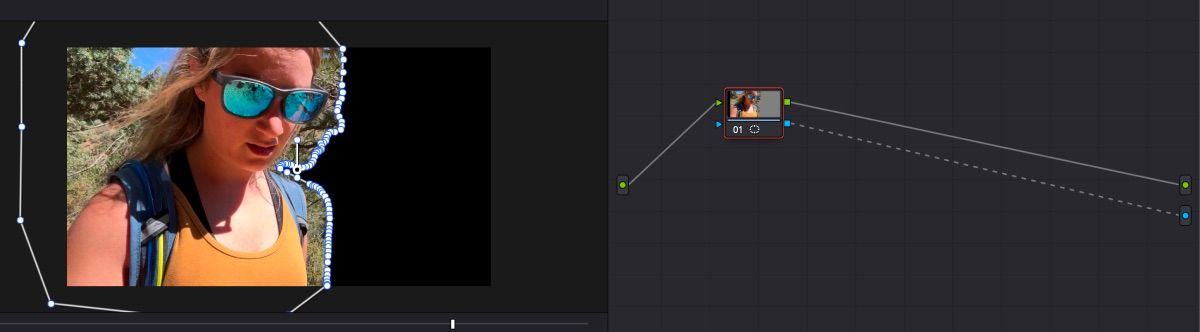
In theNodetab, right-poke the empty node box and selectAdd Alpha Output.
Drag the blue box from the clips node to the blue Alpha Output node.
You will see the background disappear.
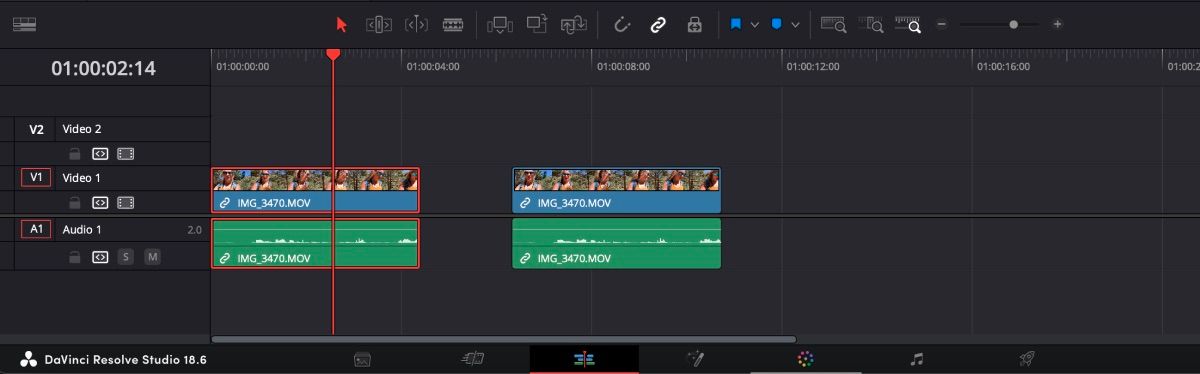
Go back to theEdittab and verify your newly edited clip is on track three.
Place the copy of the original clip on track one right underneath.
Your title effect will go on track two.
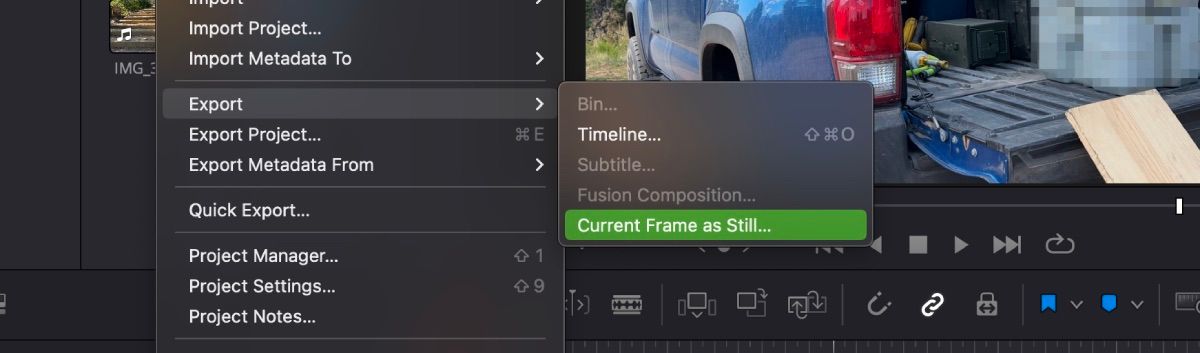
The still should automatically be set to save as a JPEG but confirm just in case.
you might also save it as a PNG if thats the file bang out you would rather work with.
ClickExportonce you have the specifications to your liking.