You might want to digitize a document to save physical space or create a save backup.
Using a combination of appropriate libraries, you could build a small app to digitize documents.
Preparing Your Environment
To follow this article you should be familiar with thebasics of Python.

You also need to have an understanding ofhow to work with the NumPy Python library.
Open any Python IDE, and create two Python files.
Name one main.py and the other transform.py.
Then spin up the following command on the terminal to load the required libraries.
You will use OpenCV-Python to take the image input and perform some image processing.
Imutils to resize the input and output images.
scikit-image to apply a threshold on the image.
NumPy will help you work with arrays.
Wait for the installation to finish and for the IDE to update the project skeletons.

After the skeletons update is complete, you are ready to start coding.
The full source code is available in aGitHub repository.
This will enable you to call and use their functions where necessary.

Ignore the error thrown on perspective_transform.
It will disappear when you finish working on the transform.py file.
Taking and Resizing the Input
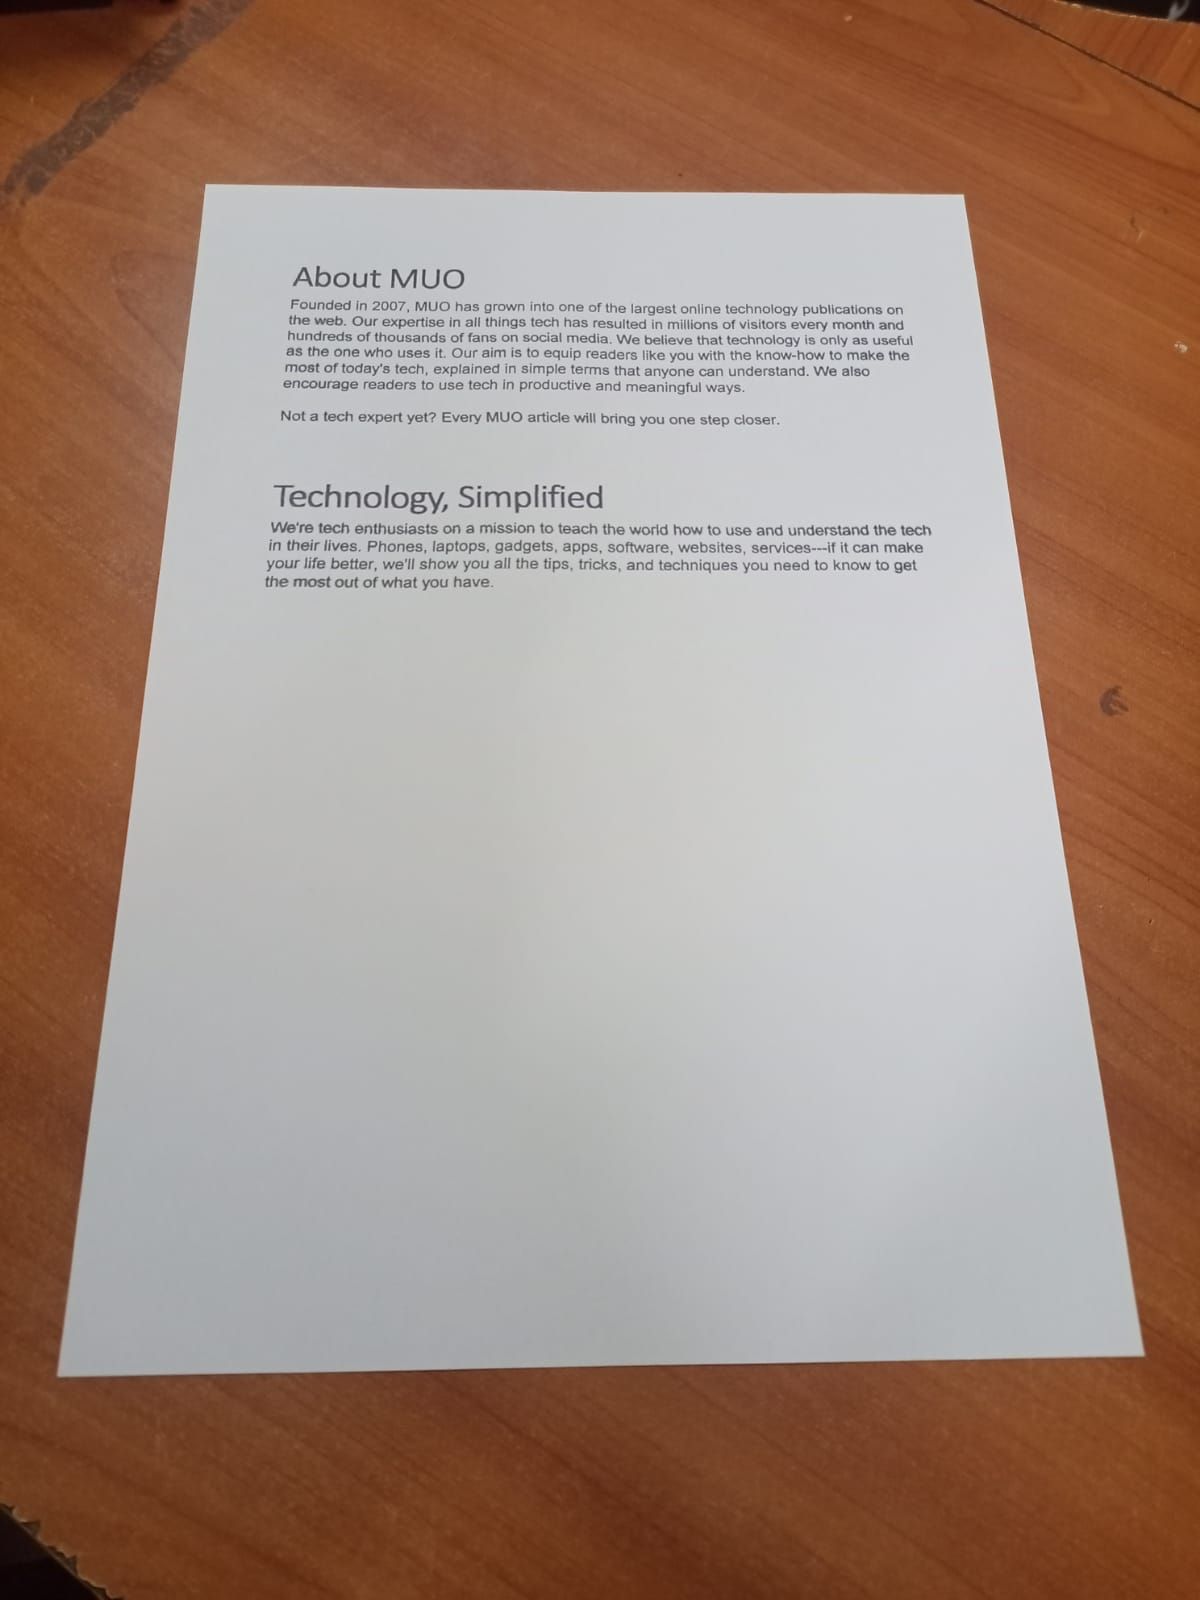
Take a clear image of the document you want to scan.
Ensure the four corners of the document and its contents are visible.
Copy the image to the same folder you are storing the program files.
Pass the input image path to OpenCV.
Make a copy of the original image as you will need it during perspective transformation.
Divide the height of the original image by the height you wish to resize it to.
This will maintain the aspect ratio.
Finally, output the resized image.
Converting the Resized Image to Grayscale
Convert the resized RGB image to grayscale.
Most image-processing libraries only work with grayscale images as they are easier to process.
Notice the difference between the original image and the grayed one.
The colored table has turned to black and white.
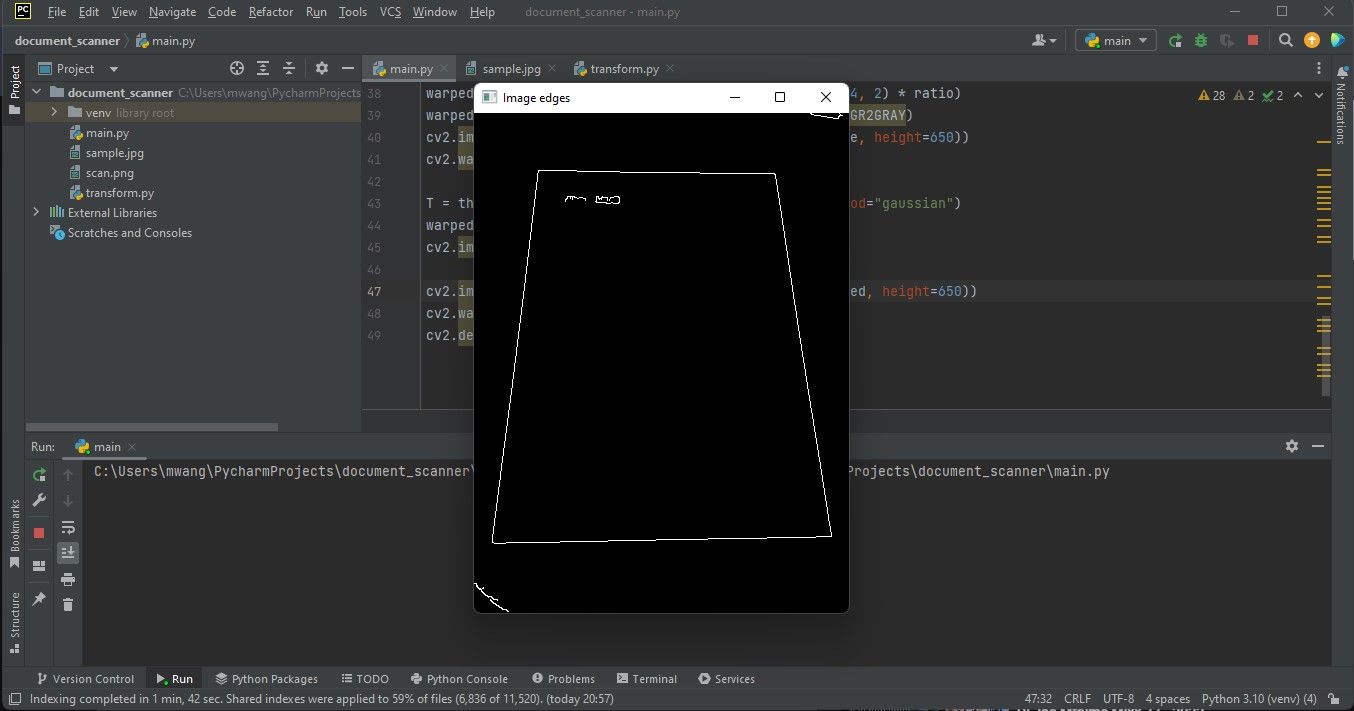
Applying an Edge Detector
Apply a Gaussian blur filter on the grayed image to remove noise.
Then call the OpenCV canny function to detect the edges present in the image.
The edges are visible on the output.
The edges you will work with are those of the document.
Finding the Largest Contour
Detect the contours present in the edged image.
Sort them in descending order keeping only the five largest contours.
Approximate the largest contour with four sides by looping through the sorted contours.
The contour with four sides is likely to contain the document.
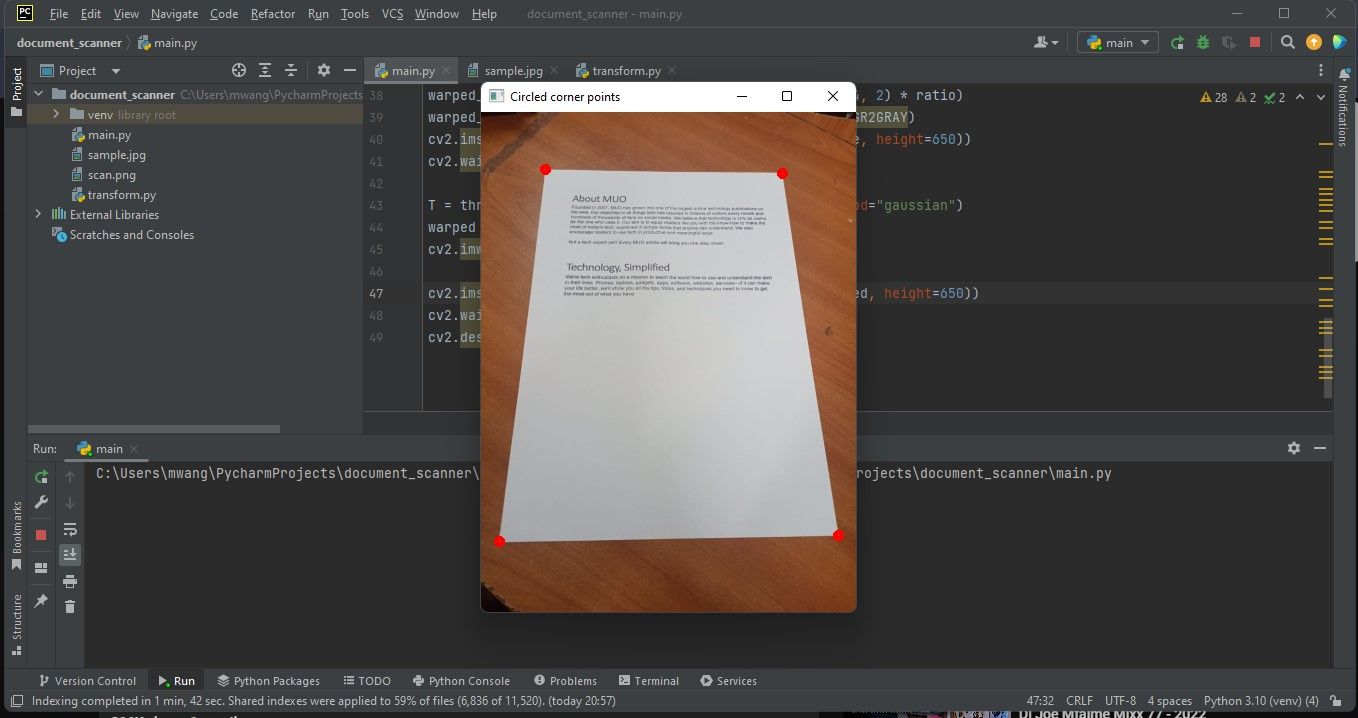
Circling the Four Corners of the Document Contour
Circle the corners of the detected document contour.
This will help you determine whether your program was able to detect the document in the image.
Implement circling on the resized RGB image.
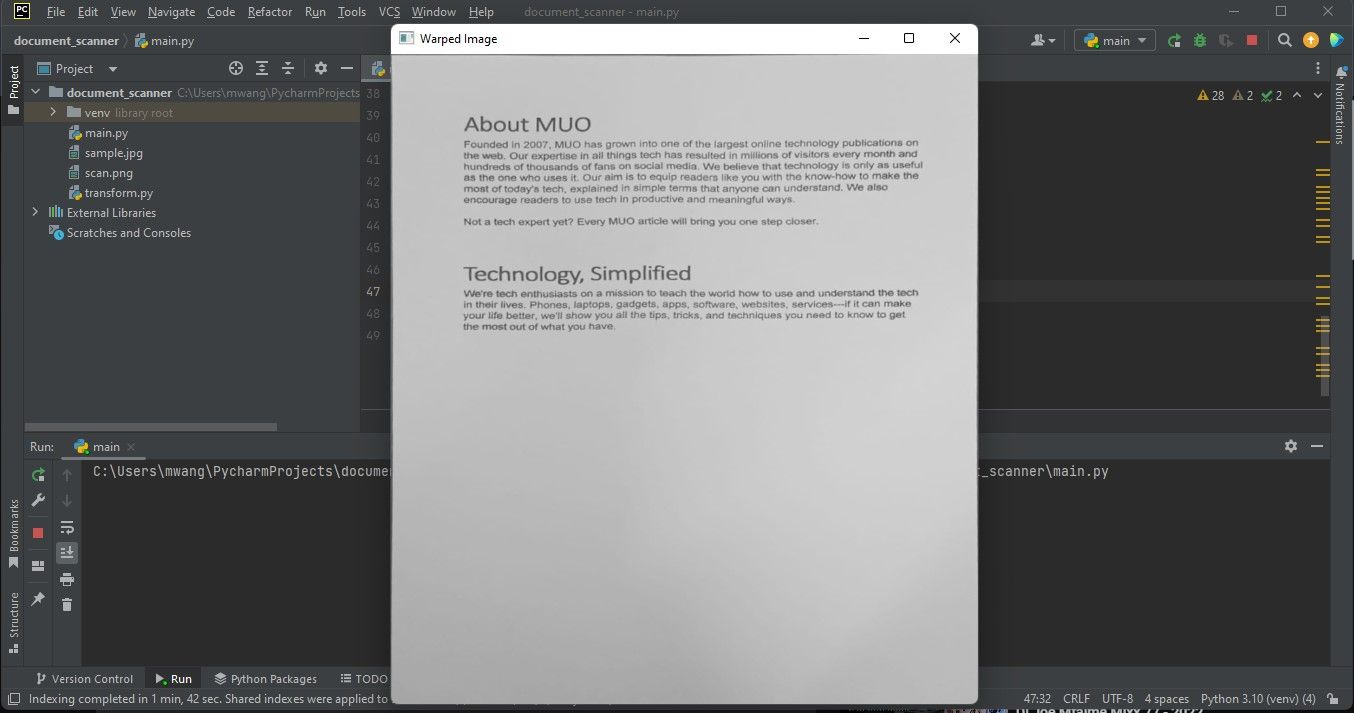
Having detected the document, you now need to extract the document from the image.
It transforms an image into a different plane allowing you to view the image from a different angle.
To obtain a warped image, you need tocreate a simple modulethat will perform the perspective transformation.
Transformation Module
The module will order the points of the document corners.
launch the transform.py file you created earlier.
Import OpenCV and NumPy libraries.
This module will contain two functions.
Create a function that will order the coordinates of the document corner points.
Create a second function that will compute the corner coordinates of the new image and obtain an overhead shot.
It will then calculate the perspective transform matrix and return the warped image.
You have now created the transform module.
The error on the perspective_transform import will now disappear.
Notice that the image displayed has an overhead shot.
This will give the warped image a scanned look.
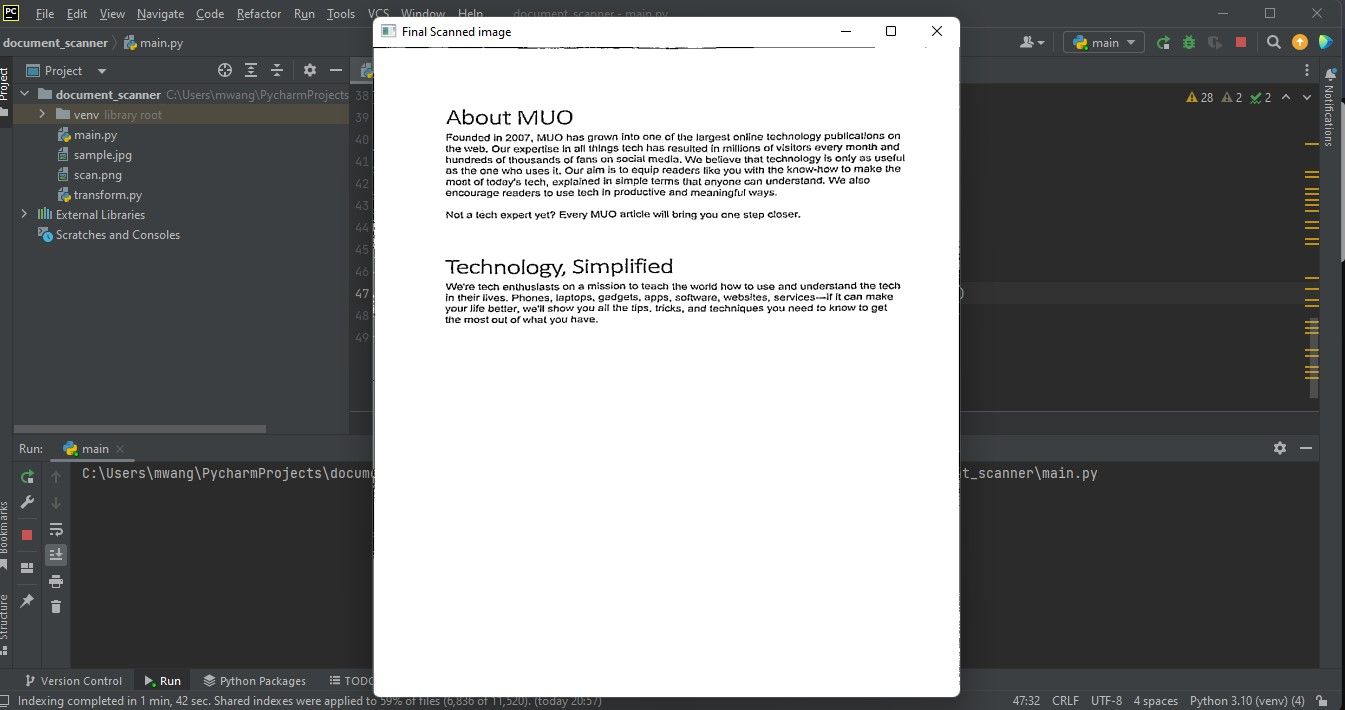
Save the scanned image output to the folder containing the program files.
Saving the scan in PNG format maintains the document quality.
To advance in computer vision you should work on interesting but challenging projects.
You should also read more about how it’s possible for you to use computer vision with current technologies.
This will keep you informed and give you new ideas for projects to work on.
