Quick Links
Summary
Like most people, you probably worry about your finances often.
Which is where creating a budget and sticking to it proves its worth.
We’ll show you how to create a personal budget in Excel and learn to manage your money better.

Proxima Studio/Shutterstock
Structuring Your Budget in Excel
Before we begin, double-check you gather all your financial information in one place.
This includes your bills, bank statements, paychecks, tax forms, and everything else.
This will be easier to do if you already have a habit of tracking your transactions.
Once you’re ready, open a new Excel worksheet.
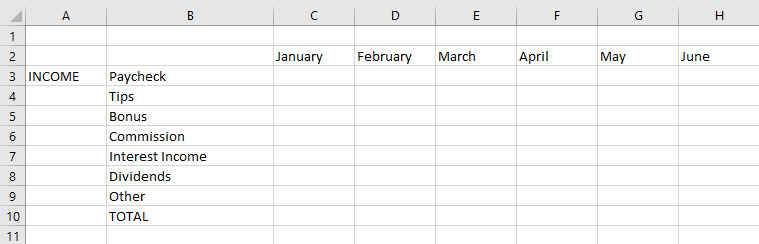
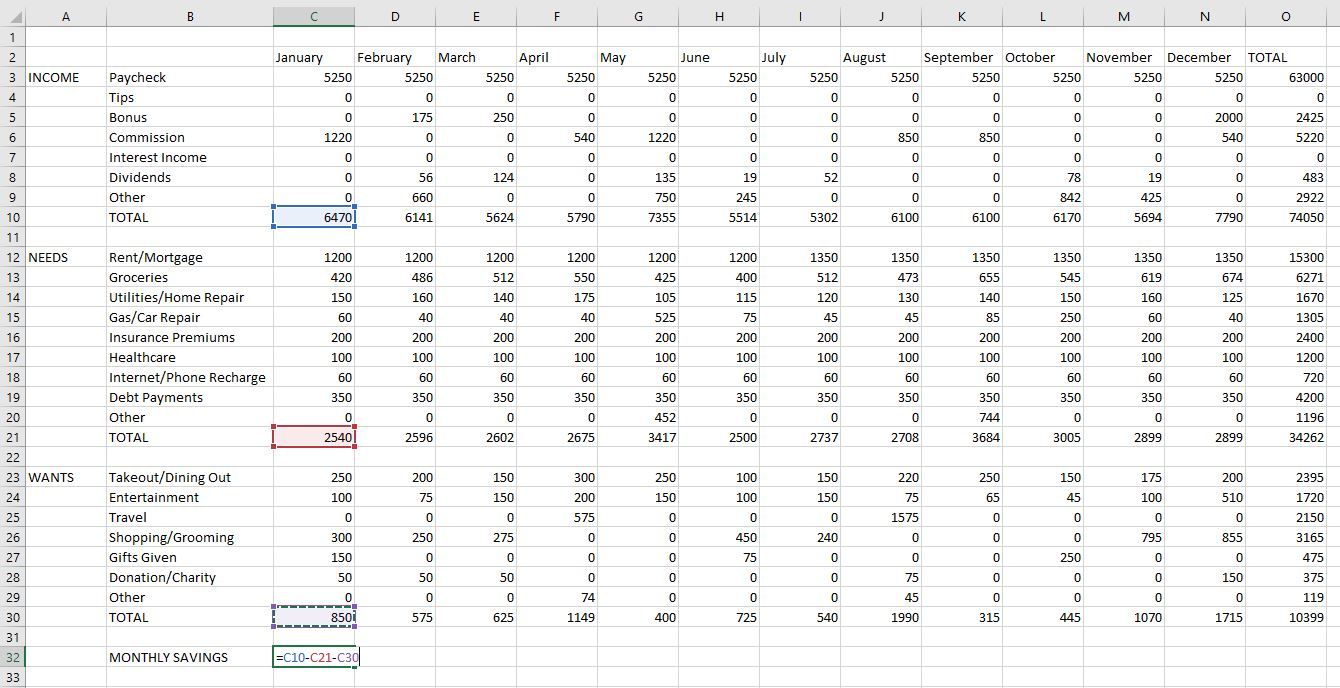
Next, we’ll create an income section that lists all your earnings.
key in “INCOME” in the A3 cell.

Refer to the image below.
The income section is made.
Next, create the expenses section following a similar structure.

Here, I strongly advise dividing your expenses into two separate sections: needs and wants.
This allows you to budget for each separately and remain disciplined.
Refer to the image below.
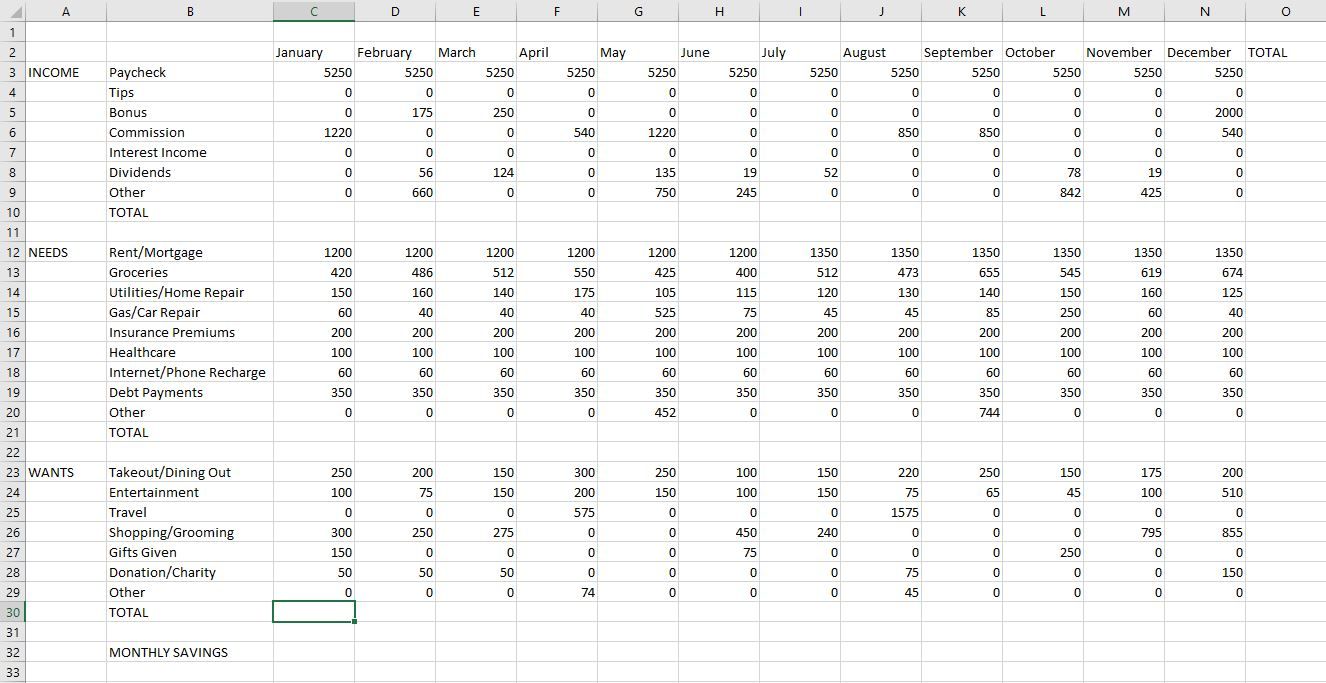
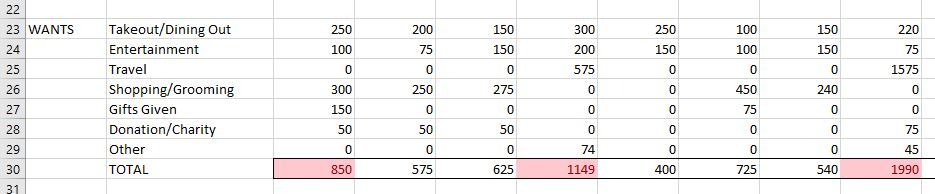
Similarly, create the “WANTS” section.
This is where you list down things like travel, shopping, and entertainment.
Remember to bang out “Other” and “TOTAL” here as well.
Finally, in column B, jot down “MONTHLY SAVINGS” below the three sections you just made.
This is where your savings will surface once we start doing the math.
Refer to your financial documents and slide in your monthly income and expenses accordingly.
you’re free to always create or remove categories later on as you see fit.
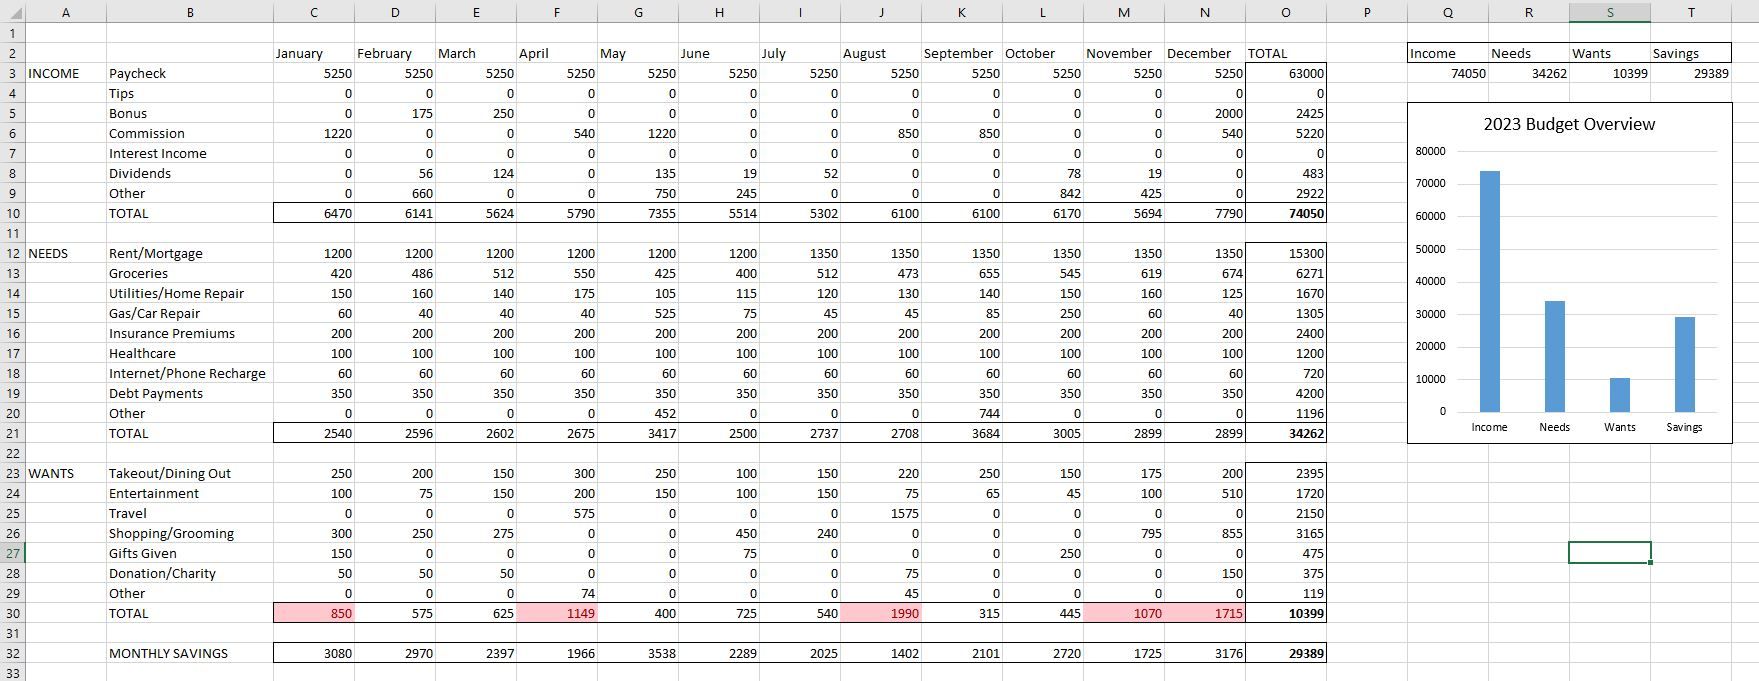
Once done, your budget will start taking shape and should look like this:
iii.
Find Remaining Balance and Insights in Your Excel Budget
You’re almost done structuring your budget.
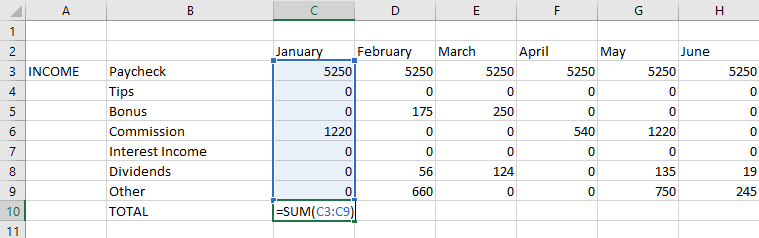
The last step is to find your total monthly and annual income, expenses, and savings.
To do that, we’ll use two simple formulas.
The first one isthe SUM function, which helps you add up the values in a group of cells.
Similarly, I’ll find my total income and expenses for all the months using this formula.
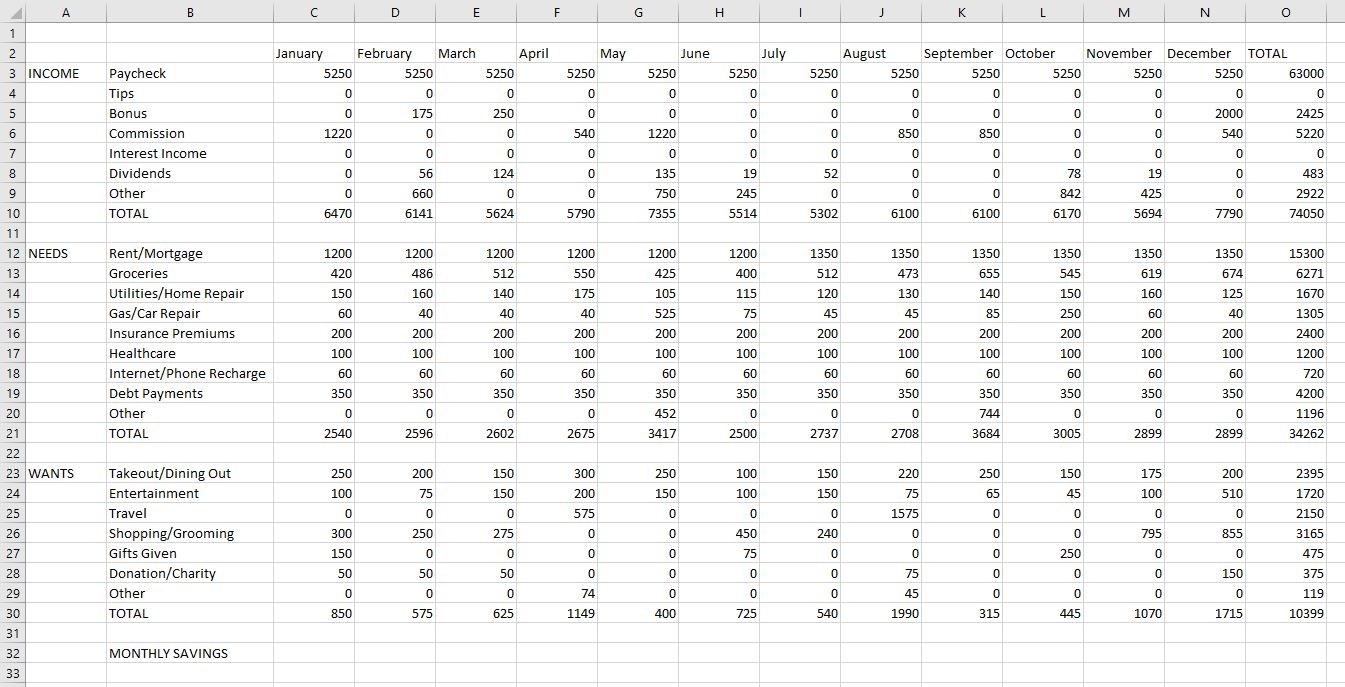
Use the same formula to find your total annual income and expenses as well.
This is where we’ll use the second formula.
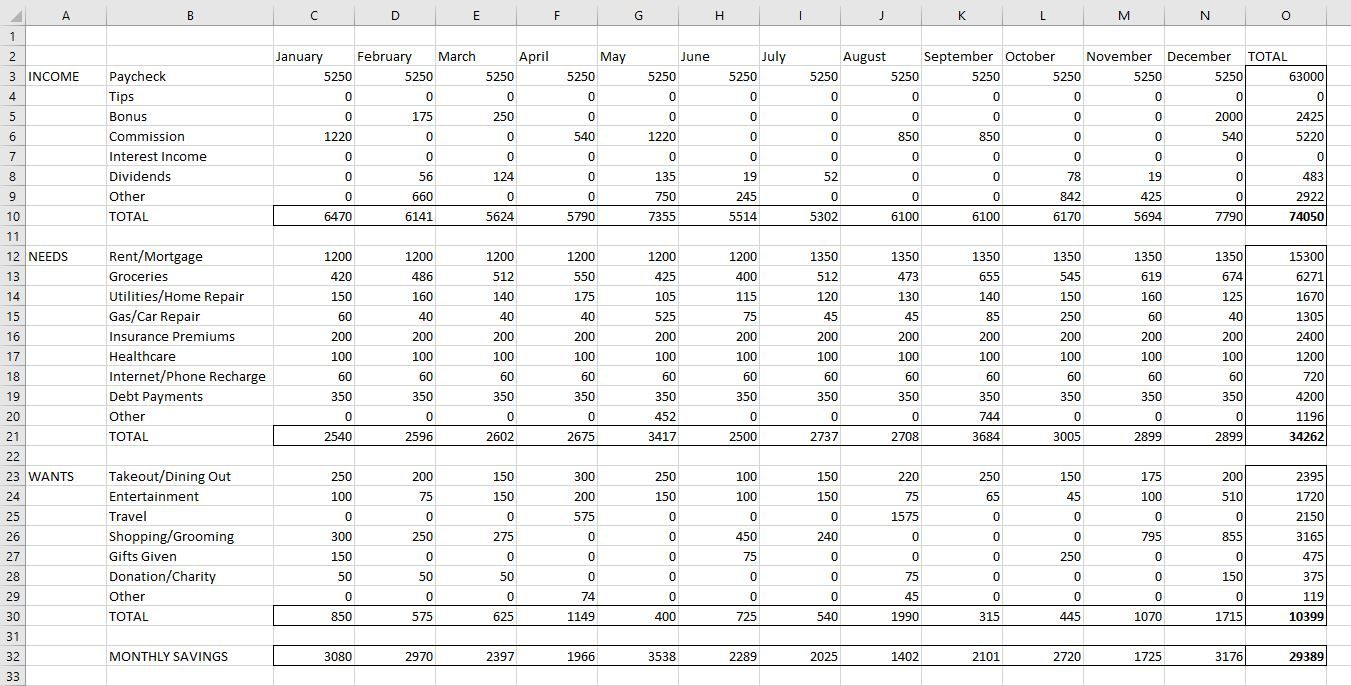
Do the same for the entire row up until the end of the inputted data.
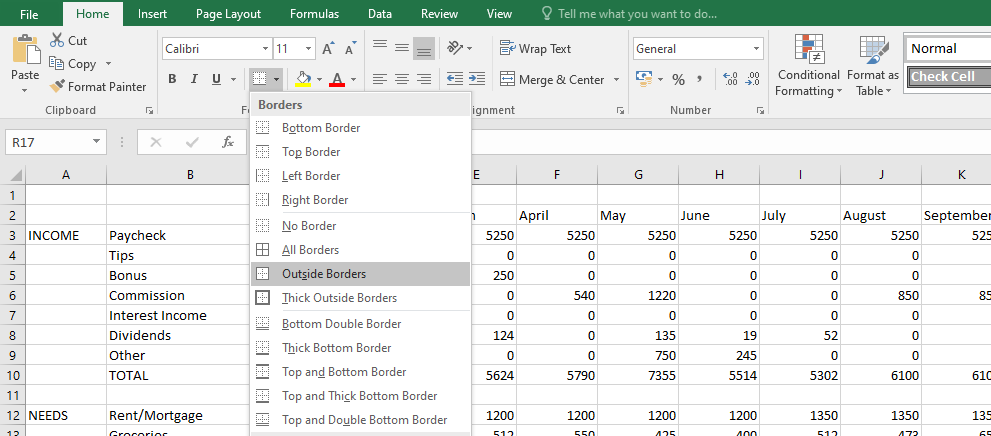
First, we’ll create borders around the total values row and column in the income and expenses sections.
This can be done by using the Borders button located in theFontsection of the Home tab.
Simply tap on theOutline Bordersoption.
Once done, your budget should look like this:
i.
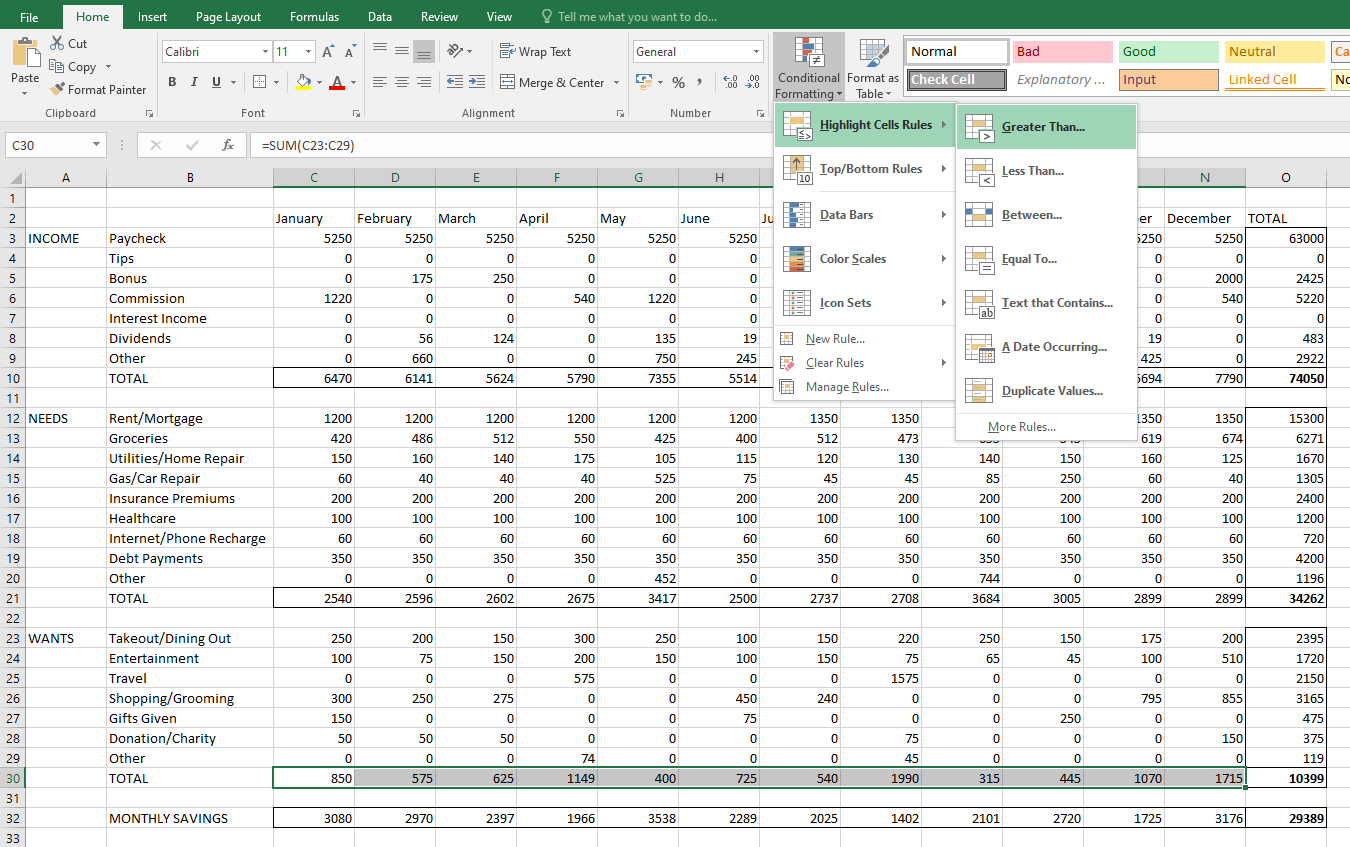
In a nutshell, it helps you identify values that you should pay attention to.
For instance, it can highlight a particular cell when you’ve gone over budget.
Let’s say you’ve decided not to spend more than $800 per month on your wants.
Then, selectConditional Formattingin the Home tab and selectHighlight Cells Rules > Greater Than…from the dropdown.
In the box that appears next, pop in “800” and clickOK.
Refer to the image below.
To do that, we’ll first create a dataset that’s easily readable by Excel.
Under each heading, pop in the total of that section.
Give the chart a title and resize it as you see fit.
Once done, your budget should look like this:
3.
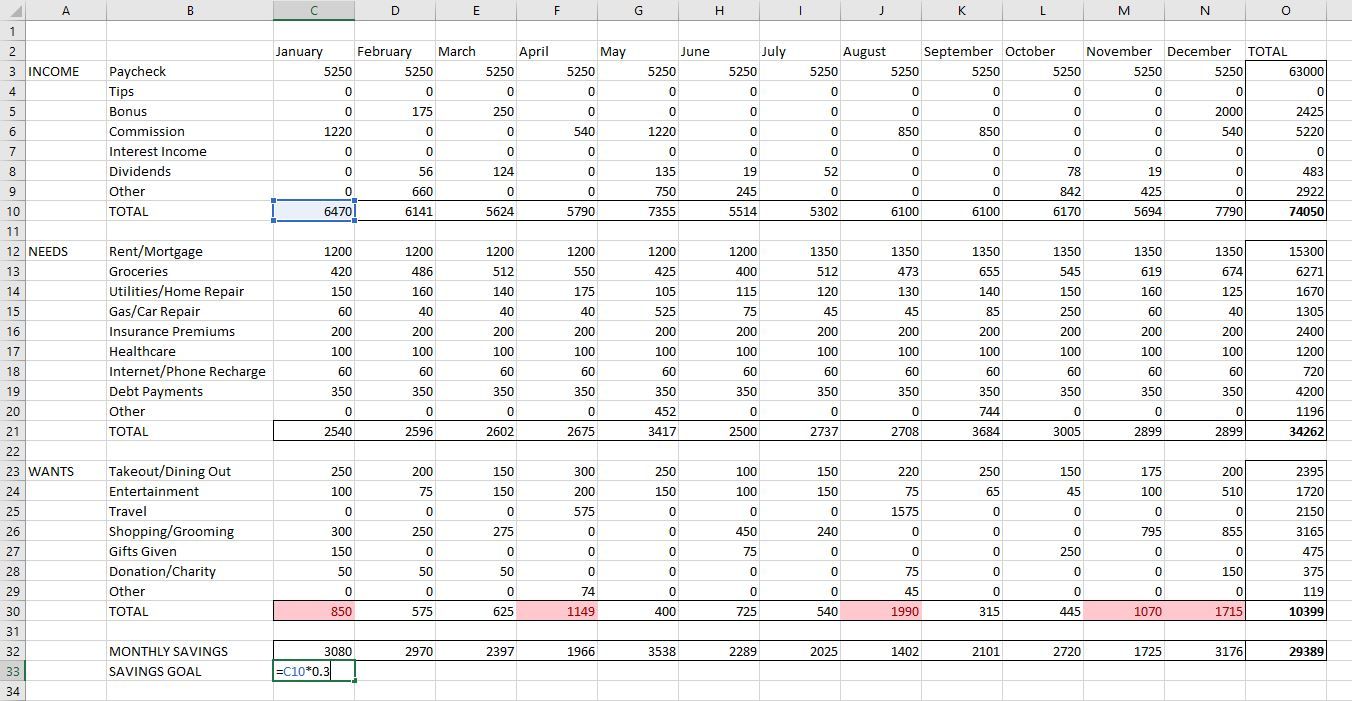
To set a savings target, add a new row belowMonthly Savingsand label it “Savings Goal”.
I’ll do the same for the rest of the cells (including months) too.
Remember, the appropriate cell location for it’s possible for you to vary, as discussed earlier.
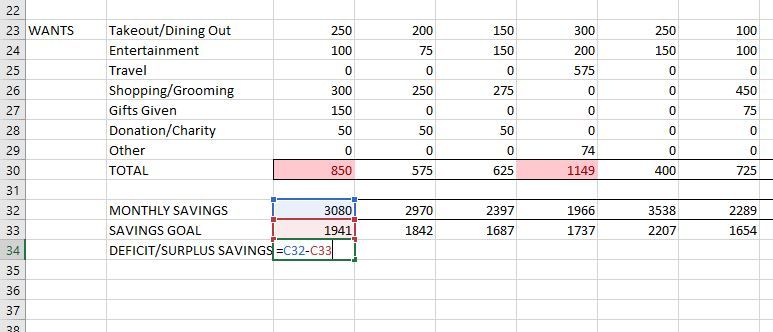
Finally, we find a deficit or surplus.
For that, create a new row under Savings Goal, titled “Deficit/Surplus Savings.”
Here, simply subtract your savings goal from your actual savings for each month.
You’ve successfully created a personal budget in Excel.
