It is a great way to preserve all the details and gives you a lot of flexibility while editing.
In short, shooting in RAW offers you more control and gives your photos a professional look.
RAW files are not image files.
The files just have all the unprocessed data from your camera’s sensor.
So, it’s crucial that you convert them into JPEG to make them usable.
Converting RAW files to JPEG in Adobe Lightroom is not a complex process.
Just follow our step-by-step process for preparing and converting your RAW files.
Why Convert RAW to JPEG?
When you shoot in JPEG, your camera gives you a compressed file that is ready to use.
On the other hand, RAW files are unusable.
They are also significantly large because they have much more information from your camera’s sensor.
With JPEG images, your camera gives you an edited version of your image.
That’s why JPEG images straight out of your camera look vibrant.
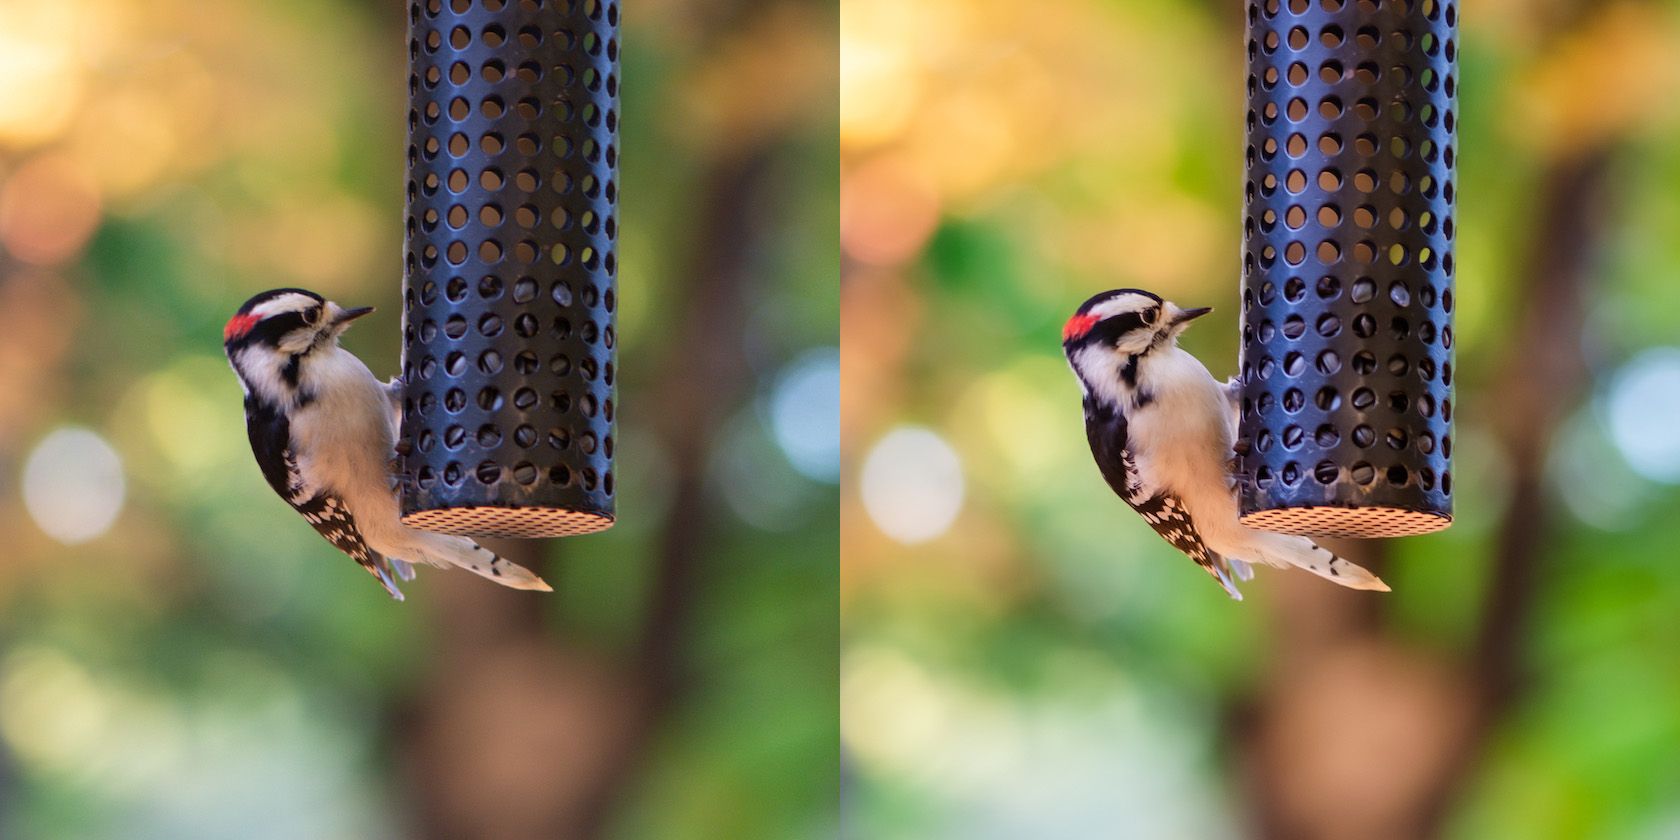
The colors in the RAW files look muted and dull.
So, you have to edit the photo and then export it as JPEG for sharing and other uses.
This will also save a lot of space considering JEPG compresses the details to smaller file sizes.
If you’re shooting RAW for the first time, verify your memory card has enough space.
Remember, RAW files are considerably larger than JPEGs.
Another potential issue you will probably face is computer storage.
it’s possible for you to read thepros and cons of shooting in RAW and JPEGhere.
The steps for doing this will differ for different camera brands and models.
If you’re not sure how to do this, check your camera’s manual.
It will have all the steps.
after you grab your RAW files, you have to import them to your rig.
Step 1
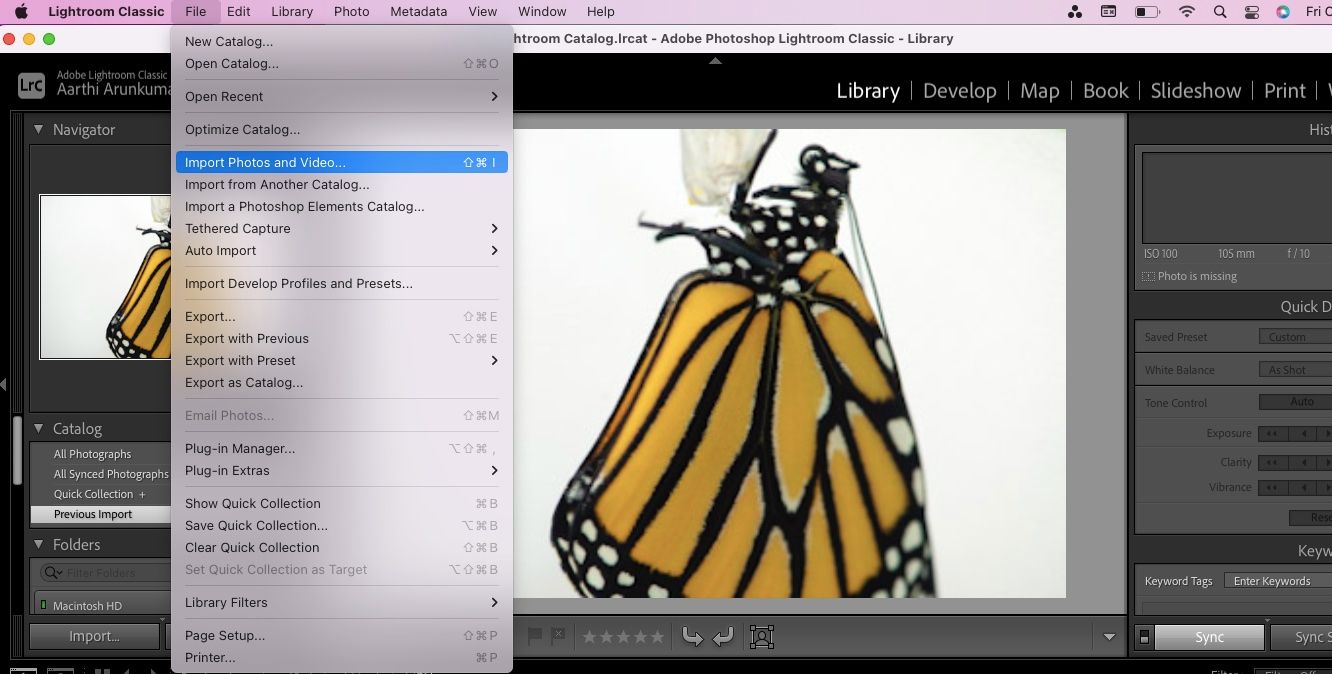
Open Lightroom and import the files from your camera.
Go toFile>Import Photos and Video.Choose the photos you want to edit.
By default, all new photos will be selected.
Step 2
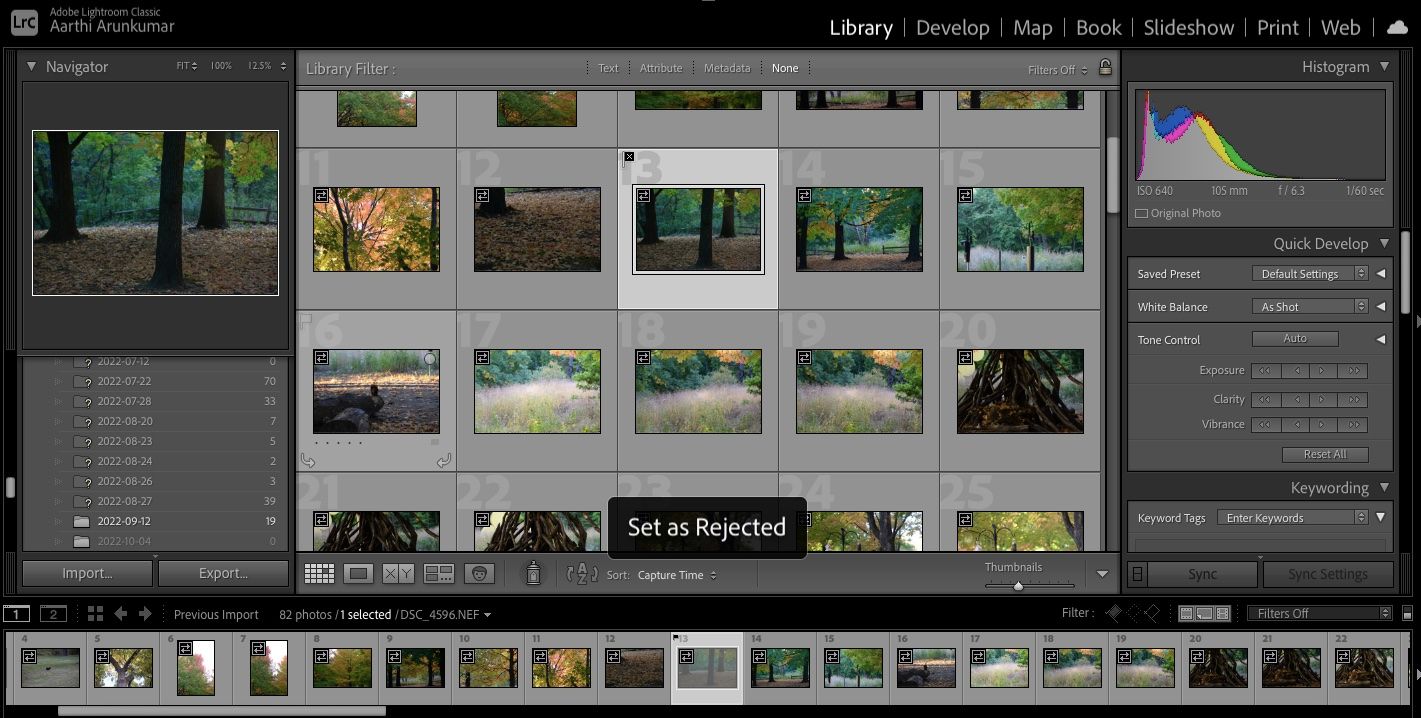
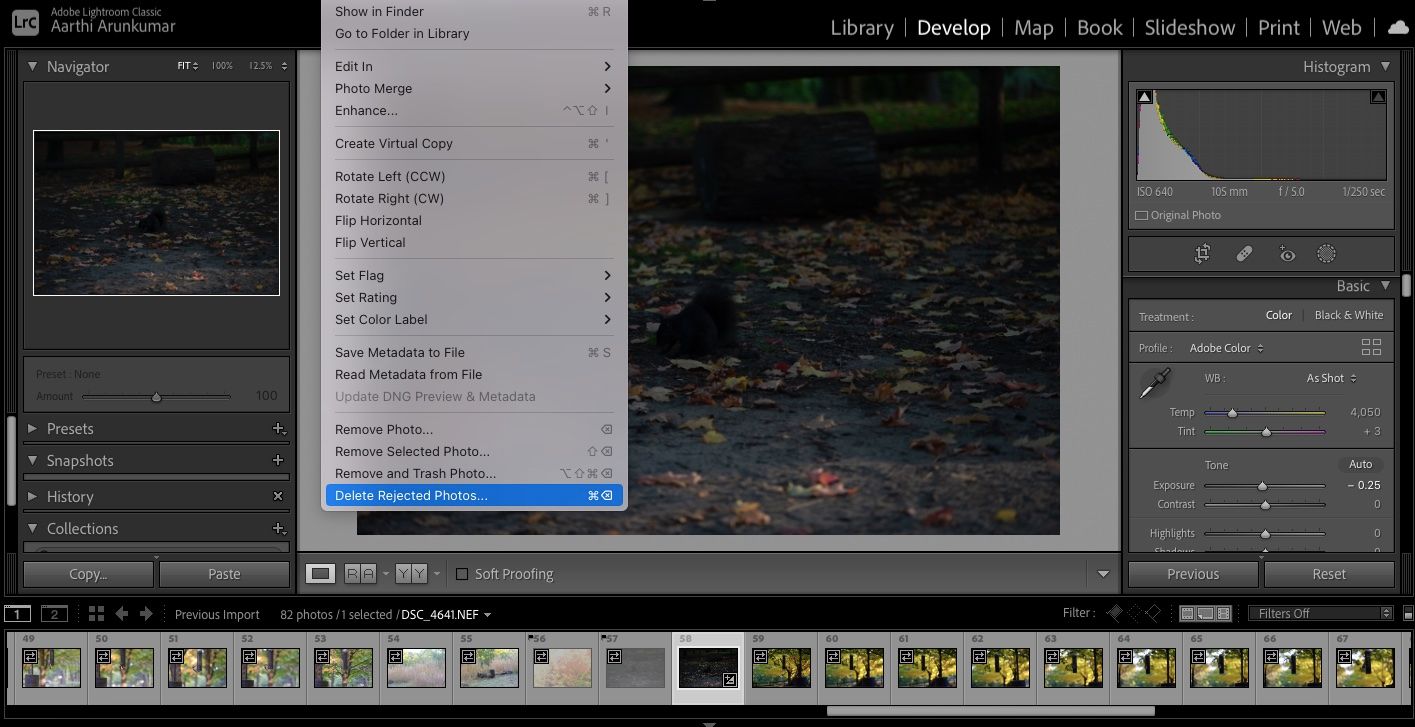
Scan the photos you’ve imported, and reject the photos you don’t want.
Go toPhoto>Set Flag>Rejected.
you might also do this by selecting a photo and pressingXon your keyboard.
This step will help you keep only the best files and delete the others quickly.
Step 3
you could delete the rejected images from Lightroom or even from your disk.
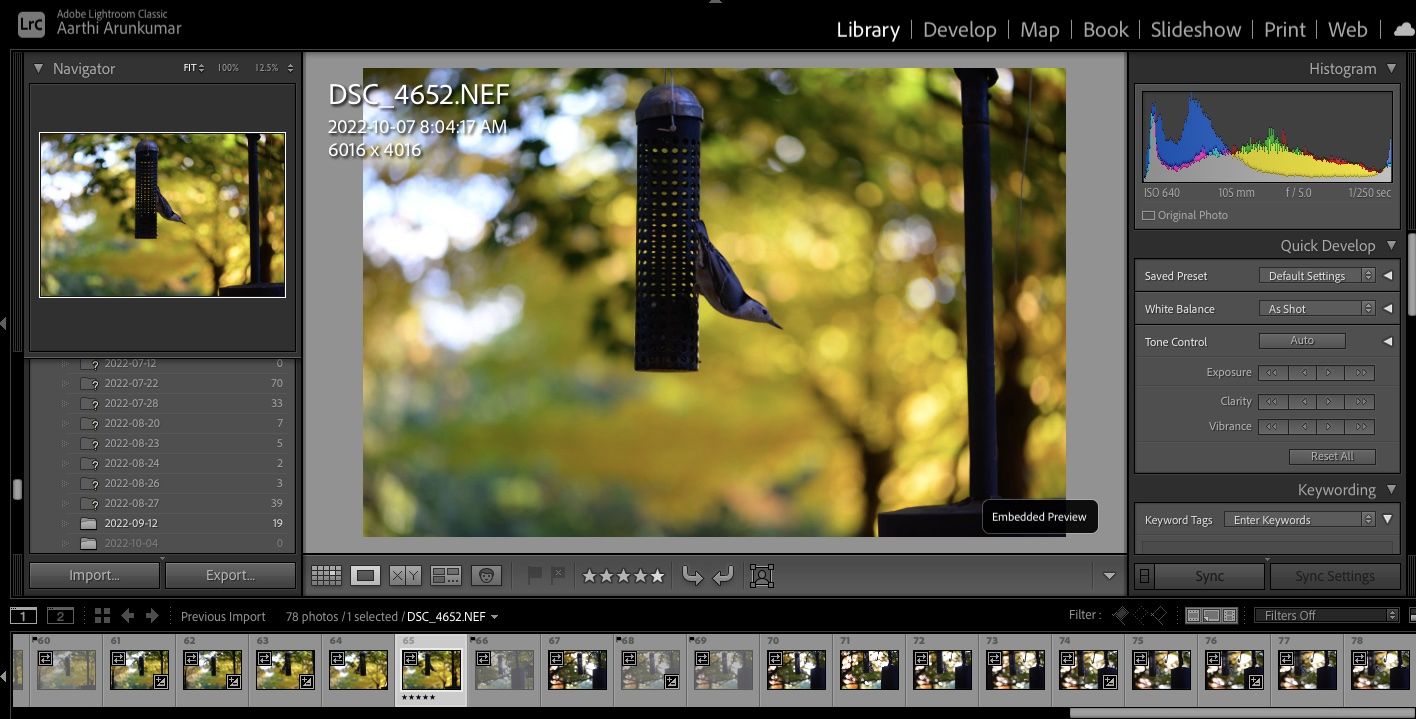
Step 4
In theLibrarymodule, you’ve got the option to rate your photos with stars.
you’ve got the option to also go toPhoto>Set Flagand choose your rating.
This is a good way to find the best image out of many similar shots.
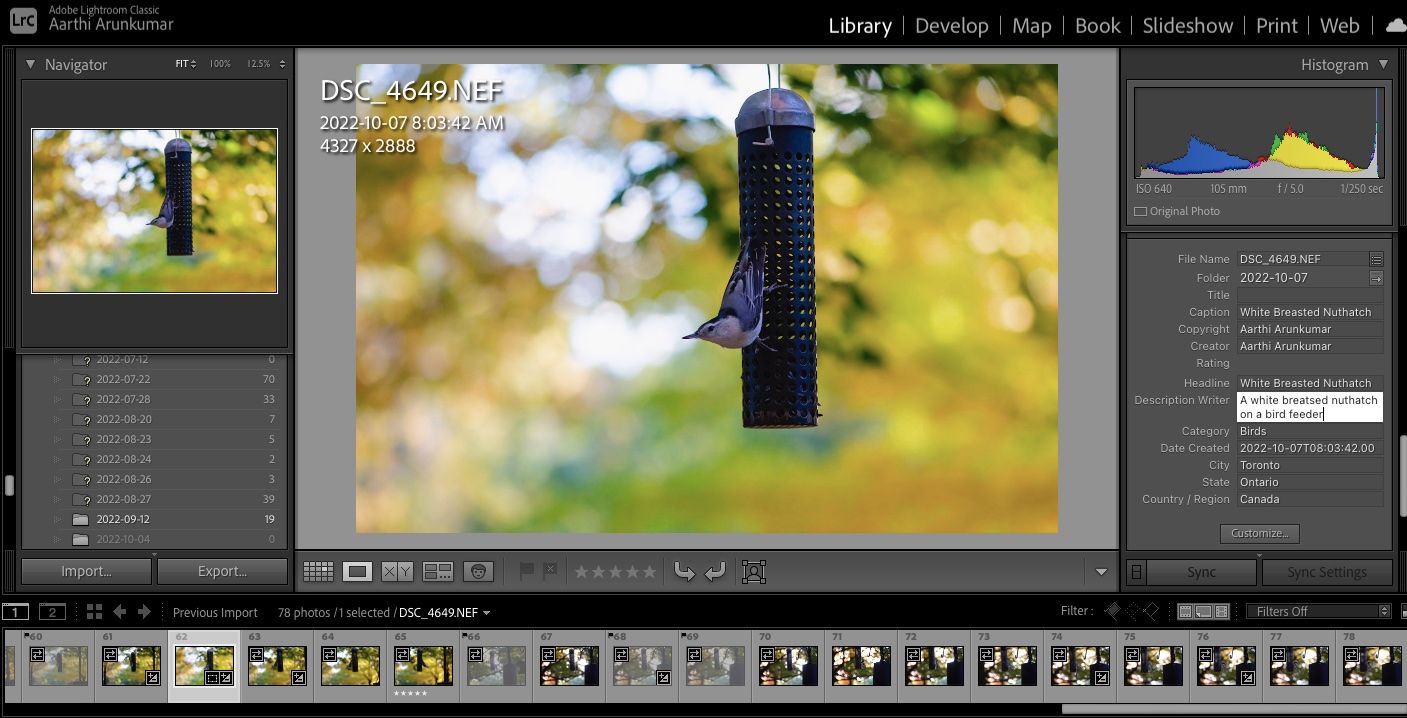
Step 5
Add metadata to your photos.
you might find it on the right side under the histogram.
It is not mandatory, but adding the relevant details is good practice.
For example, ensure to fill in the title and copyright information.
you’ve got the option to also fill in the keywords.
This is a crucial step if you’re a stock photographer or regularly upload on photography websites.
It will save you time as your keywords are already prefilled.
See our guide onhow to succeed as a stock photographer.
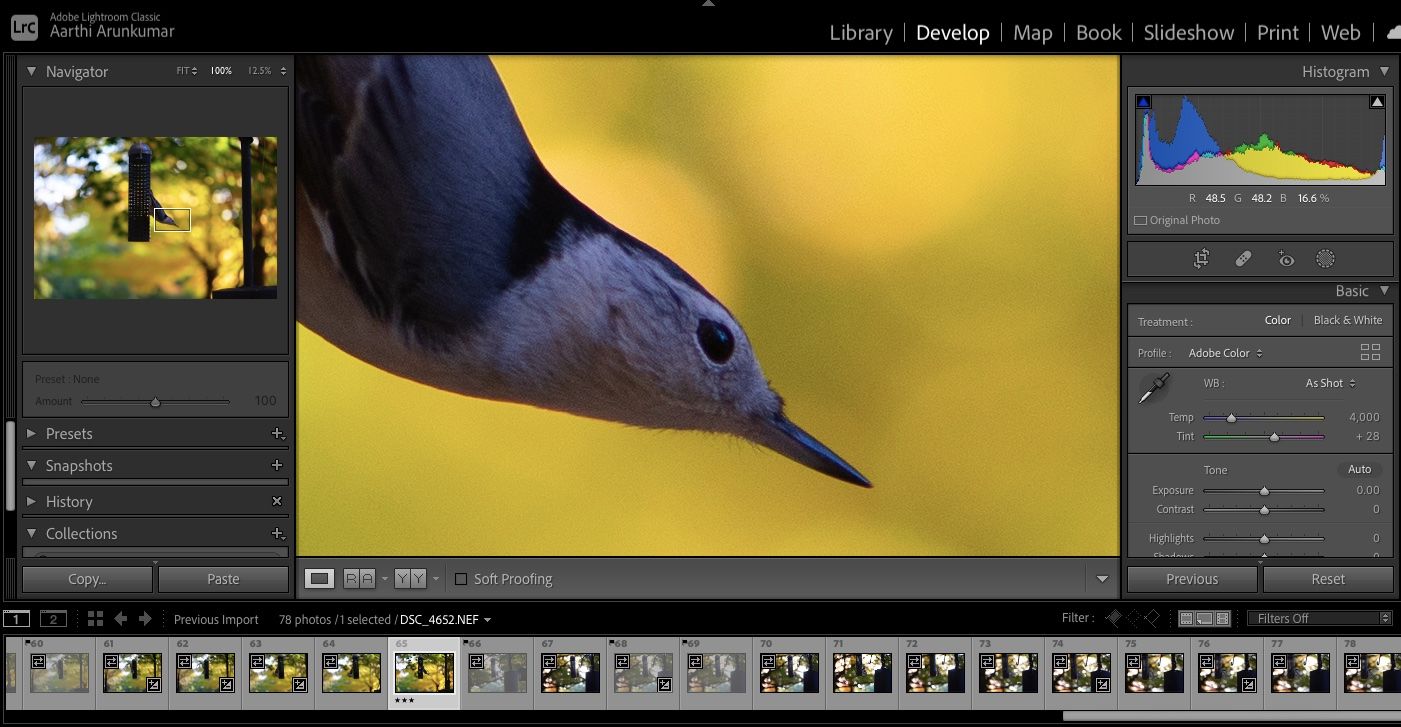
Step 6
Go toDevelopmodule on the top right-hand side.
Enlarge each image to 100 percent, and check the focus.
you might also try theseoptions to fix blurry photos.
If your image looks completely unusable, you could reject it and delete it.
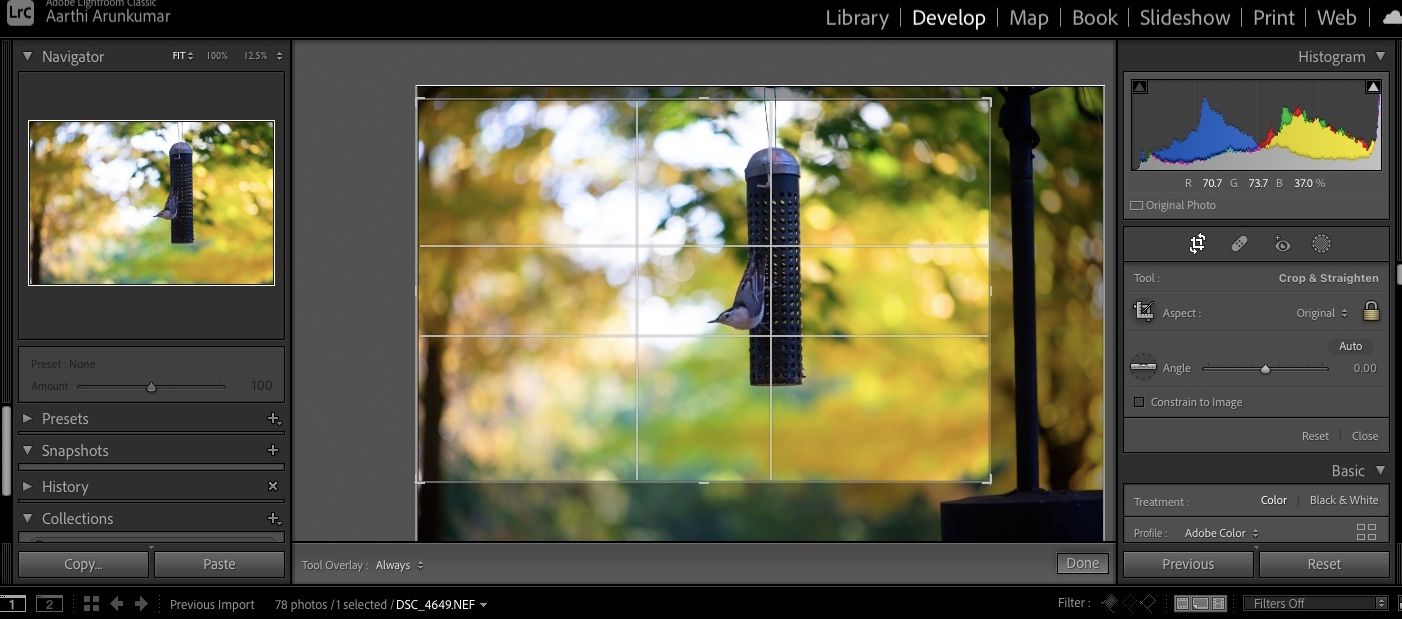
Step 7
Time to edit your photos.
Remember to do all your edits on your RAW file.
The whole point of shooting in RAW mode is to capture all the information.
Try using presets if you want a quicker workflow.
See our guide tocreating your own presets in Lightroom.
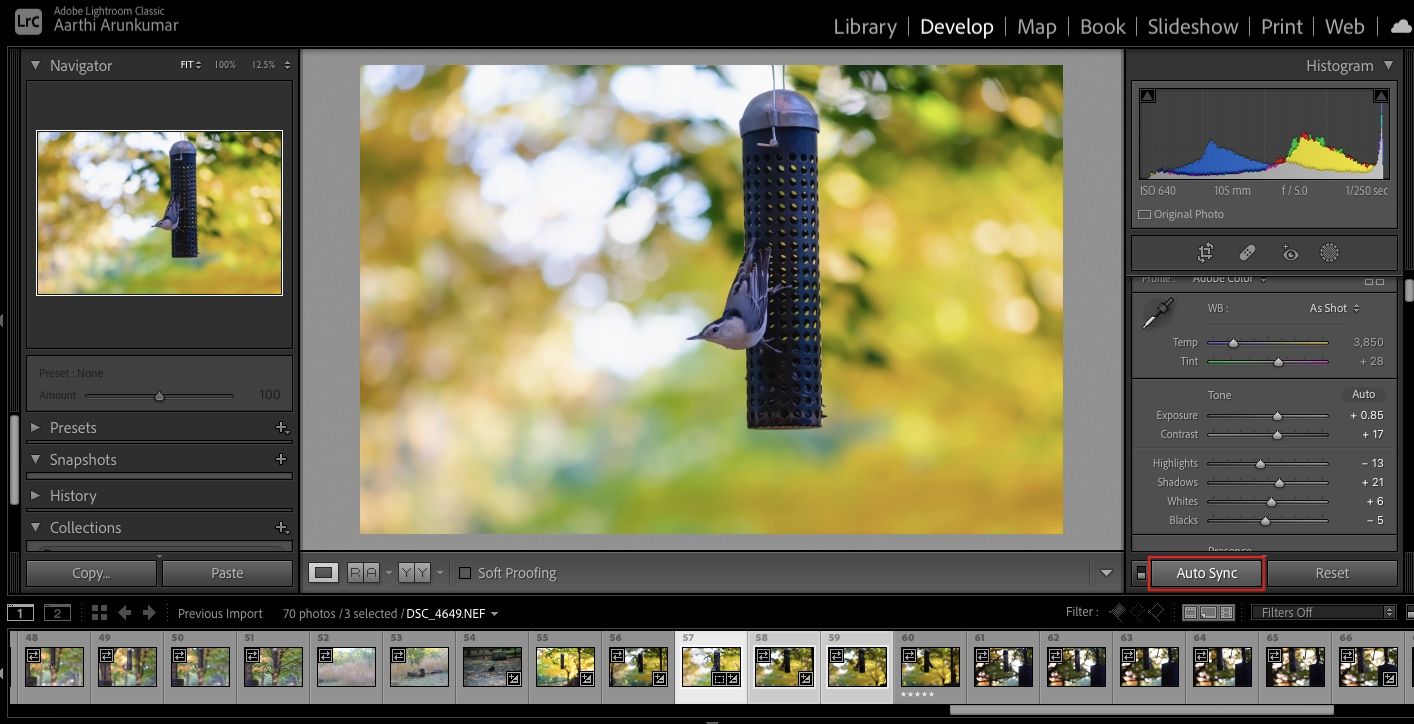
First, select all the images you want to sync, then, click theAuto Syncbutton.
you’re free to customize the sync options.
you’ve got the option to also sync your metadata and keywords in the Library module.
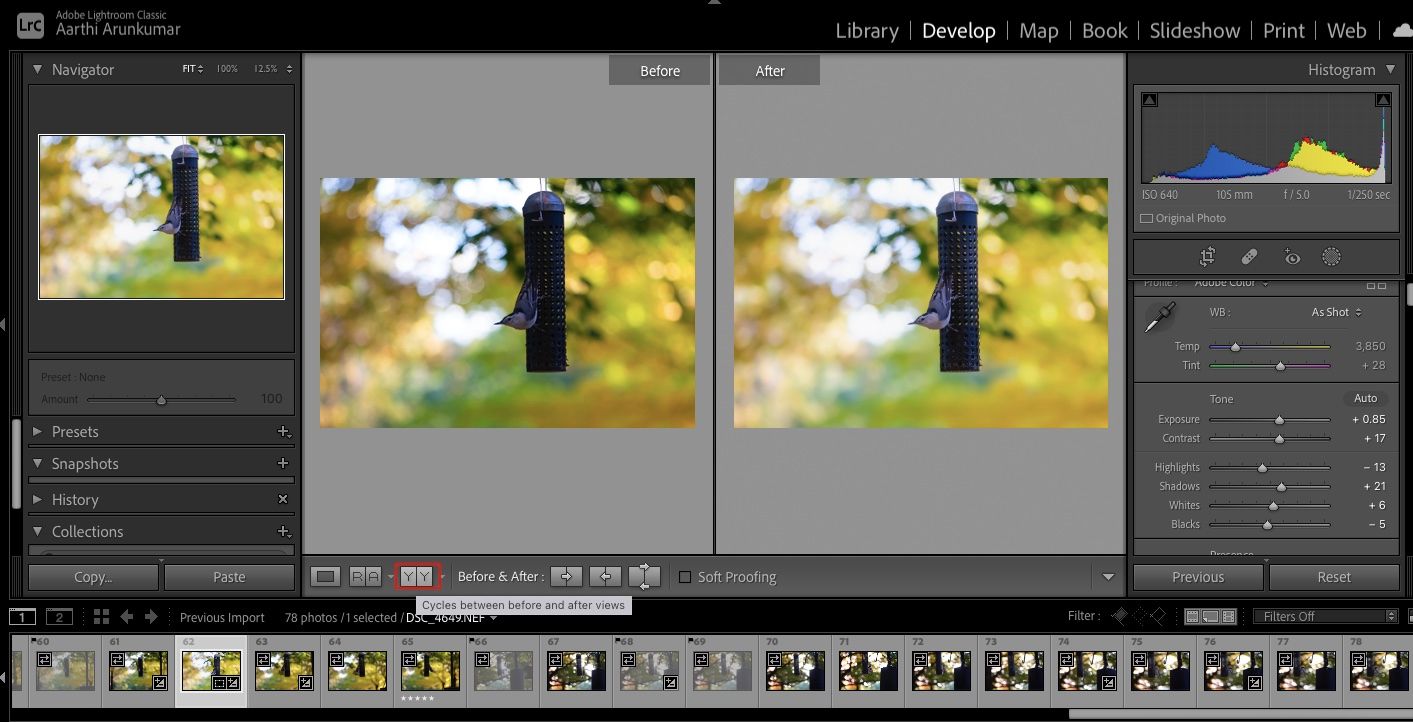
you’ve got the option to do this by clicking theYYbutton on the bottom panel.
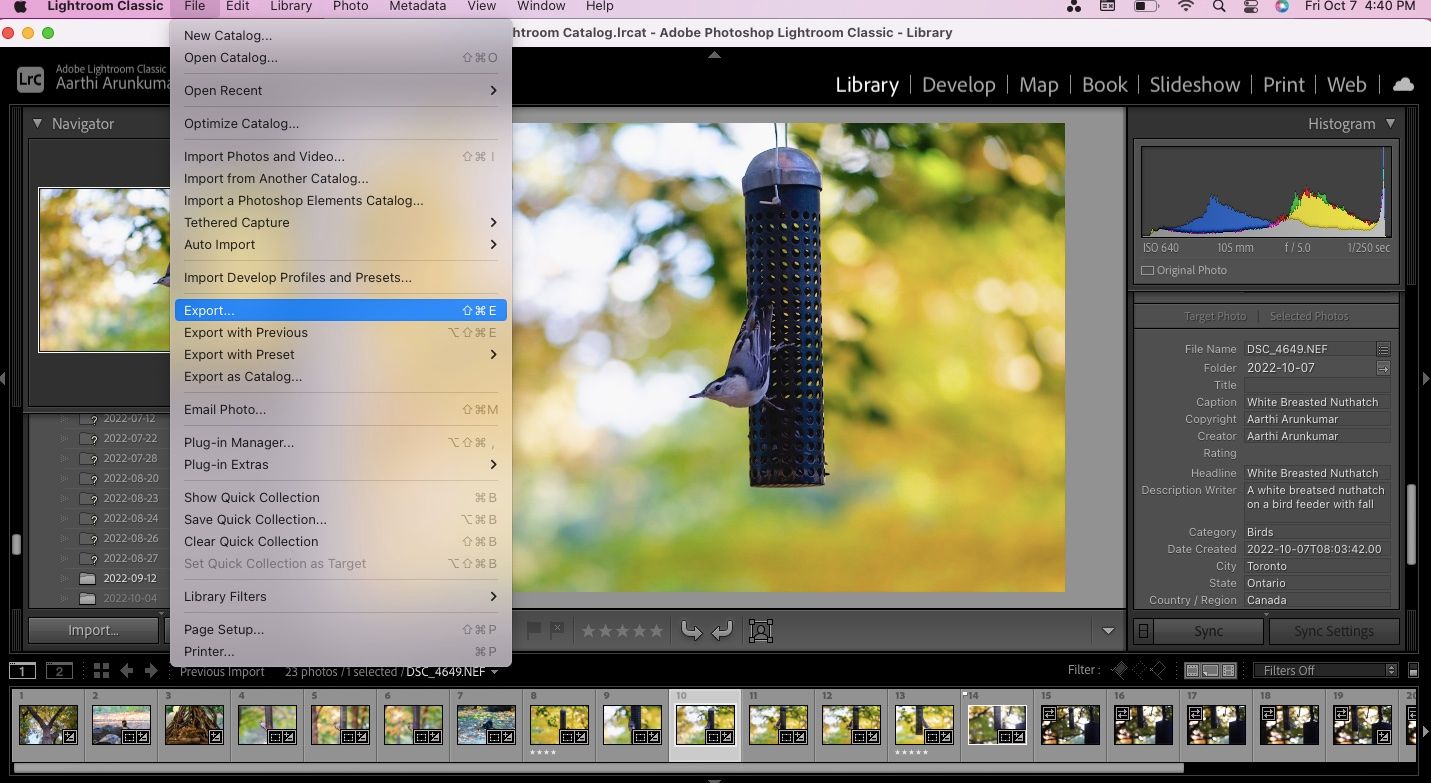
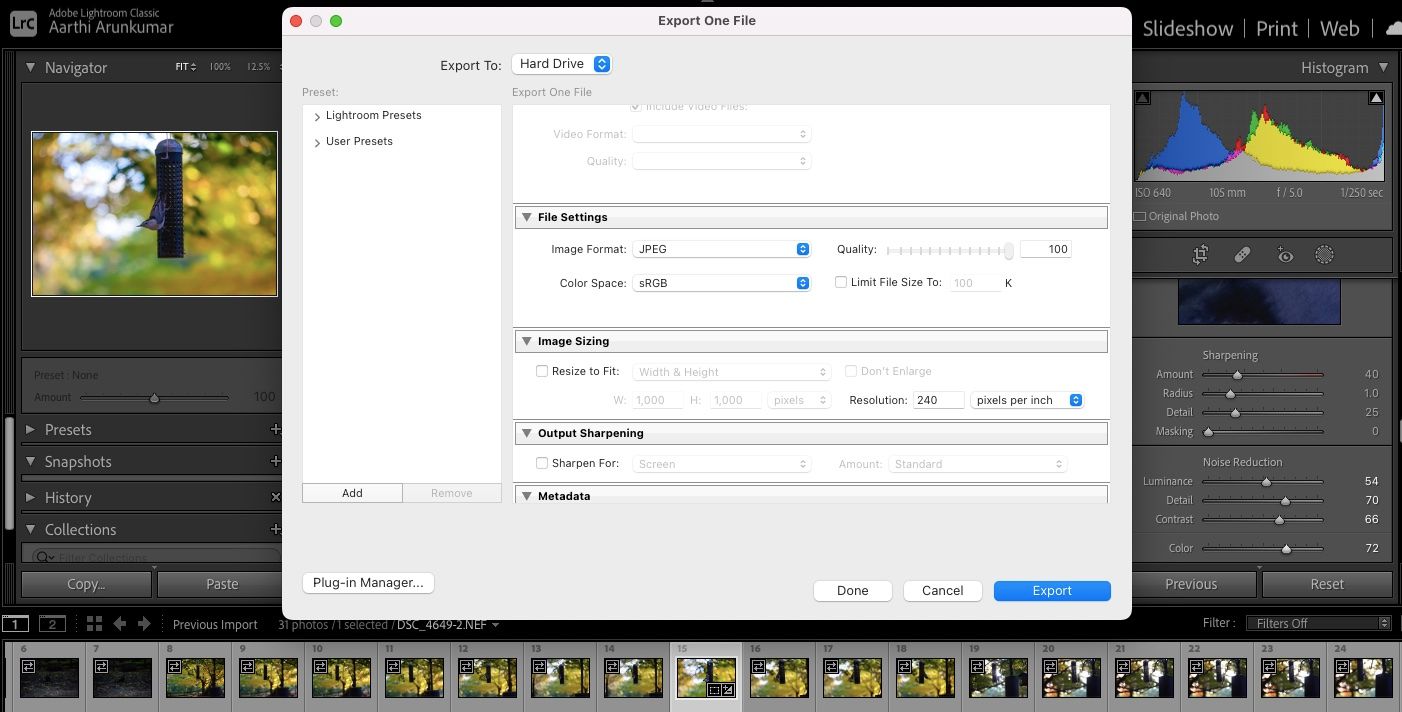
Step 10
Export your photos to the desired location.
Go toFile>Export.
Set the export location.
SelectJPEGas theImage FormatunderFile controls.
Your JPEG is ready for use and sharing.
The above steps are suitable for a small batch of files.
Shooting in RAW format and then converting to JPEG can instantly elevate the look of your photos.
