Why Is a Pi KVM Different?
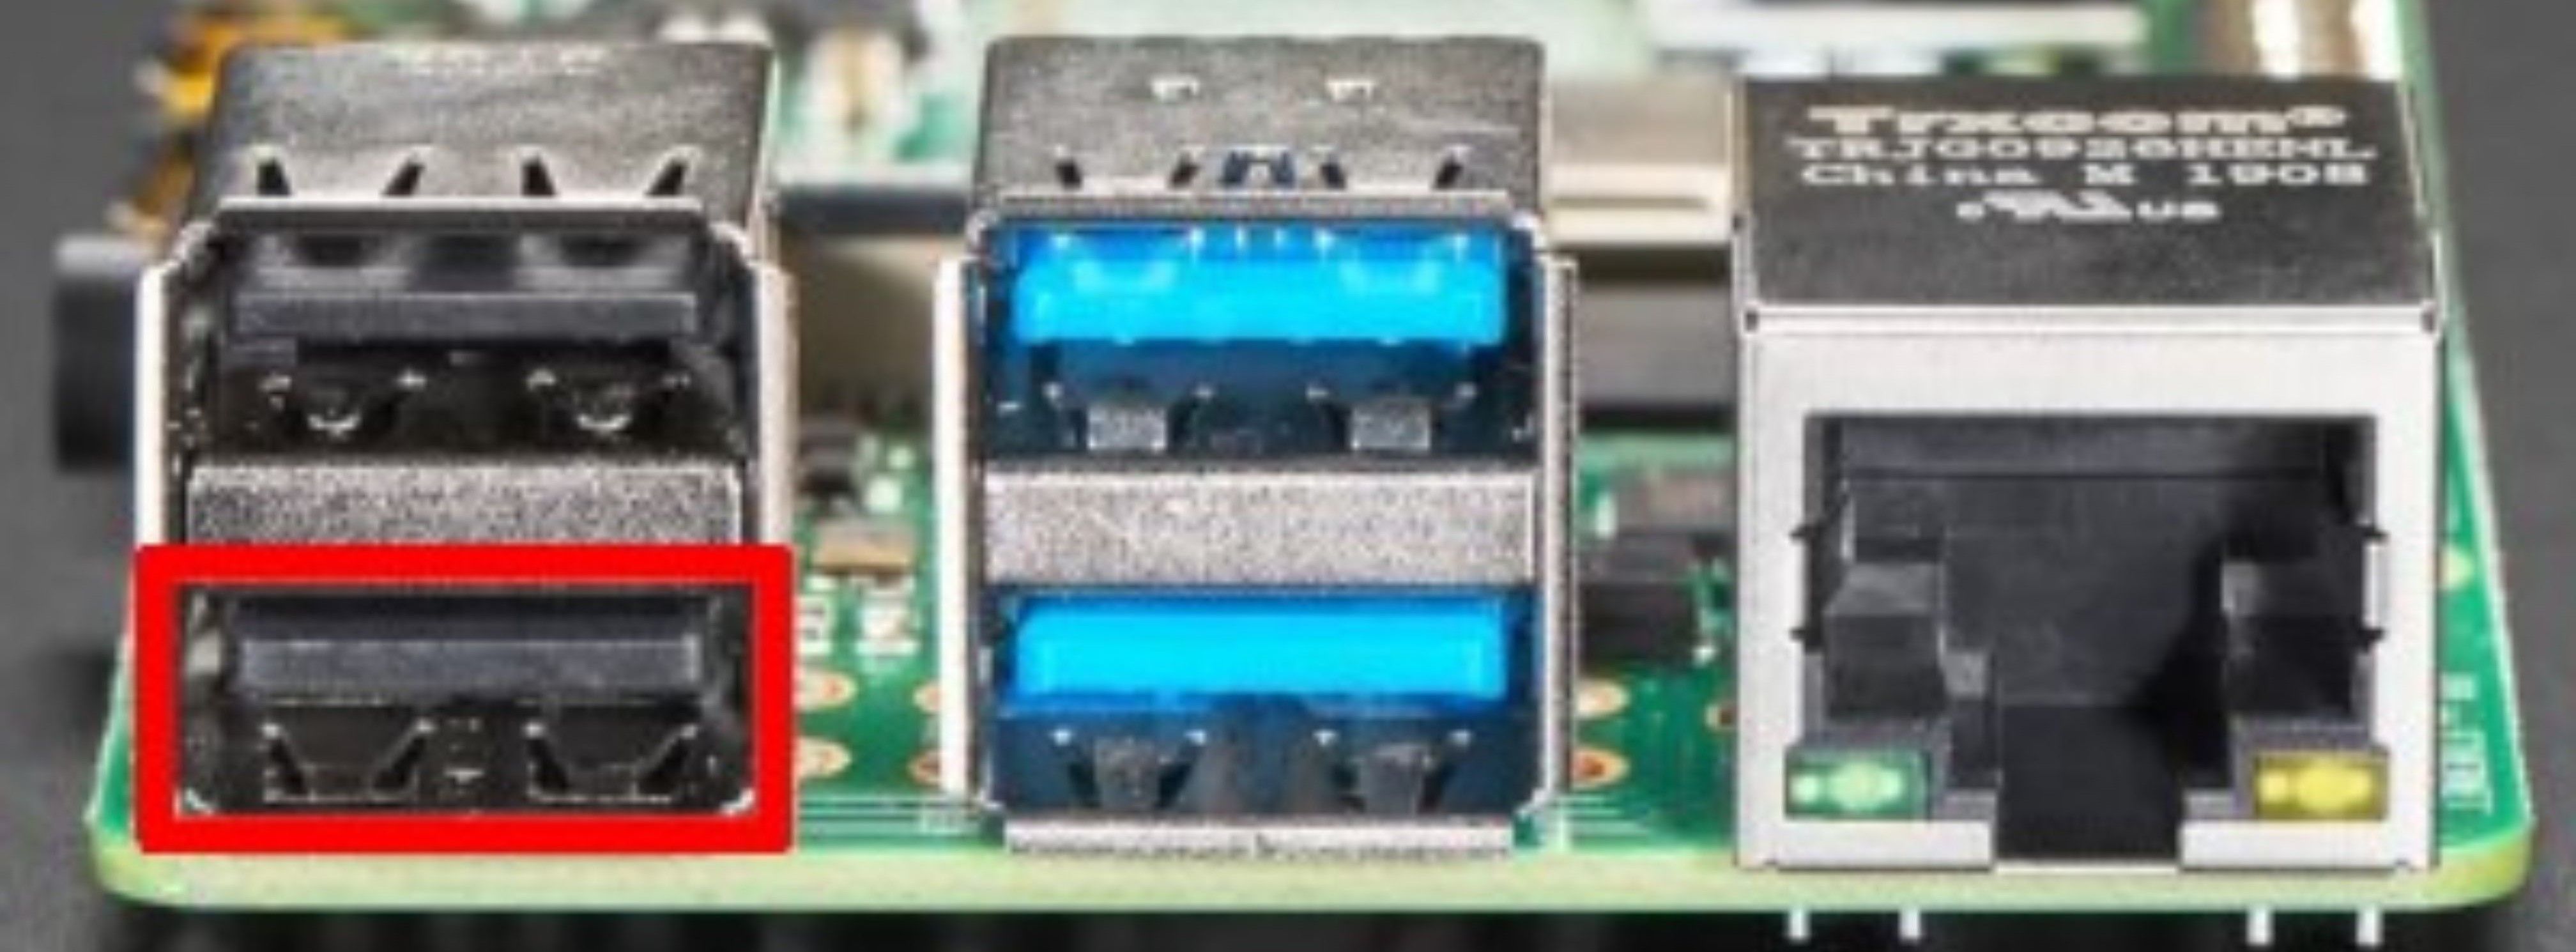
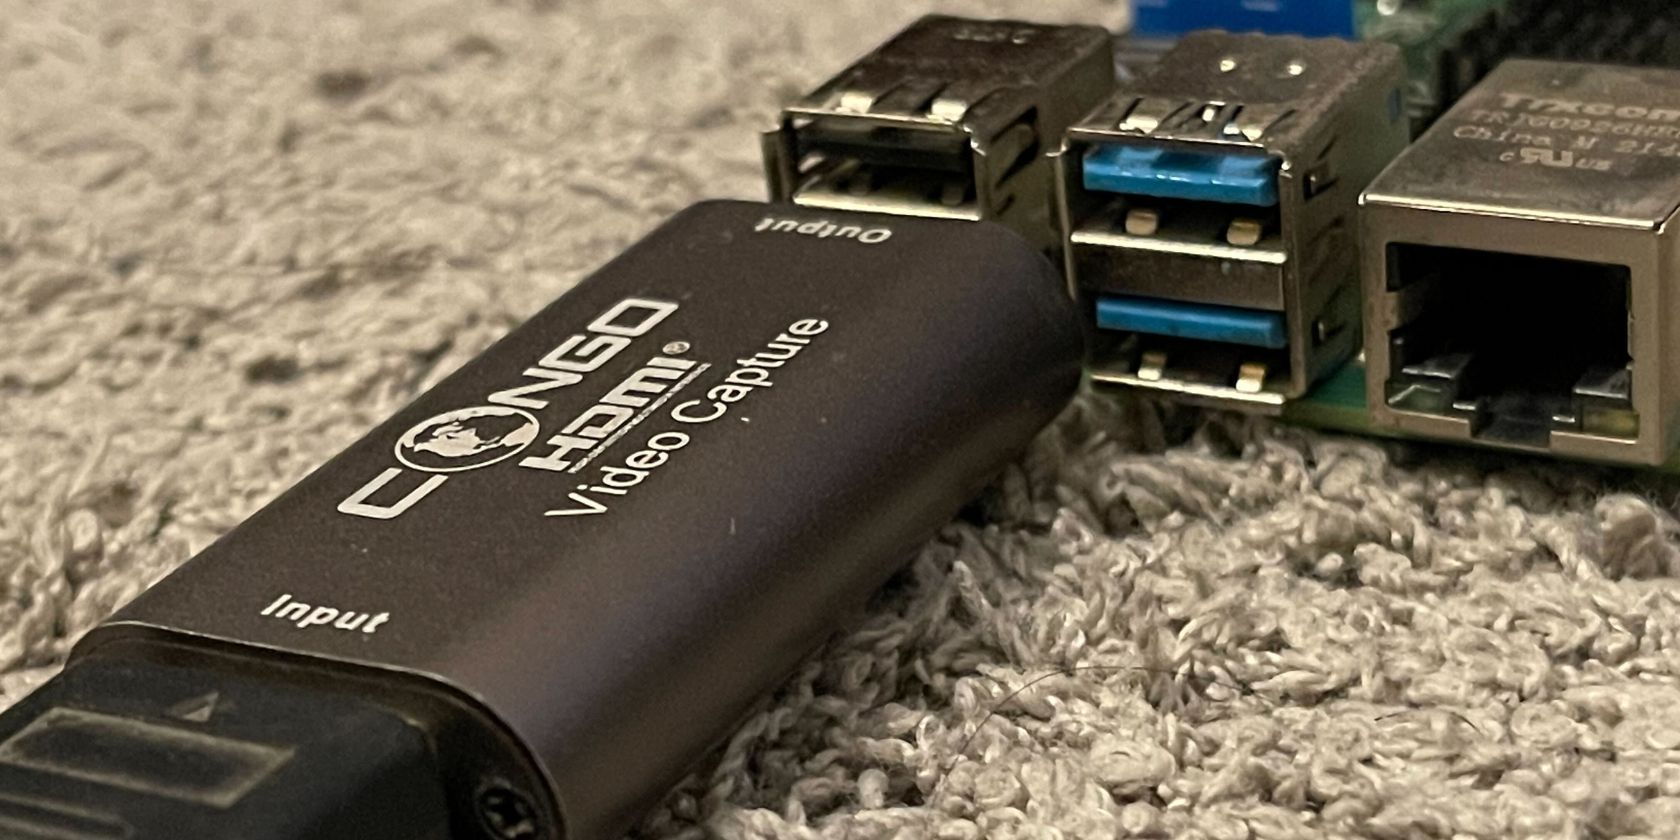
There are two different ways to capture the video when you choose to build your own Pi KVM.
you could choose either, based on the available Raspberry Pi board.
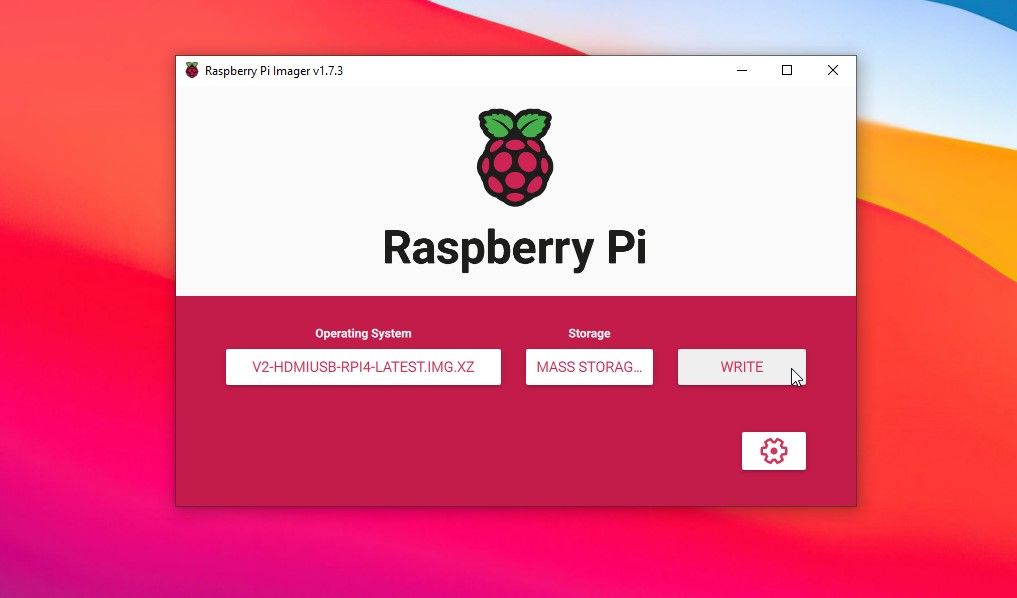
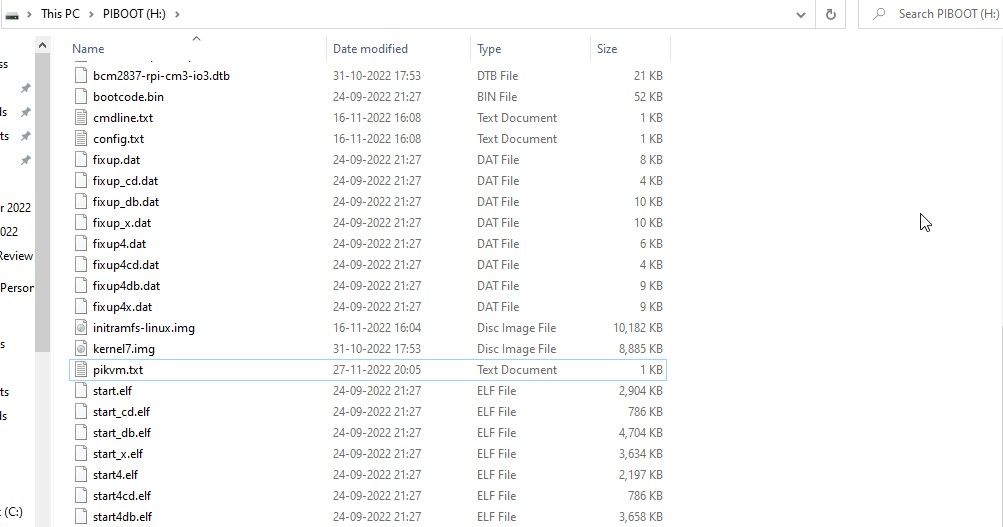
Then stick to this to flash the microSD card with the Pi KVM OS image.
initiate the file in Notepad and paste the following lines below theFIRST_BOOT=1line and replace the Wi-Fi SSID and password.
Set Up the Pi KVM
The first boot process will take longer to complete.
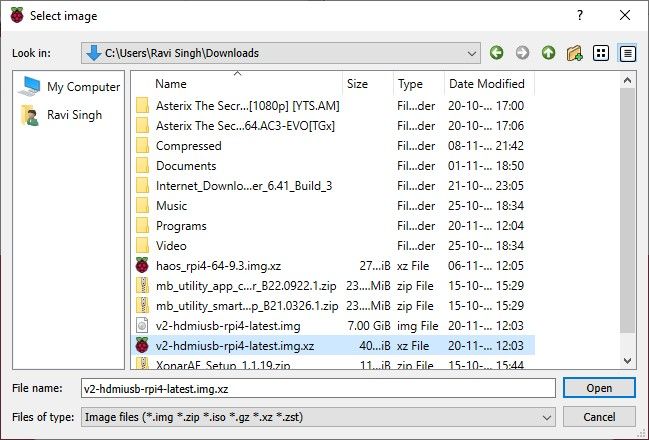
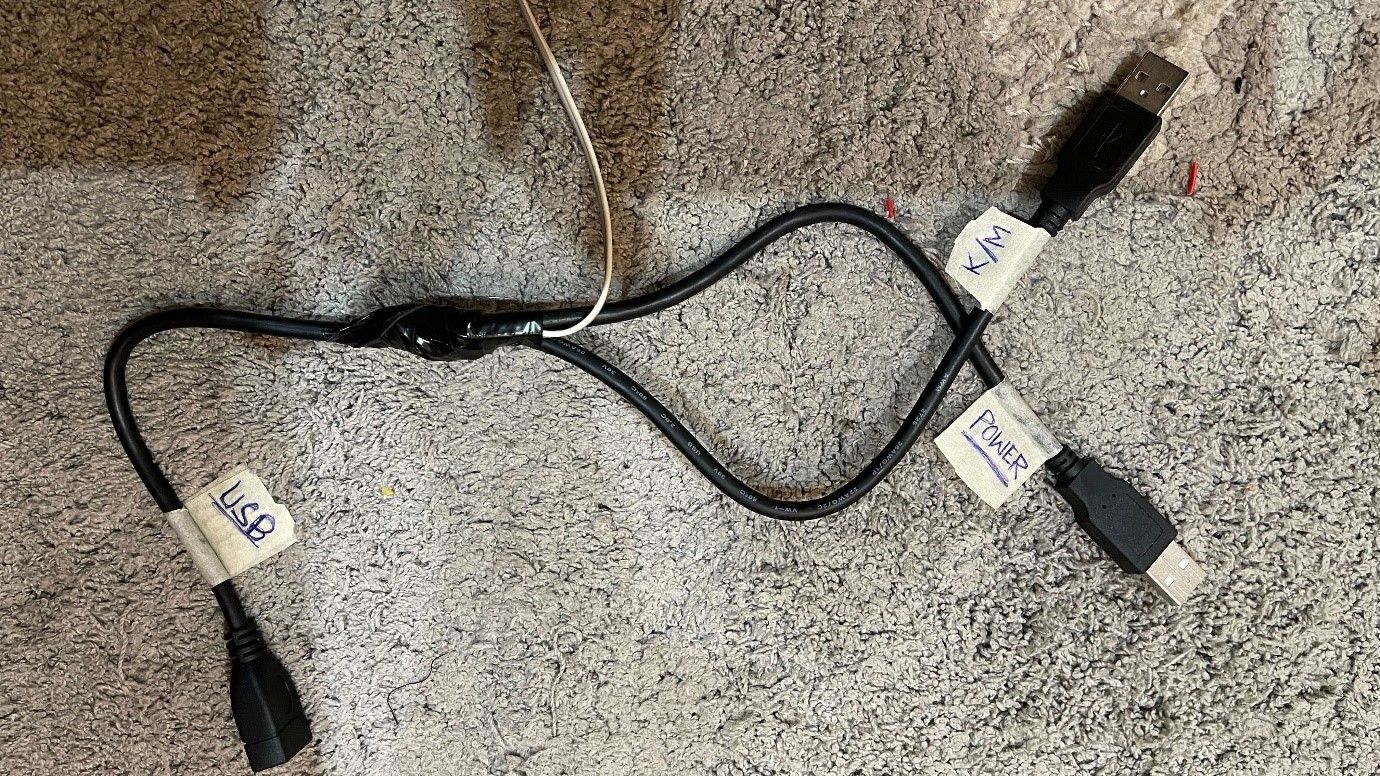
Captured by Ravi. No attribution required
Once it is complete, open your router configuration and go to the DHCP parameters.
Find the IP address of the connected Raspberry Pi or Pi KVM.
You may also use the Fing app on your smartphone to scan your internet and find the IP address.
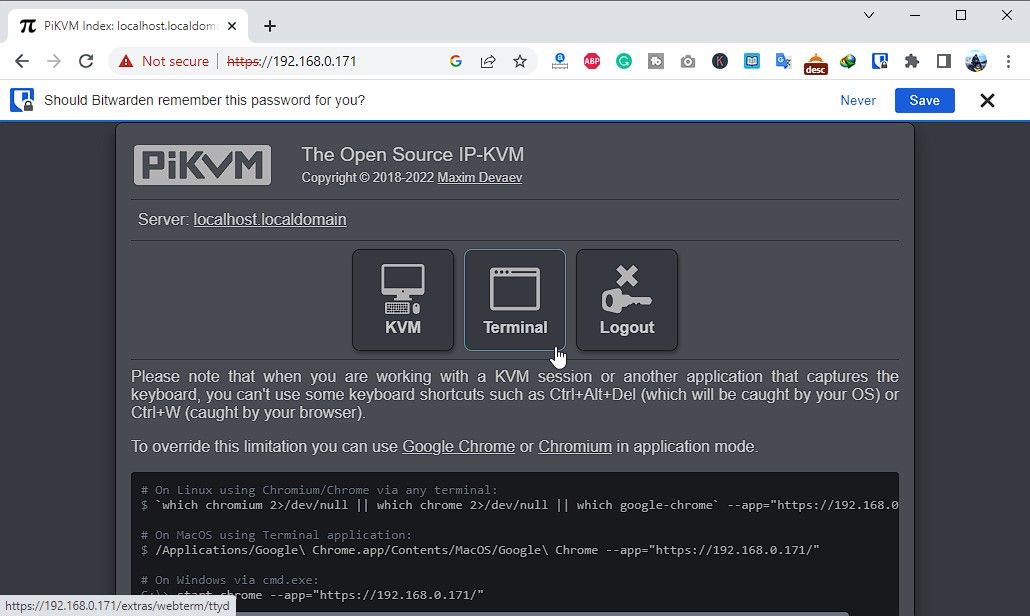
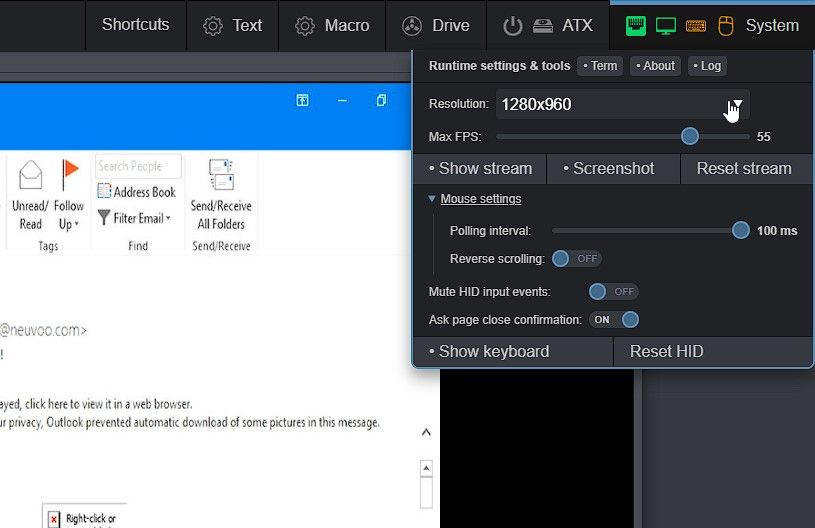
This will load the Pi KVM login page.
Enter “admin” for both username and password, then clickLogin.
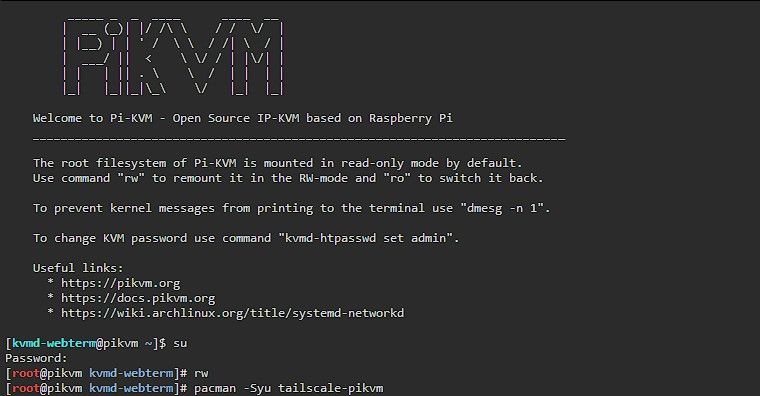
ClickTerminaland then stick to this to enable read/write permissions and update the Pi KVM.
jump in as a superuser (root user).
The password is root by default.
It can take several minutes to complete.
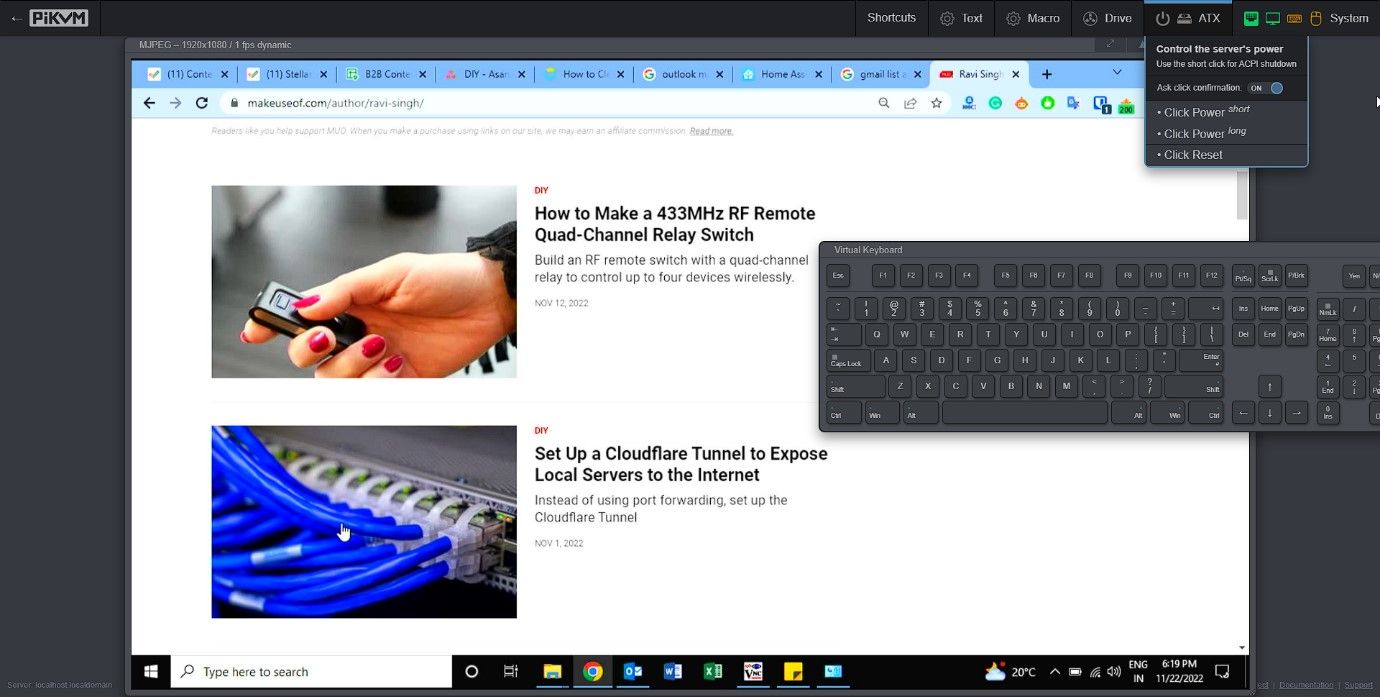
it’s possible for you to now get into the PC or the server remotely.
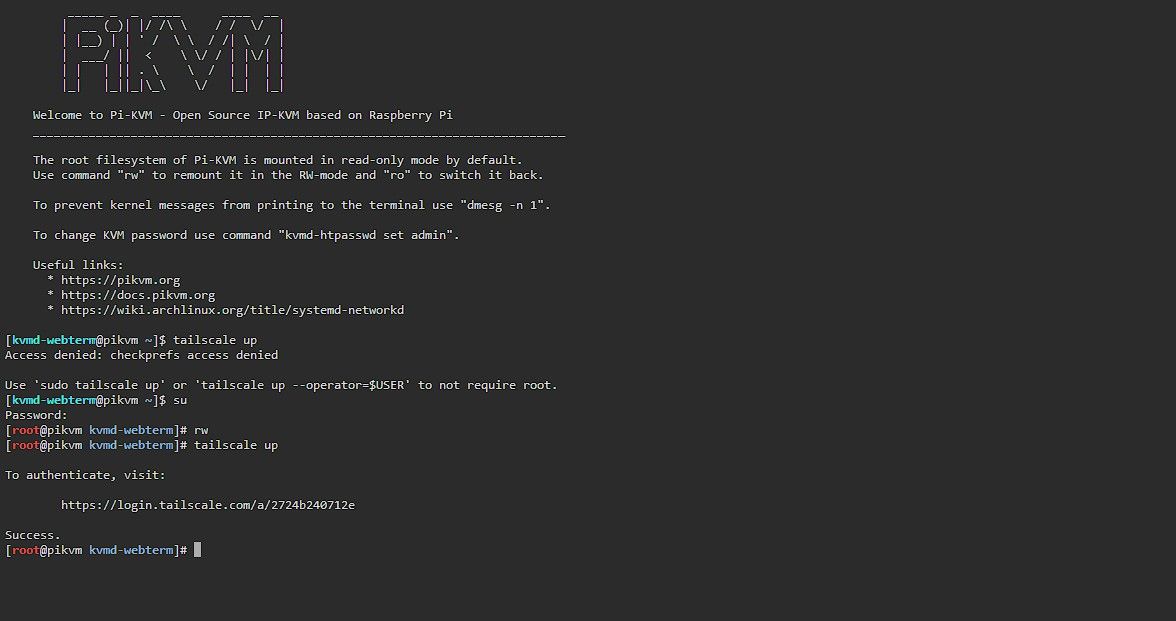
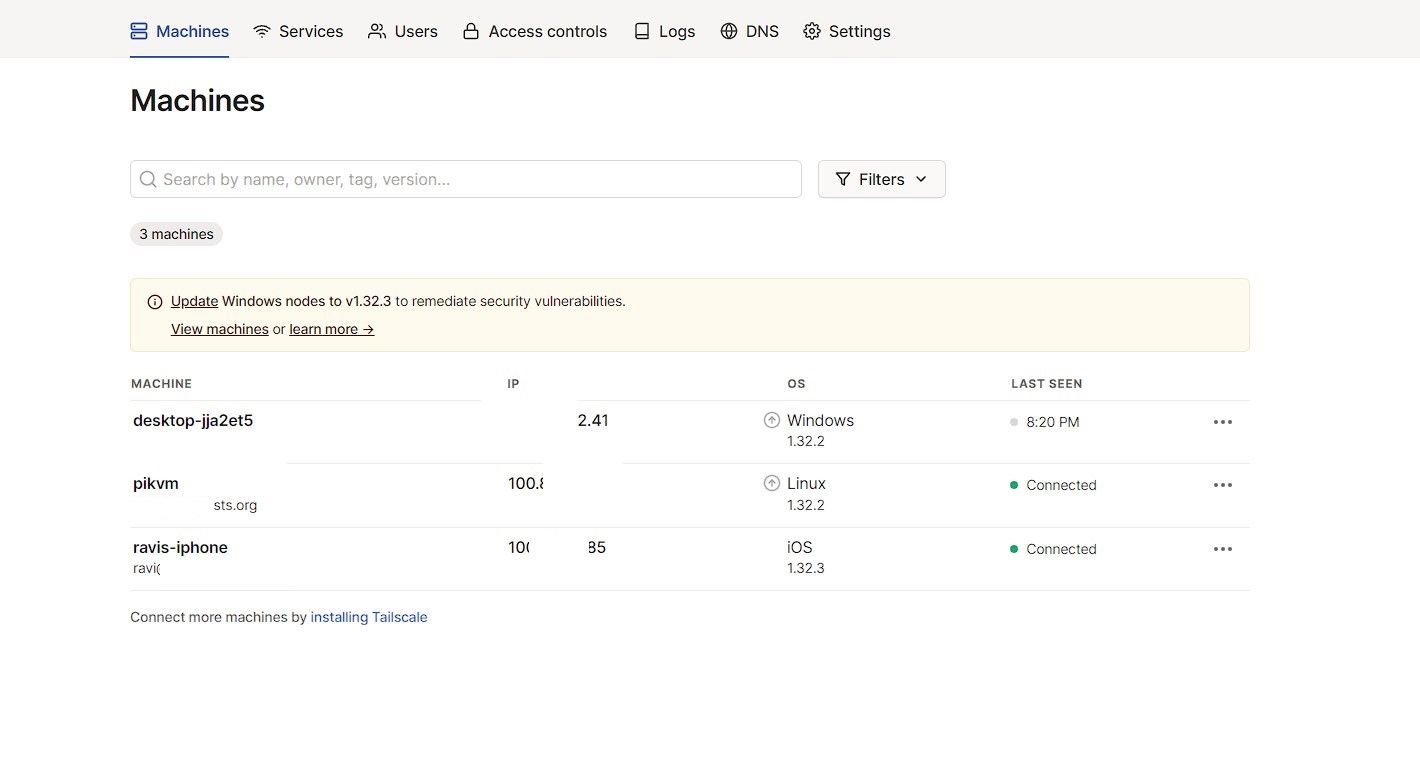
Alternatively, you may also install and use the TailscaleVPN to access your Pi KVM from anywhere.
To install and set up Tailscale, initiate the following commands in the Terminal app.

This will install Tailscale and enable auto-start for it if the Pi KVM reboots.
This will display a URL.
Copy the URL to the web web app and authorize.

Captured by Ravi. No attribution required
To learn more, you could visit thePi KVM GitHubpage.
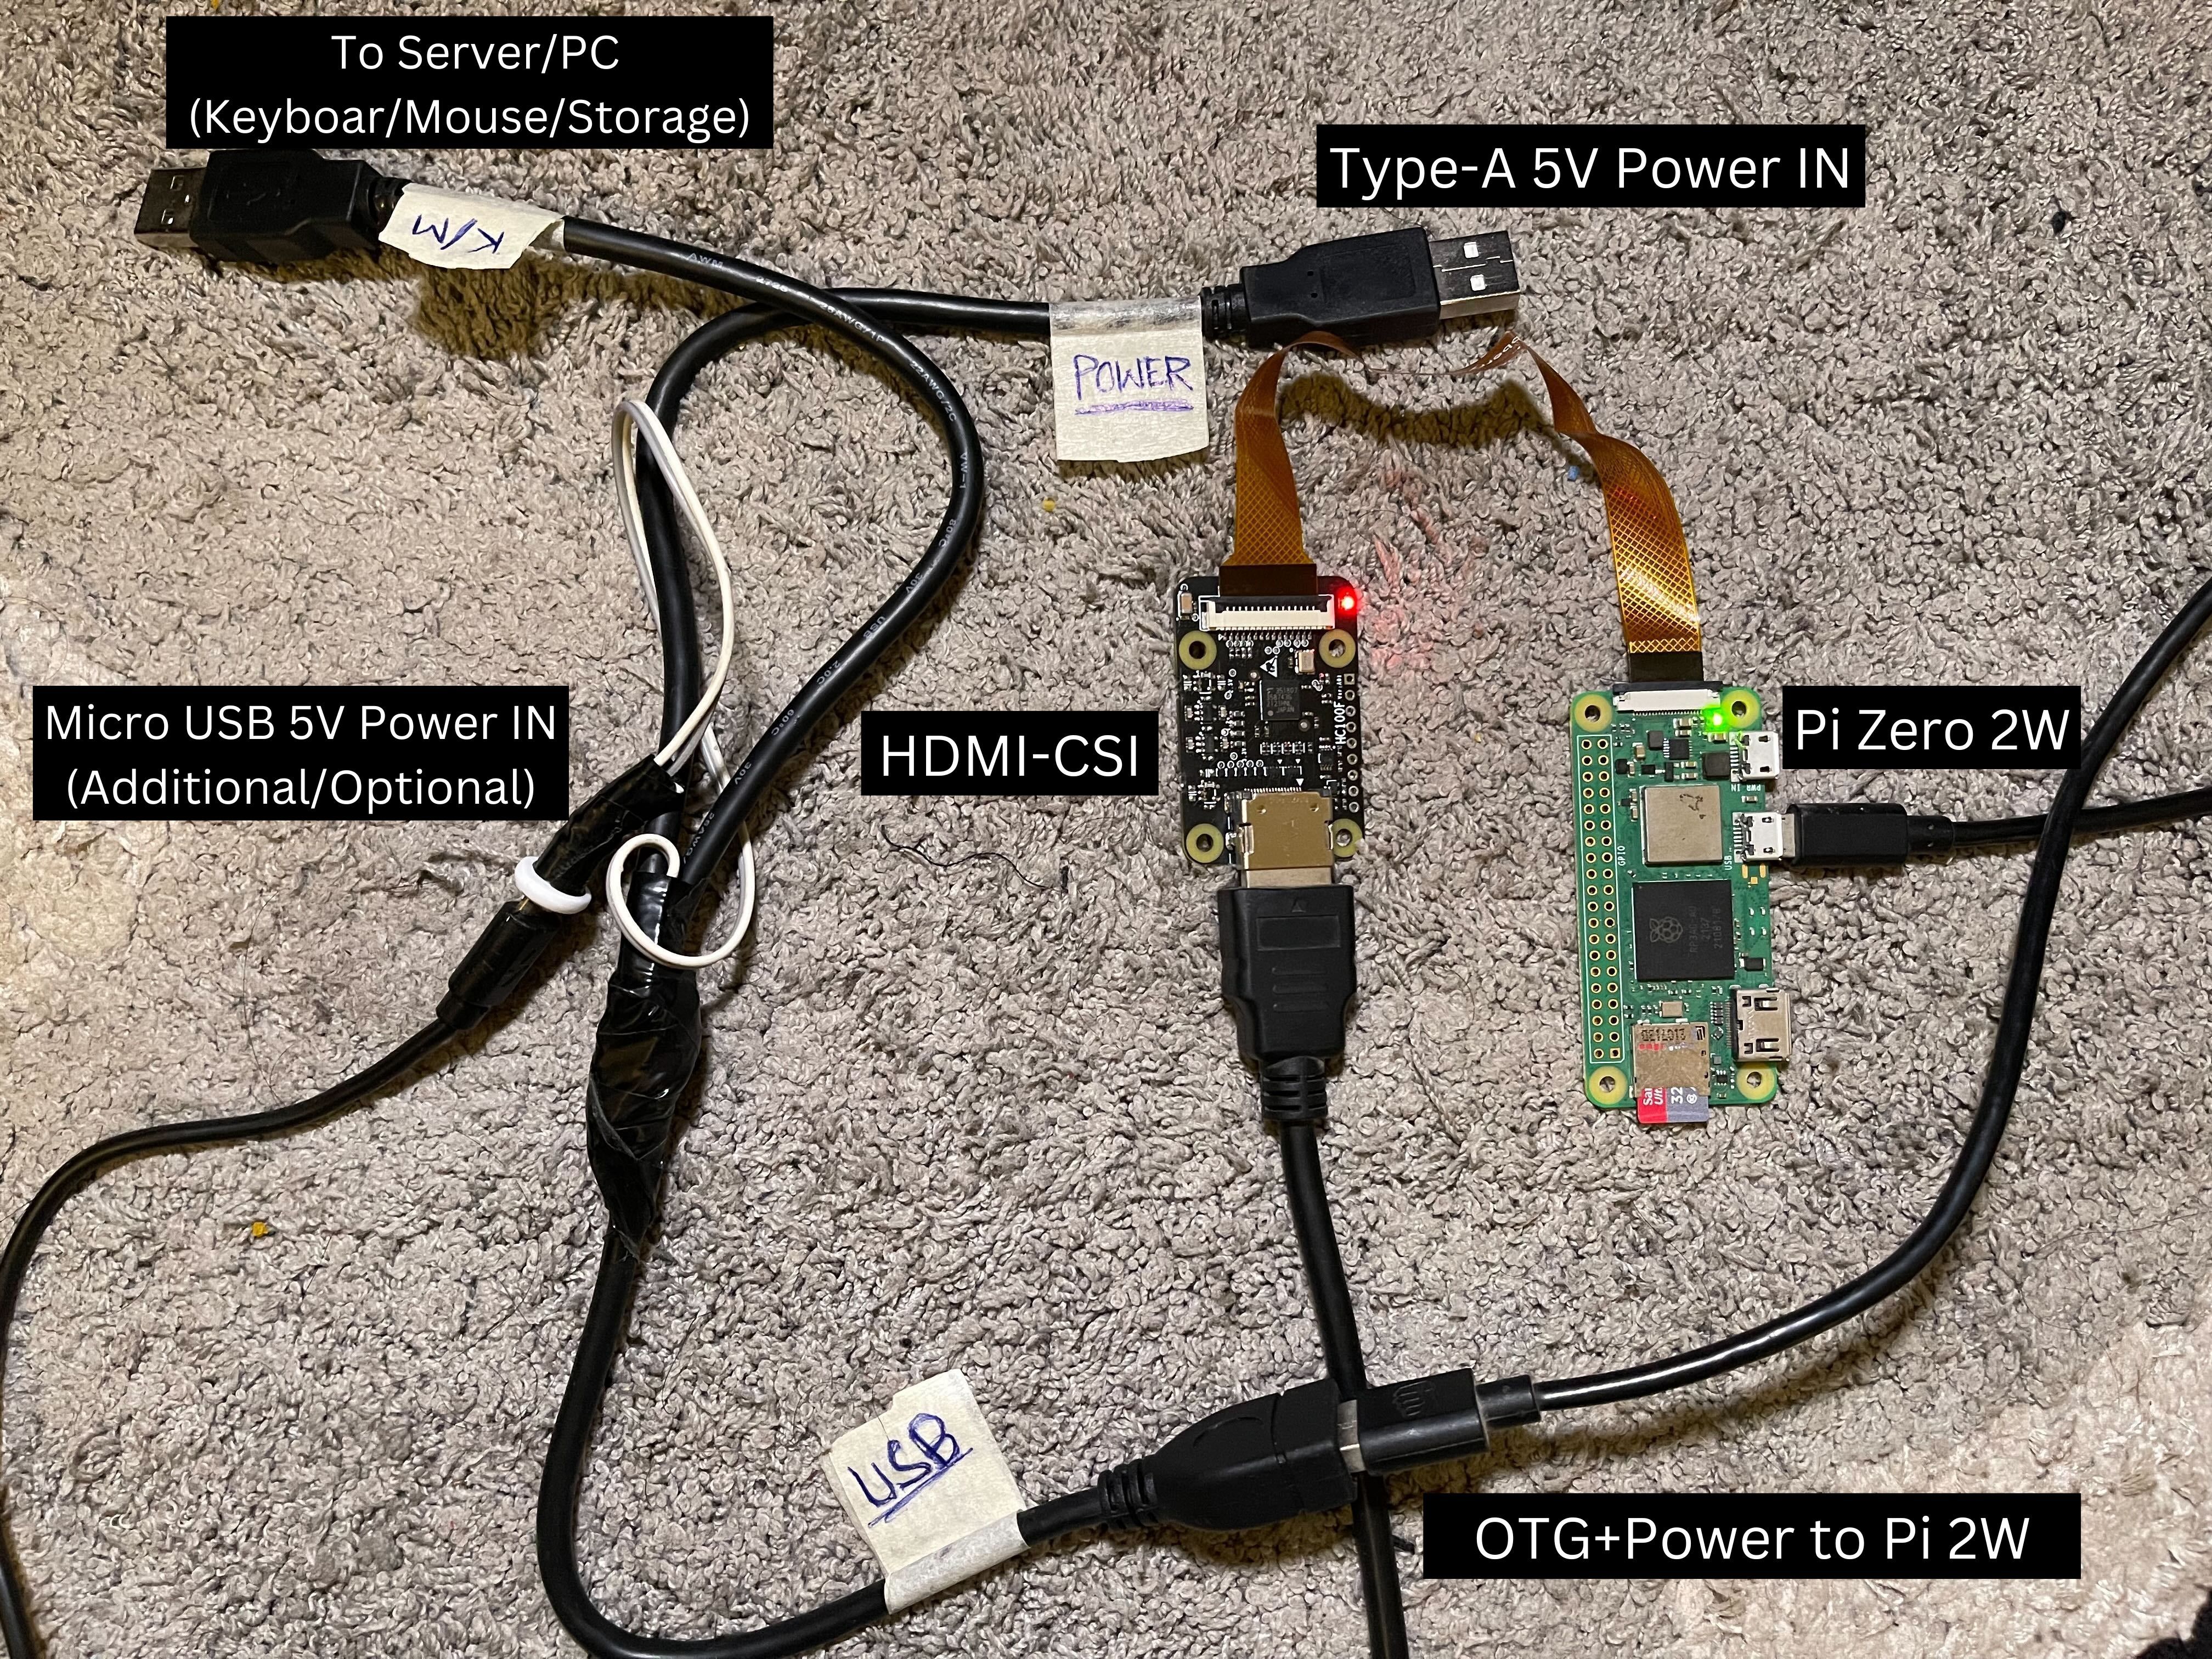
You may also use a Raspberry Pi Zero 2 W to reduce the overall build cost and footprint.