you might install it anywhere with a decent Wi-Fi range.
The ESP32-CAM will connect to the data pipe and display an IP address.
Note it down and visit the IP in your web online window.
Assign a permanent IP to your ESP32-CAM via your router’s DHCP parameters.
This is important to keep the IP address of the ESP32-CAM same after the restart.
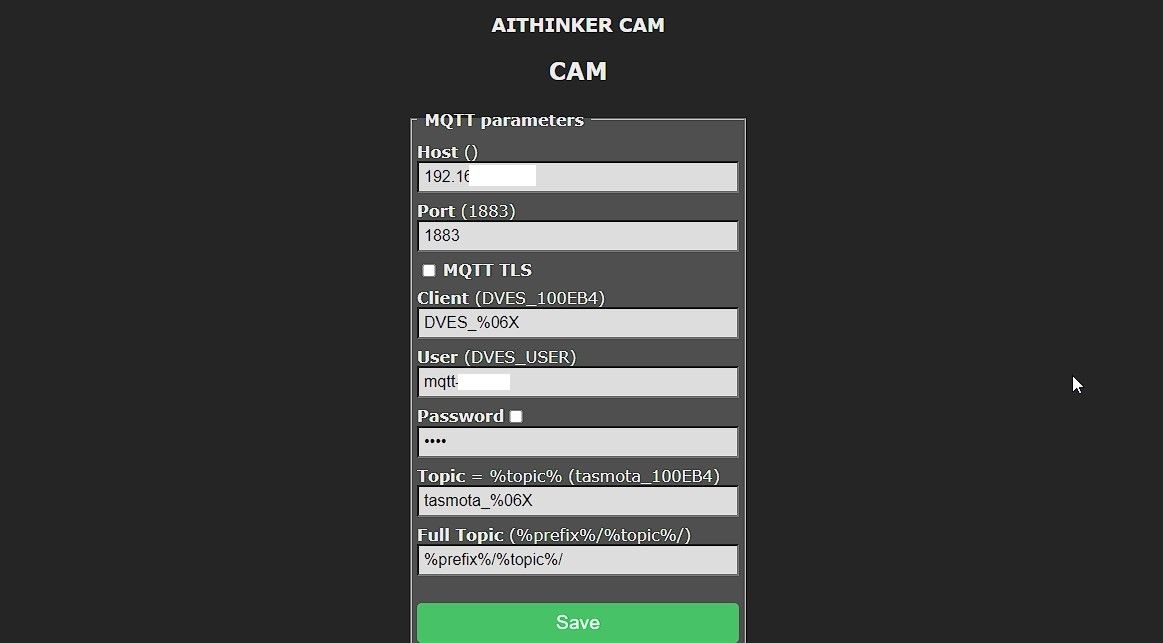
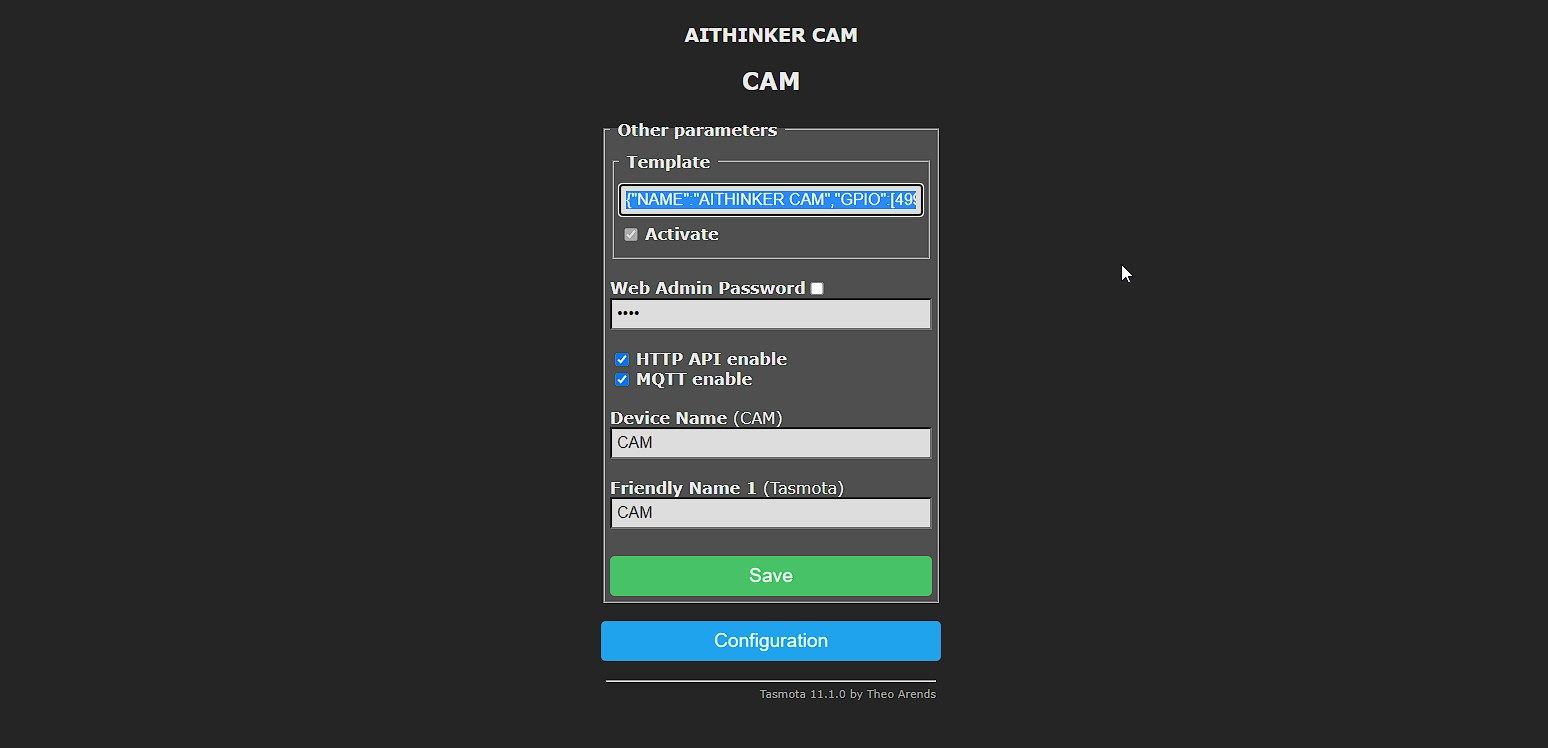
Now, go toConfiguration > Configure Otherand paste the following under theTemplatefield and then click onSave.
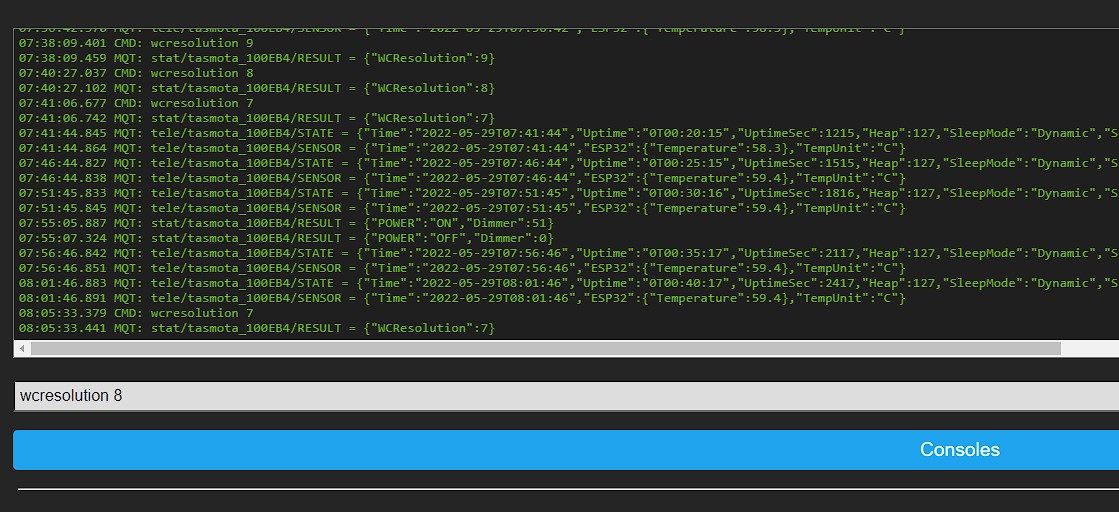
The default resolution is low, and you may see a blurred stream.
However, you’ve got the option to easily change the resolution by using thewcresolutioncommand.
you could adjust the frame size or resolution between96x96to1600x1200.
However, in our testing, we found480x320and640x480to be more stable with frame rates and ESP32-CAM temperature.
To set the resolution, visit the Tasmota Webcam IP address, clickConsoles> Console, and typewcresolution 7.
This will change the resolution to480x320.
Similarly, if you trigger the commandwcresolution 8, the resolution will change to640x480, and so on.
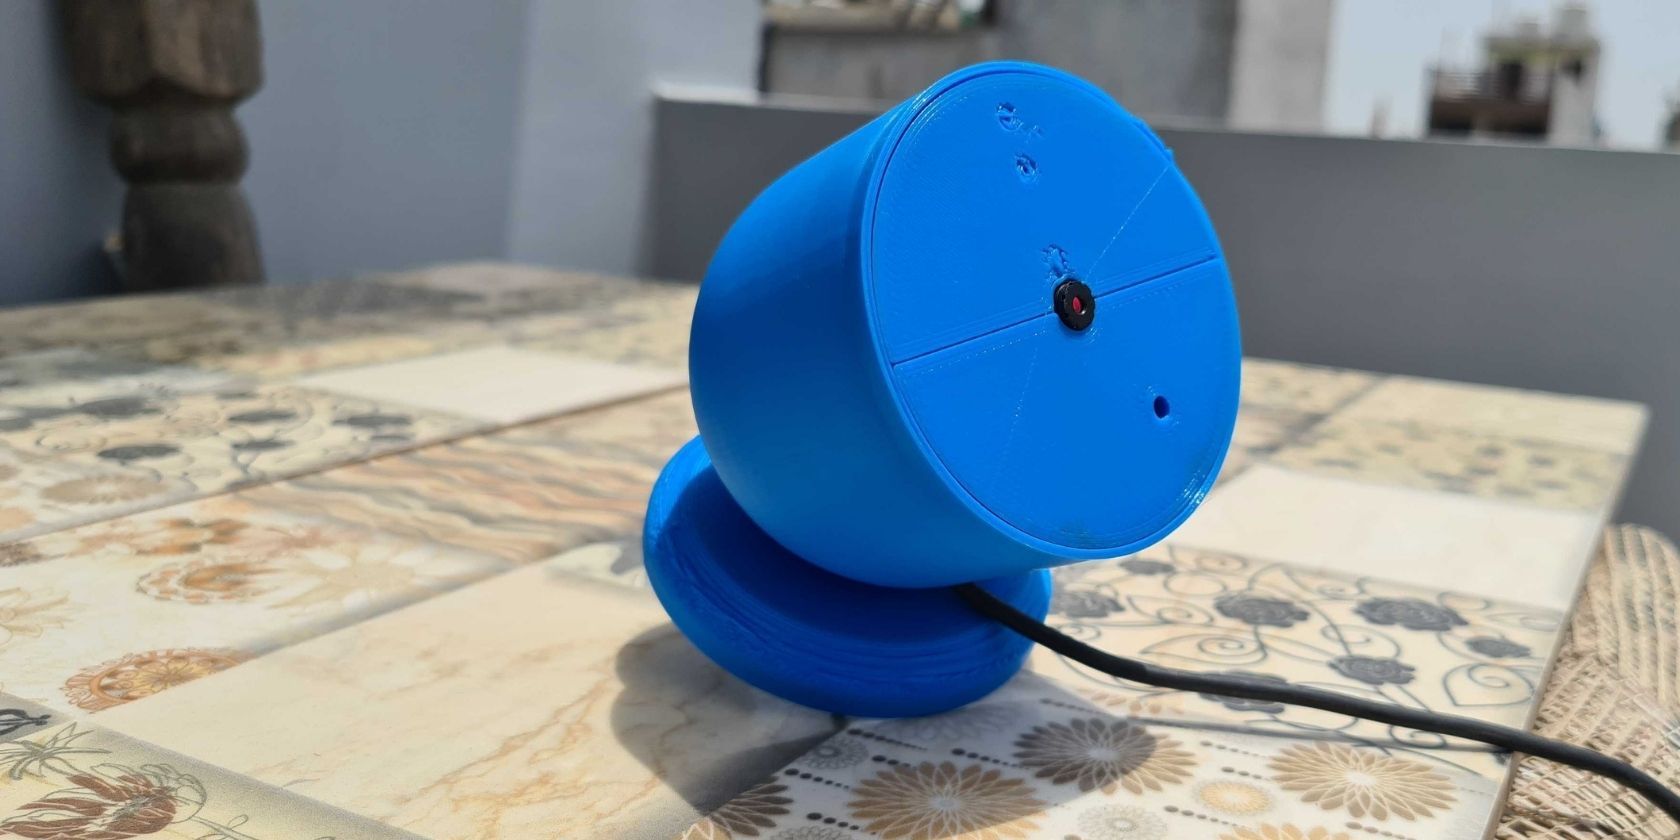
It’s also adjustable, and you’re able to easily screw it onto any wall or ceiling.
It also looks good if printed with good quality PLA or PETG filament.
It will also send you notifications on your phone.
You may also enable voice notification via Alexa.
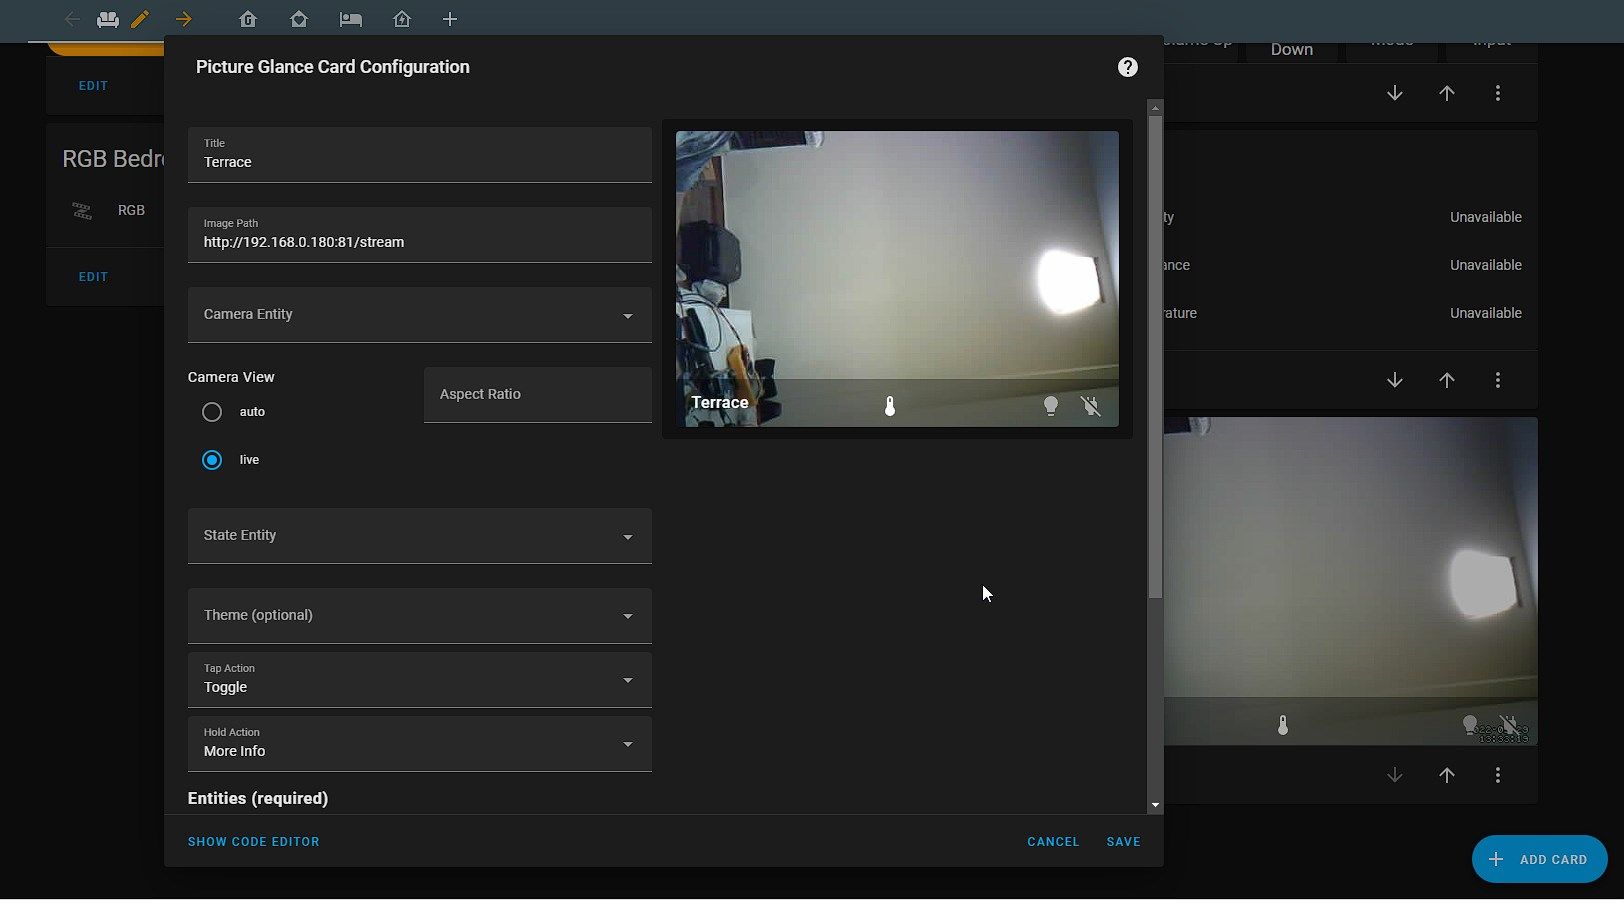
You may follow our guide toset up Home Assistant Server on a Raspberry Pi.
However, this will only display the live stream.
It won’t record or capture anything.
The camera can’t see or detect motion in the dark.

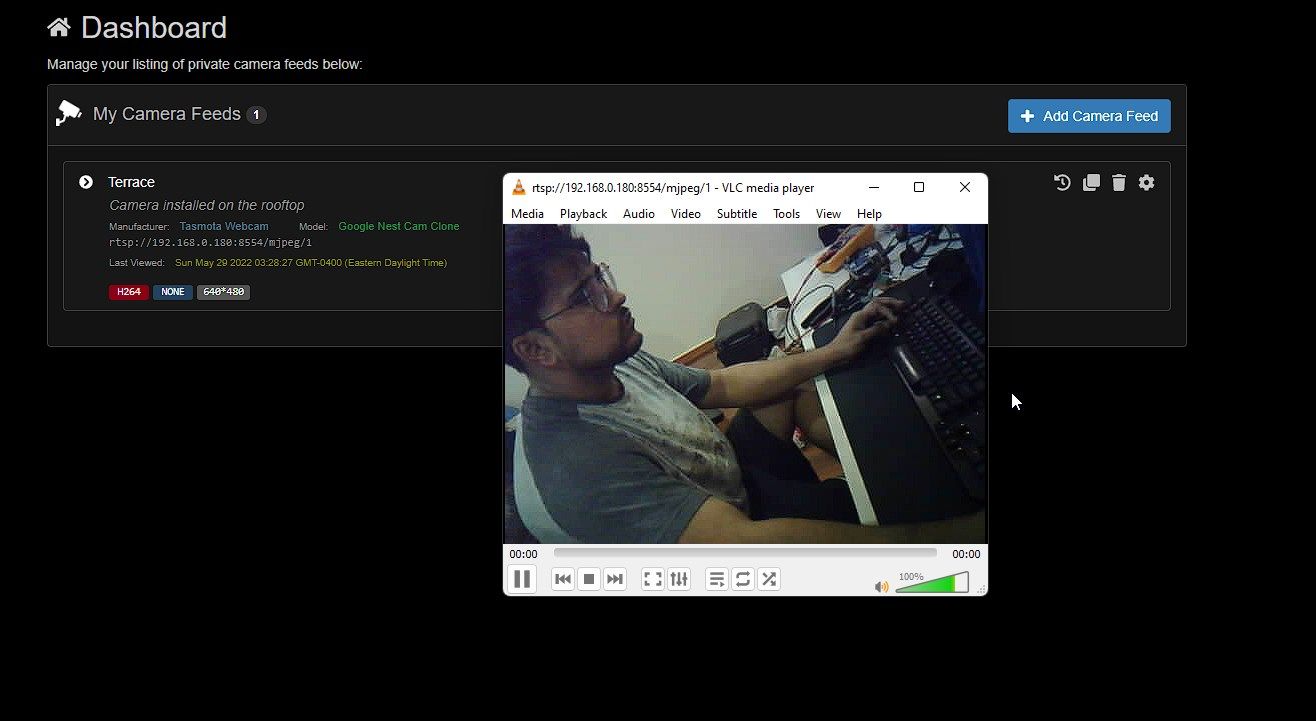
Now, paste the RSTP URL and clickPlay.
If the stream starts playing, it’s working.
However, you will need to install and set up theMonocle RTSP/RTP IP Camerasskill in the Alexa app.
Secure Your Home on a Budget
Cameras are perfect for securing your homes or offices.