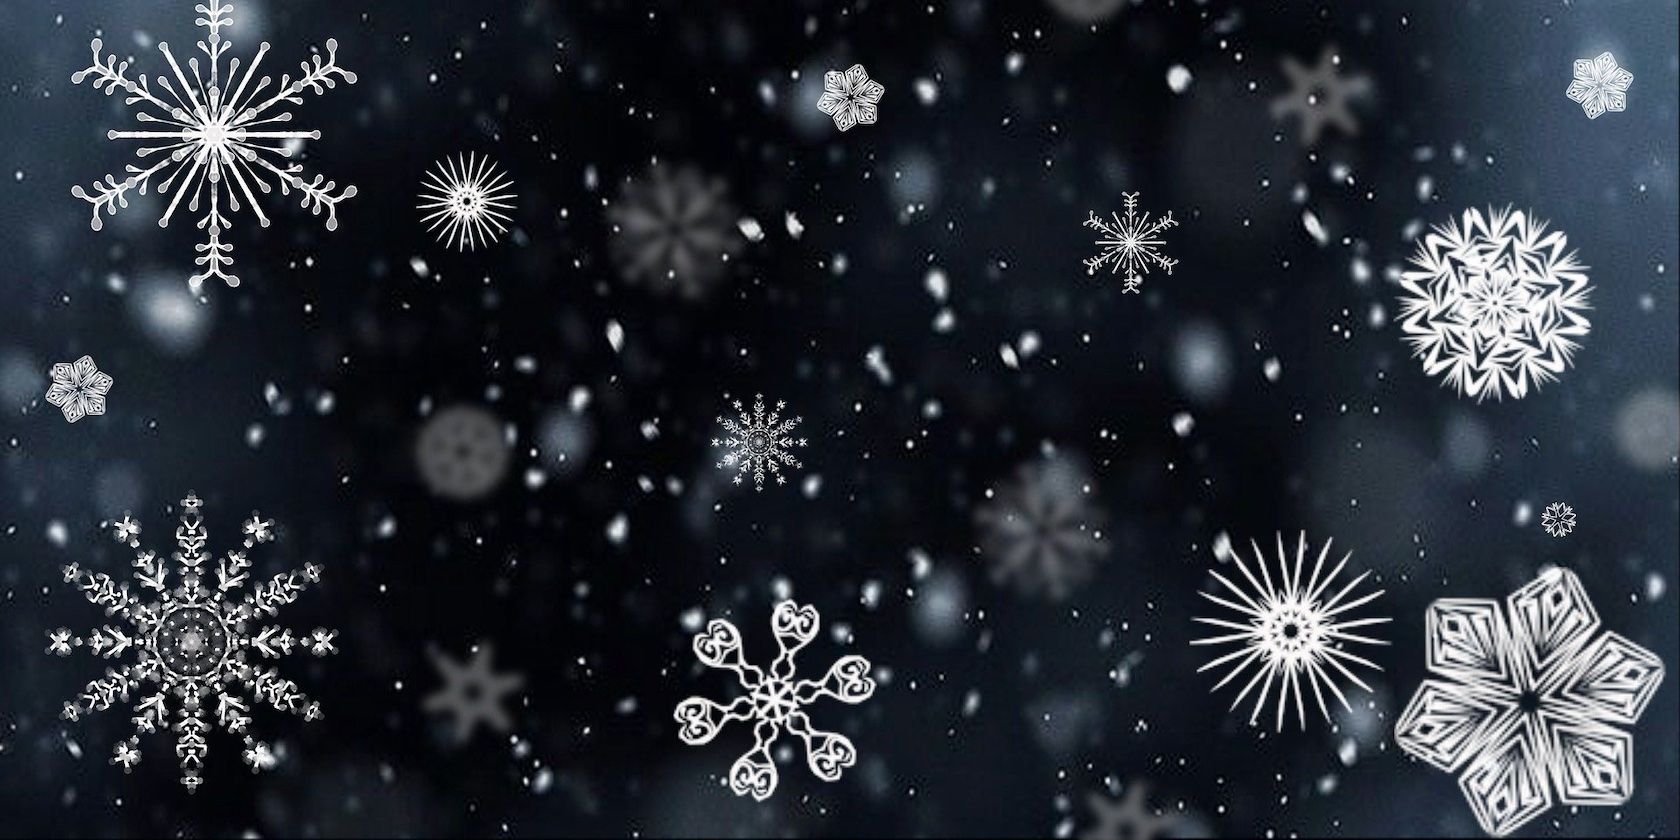
Nothing is more joyful than watching the fresh snow twirling in winter.
You’re mainly at Mother Nature’s mercy.
That’s why we have an easy solution to add animated snow to your projects.
Adding snow to your photographs, videos, or vectors is easy with Adobe After Effects.
Don’t have After Effects?
No worries, download a free trial for seven days.
Then, you’re able to buy it if you like it.
Let’s see how to do it step by step.
It only takes a couple of steps to animate snow.
If you’ve worked with other Adobe software, you’ll catch up with it soon.
Step 1
Open Adobe After Effects on your machine and clickNew Project.
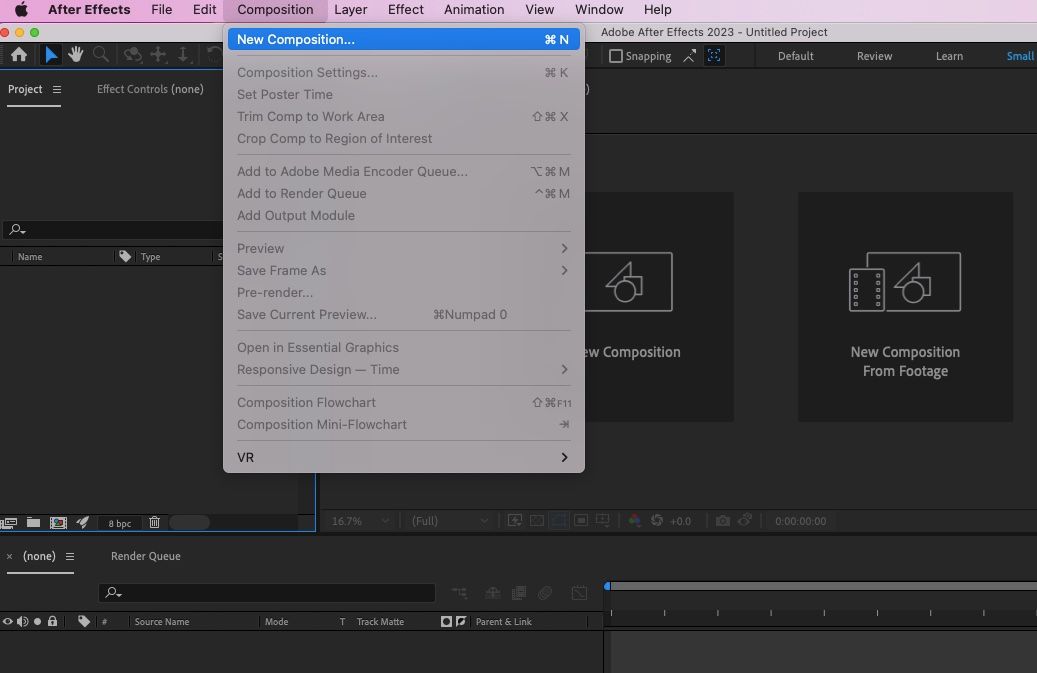
Go toComposition>New Composition.

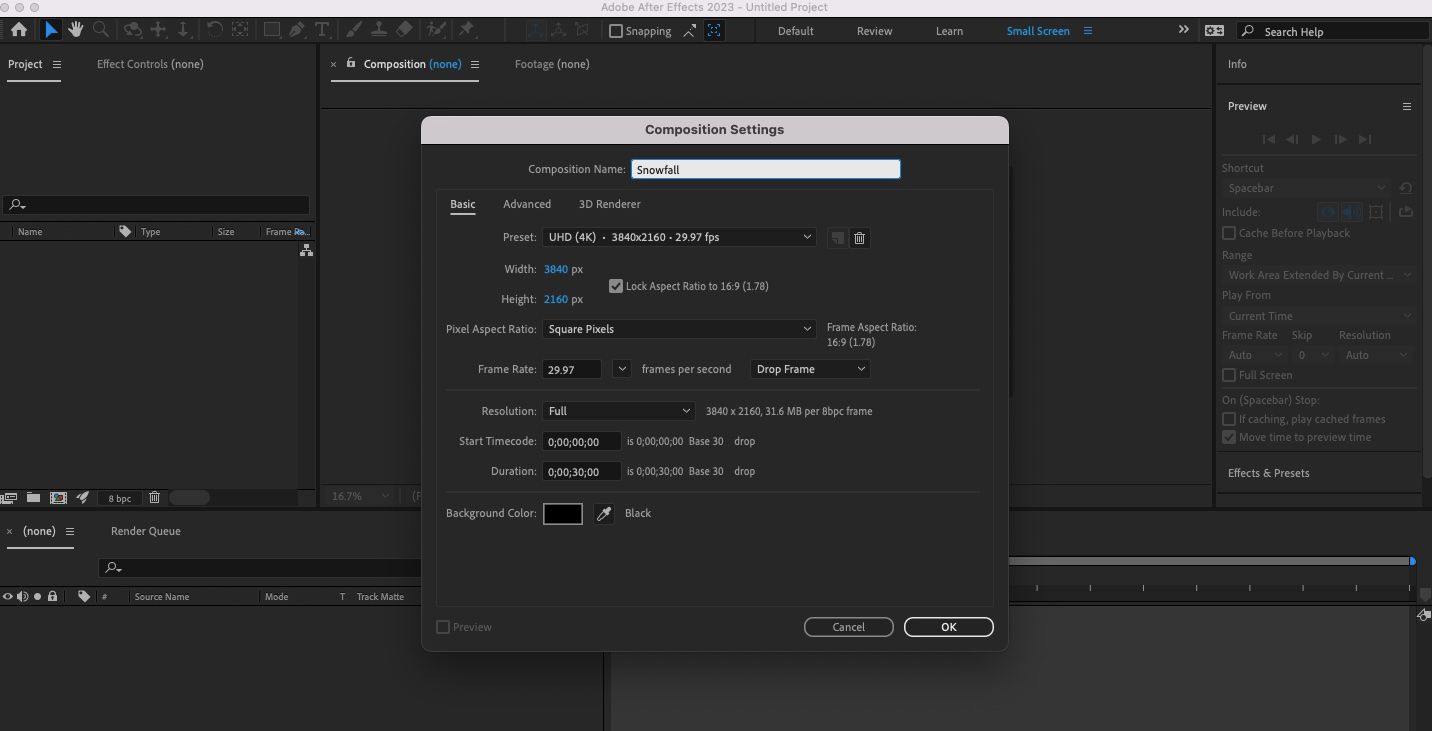
Give a name for your composition.
Leave all the other fields as their default.
Step 2
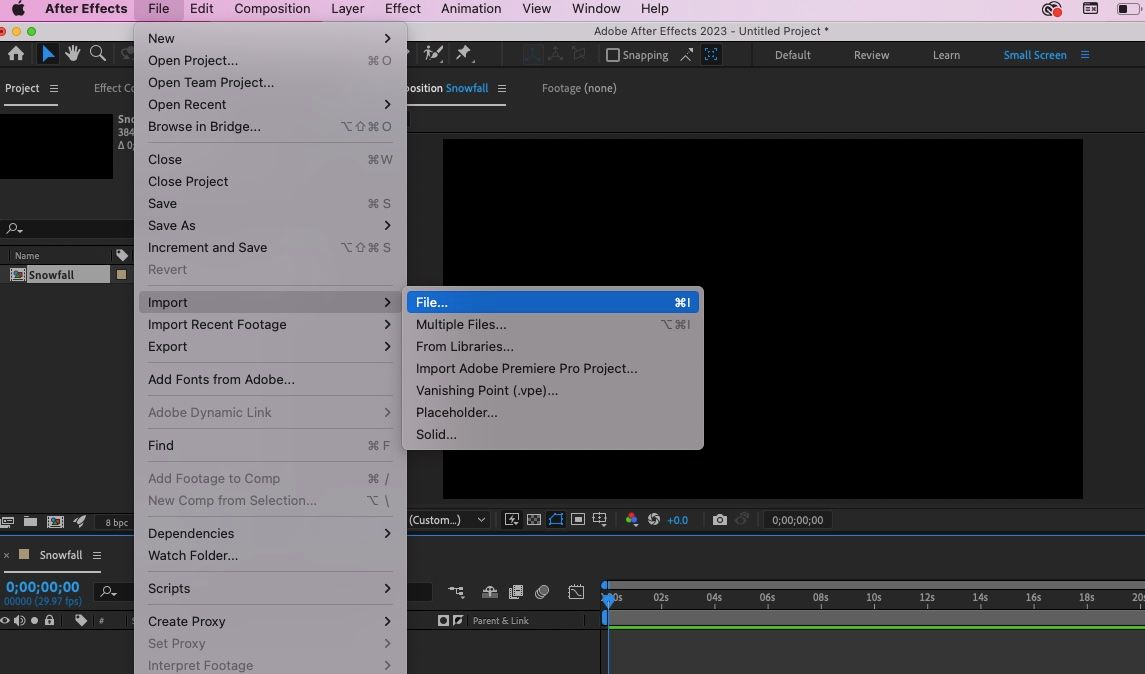
Go toFile>Import>File.
Import the photo you want to animate into After Effects.
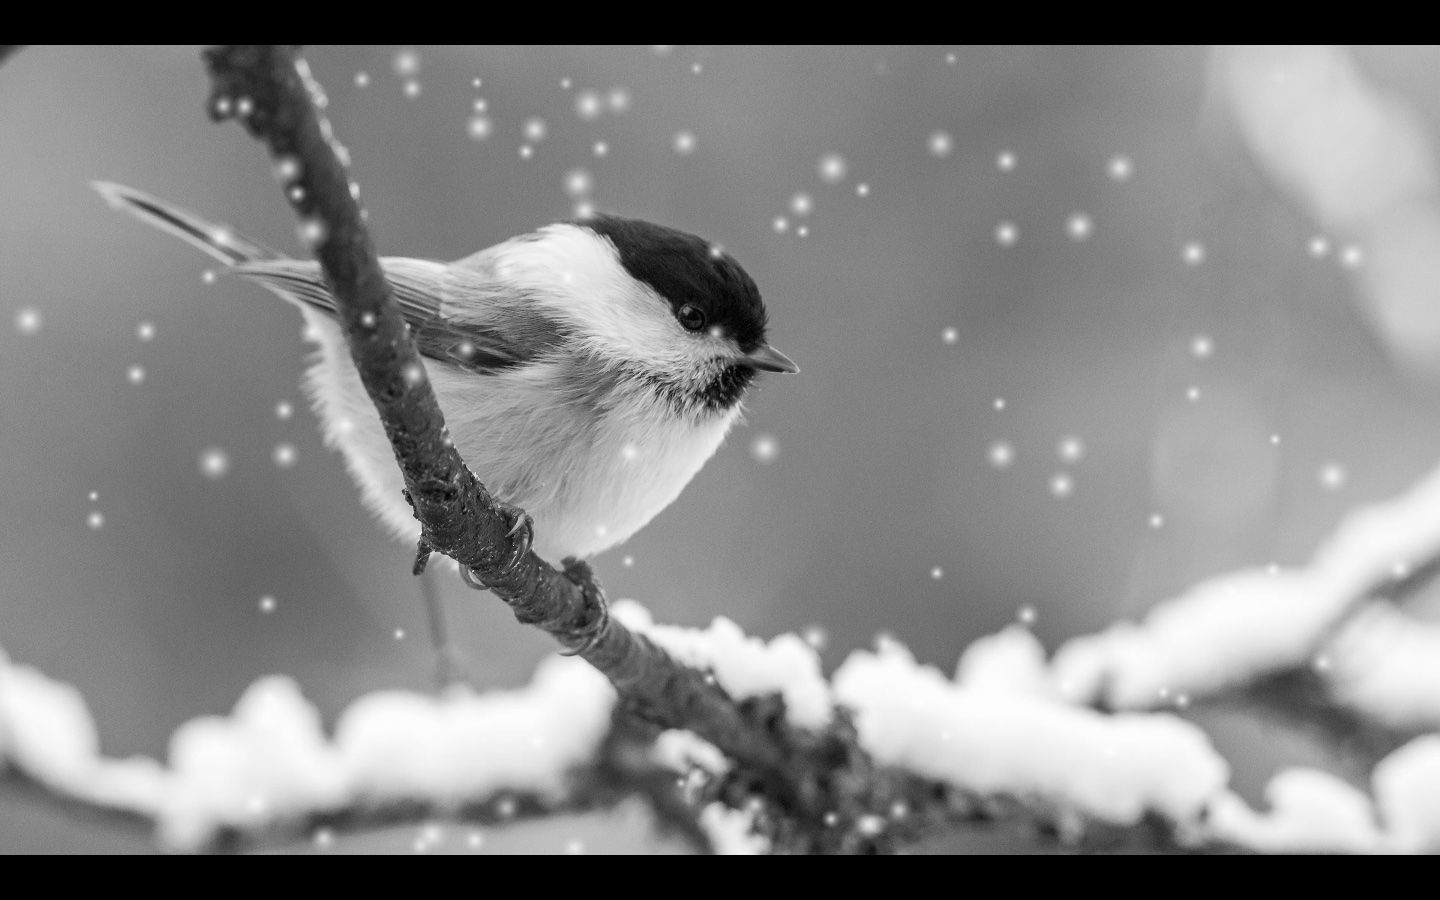
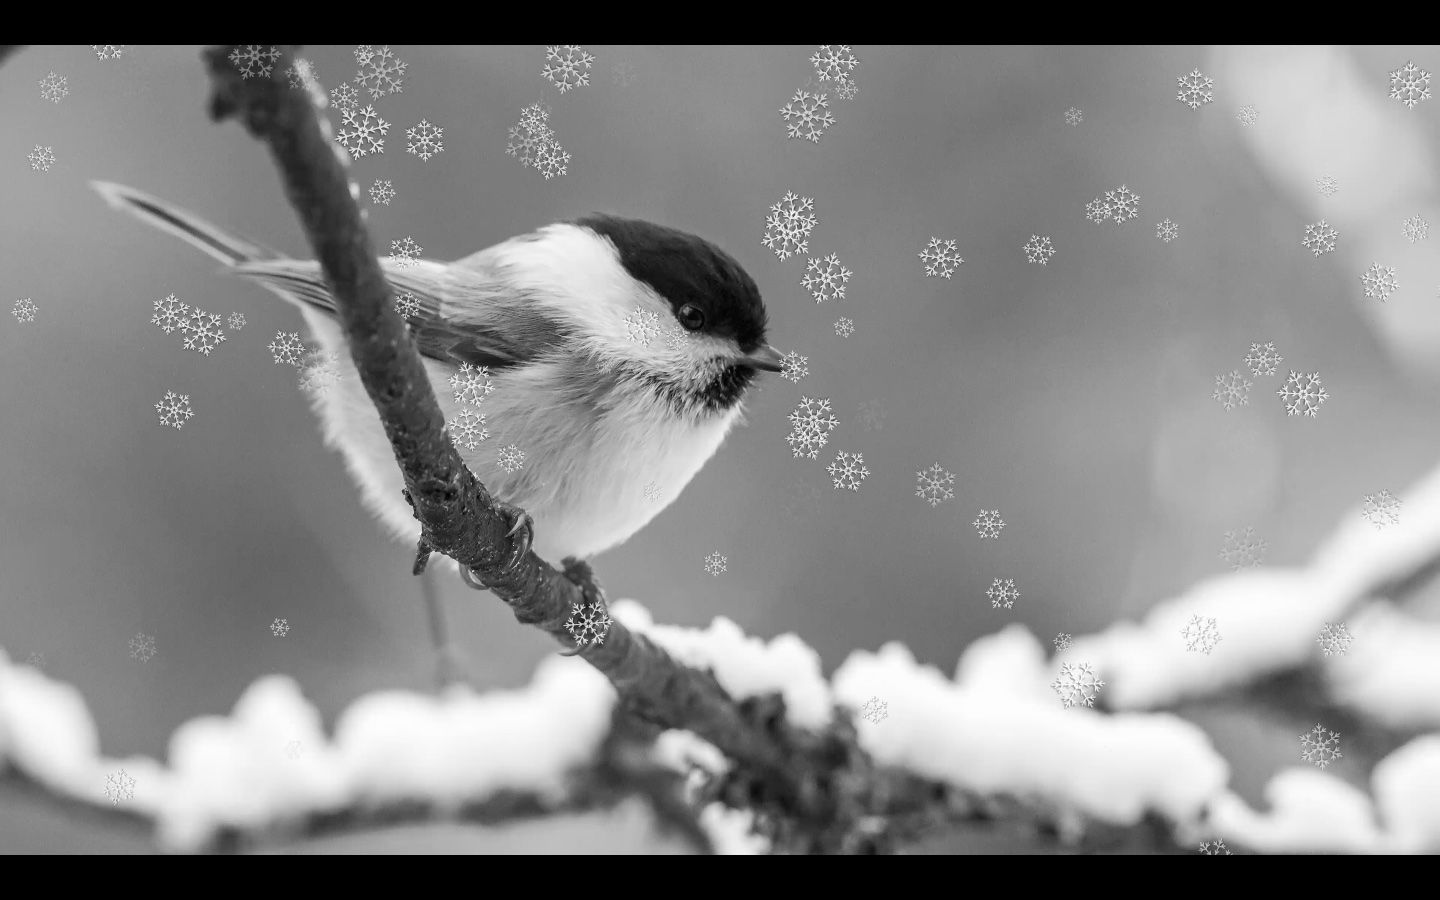
We have downloaded a gorgeous bird photo fromPixabayfor our tutorial.
you could see the photo on the left side panel.
Drag the image into the project panel in the bottom left corner.
Step 3
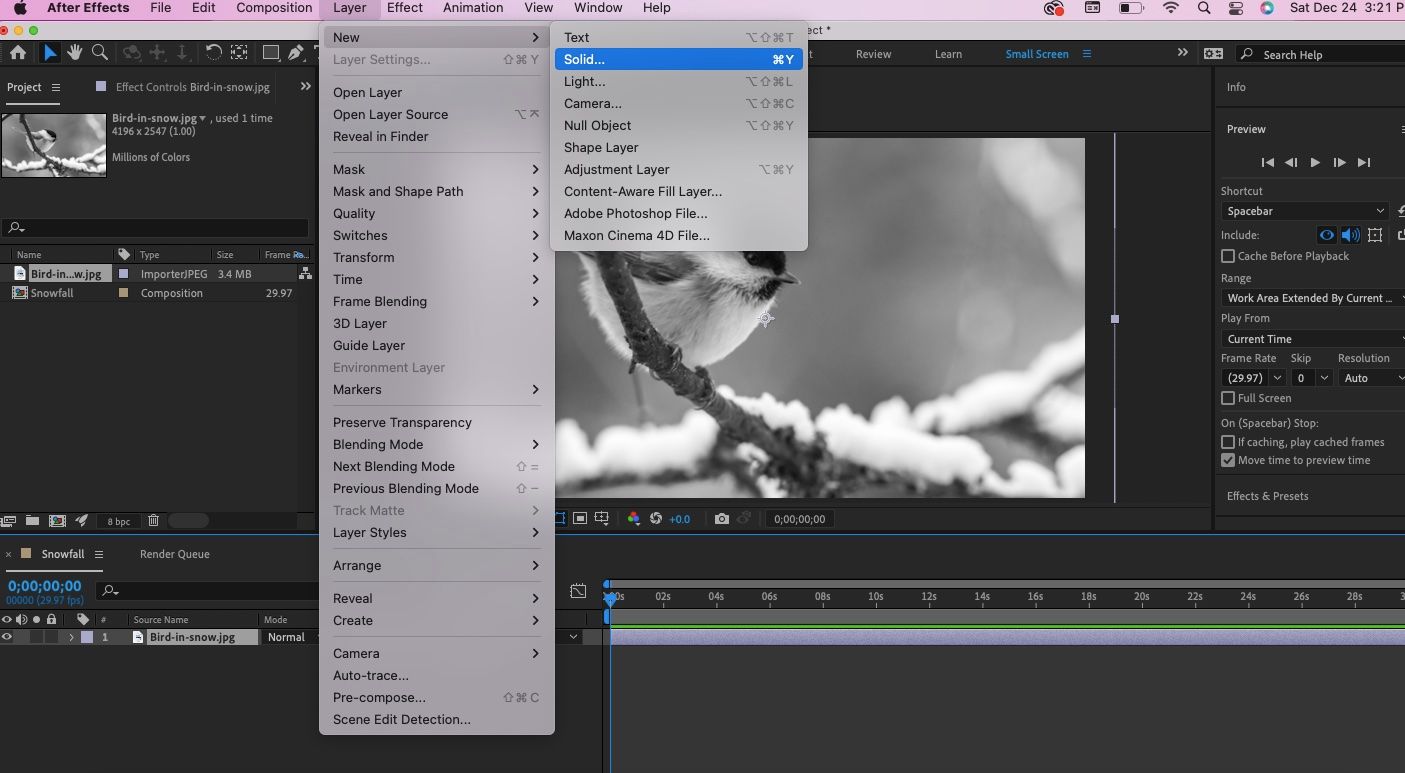
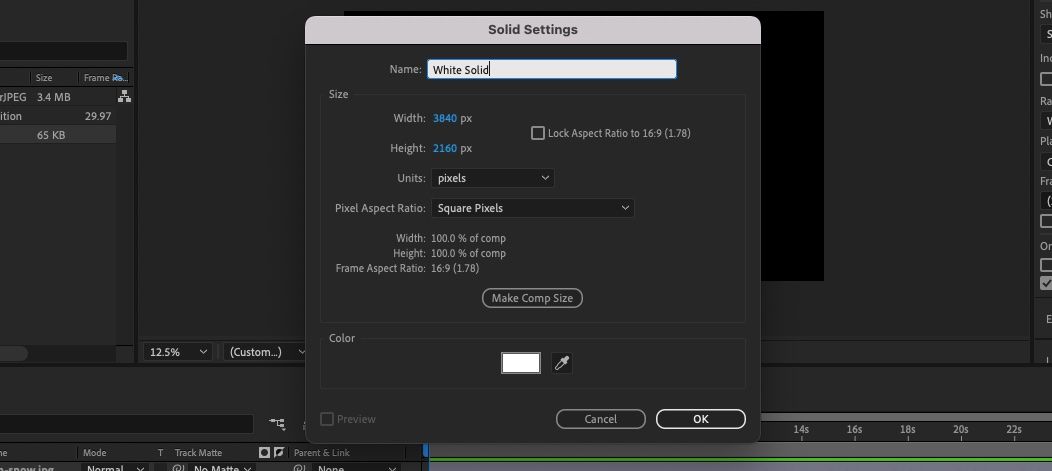
Add a new solid layer.
Go toLayer>New>Solid.
Change theBackground Colorto white.
This step is essential.
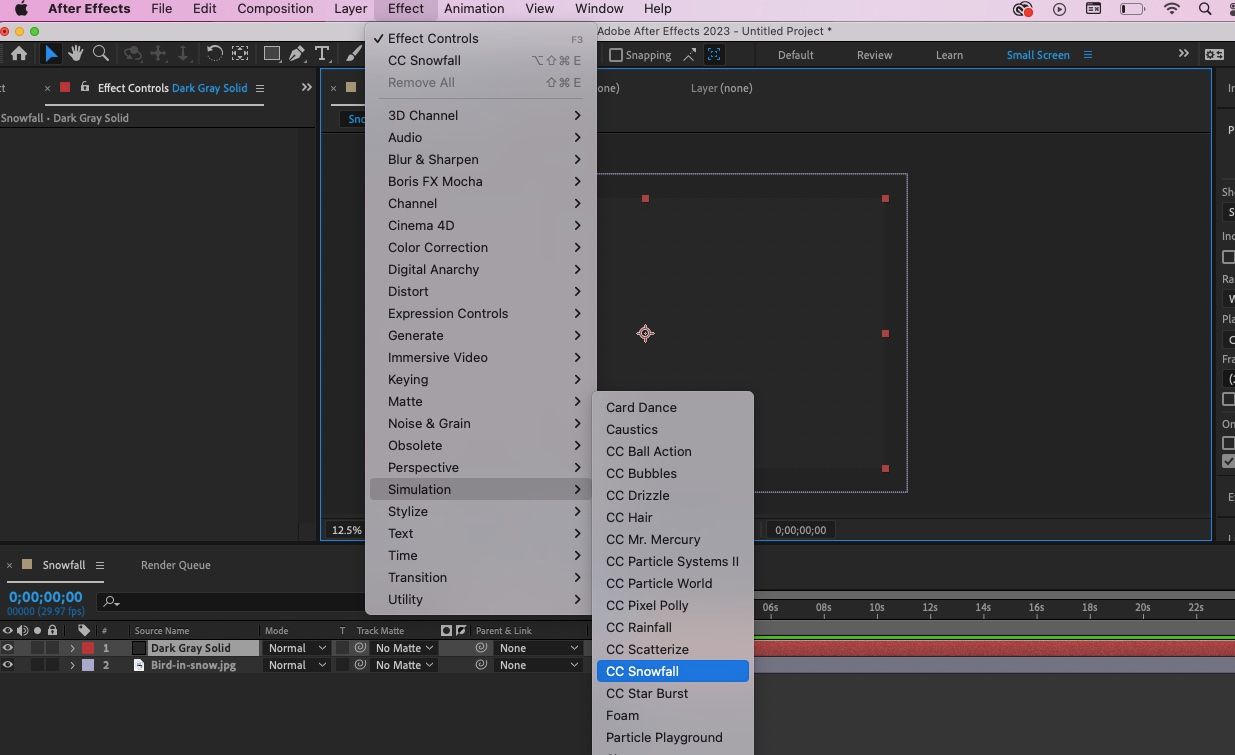
Step 4
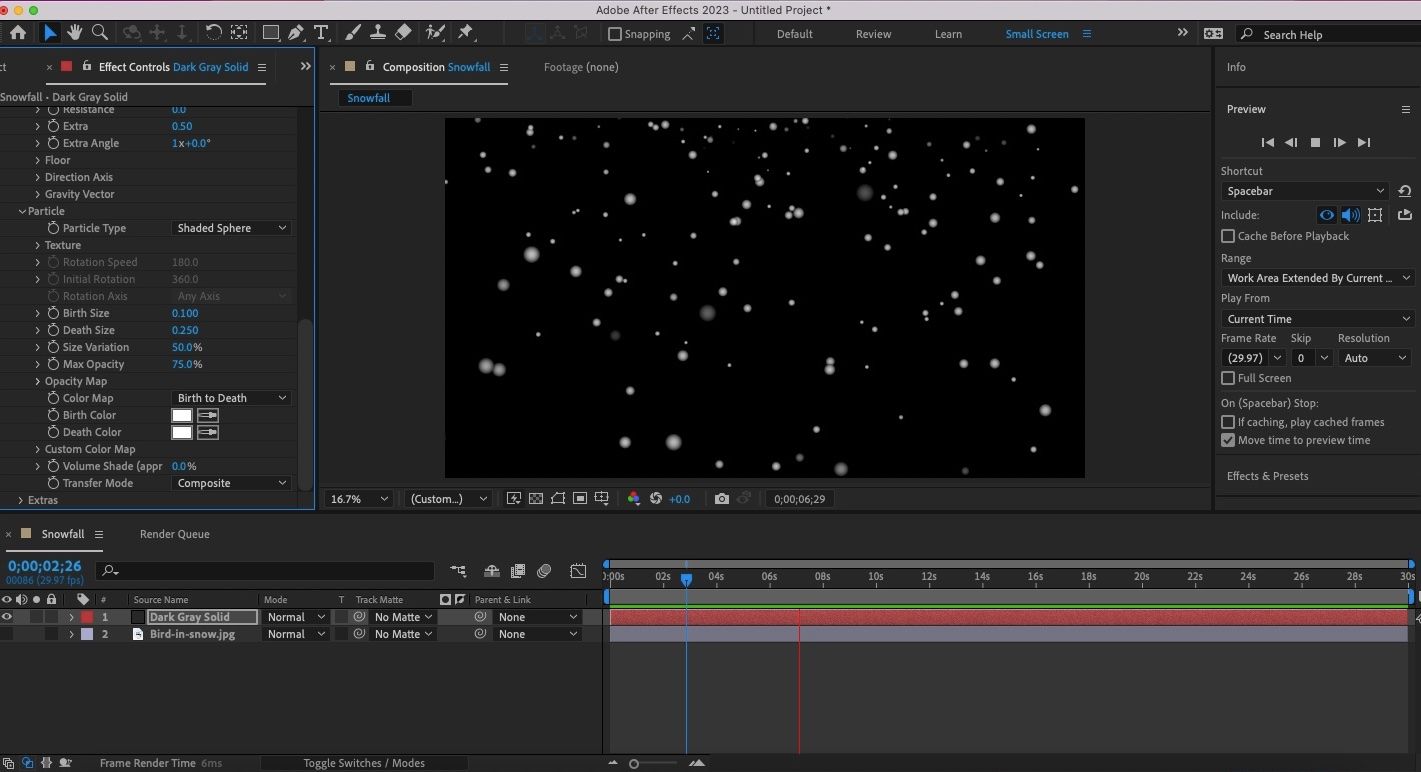
Go toEffect>Simulation>CC Snowfall.
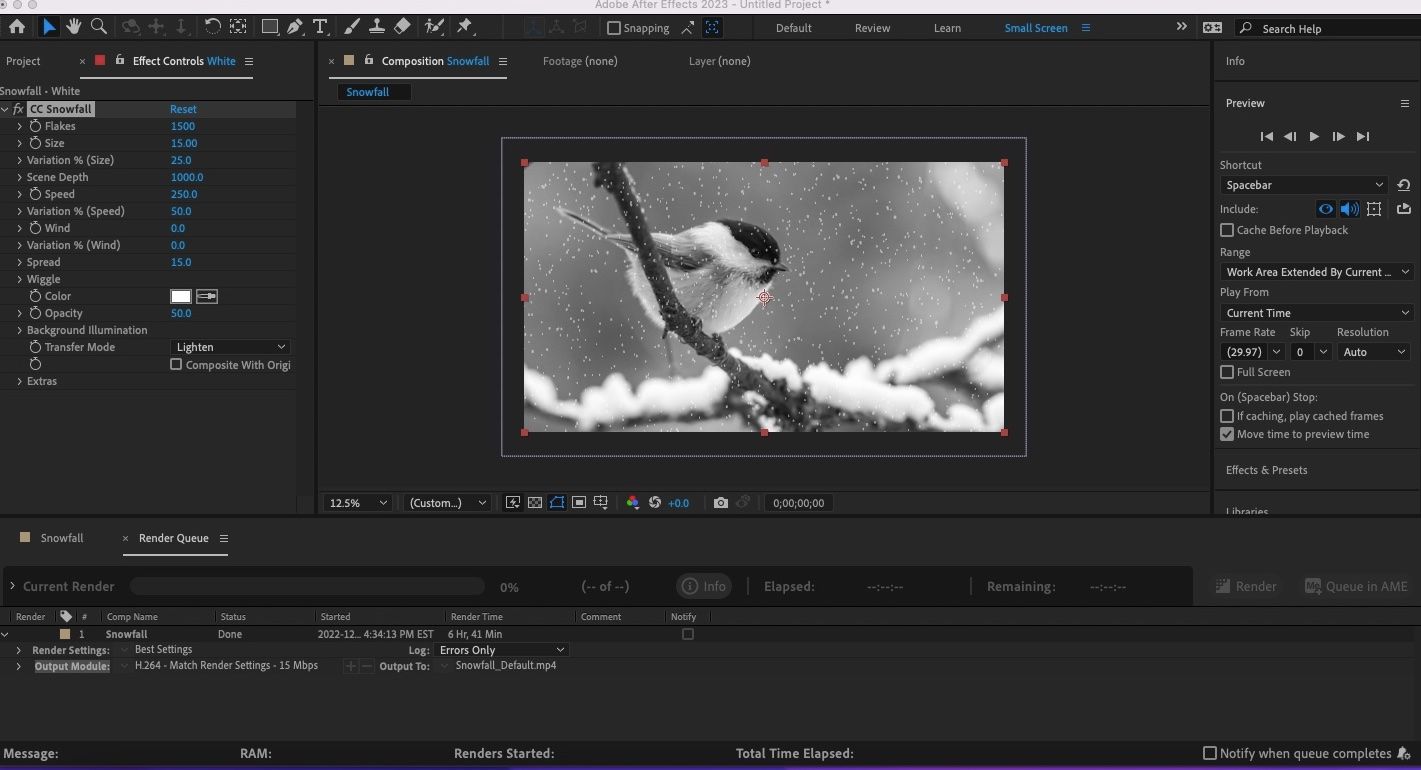
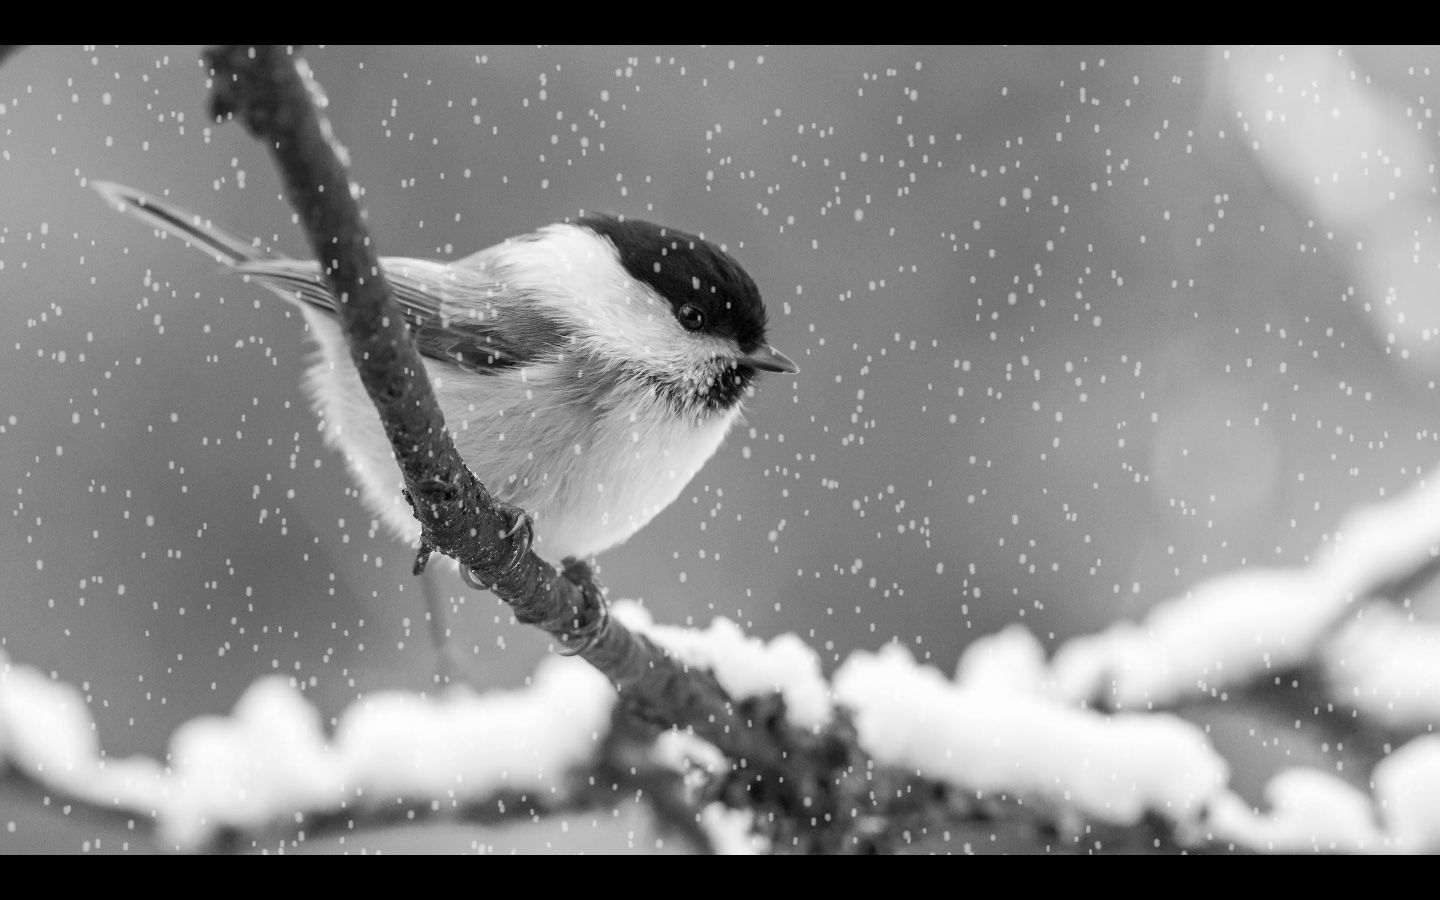
You will see the snowfall in your image.
Press the play button on the right side to preview the animation.
This is the fastest way to animate snow in After Effects.
We like the beautifully falling snow, but there is no way to adjust the look of the snowflakes.
First, let’s try a perfectly round snowfall.
Repeat all the previous steps untilStep 3.
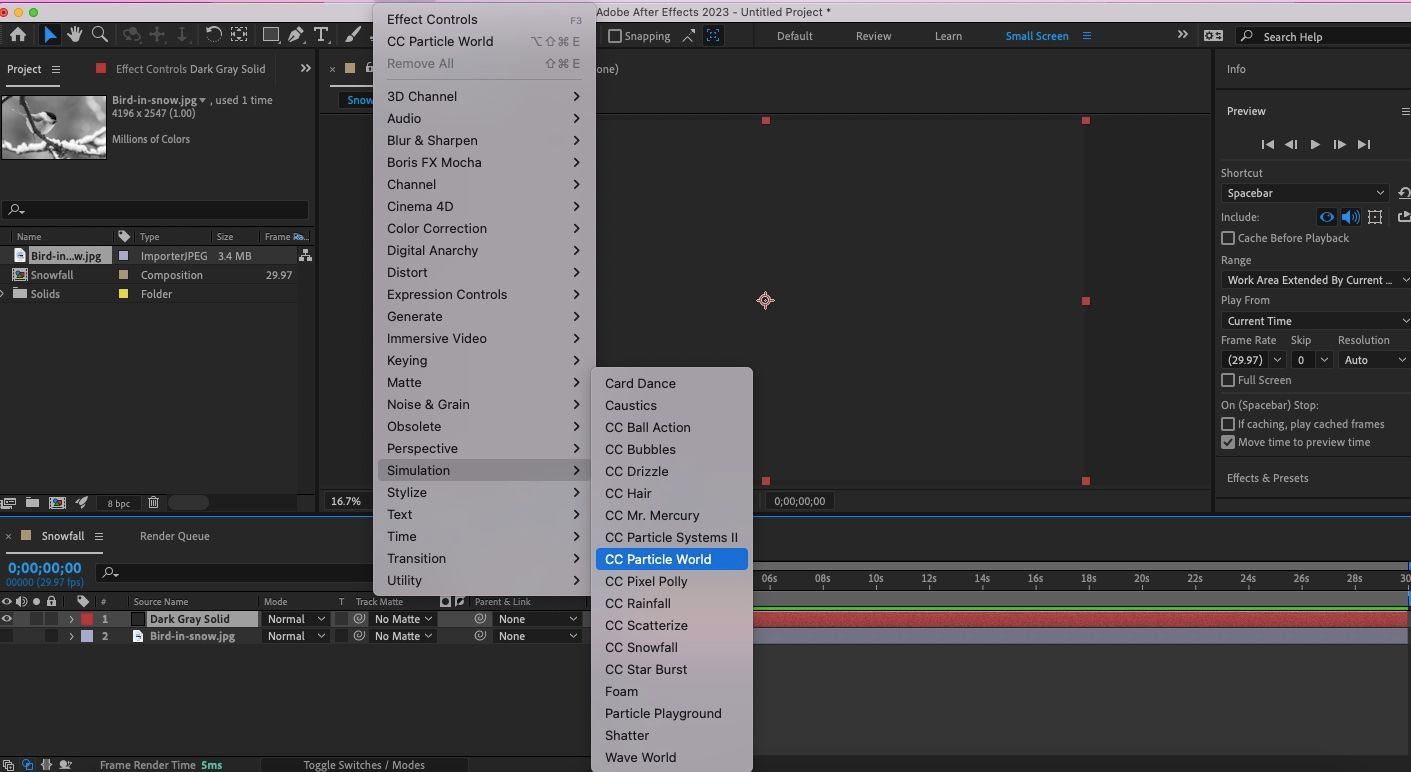
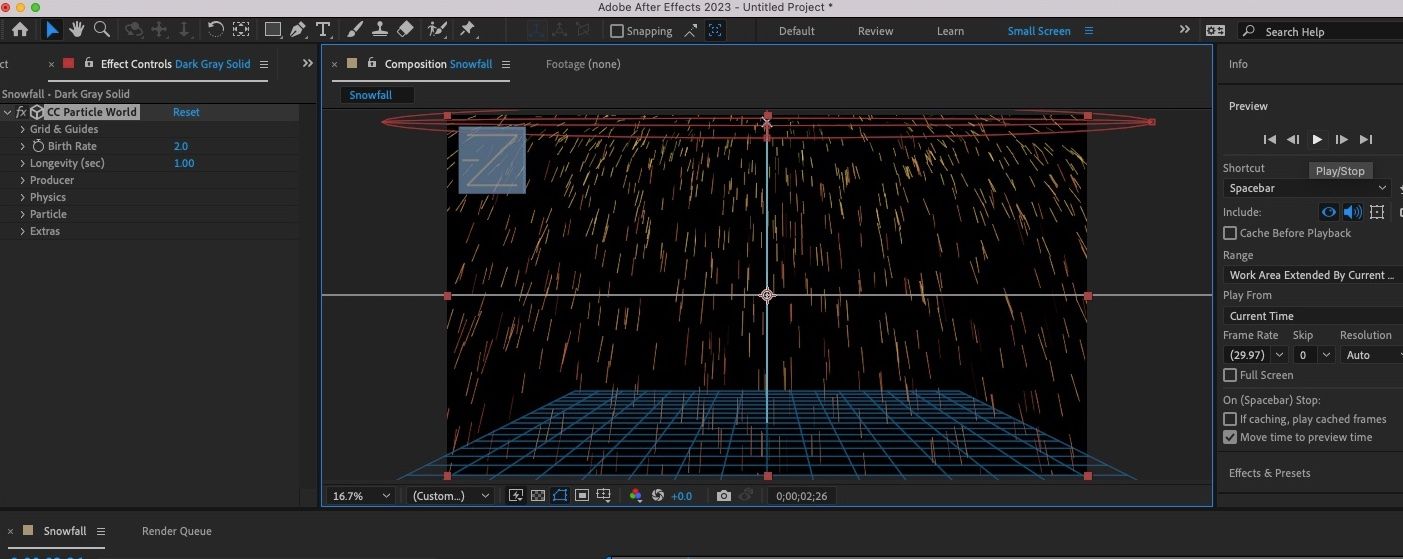
Go toEffect>Simulation>CCParticleWorld.
You will see sparkles flying all over the frame, which may not look like snowfall.
But don’t worrywe will fix it by tweaking the options.
you’re able to also adjust this inEffect Controlson the left side.
it’s possible for you to change the positions and radius manually under theProducertab.
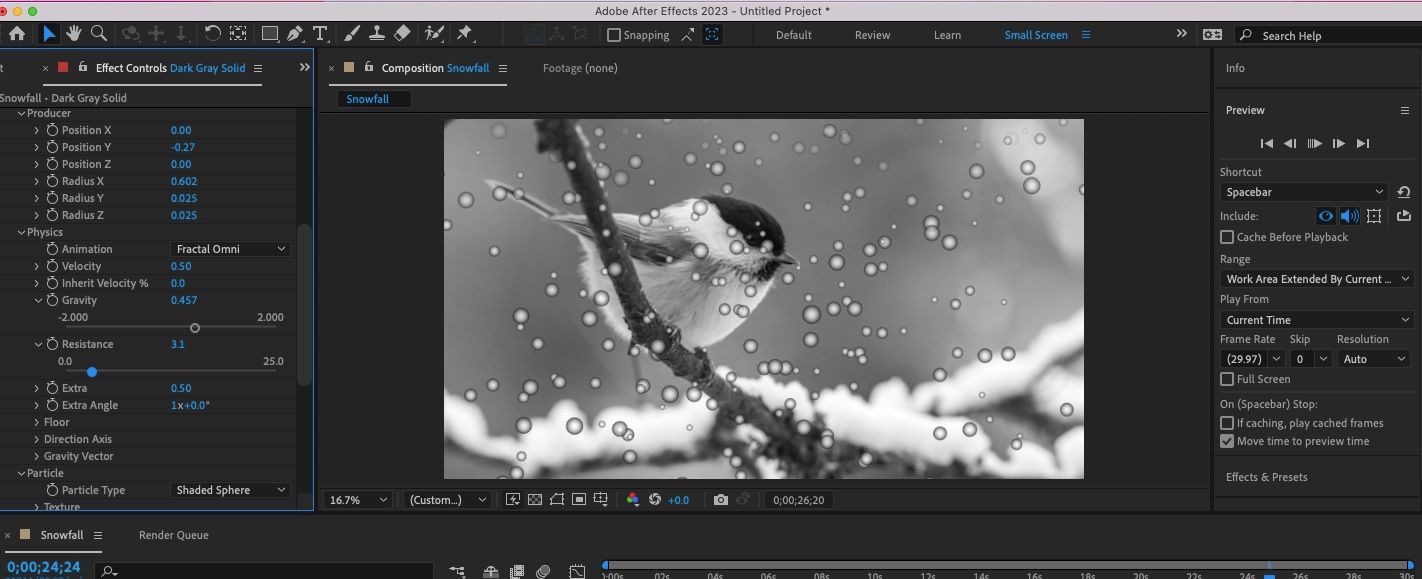
UnderEffect Controls, go to theParticletab, and selectShaded SphereforParticle punch in.
you’re free to change the falling style by adjusting theAnimationstyle under thePhysicstab.
you’ve got the option to also change theBirth RateandLongevityto adjust your snowfall speed.
The resulting snowfall from this option is like a pleasing bokeh.
Remember, your image should be in PNG format with a transparent background.
Here’show to make the background of a PNG transparent.
Just like before, repeat the steps in the first section untilStep 3.
Import the PNG file into your project.
Go toFile>Import>File.
Drag it into your project panel on the lower left side.
You will see sparkles flying all over the frame like before.
However, you’re free to achieve a snowy look by tweaking the tweaks.
Adjust the red circle on the top of the sparkles, which is their starting point.
it’s possible for you to change the positions and radius manually under theProducertab in theEffect Controlpanel.
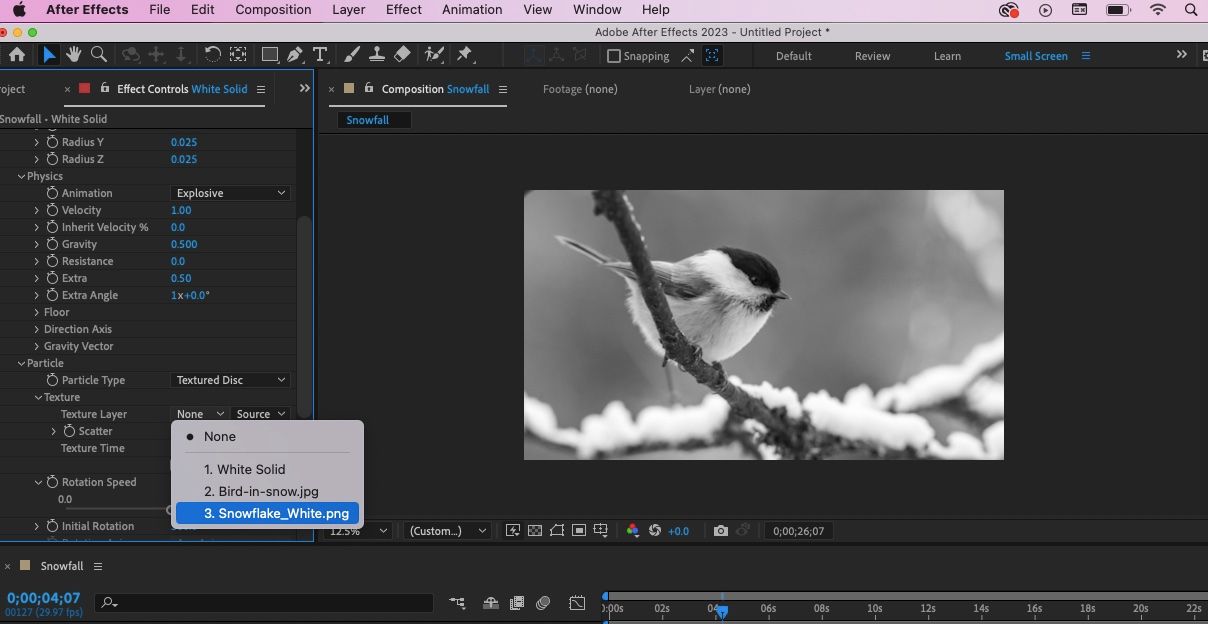
UnderEffect Control, go to theParticletab and change theParticle TypetoTextured Disc.
Select your PNG file forTextureLayerunder theTexturetab.
Step 5
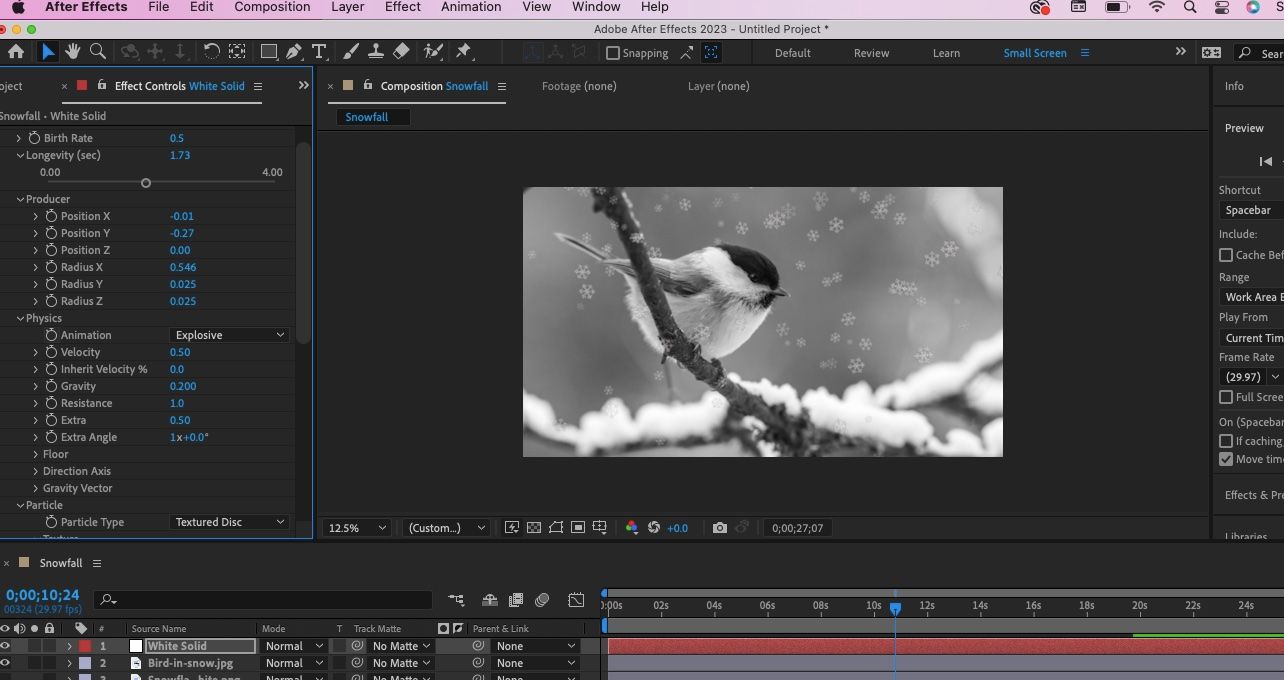
You will see your custom snowflakes falling in the frame.
you’re free to also tweak the size of your snowfall.
The resulting effect will be one-of-a-kind with your own custom snowflake.
Fine-tuning different effects underEffect Controlwill give you various looks.
you might use the Help button to explore more.
In addition, feel free to browse tutorials and YouTube videos and learn from there too.
The effort you put into learning new software like Adobe After Effects can be handy for many future projects.
you could try a lot of different effects in a similar way.
You don’t have to commit to the software immediately.
Instead, use the trial version and polish your skills before buying.
