Chatbots are becoming an increasingly vital tool for businesses in the modern age.
With the right tools and know-how, companies create chat agents that can have real conversations with customers.
Google Dialogflow ES is one of the market’s most powerfuland freechatbot-building tools.
But how can you unleash its full potential?
Any Google account works, and you start by navigating to theGoogle Dialogflow ES website.
Click onCreate Agentonce you have logged in and fill out the details in the form before clickingCreate.
you’re able to use Dialogflow tocreate a chatbot for entertainment, automation, or customer service.
This project covers the latter.
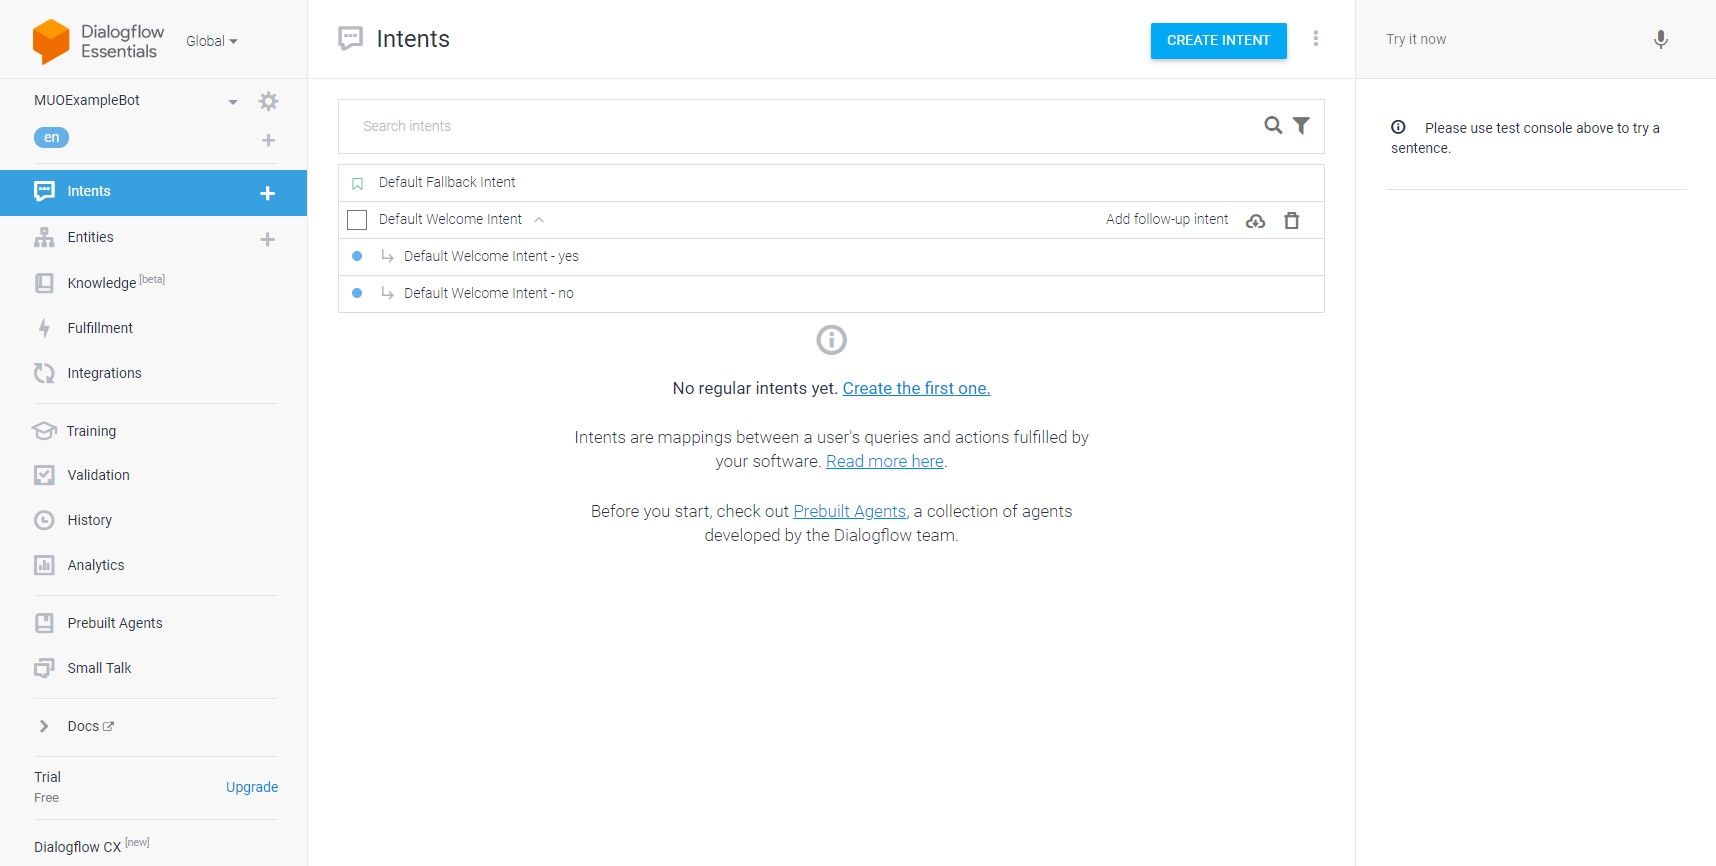
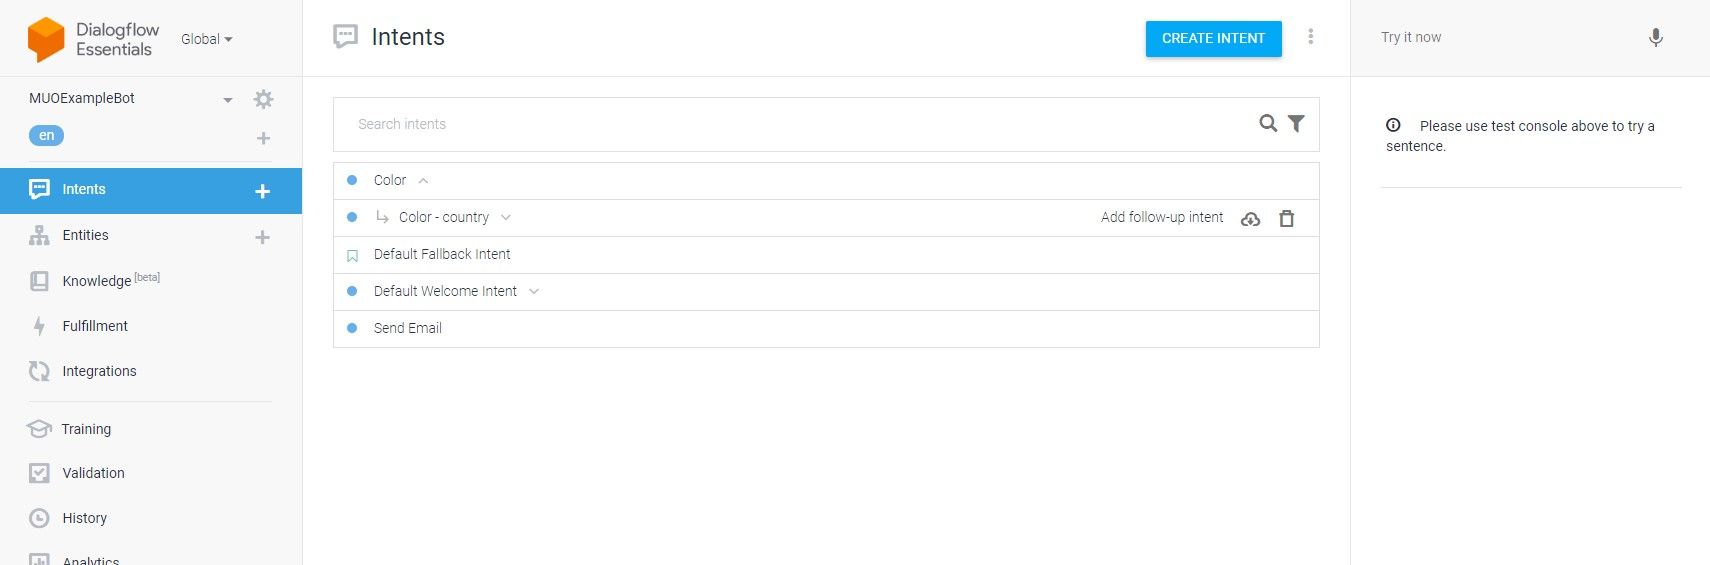
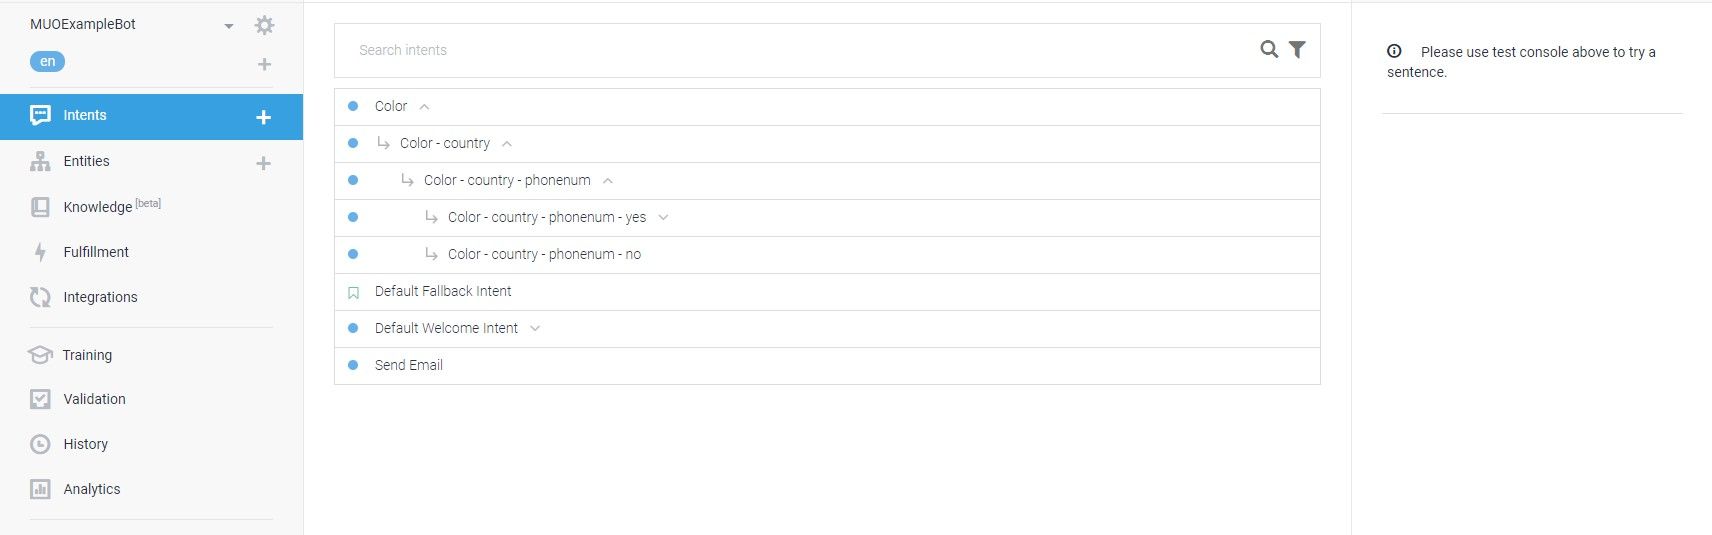
The new agent only has a Default Welcome Intent and a Default Fallback Intent.
An intent is a fragment or stage in a conversation.
it’s crucial that you add two follow-up intents to the existing Default Welcome Intent to get started.
Hover over theDefault Welcome Intent, click onAdd follow-up intent, and pickYesfrom the drop-down menu.
Repeat the process by selecting No from the drop-down menu to create the second follow-up intent.
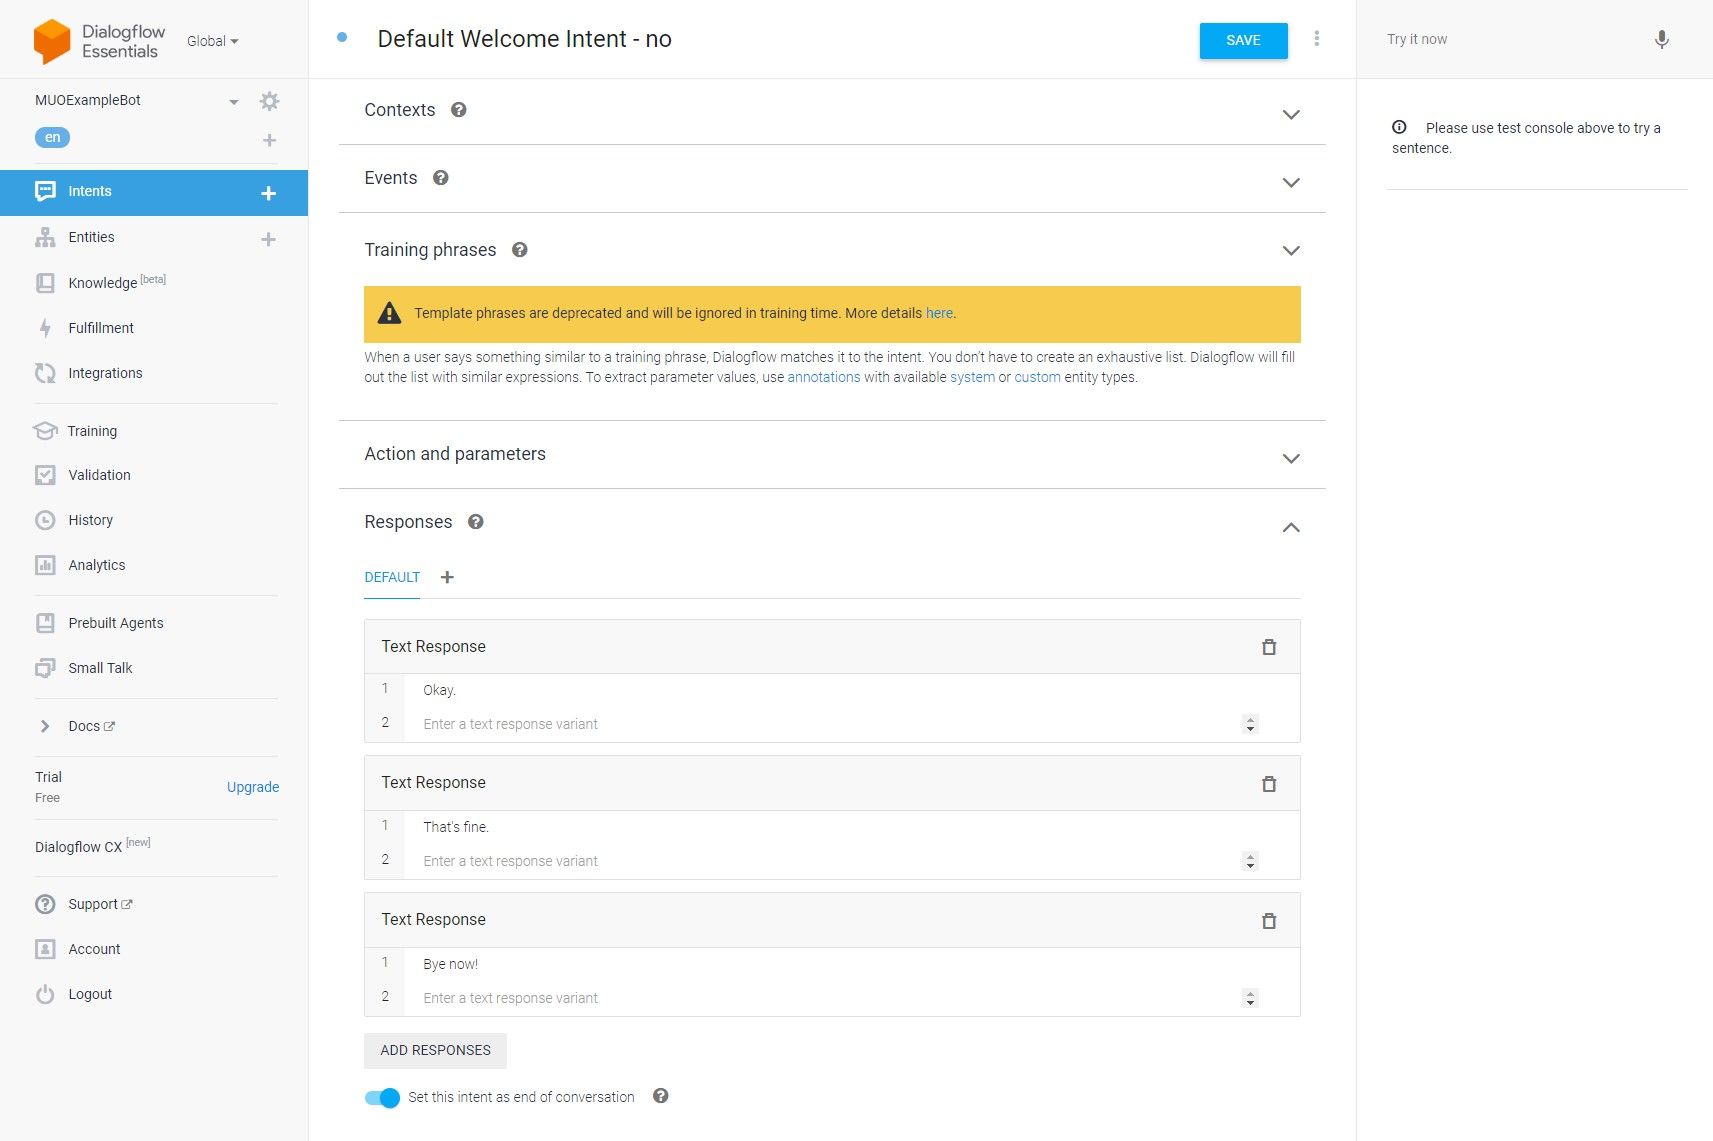
The No follow-up intent will end the conversation and say goodbye to the user.
Open theNo follow-up intentand add a series of text responses to end the conversation.
Activate theSet this intent as the end of conversationslider.
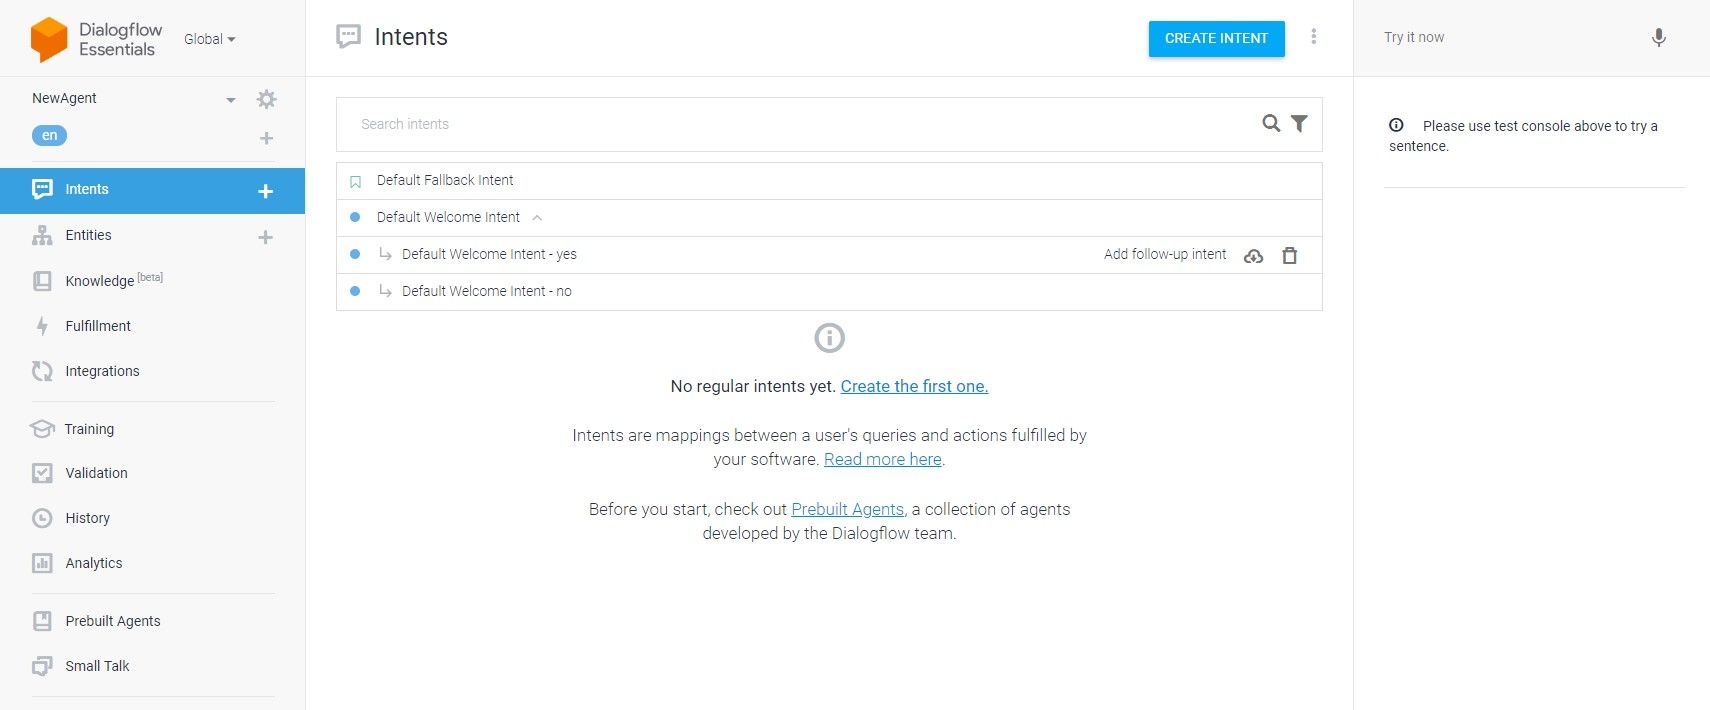
Go back to the main Intents screen and hit theYes follow-up intentto open it.
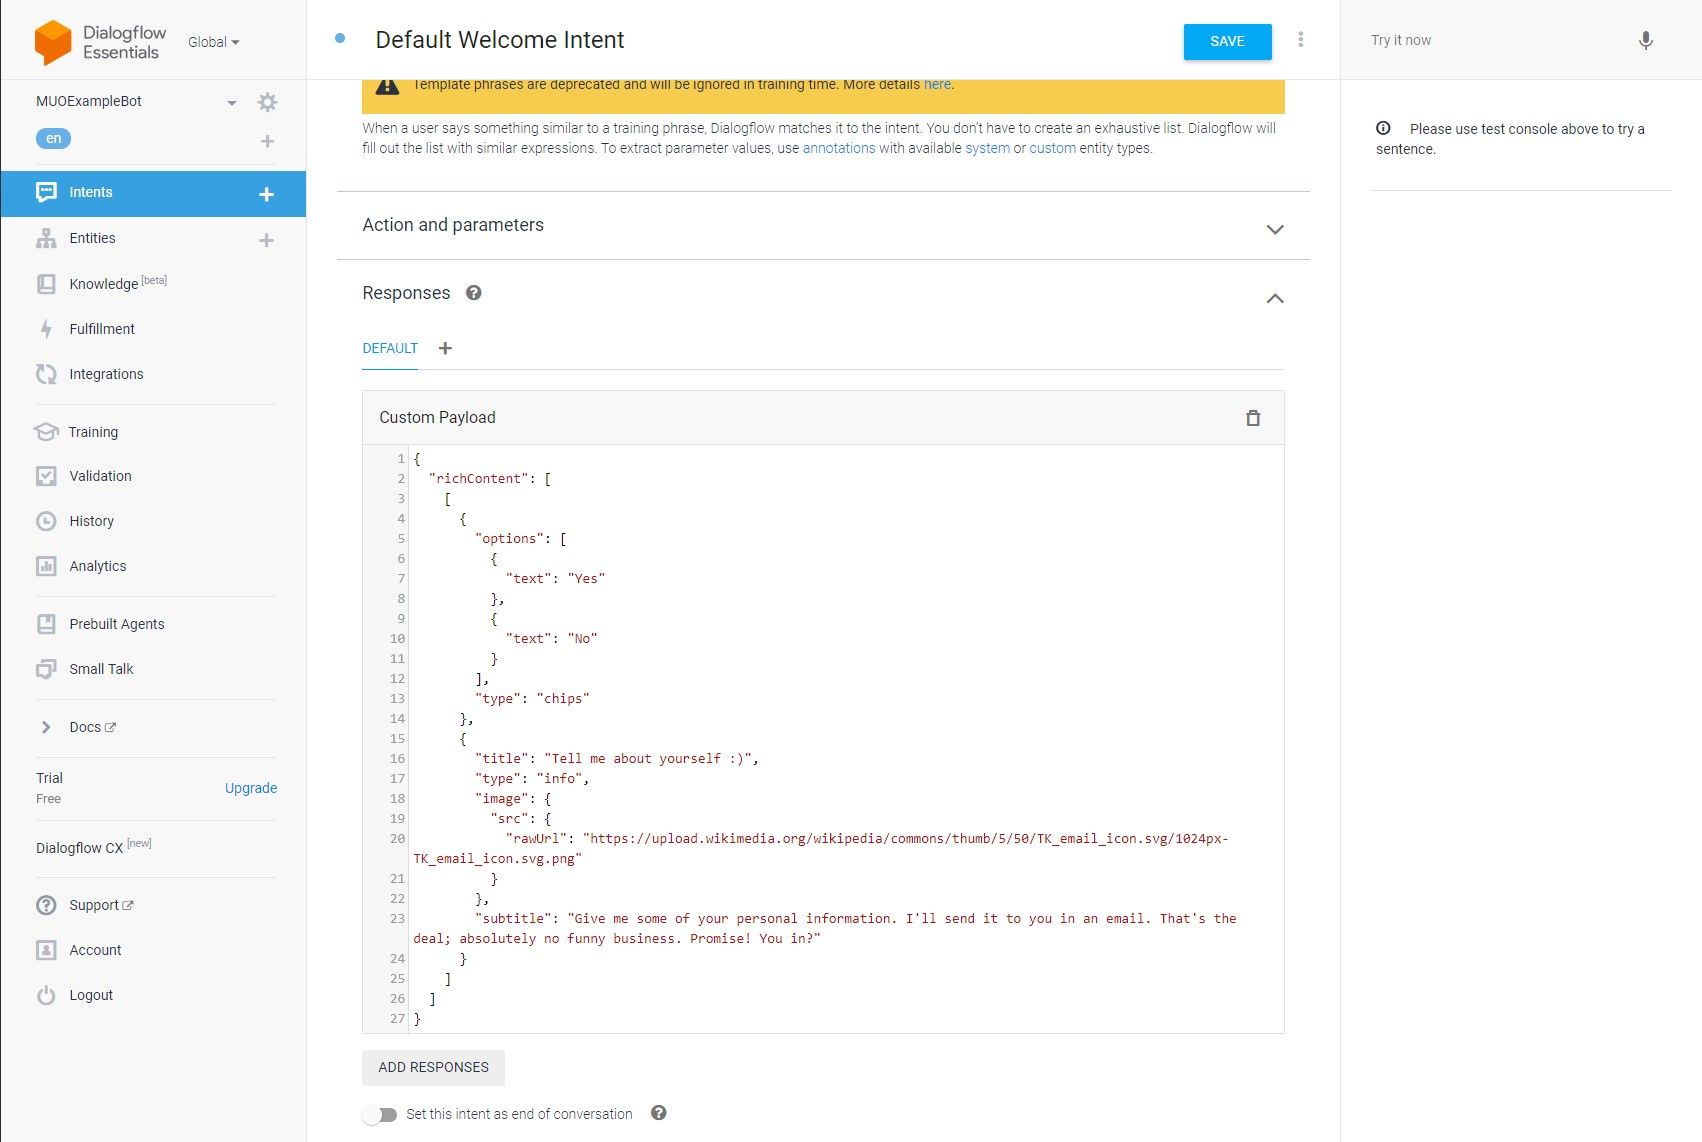
Open theDefault Welcome IntentandDeletethe responses it generated with.
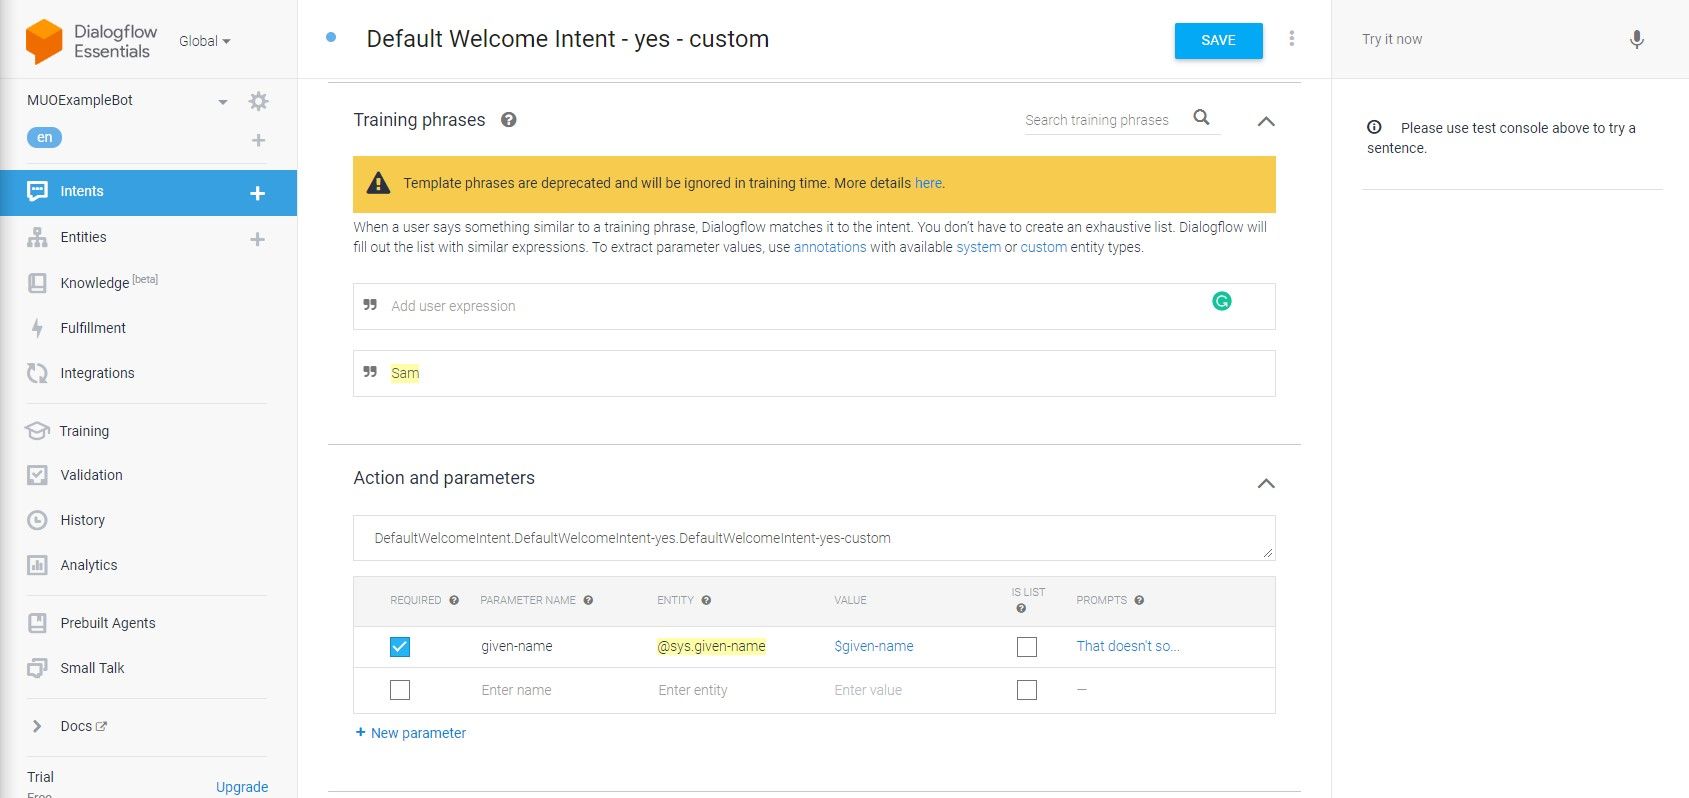
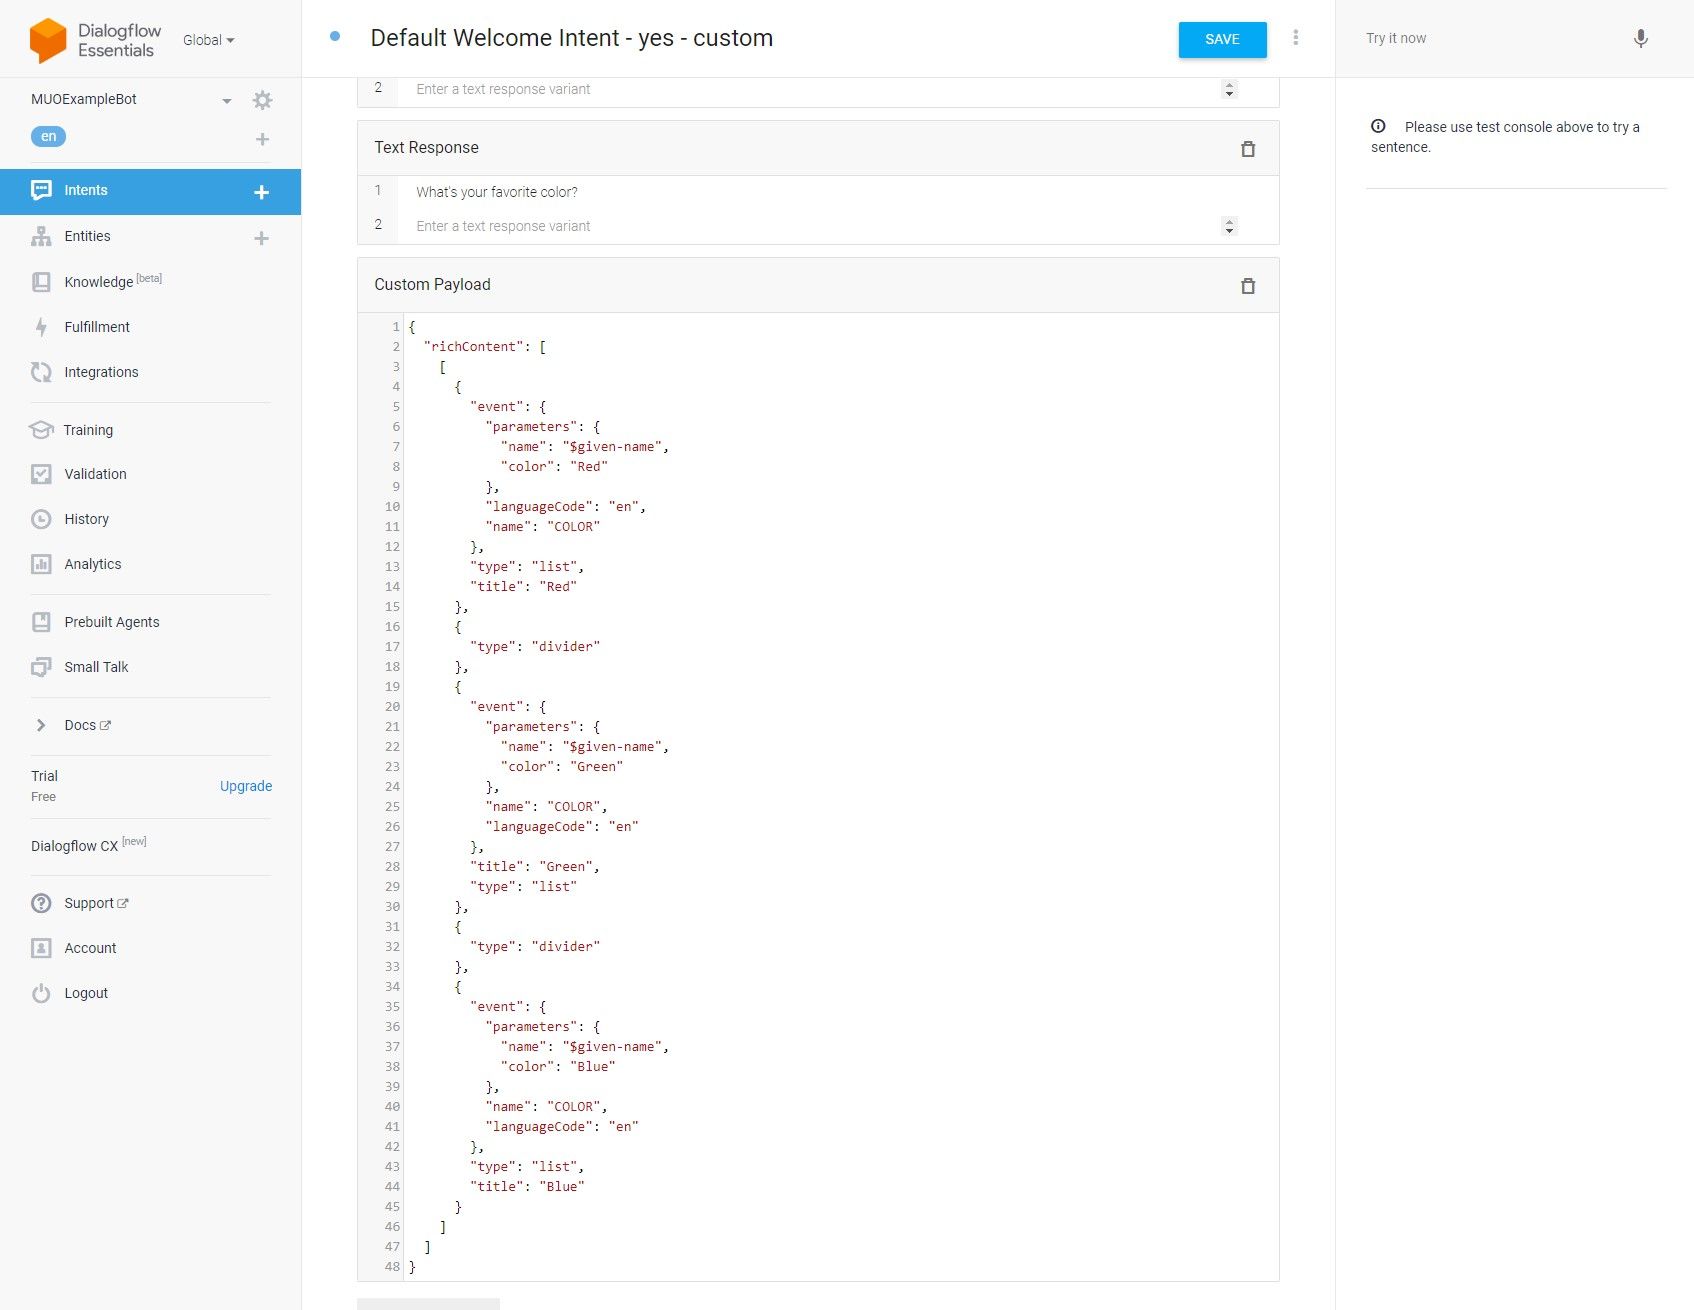
ClickAdd Responsesand selectCustom Payloadfrom the menu.
The JSON code below adds two different types of rich responses; info and chips.
Hover over theYes follow-up intentin the main intents menu, clickAdd follow-up intent, and selectCustomfrom the list.
This will create a new follow-up intent without any training phrases.
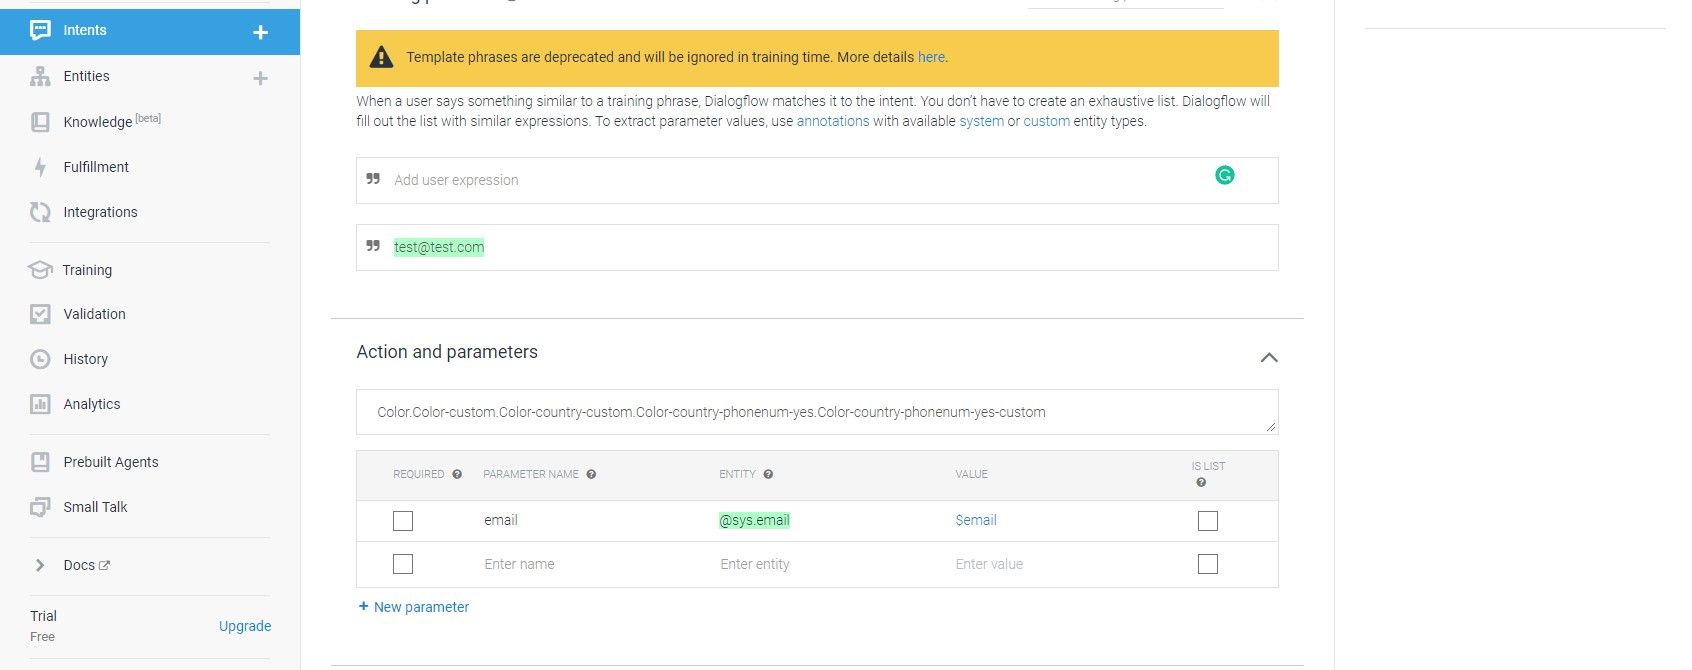
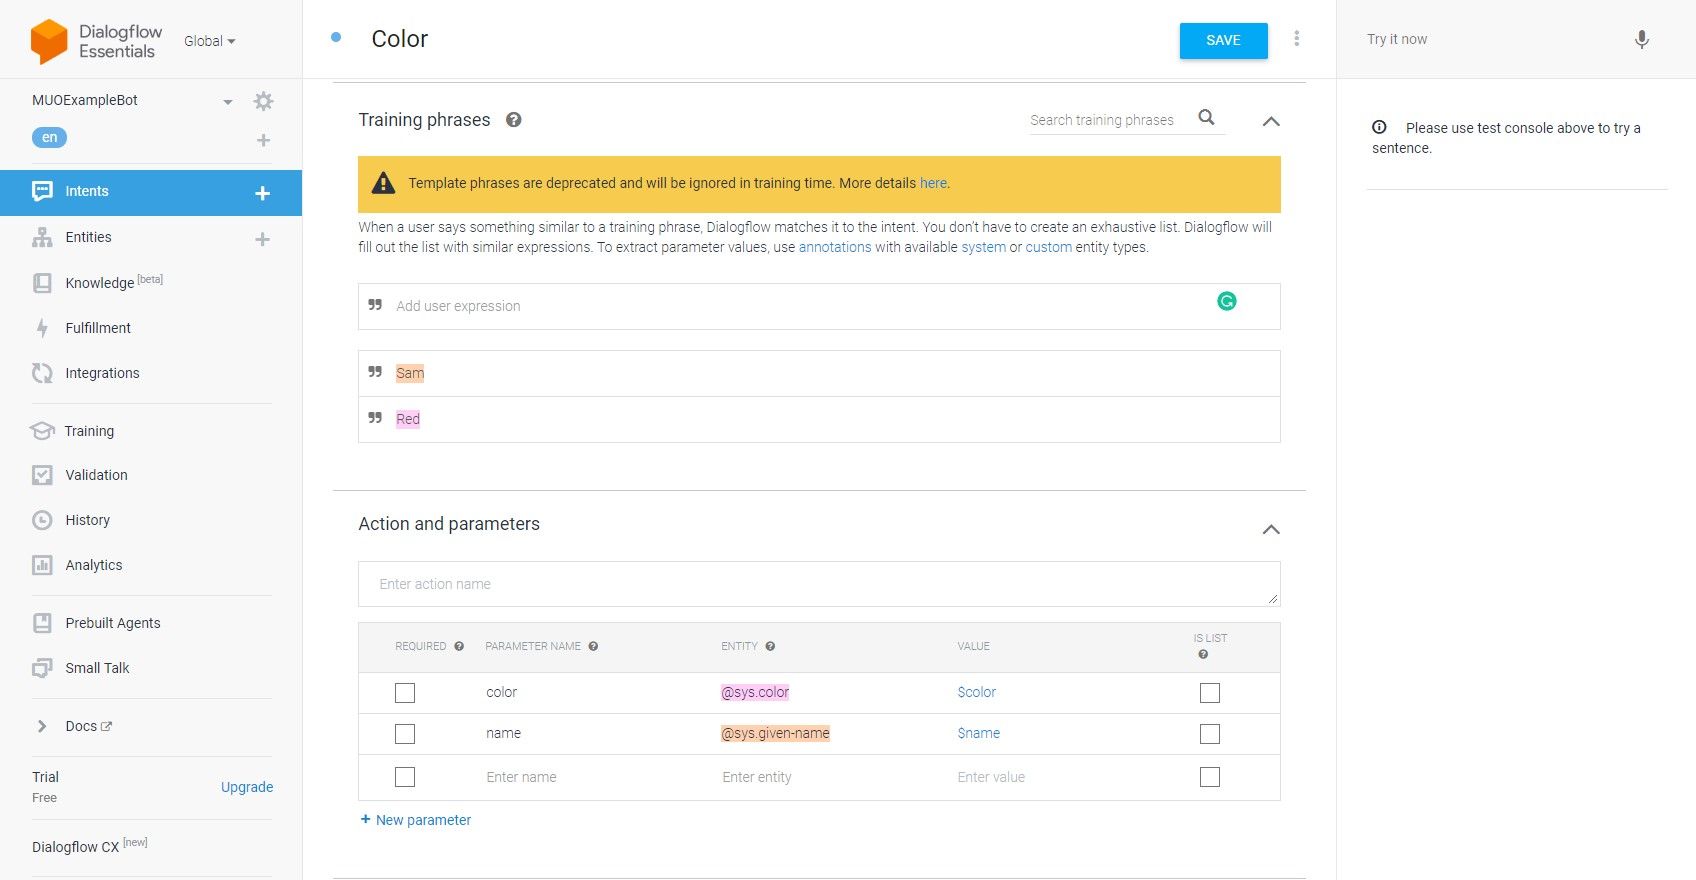
This will trigger the creation of a new parameter with the @sys.person entity bang out.
go for the@sys.personentity and change it to a@sys.given-nameentity.
This will store the users input so that the agent can use it.
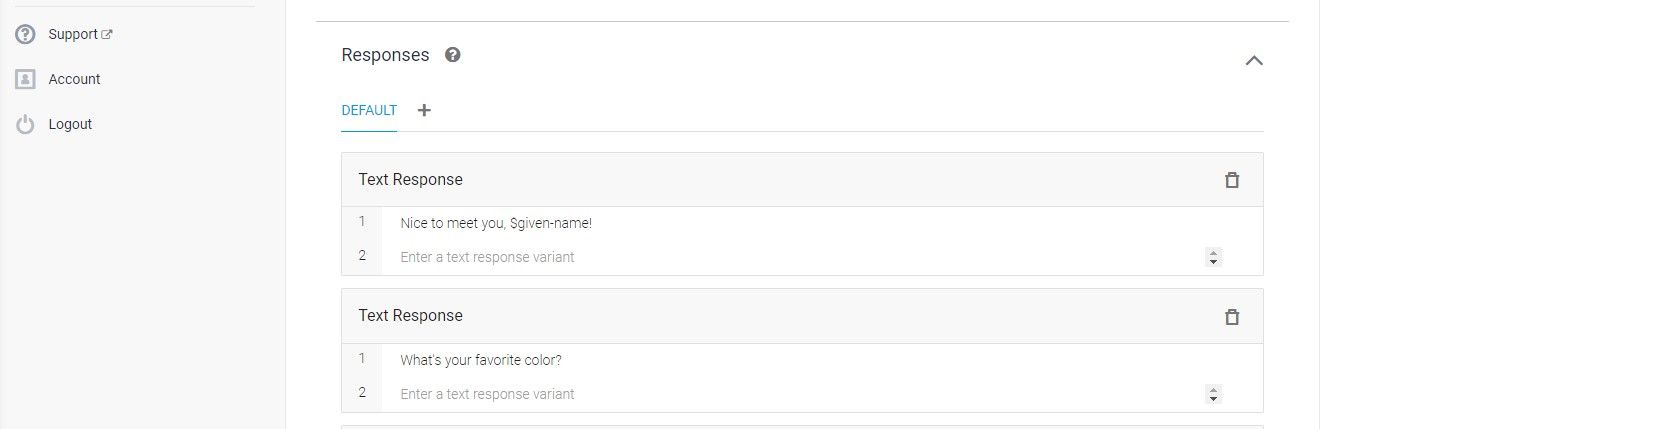
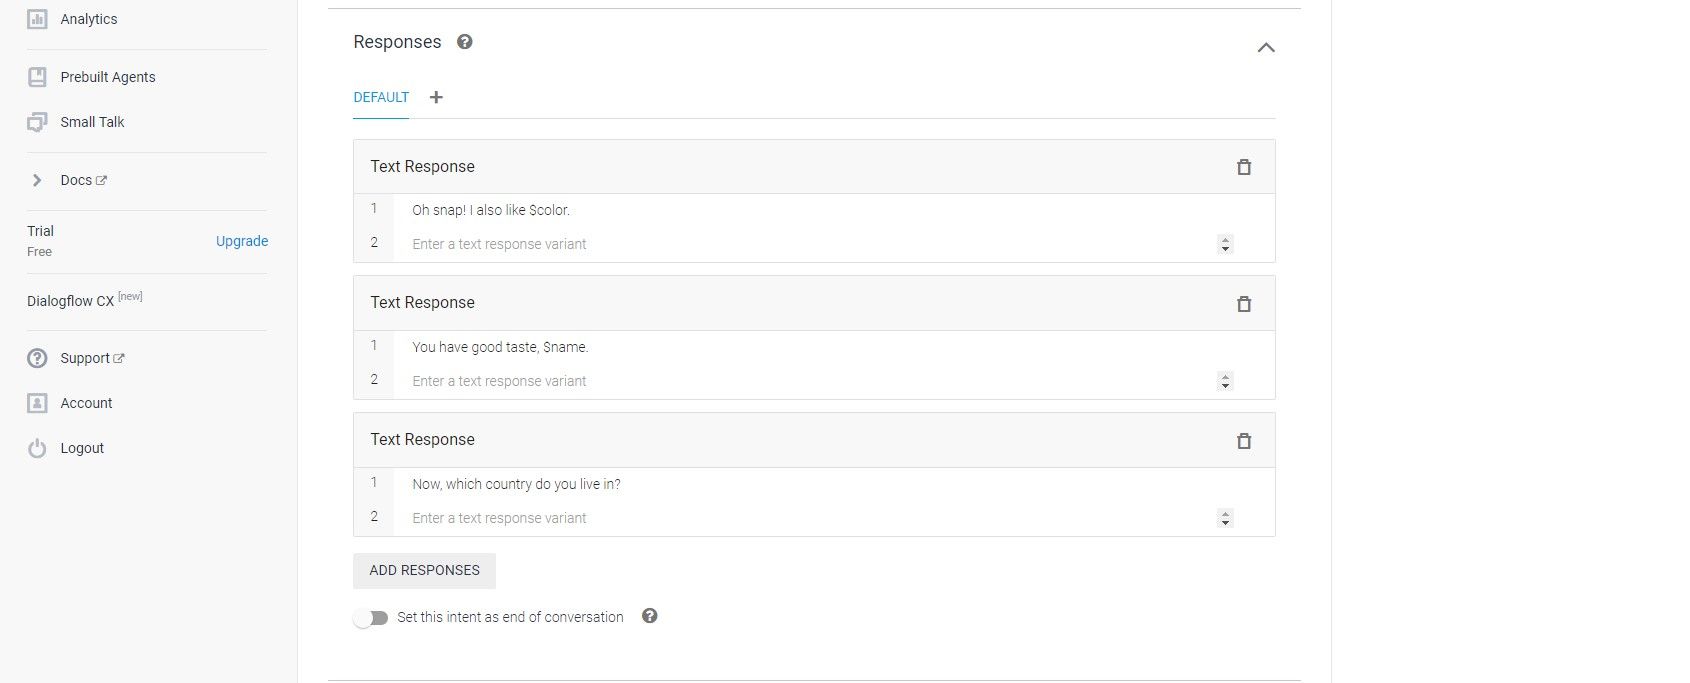
Head to the Responses section and add a response with$given-nameinside it.
This calls the name parameter you have collected, enabling it to appear in the chat.
The most important part of this JSON code is the event section with each entry.
Intents can have events assigned to them that will trigger them.
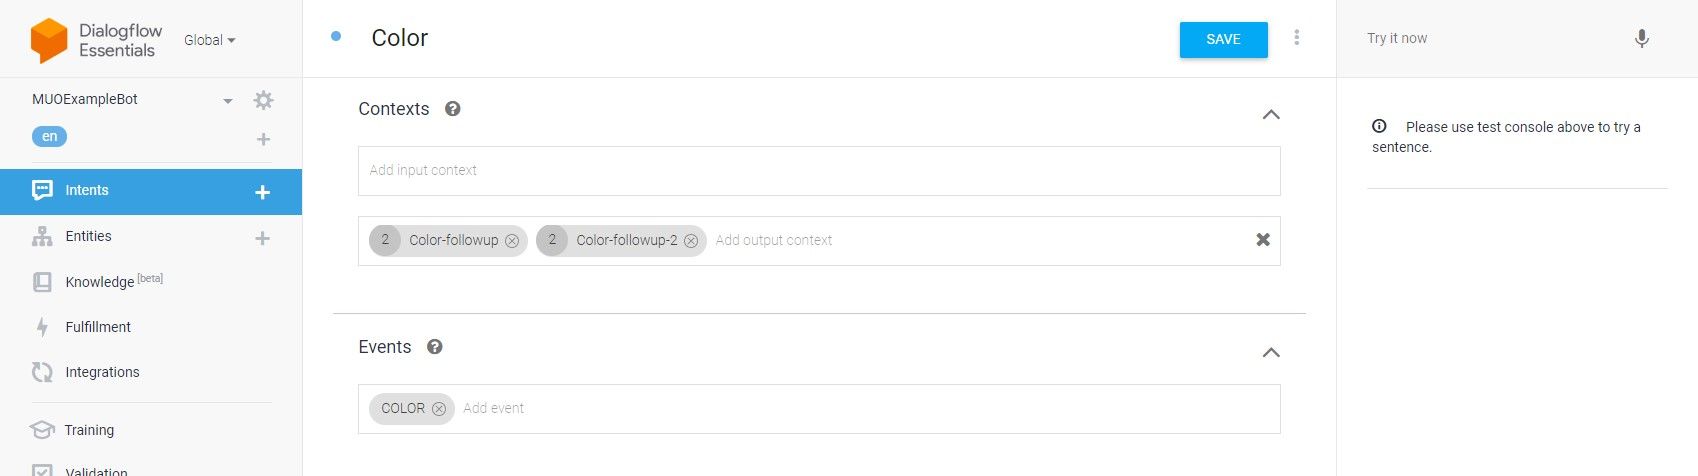
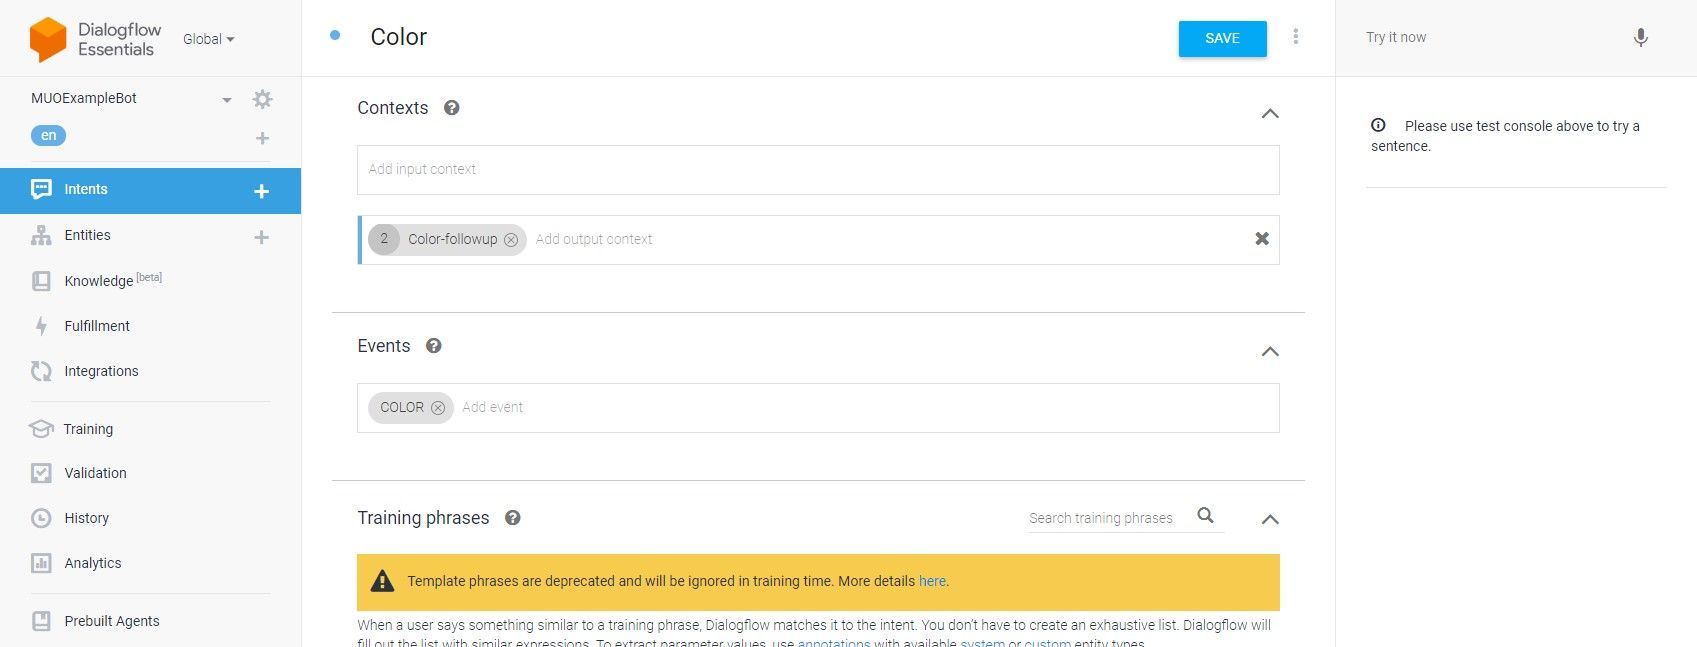
Give your new intent a name and enterCOLORin the events section before hittingEnter.
This will pass the parameters from this intent to the next one.
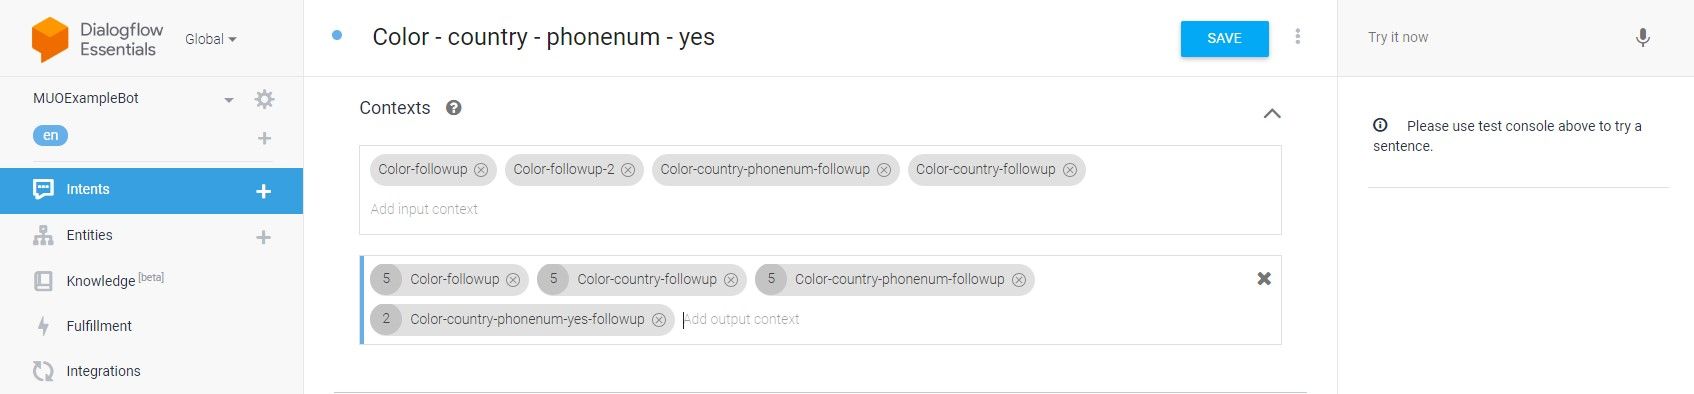
Check the Contexts section of the new intent.
Add another output context for the current intent.
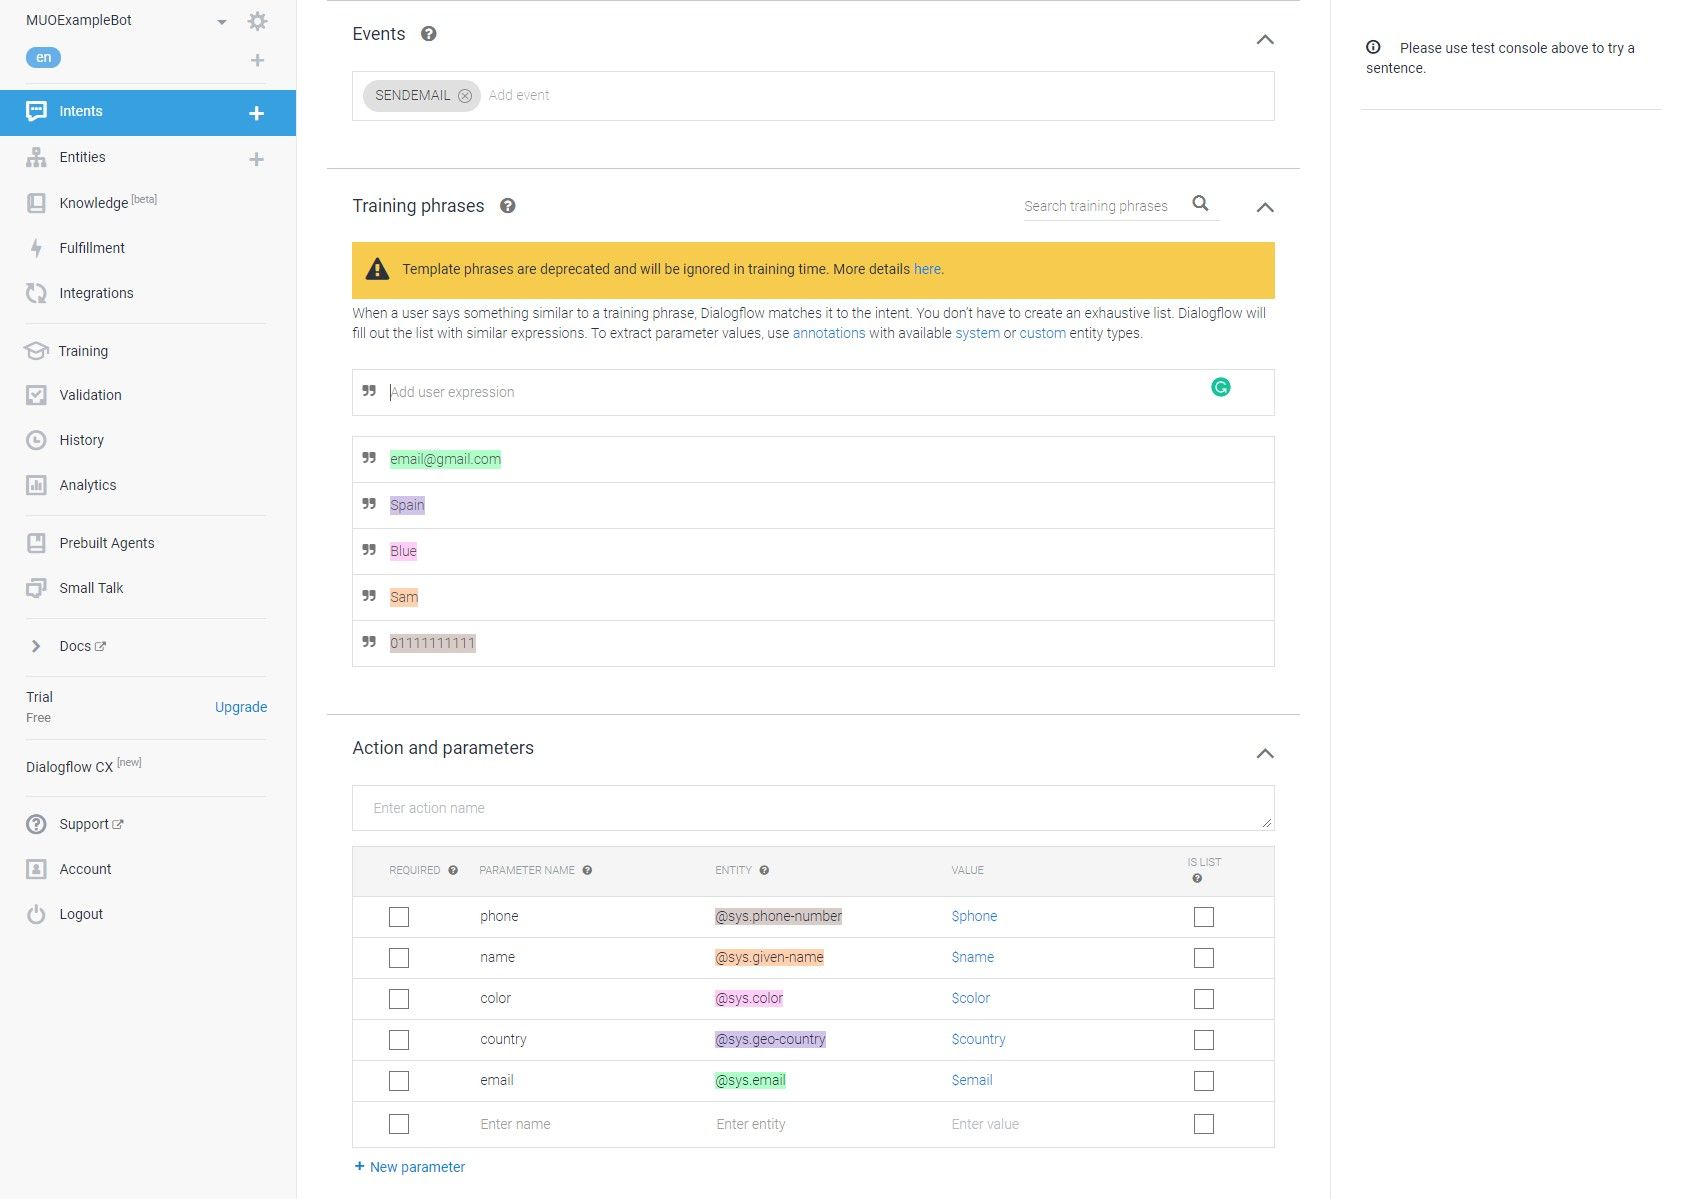
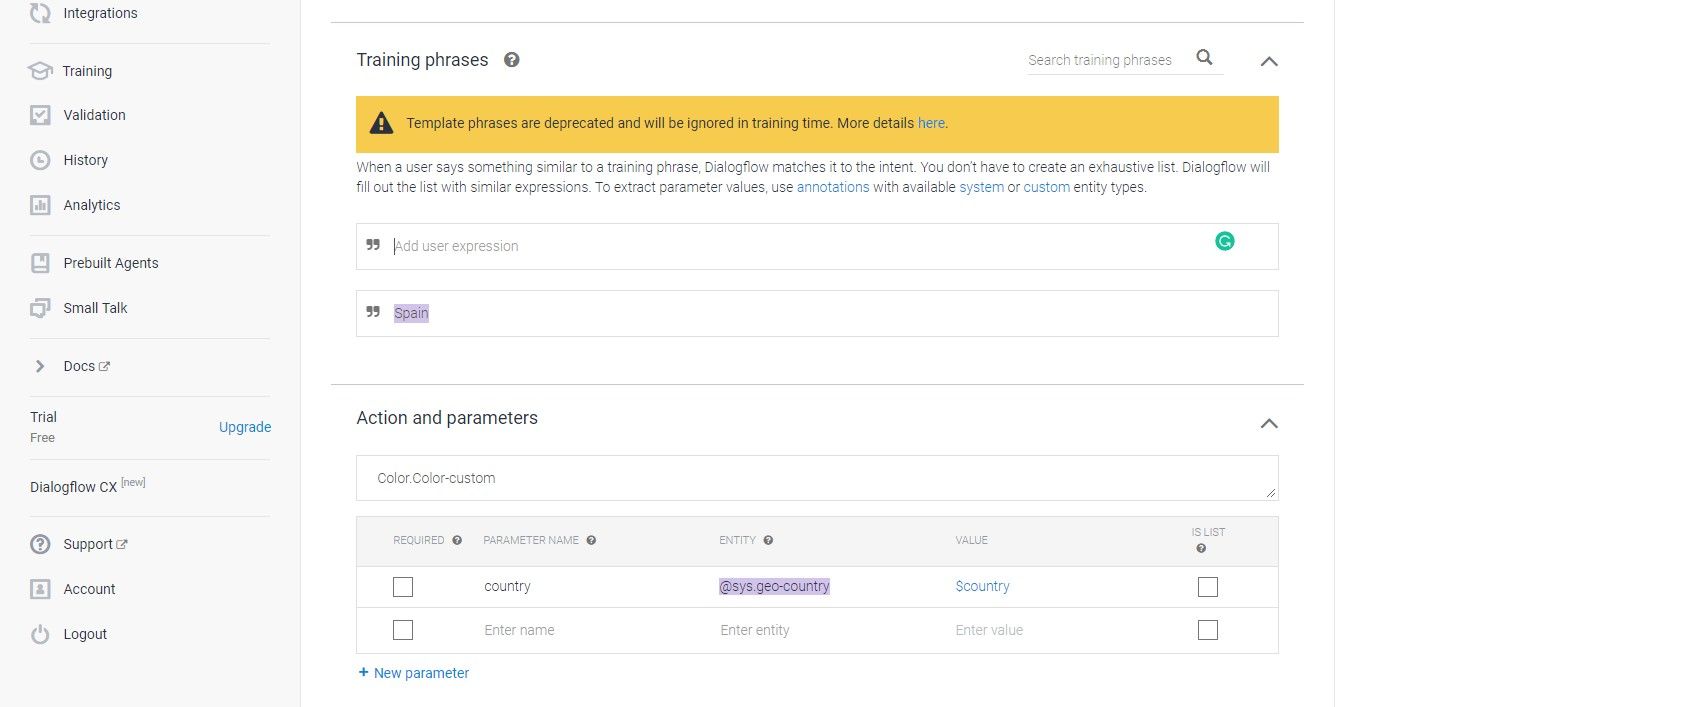
Go to theTraining Phrasessection and add the name of a country to the list before hittingEnter.
This will create a new parameter.
Change the parameters entity key in to@sys.geo-countrybefore adding the parameter to the response section.
Go back to the main Intents menu and create a new follow-up intent for the intent you just created.
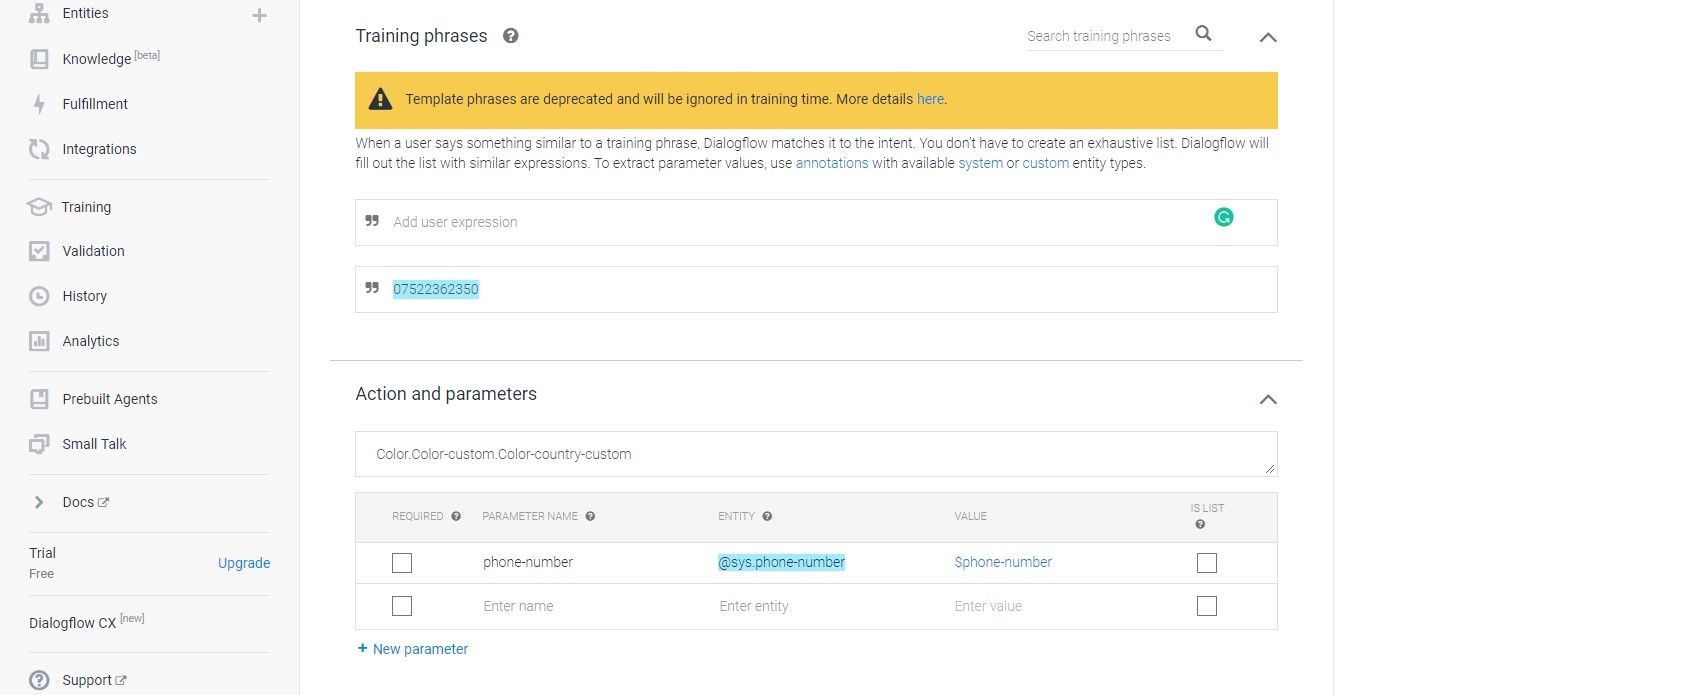
Repeat the steps you’ve just taken, but use a phone number in theTraining Phrasessection.
verify that the generated parameter has a@sys.phone-numberentity key in.
you’ve got the option to set the No follow-up intent to end the conversation.
The Yes follow-up intent needs to have all the Contexts from the previous intents you have created.
Go to theResponsessection, clickAdd Responses, and selectCustom Payloadfrom the list.
The following JSON code will add a list-punch in rich response that calls an event called SENDEMAIL.
All the user parameters you have asked for so far will be sent to this intent.
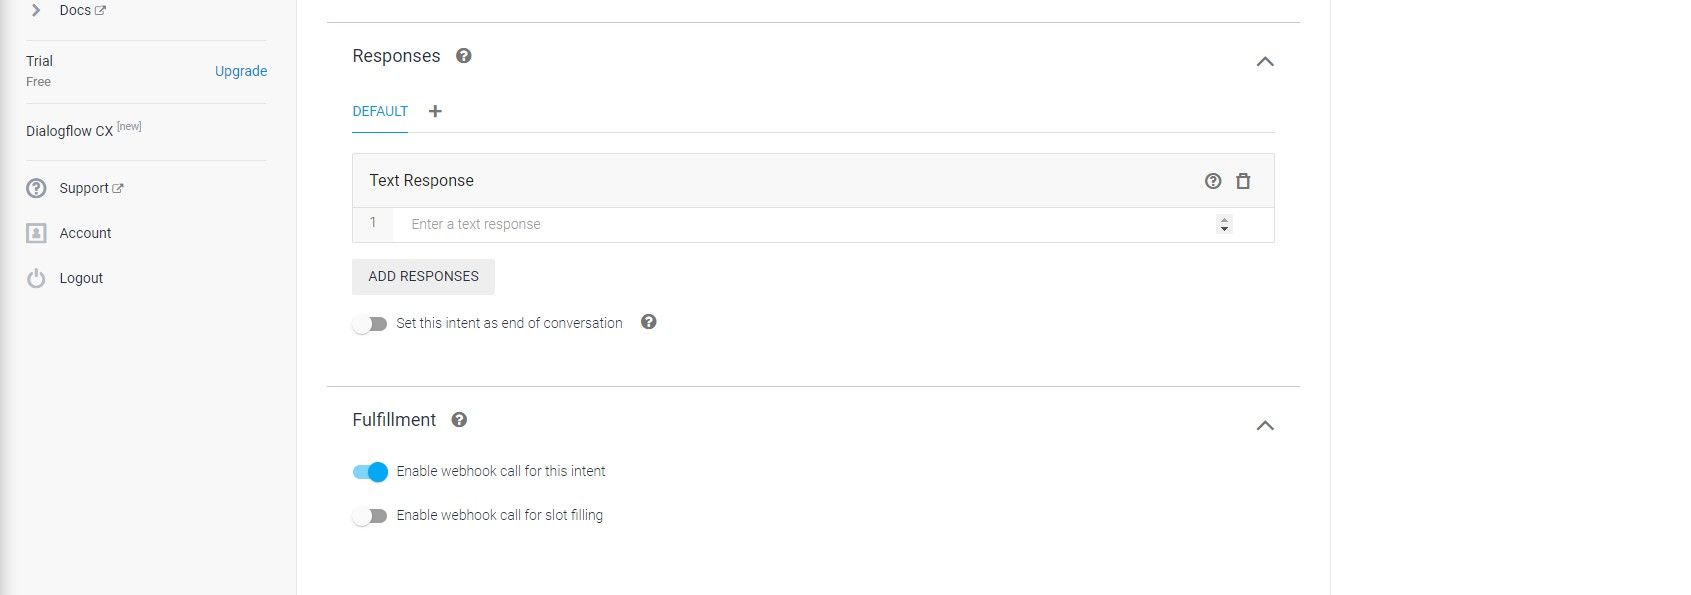
Go to theFulfillmentsection at the bottom of the page and activate the slider labeledEnable webhook call for this intent.
This will enable you to add custom code to this intent.
press thepackage.jsontab and scroll to the bottom of the file.
Replace the dependencies section with the following code to add the Nodemailer API to your project.
Go back to the index.js file and replace the existing code with the sample found onthis CodePen projectbefore clickingDeploy.
You will need to replace the Gmail credentials with those of your own account.
you should probably use an App Password for this.
You canlearn more about Node.jsand how to use it with our handy guide.