Do you have something that you want to display for hours on end?
Maybe an aesthetic digital fish tank for your living room or a home automation dashboard for your smart devices?
Then what you need is balenaDash.
We’ll cover the step-by-step guide on how to build a balenaDash display for displaying a simple website.
But don’t power on the board just yet.
Here’s what you gotta do:
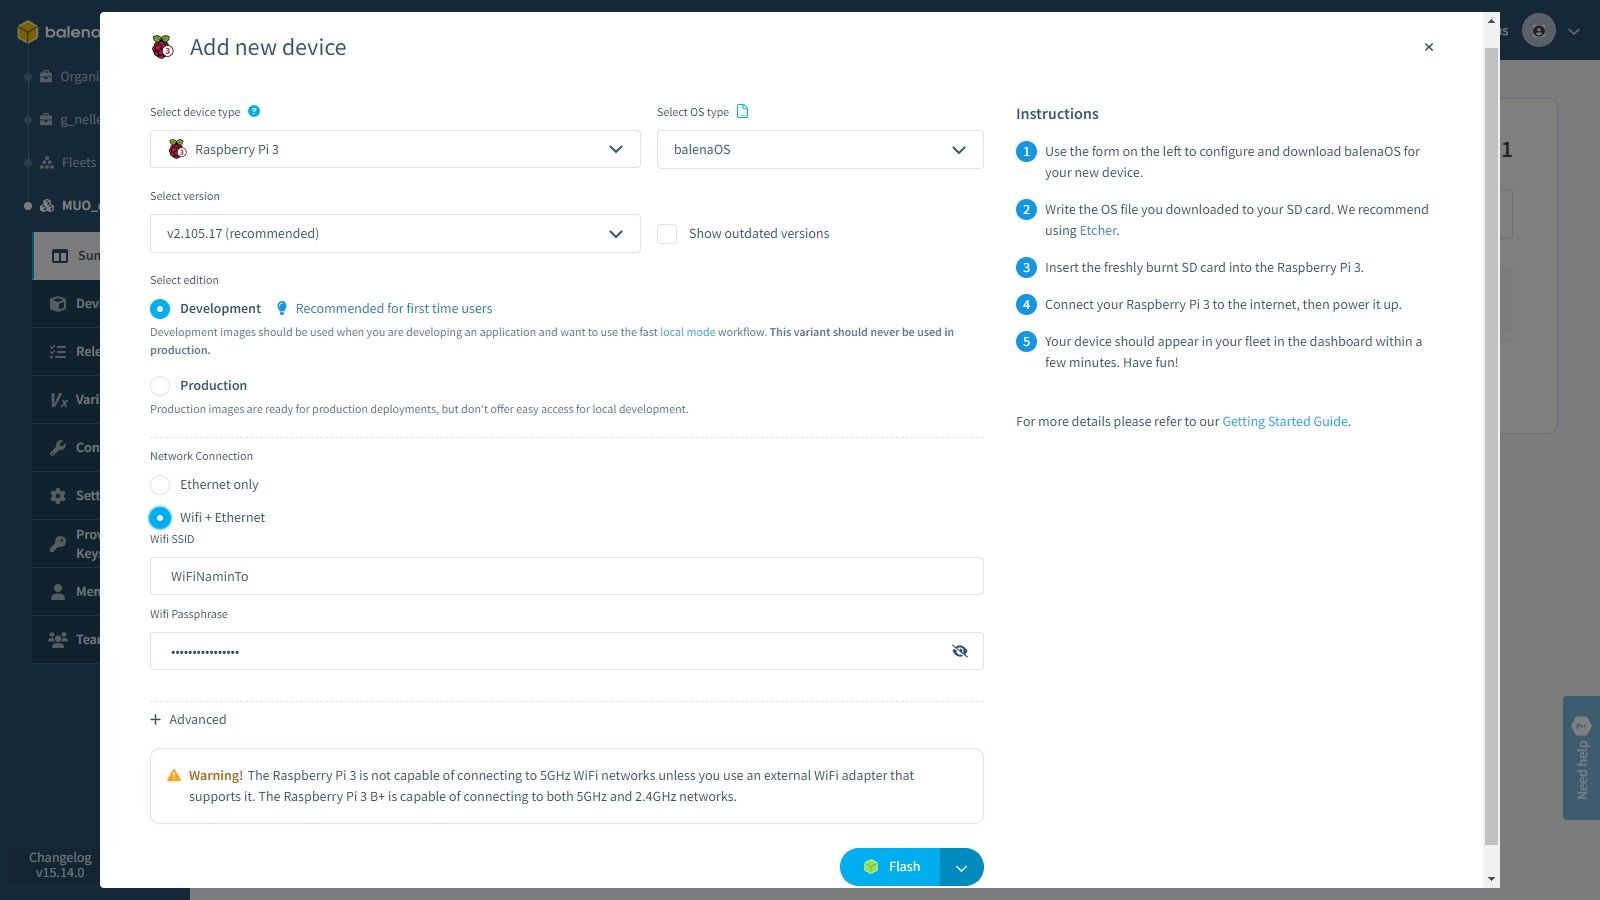
Wait for the flashing process to complete.
Afterwards, insert the microSD card into your Raspberry Pi and power up the board.
This means you’re good to go.
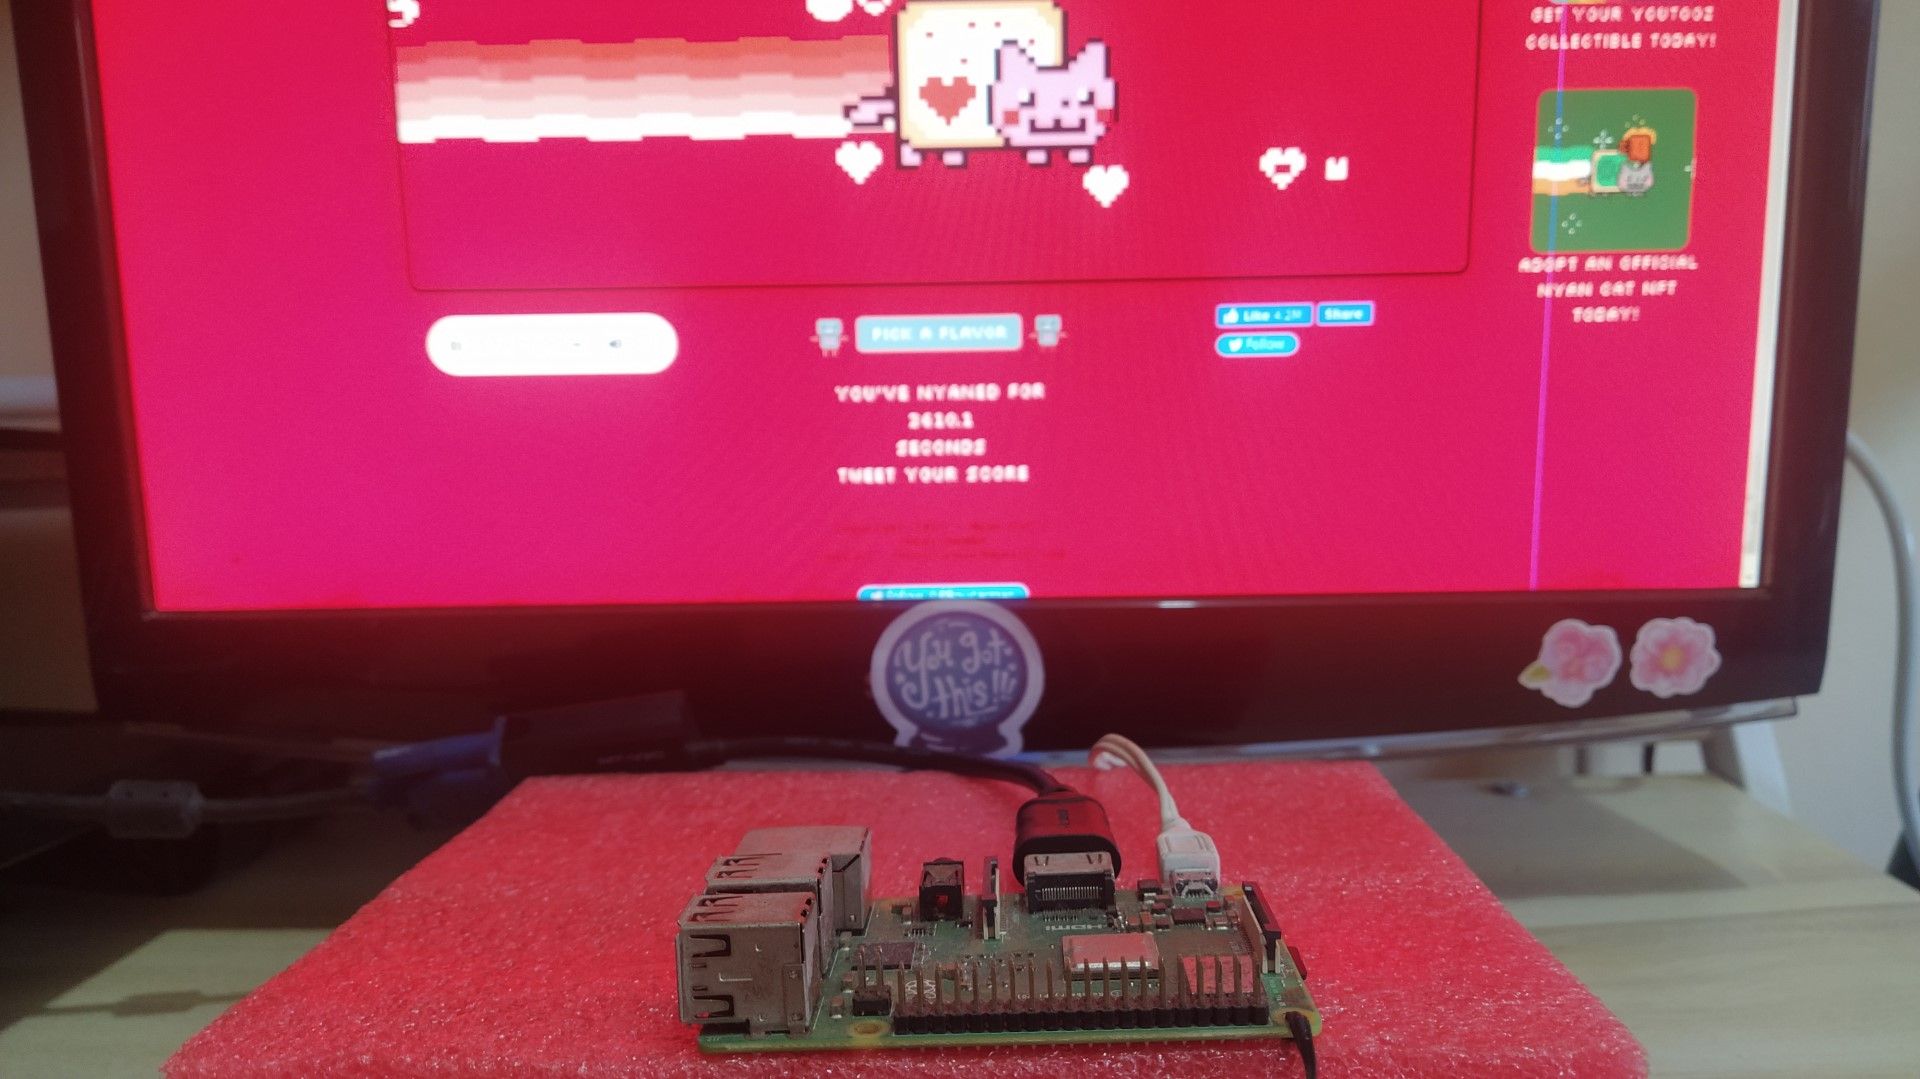
For this example, we’ll display the 24-hour live animated cat found atnyan.cat.
To do this, punch the equipment on your dashboard.
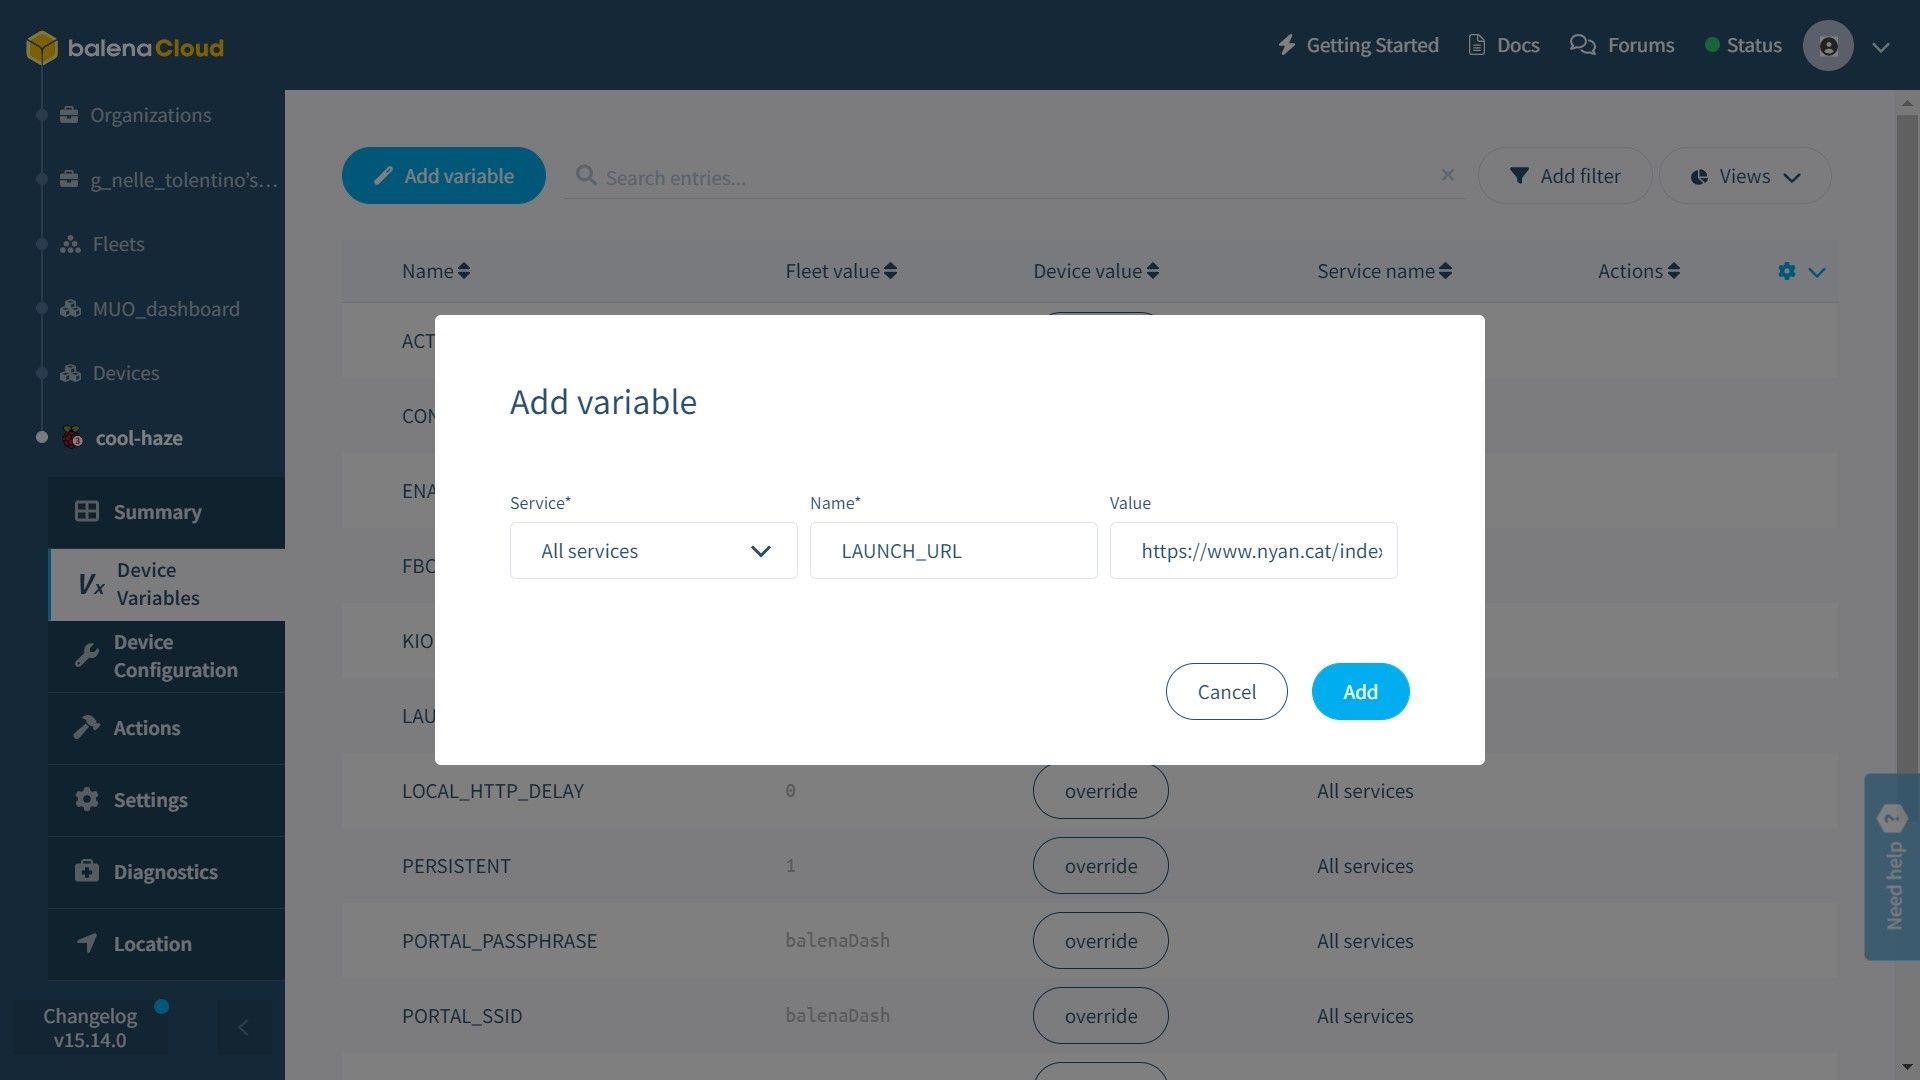
Then, go toDevice Variableson the side panel.
hit theoverridebutton next toLAUNCH_URLand paste the URL in theValuefield.
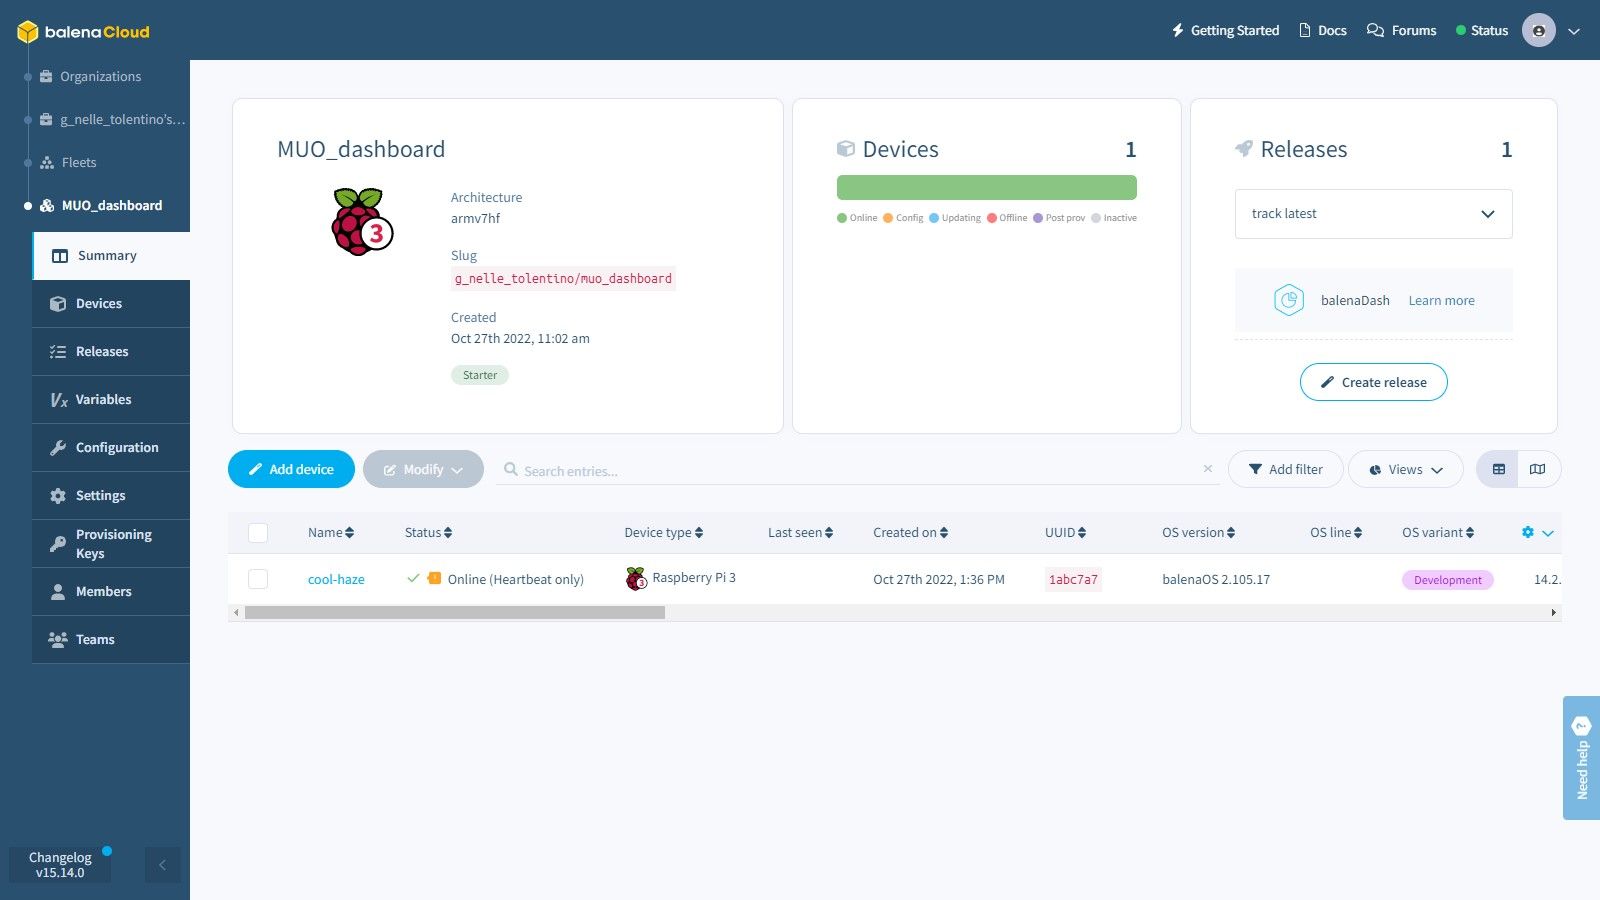
Select theAddbutton to save the configuration.
The webpage should almost immediately be displayed on your Raspberry Pi monitor.
For more ideas, check out thebest Raspberry Pi projects for beginners.
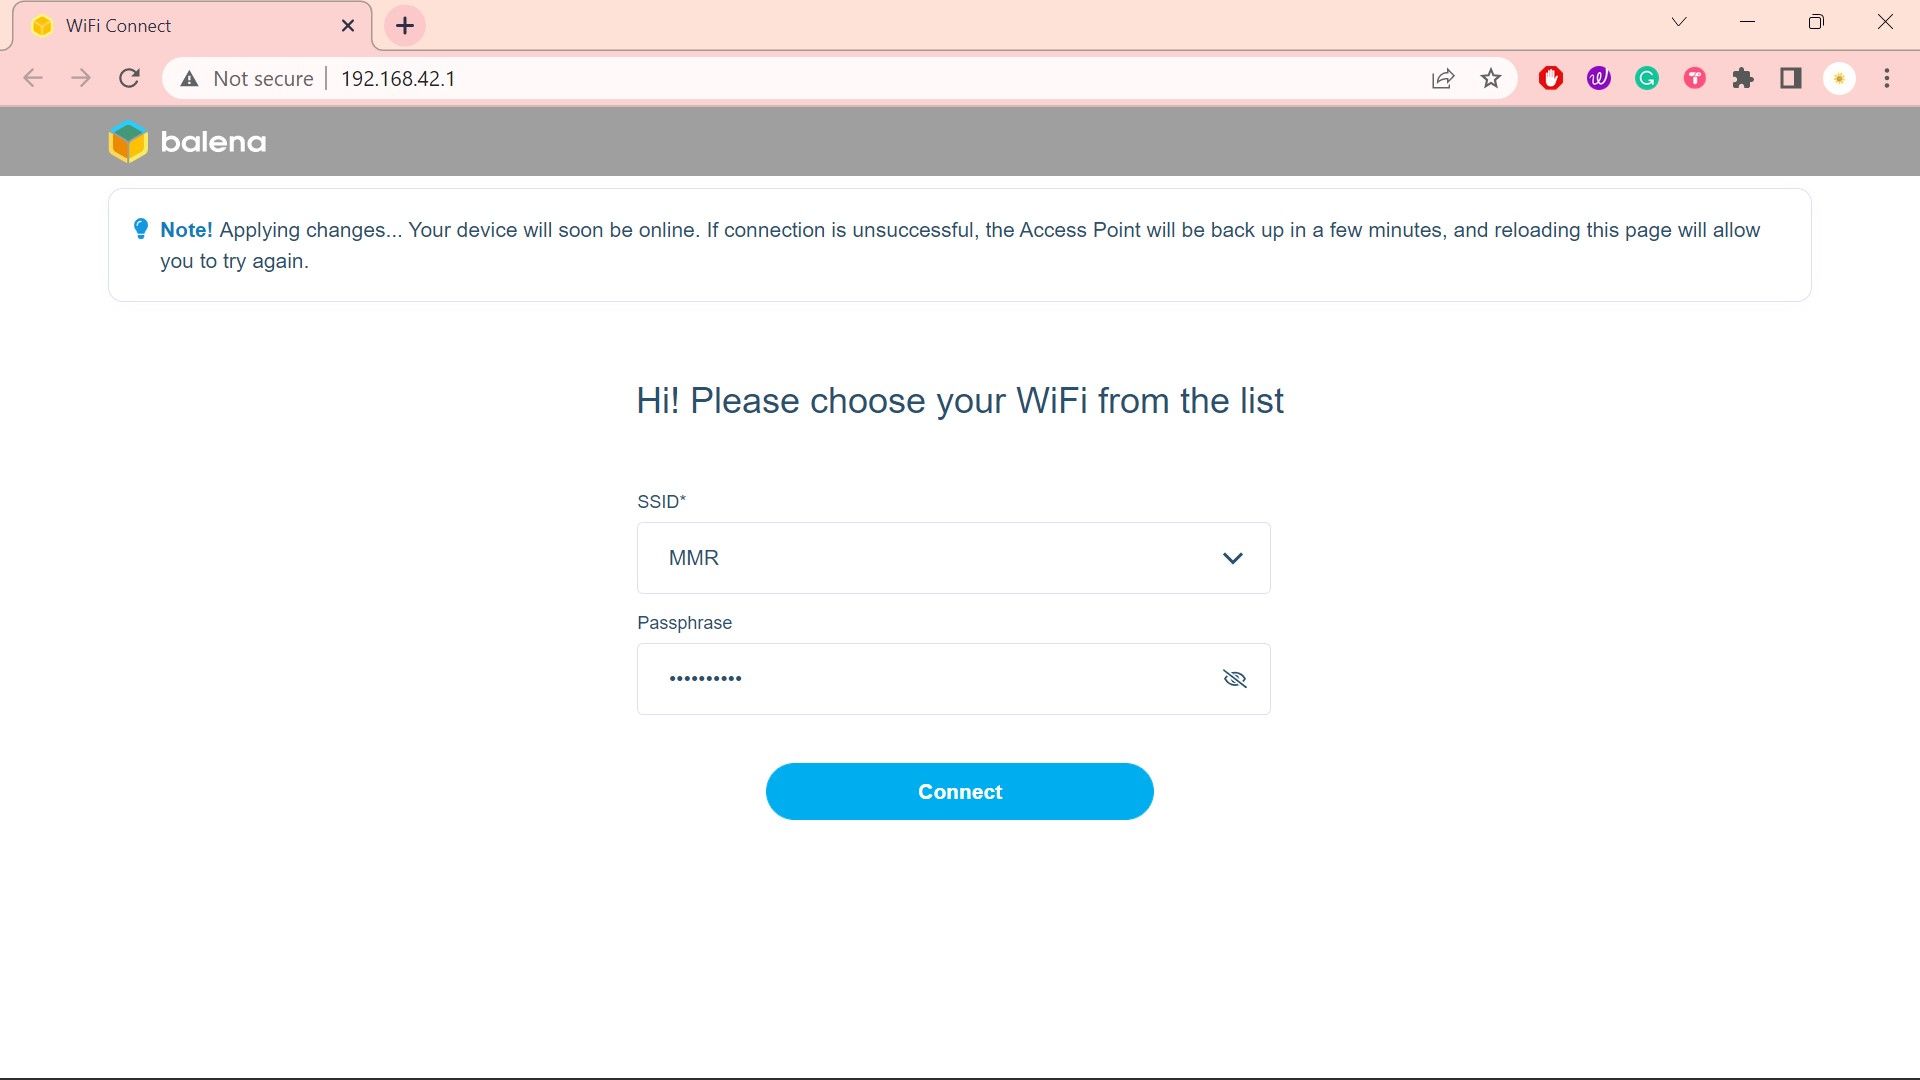
The way Wi-Fi Connect works is that it tests for an internet connection every 120 seconds.
When it detects no connectivity, it automatically switches to become a Wi-Fi access point named “balenaDash”.
you’re free to then join this access point from your laptop or phone.
Upon joining the balenaDash online grid, you will be directed to a portal popup.
Then, wait for your board to connect to the internet again.
What to Display Next?