Let’s discuss the key essential features to help simplify your learning curve.
Transform
Every layer in your project has a selection of Transform effects, each with adjustable properties.
The Transform area is where animation happens in After Effects.

Nolen Jonker/MakeUseOf
To create the second keyframe, drag the playhead to where you want the animation to stop.
This will automatically create a second keyframe, and you’ve just created a basic motion path.
Hit the play button (or Spacebar) to watch your content move along this path.
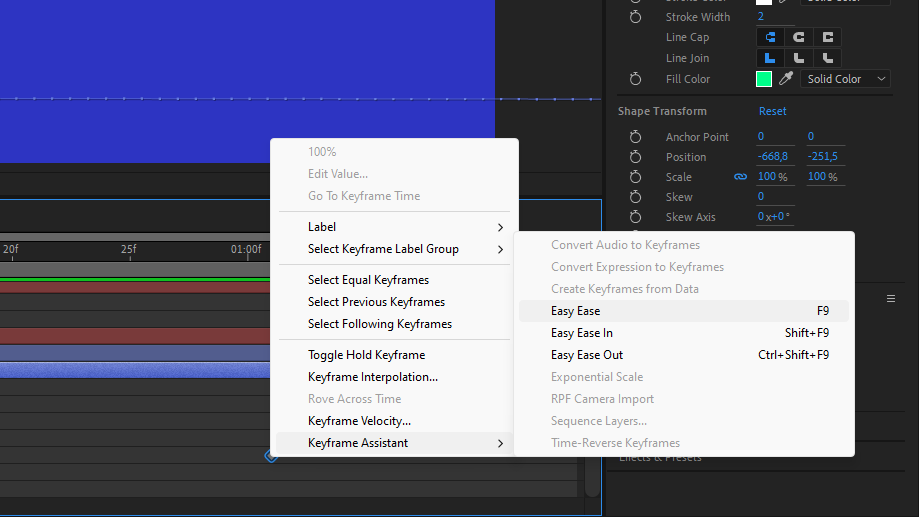
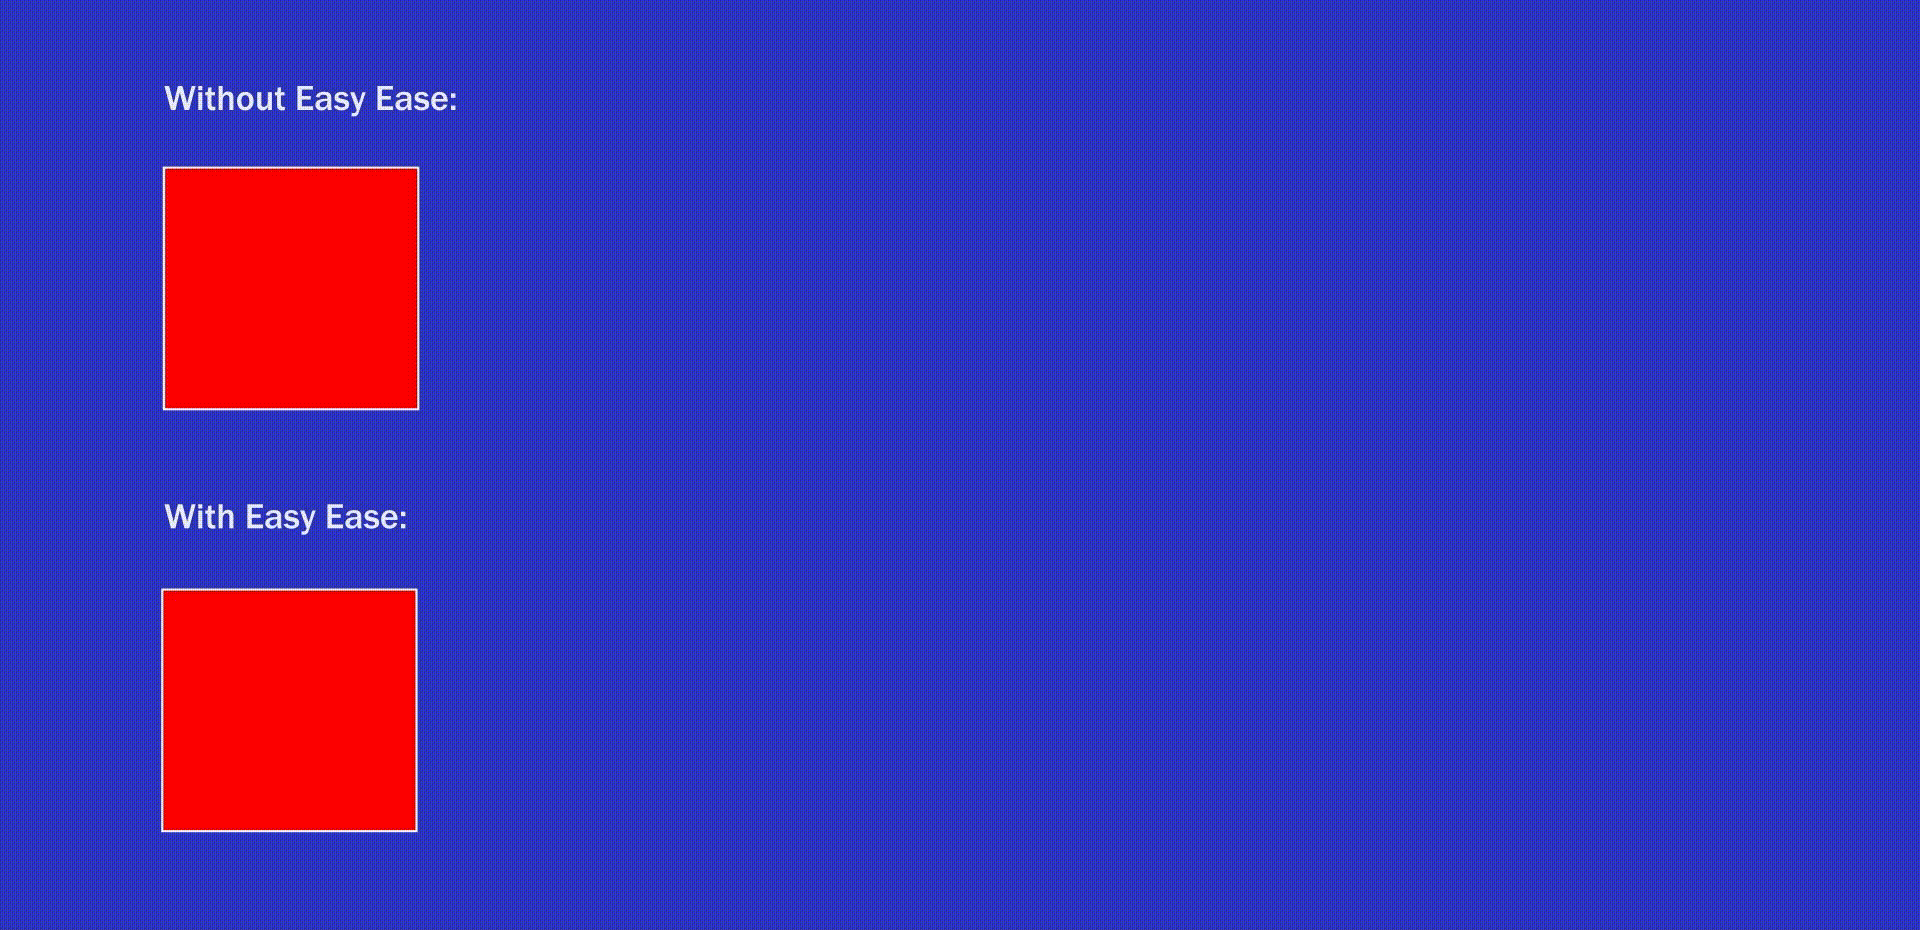
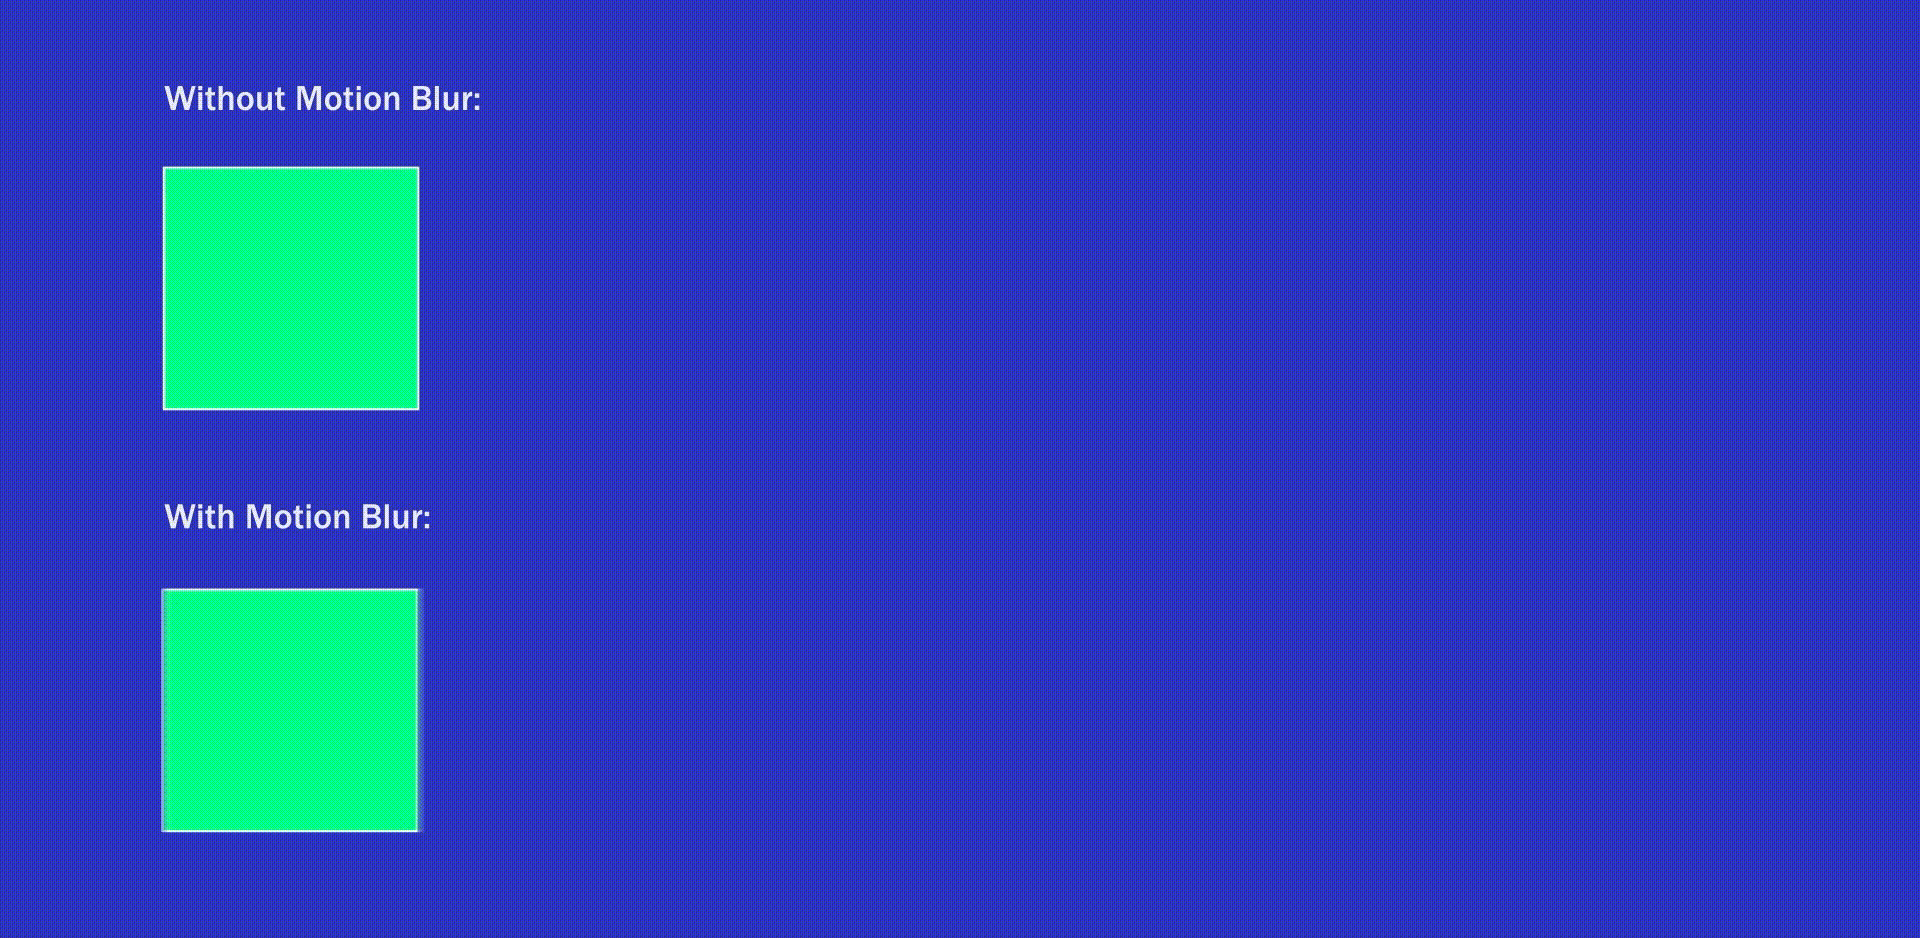
This can look very unnatural and robotic, so adjusting the interpolation is crucial.
it’s possible for you to also play around withEasy InandEasy Outif you want to try varying interpolation speeds.
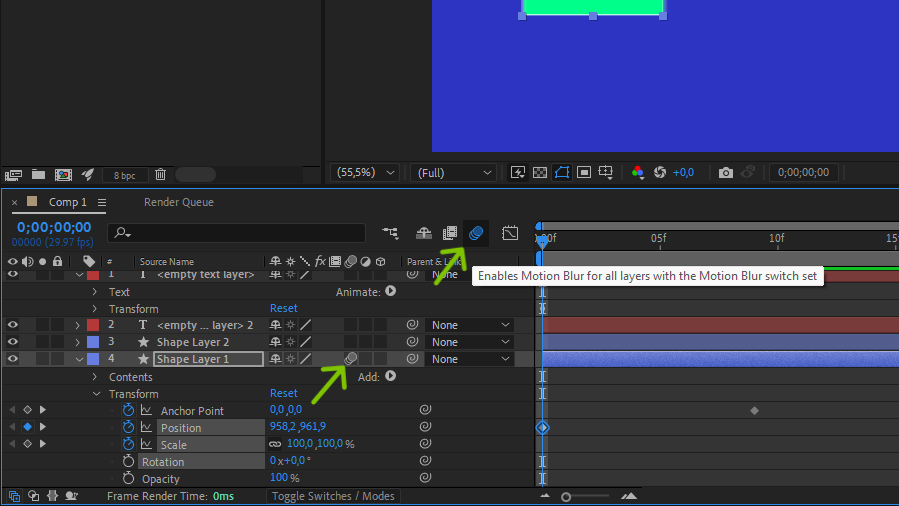
The Motion Blur feature in After Effects prevents the mechanical appearance of motion without blur.
Nolen Jonker/MakeUseOf
Null Object
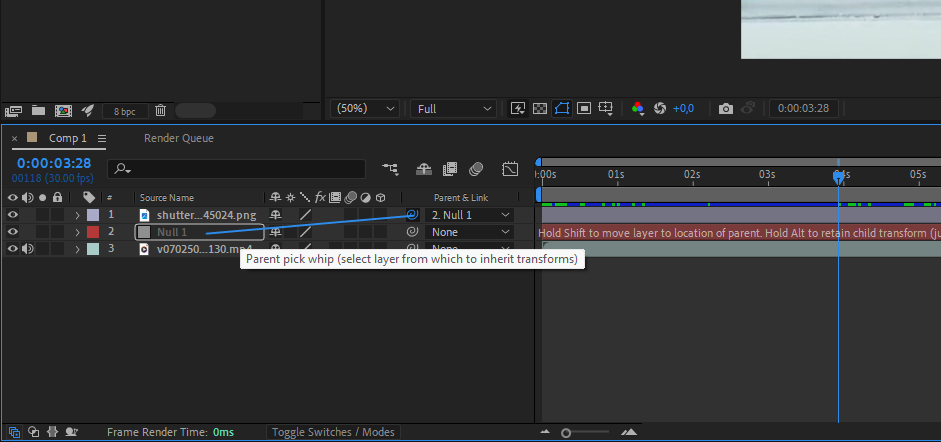
A Null Object is a nothing object and is an essential feature for motion tracking.
The purpose of a Null Object is to act as a parent layer.
Keep reading to see how useful this feature is.
That layer will then move along the path of matching image data across the different framesthis is motion tracking.
In the Tracker window, clickTrack Motion.
A double-square will appear in the playback windowmove it onto the object you want to track in the frame.
Nolen Jonker/MakeUseOf
you’re able to also adjust its size by dragging the little white dots.
take a stab at place it over a high-contrast area that remains unobscured throughout the clip.
Hit the littleplay iconin the Tracker window to start recording the tracking data.

Hit the play icon to restart the tracking for that part.
Once you’ve got the tracking data for the entire clip, you have to store it somewhere.
Go toEdit Targetin the Tracking window and select yourNull Objectnext toLayerin the pop-up.
![]()
Then hitApply, and select bothX and Yin the Dimensions pop-up.
Your motion tracking data is complete and safely stored in the Null Object.
Pick Whip
So you’ve got all this tracking data in your Null Object, but it’s invisible.
![]()
Just ensure it sits above your footage.
Reposition and resize it over the object that you tracked in the video.
Your image layer (child) will now inherit the same properties as the Null Object (parent).
![]()
Hit Spacebar to watch it follow the same motion path.
As shown above, I’ve animated the star face emoji over a dancer’s face.
it’s possible for you to alsocreate animated GIFs using Puppet Warp in Photoshop.
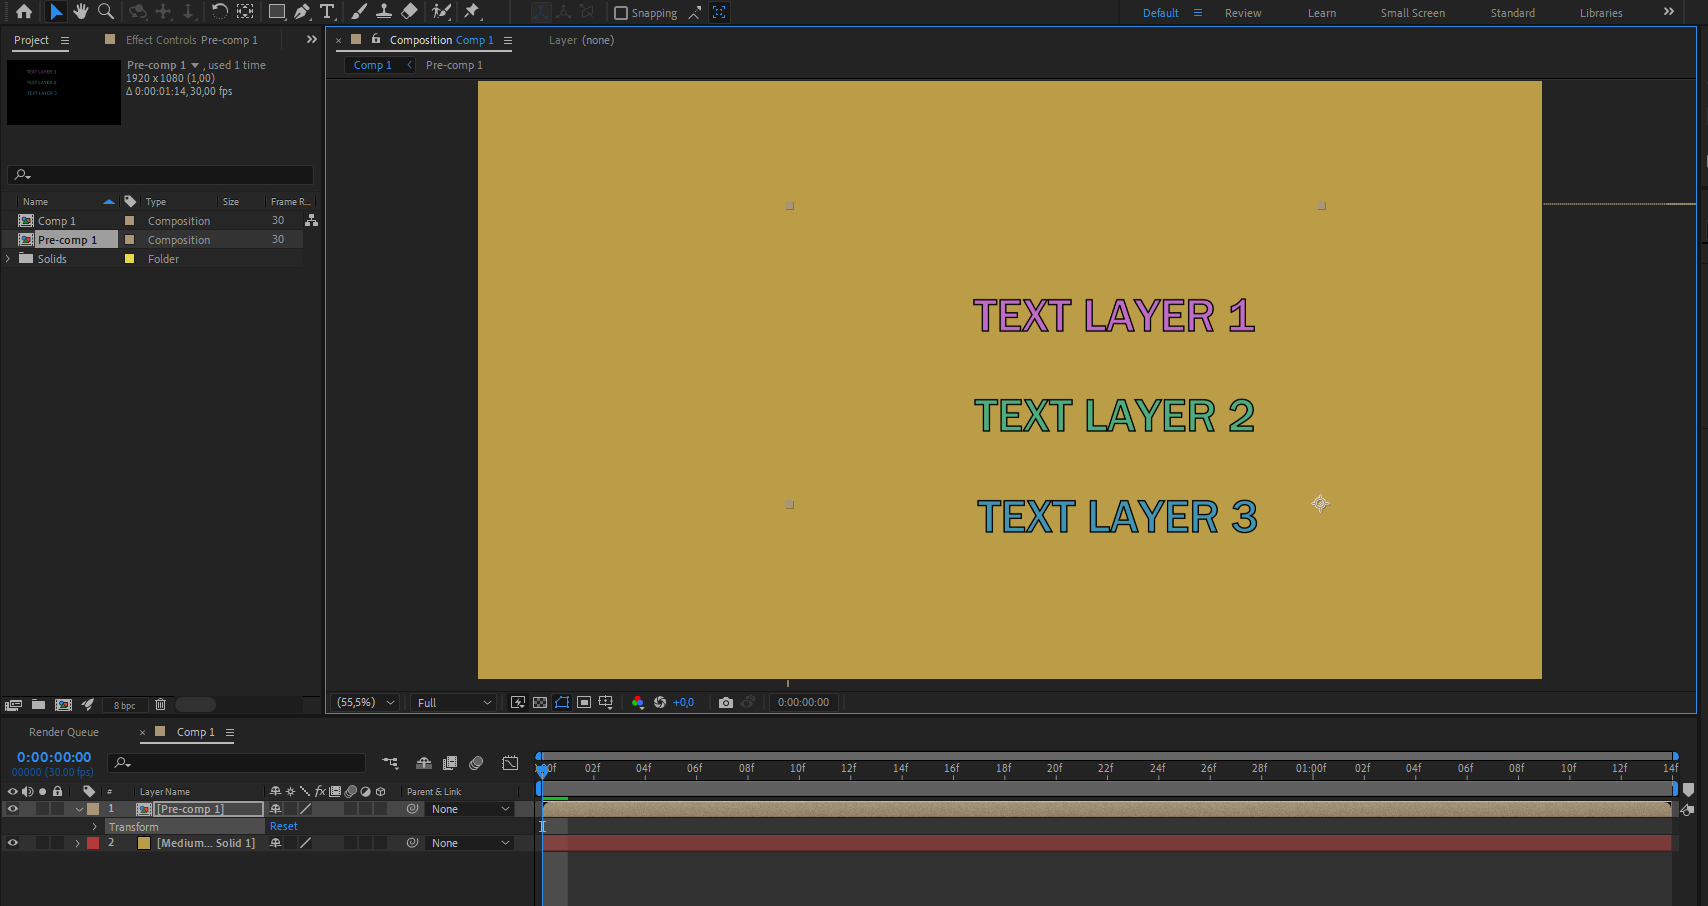
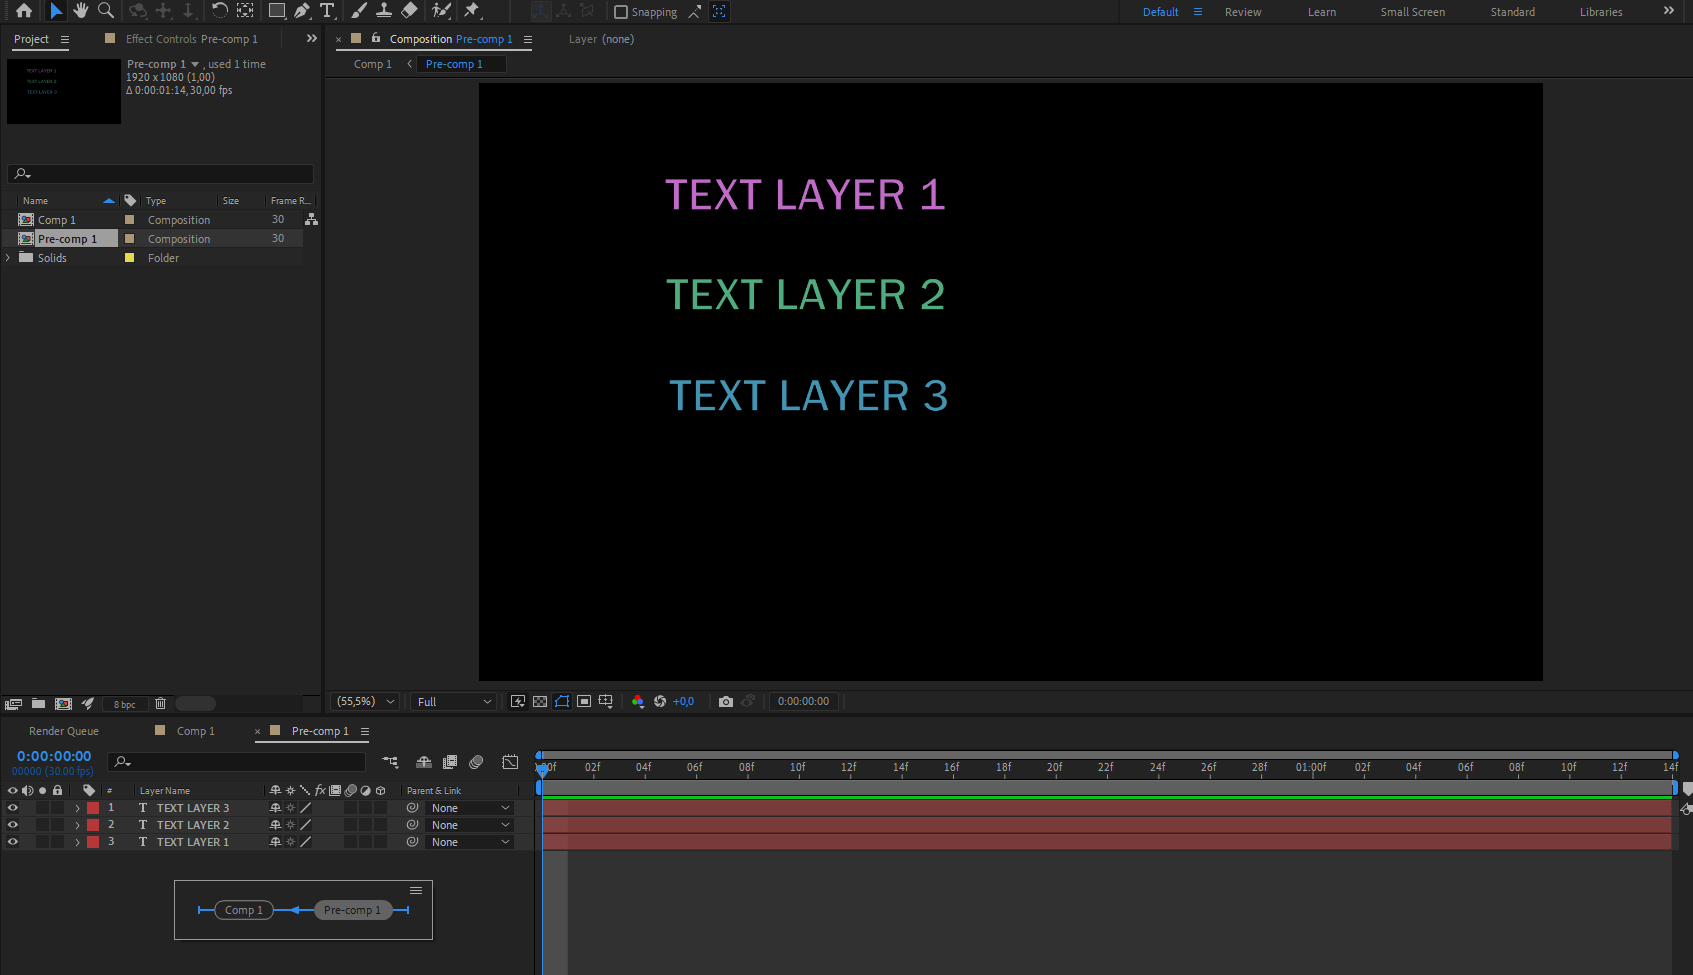
Pre-Compose
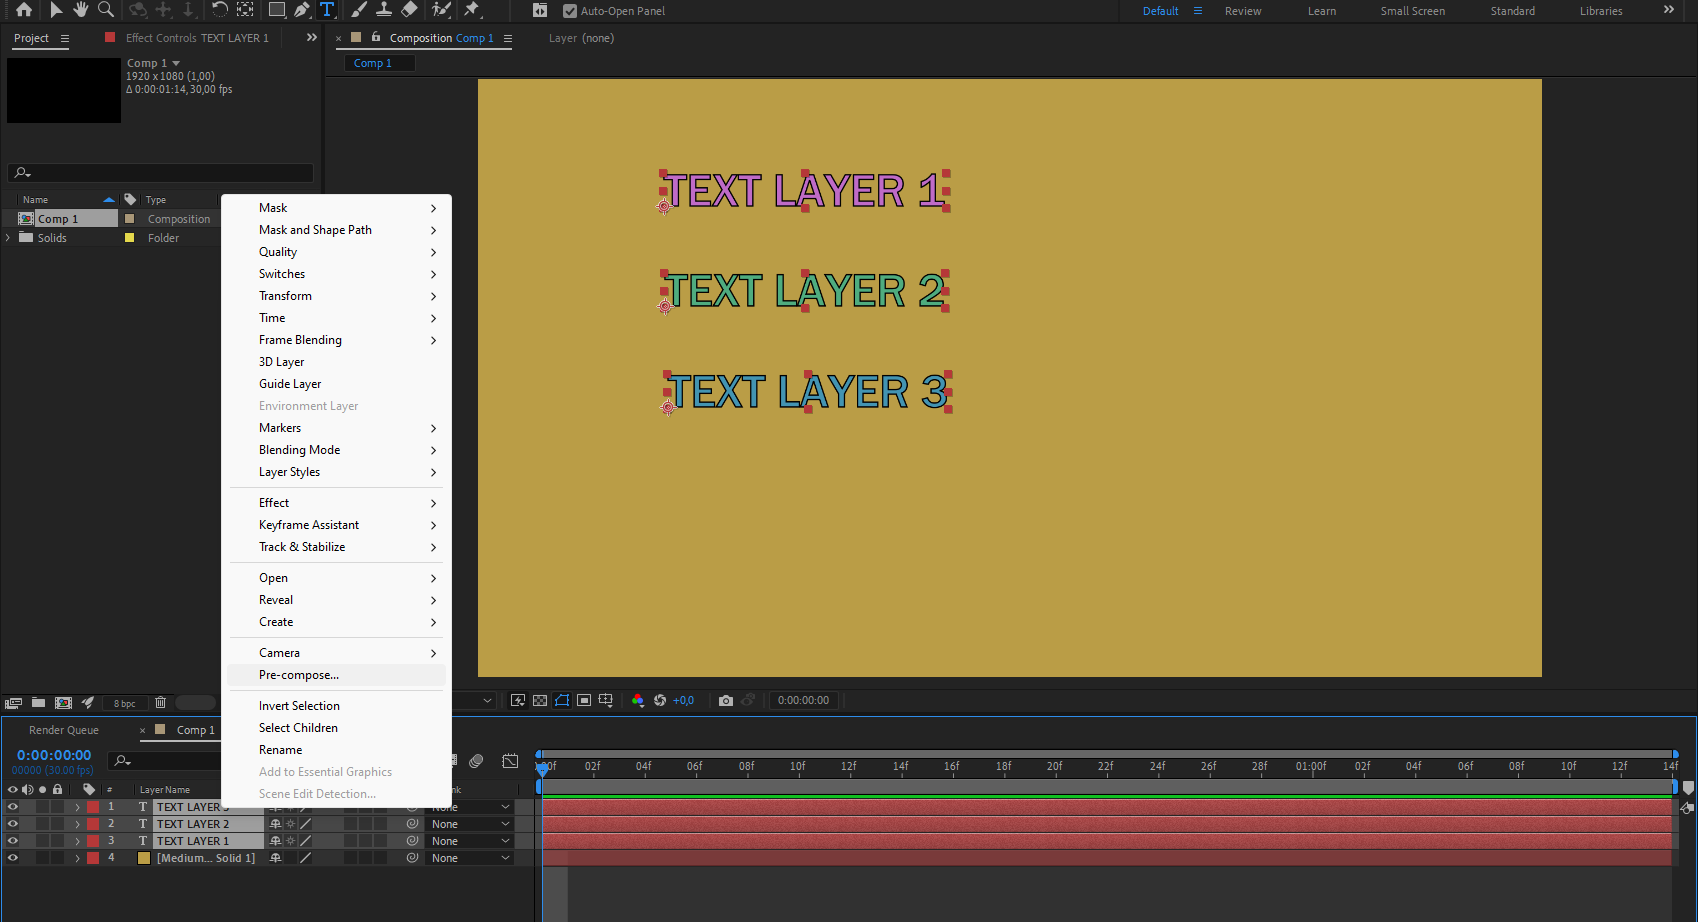
Pre-composing your layers groups them into one package.
Except with Pre-compose in After Effects, you’re free to return to edit any individual layer.
Select all the layers you want to group, right-punch them, and selectPre-compose.
![]()
Nolen Jonker/MakeUseOf
you’ve got the option to also go toLayerat the top panel and selectPre-compose.
This will create a new composition folder containing all the layers you’ve selected.
Whatever effects you apply to this pre-comp folder will be applied to all the layers contained in it.
Mastering these features in After Effects will improve your proficiency in motion animation andstreamline your video editing skills.
Once you’ve got these basics under your belt, you’ll be well-prepared for more advanced editing techniques.