There are numerous tweaks you might play around with, and well outline the most essential ones today.
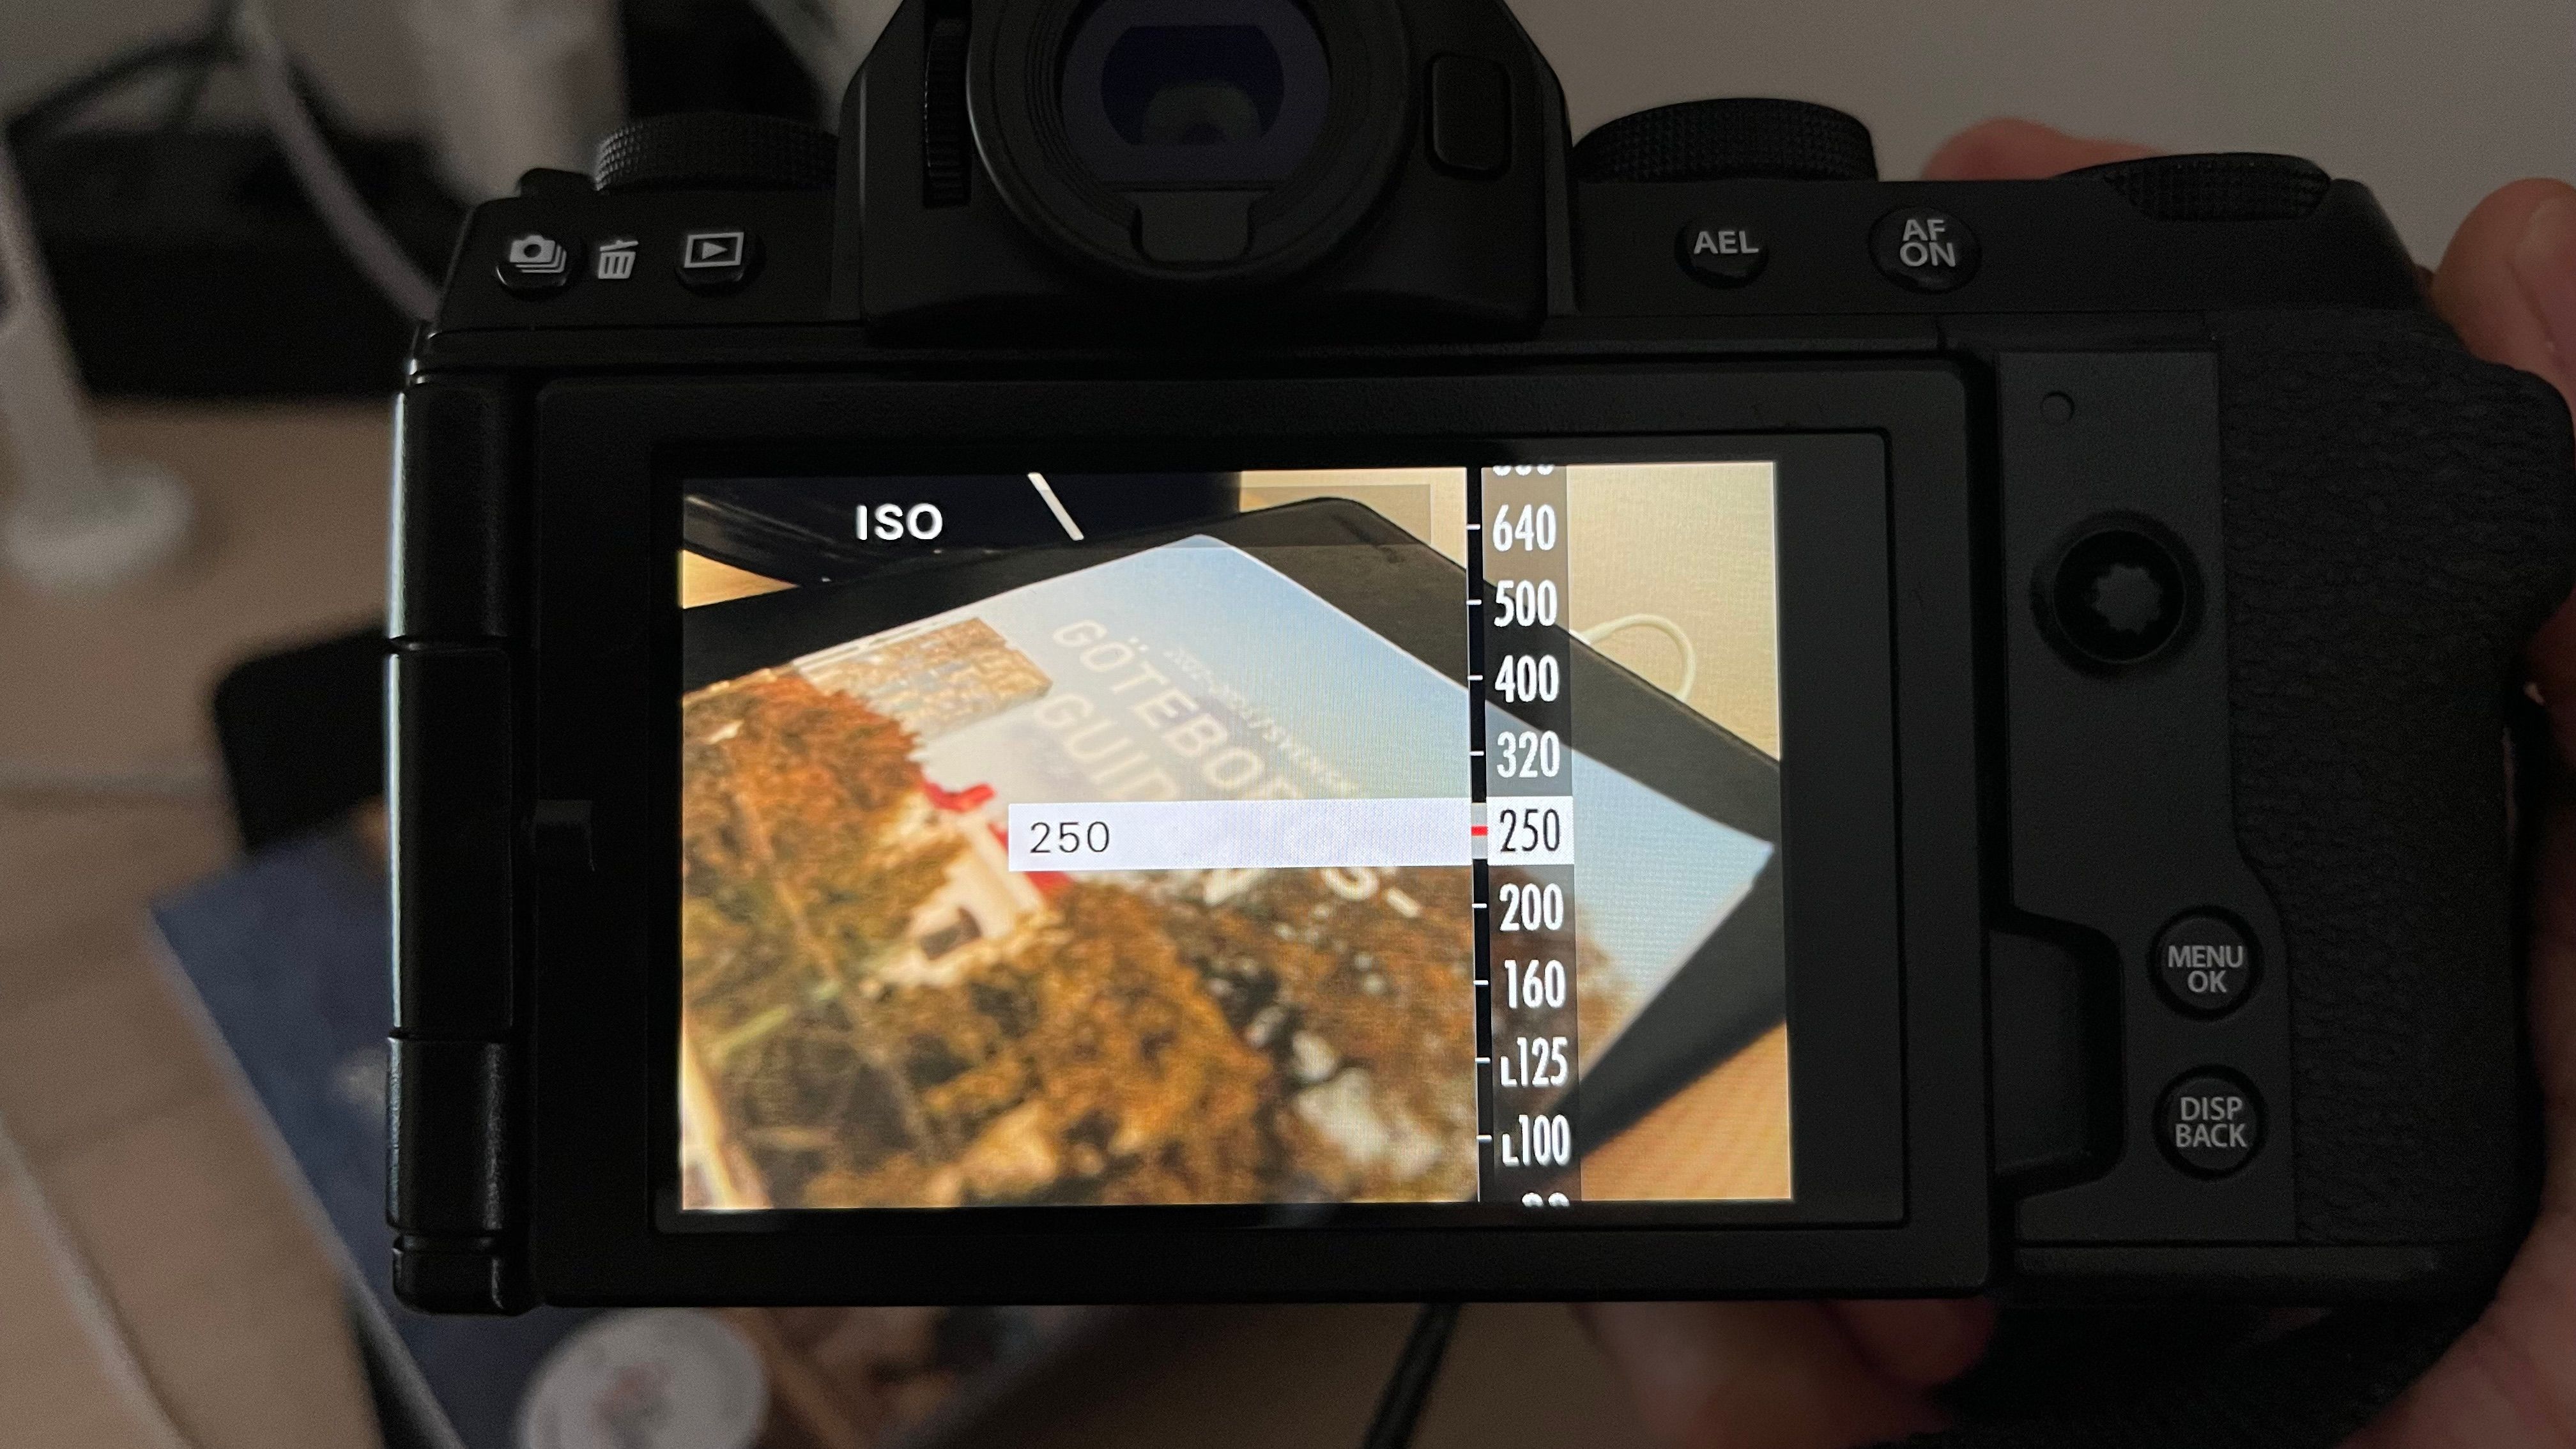
Many photographers shoot anywhere from ISO 400-1,000 for low-light conditions.
If youre taking photos in overcast weather, something around the 400-640 mark will likely work.
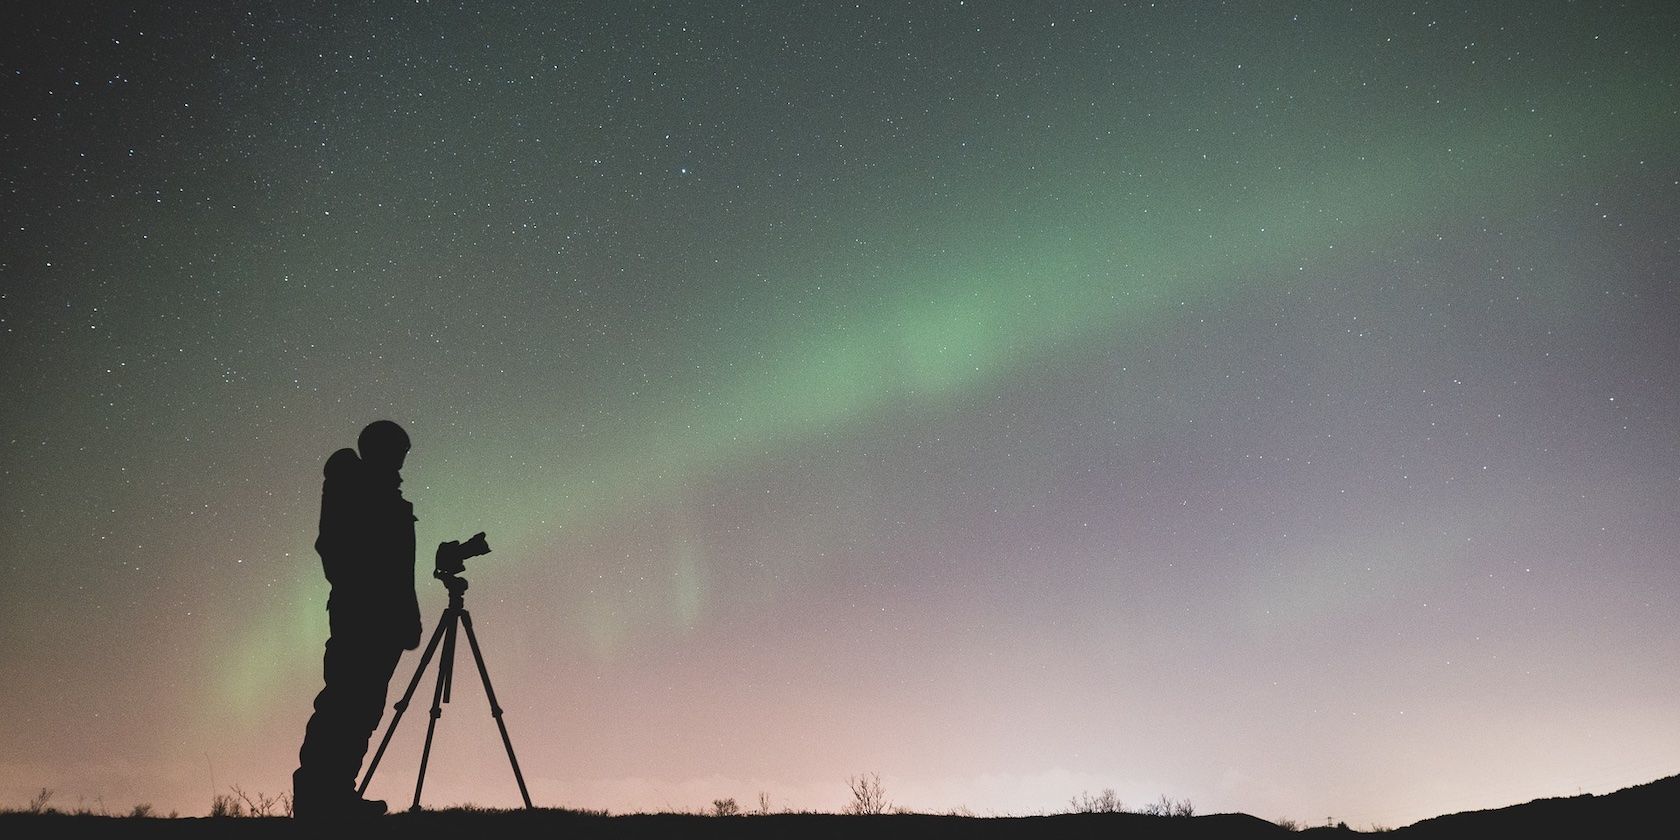
But at night, youll probably need to bump this number higher (unless youre using a tripod).
Despite needing to raise your ISO, you should still keep the number as low as possible.
Past a certain point, your images will become more grainy.
Continuous shooting mode is especially helpful if youre capturing fast-paced sporting events taking place at night.
Theyre also ideal for outdoor nighttime photography.
The good news is that you’ve got the option to still sometimes save blurry photos.
you might read this guide explainingways to fix blurry picturesif youre dealing with this issue.
Aperture Priority Mode is one that you should strongly consider.
When you use Aperture Priority on your camera, you could make the aperturealso known as the F-stopwider.
Doing this will allow more light into your gear, and the ISO and shutter speed will automatically adjust.
This mode is especially helpful if youre trying to capture unique types of images, such as bokeh portraits.
Aperture Priority Mode will still require you to think about what youre photographing.
And the good news is that the lighting meter is very easy to understand.
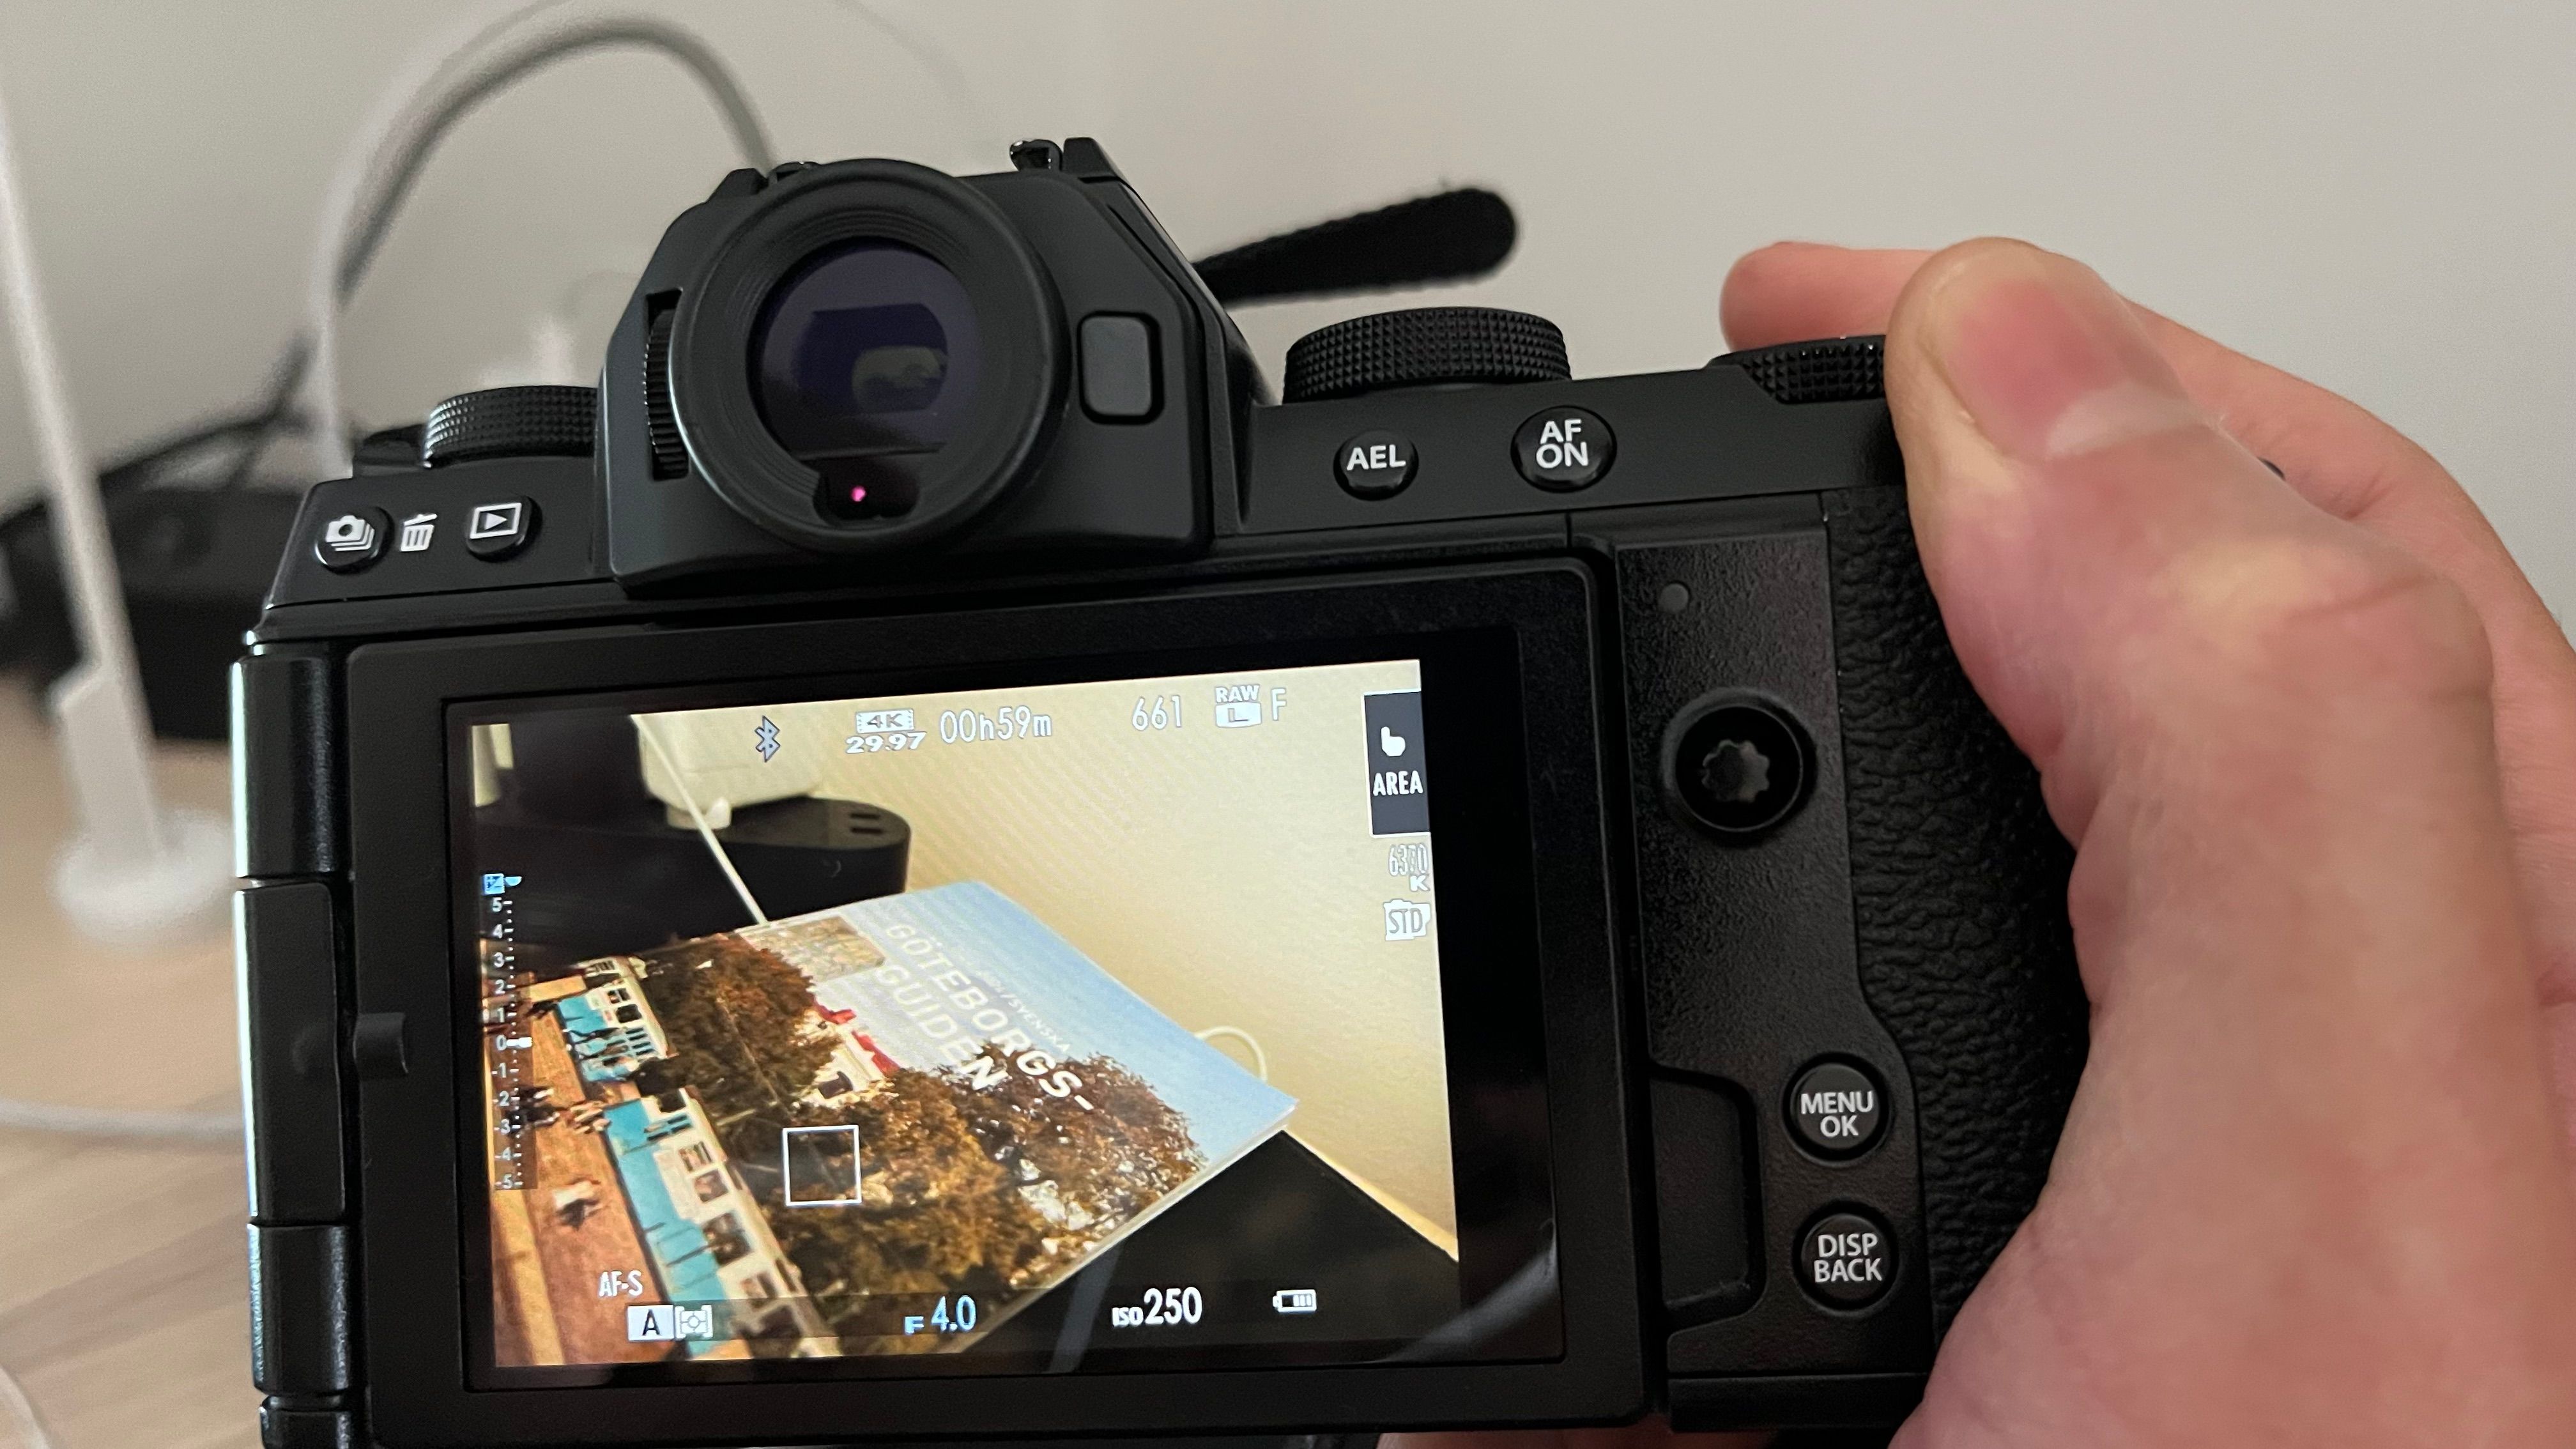
What exactly is the lighting meter, then?
In simple terms, its the meter you see that ranges from +3 to -3.
To get the correct levels of exposure, you normally want to stay as close to 0 as possible.
The lighting meter is also known as exposure compensation (what is exposure compensation in photography?).
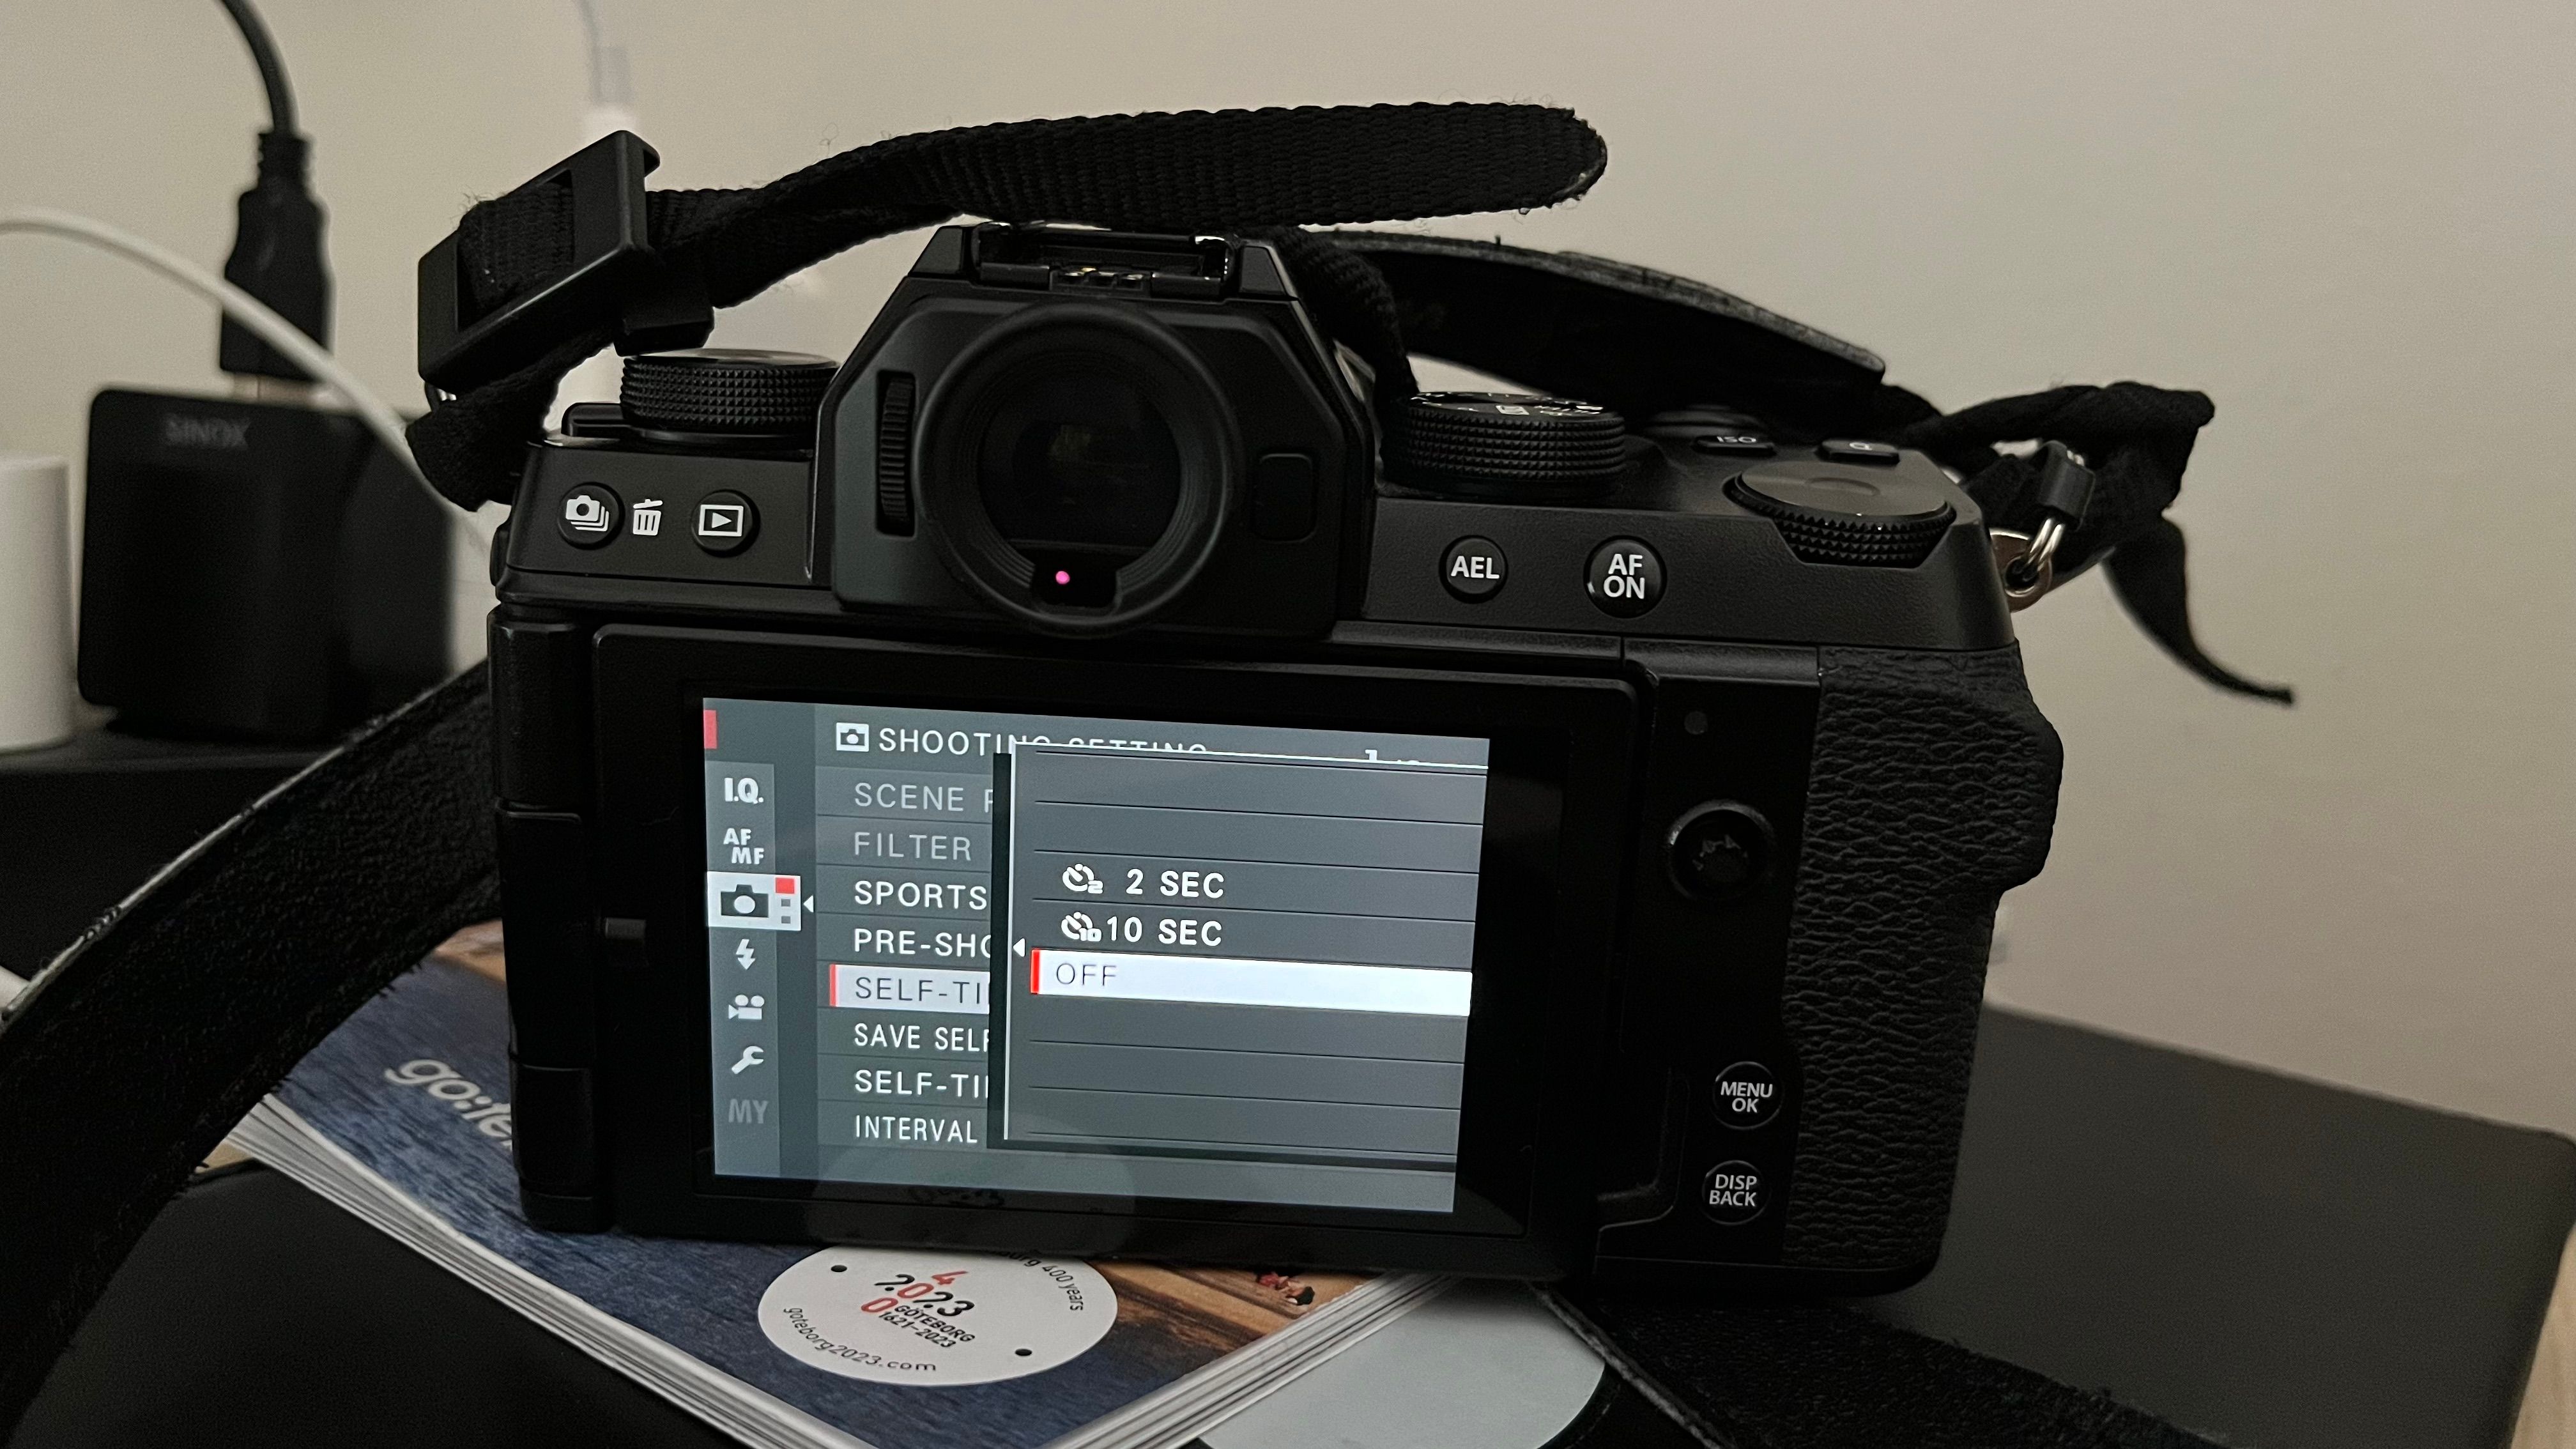
When you use image stabilization, your camera actually shakes a bit during the process.
For this reason, the feature can wreak havoc on your images if you use a tripod.
you might normally adjust your image stabilization configs via a button on your camera.
Youll know whether its turned on or off because your screen should notify you.
And when that happens, your chances of getting clear photos will significantly reduce.
One easy way to mitigate this problem is by using the self-timer feature on your camera.
Shutter Speed
Shutter speed is one of the first aspects that beginner photographers learn to control with their camera.
Slower shutter speeds will let more light into your camera and enable you to capture your scene correctly.
You may need to experiment, as itll come down to your manufacturer and camera model.
you could tweak the ISO, use self-timers, and even enable or disable image stabilization.
These tips will also work in overcast prefs and for indoor photography scenarios where you have limited artificial lighting.
