Cyber-Ds Autodelete
Cyber-Ds Autodelete is an easy-to-use tool with a simple interface.
It has several filters that allow you to schedule automatic file deletions.
To get started, press theADD FOLDERbutton in the top-right corner and select your preferred folder.

Next, scroll to theNAME FILTERS,DATE FILTERS, andDELETE OPTIONSbuttons.
From there, you’re able to pick the date filters.
To do this, navigate to theDATE FILTERSsection and then turn on the relevant buttons.
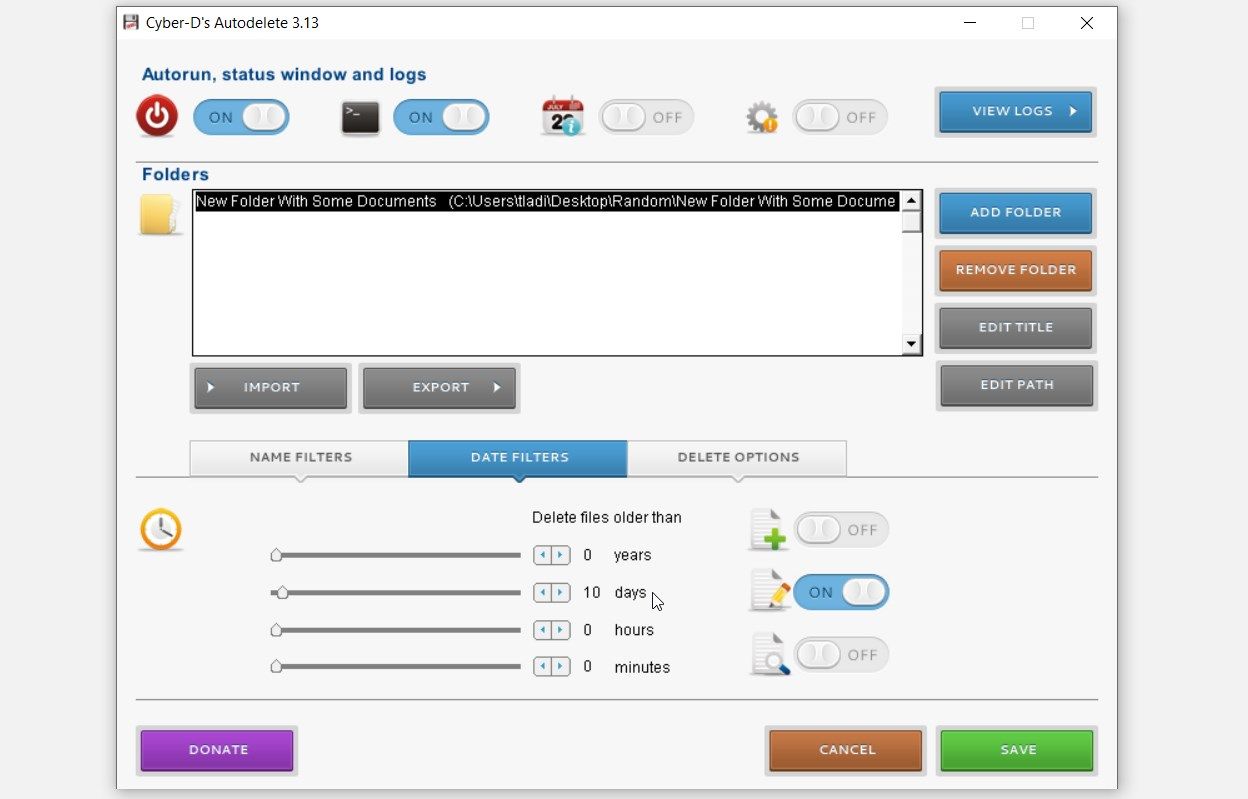
For example, you could turn on theDate Createdbutton.
From there, press theSAVEbutton.
Finally, navigate to theDELETE OPTIONSsection and configure the relevant controls.
Download: Cyber-Ds Autodelete forWindows(Free)
2.
Remove Old Files
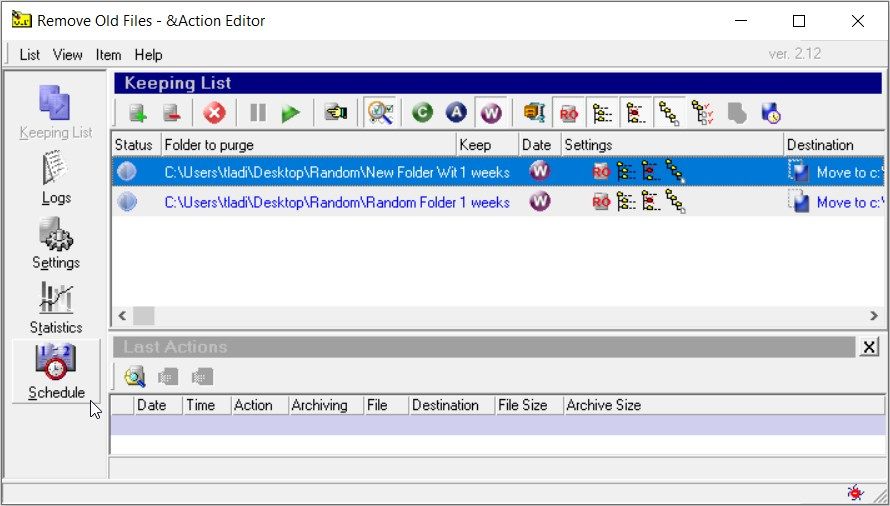
Remove Old Files is packed with tons of features.
But to automatically delete your files, you only need to use theSchedulesection on the left.
To get started, press theItemtab towards the top-left corner and selectAdd item.
Next, press theKept Folderbutton and select your preferred folder.
From there, add a description in theDescriptionbox and press theOKbutton.
Next, press theSchedulebutton on the main interface and then double-hit your target folder.
From there, configure the relevant prefs to schedule automatic file deletions.
Finally, pressOKto save these changes.
To configure additional tweaks, press theSettingsbutton on the main interface.
To view some results, press theKeeping List,Logs, orStatisticsbutton on the main interface.
Download: Remove Old Files forWindows(Free)
3.
Delete Files Older Than
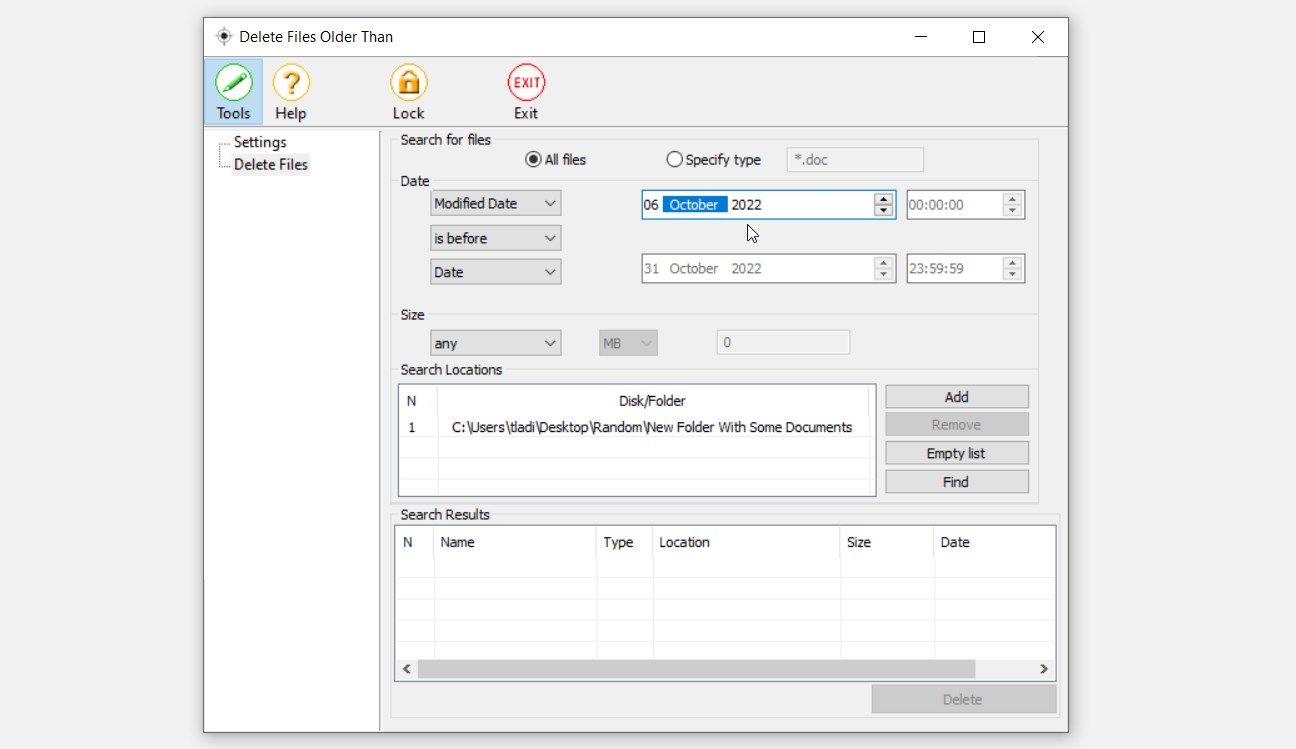
The Delete Files Older Than tool features a simple and easy-to-use interface.
To get started with using the tool, select theDelete Filesoption on the left-hand side.
Next, press theAddbutton in the bottom-right corner.
From there, go for the relevant folder and pressOK.
You also have the choice to choose the size of files you want to delete.
To do this, click theSizedrop-down menu and snag the relevant option.
To configure additional configs, press theSettingsbutton on the left-hand side of the main interface.
If you need additional tips on how to use the tool, press theHelpbutton.
Download: Delete Files Older Than forWindows(Free)
4.
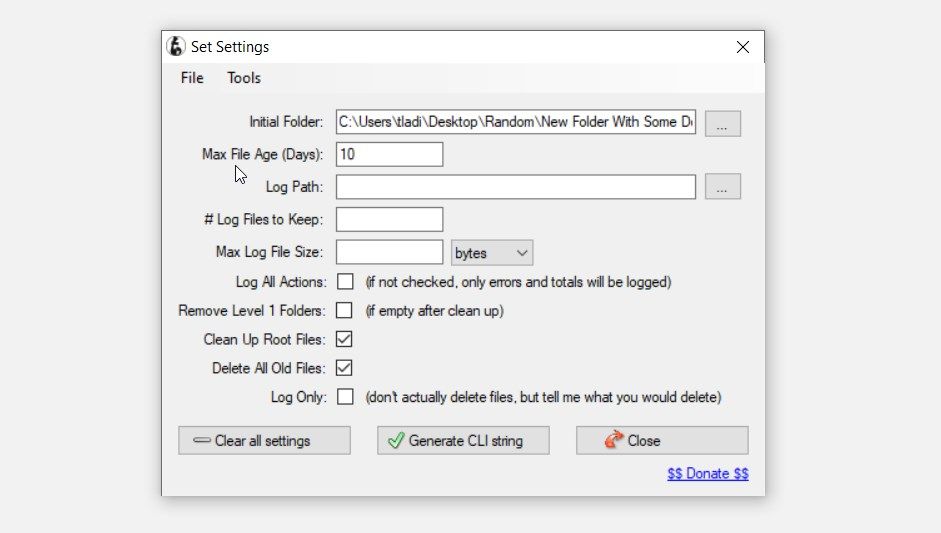
To get started, press theConfigure Settingsbutton in the bottom-left corner.
Next, press theInitial Folderbutton and select your preferred folder.
Next, configure the other parameters and tick the relevant boxes in the same window.
Finally, pressEnterto finalize the process.
Download: SubDirectory Cleanup forWindows(Free)
5.
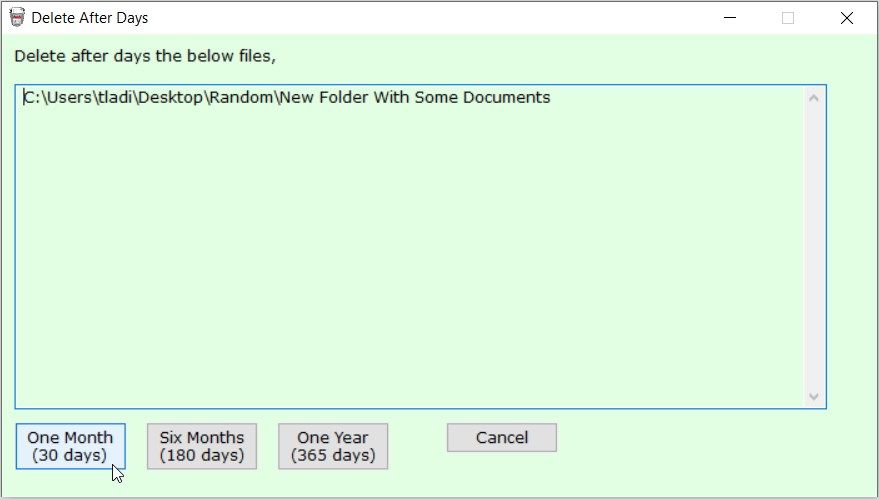
Delete After Days
The Delete After Days tool is another easy-to-use and lightweight app.
After launching this tool, it displays a widget toward the bottom-right corner of your screen.
From there, press theOne Month,Six Months, orOne Yearbutton at the bottom.
This will automatically delete your files based on the option youve chosen.
Download: Delete After Days forWindows(Free)
6.
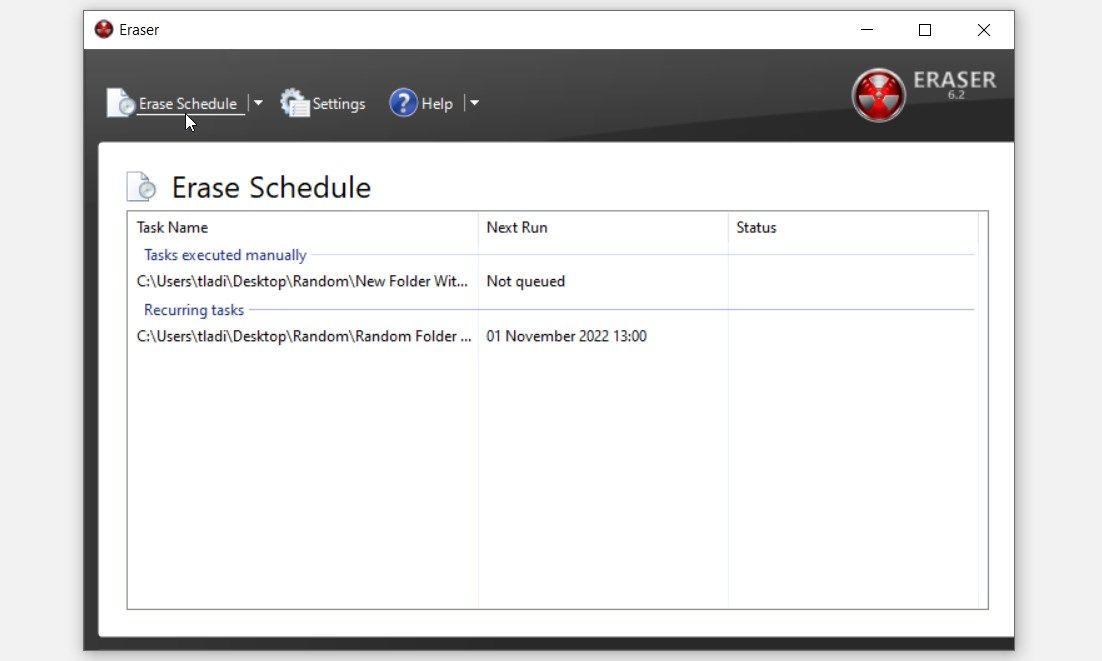
Eraser
The Eraser tool features a simple interface comprising only three buttons: theErase Schedule,configs, andHelpbuttons.
TheErase Schedulebutton allows you to schedule your file deletions.
To get started, click theErase Scheduledrop-down menu and selectNew Task.
From there, opt for relevant option on theTask Typemenu and then press theAdd Databutton.
In the next screen, click theTarget typedrop-down menu and selectFiles in Folderor any other relevant option.
From there, press theBrowsebutton and then select your preferred folder.
Next, right-choose your folder and selectEdit Task.
When you finish, navigate to theScheduletab and configure the automatic file deletion tweaks.
If you want to configure additional controls, press theSettingsbutton on the main interface.
And if youre stuck along the way, press theHelpbutton.
Download: Eraser forWindows(Free)
7.
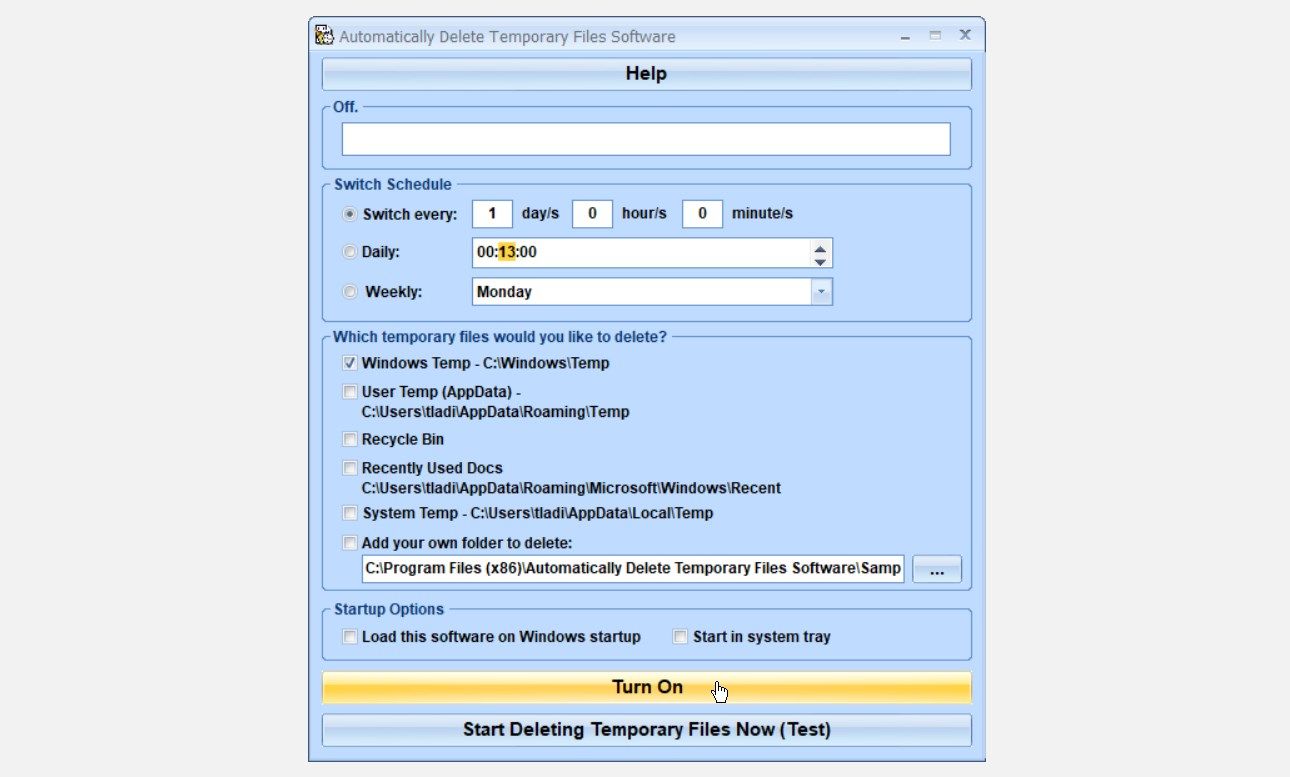
Automatically Delete Temporary Files Software
This lightweight app is built specifically for automatically deleting temporary files.
The Automatically Delete Temporary Files Software tool is quite user-friendly and has an impressive interface.
From there, select whether you want to delete the temporary files daily or weekly in theSwitch Schedulesection.
Finally, press theTurn Onbutton at the bottom of the screen to start the automatic file deletion process.
And if you want to automate this process, check out any of the apps weve covered.
The best part is that most of the tools we’ve covered are free of charge.
