3D printing delicate parts can be challenging, and this is where support structures come in.
Supports ensure that complex parts are not misaligned or detached during the 3D printing process.
Below, we discuss the three main scenarios for using them.
The additional weight and leverage of the overhang make the structure more prone to collapse.
By using supports, you’re able to ensure the vertical elements are adequately reinforced.
They also ensure that your 3D models are stable and appear as expected.
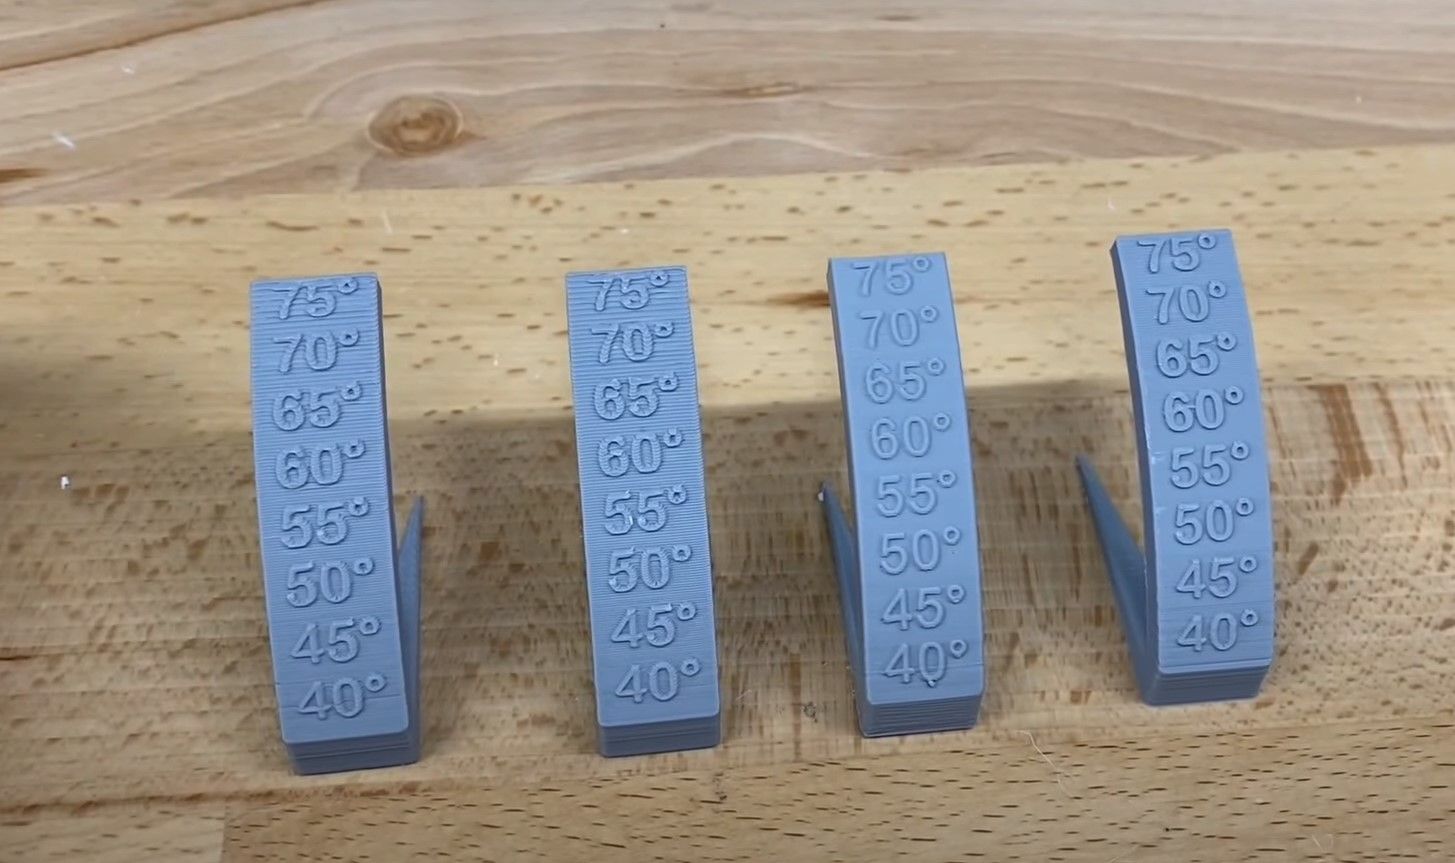
Image Credit: Farnz’s Free Time/YouTube
The supports also prevent designs from warping or breaking during the printing process.
Additionally, using these supports allows you to make precise adjustments to ensure your model matches your original design.
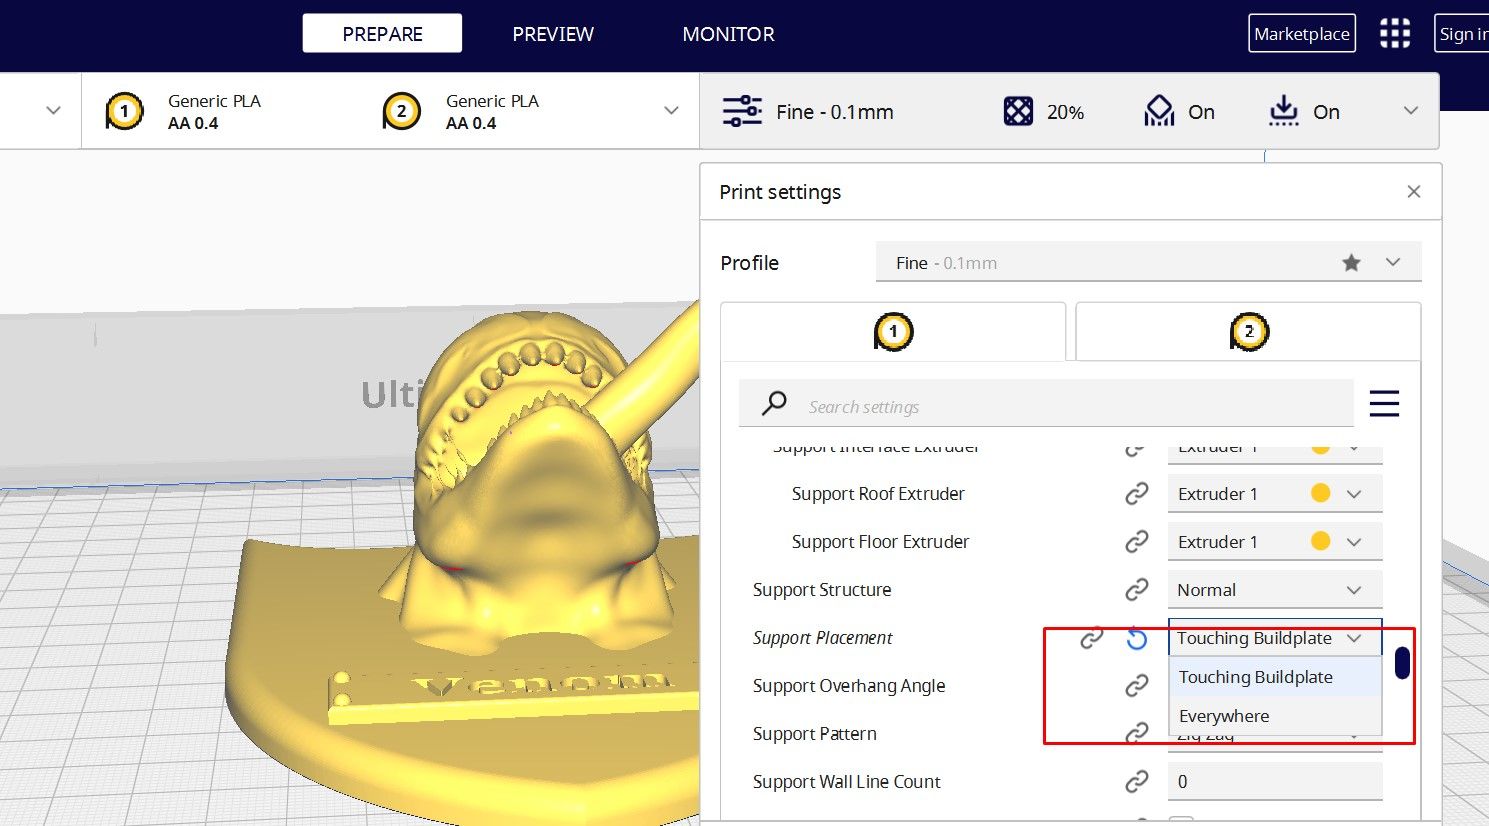
In Cura, you might add them by going to thePrint settingsmenu and selecting theSupportoption.
There is also an option to snag the pattern of your supports.
Whether triangles, lines, grids, concentric, zigzags, or crosses.
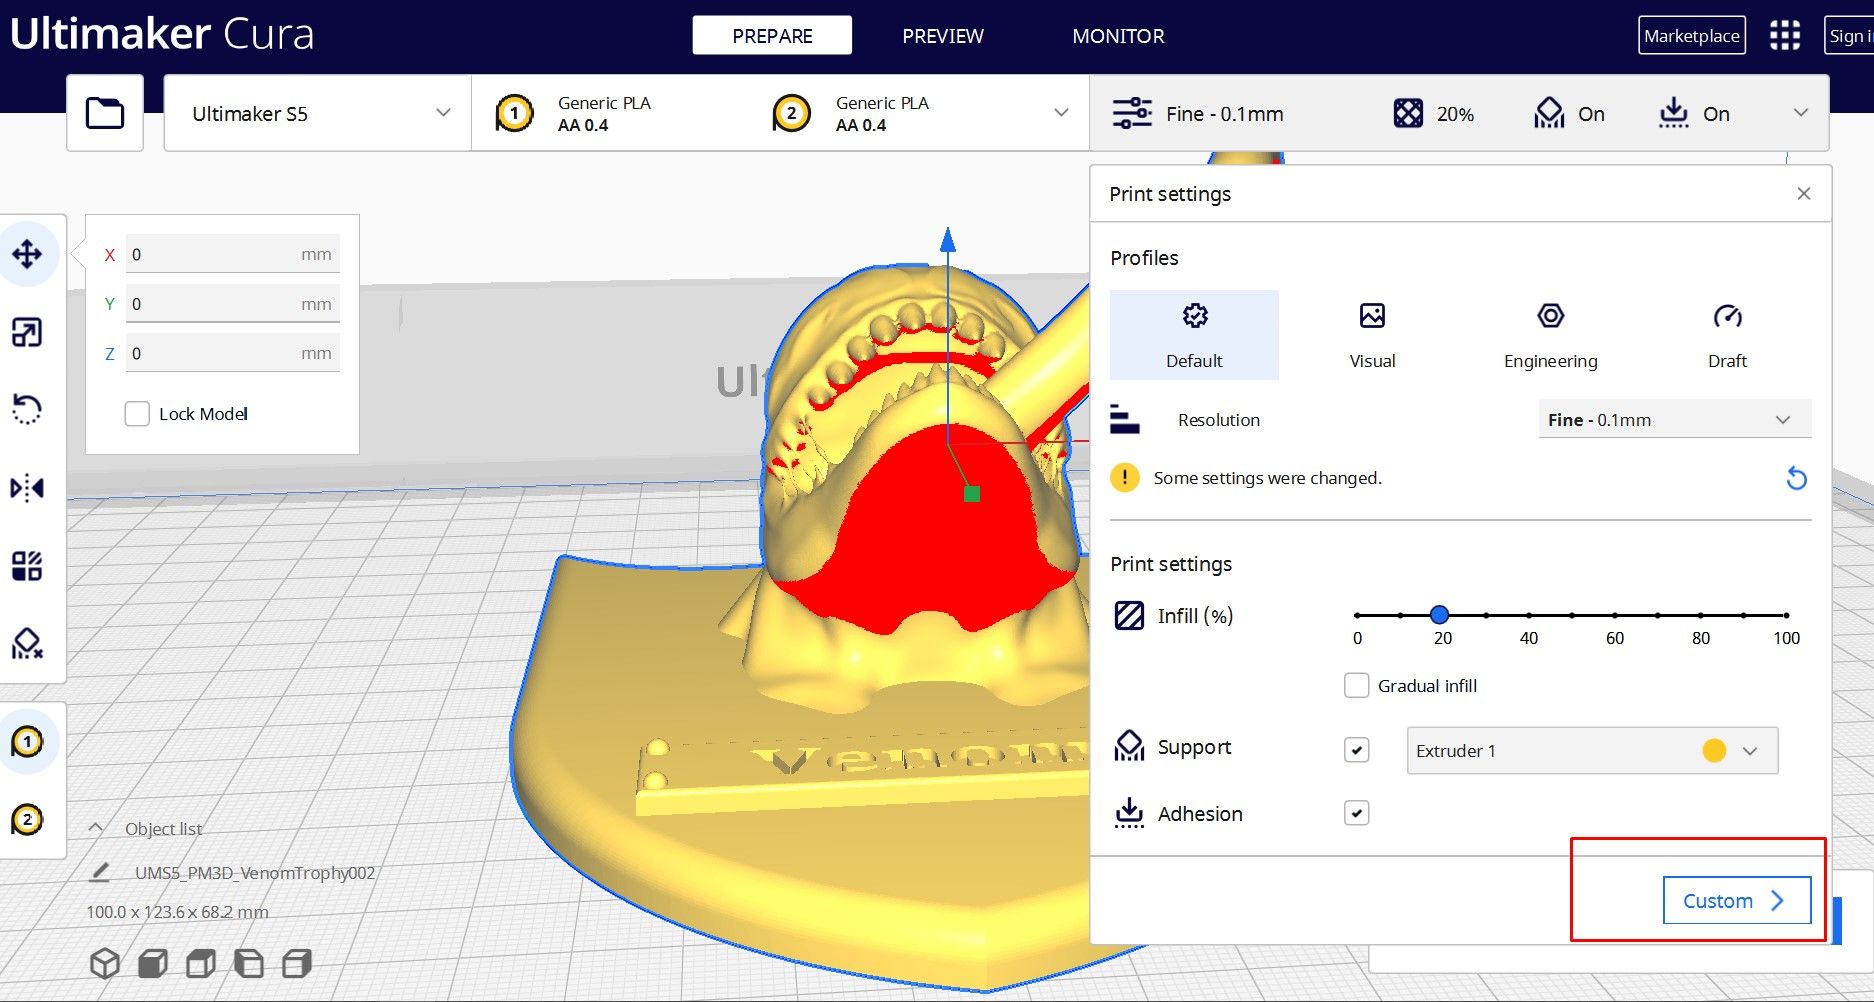
Cura also has an option to add custom supports.
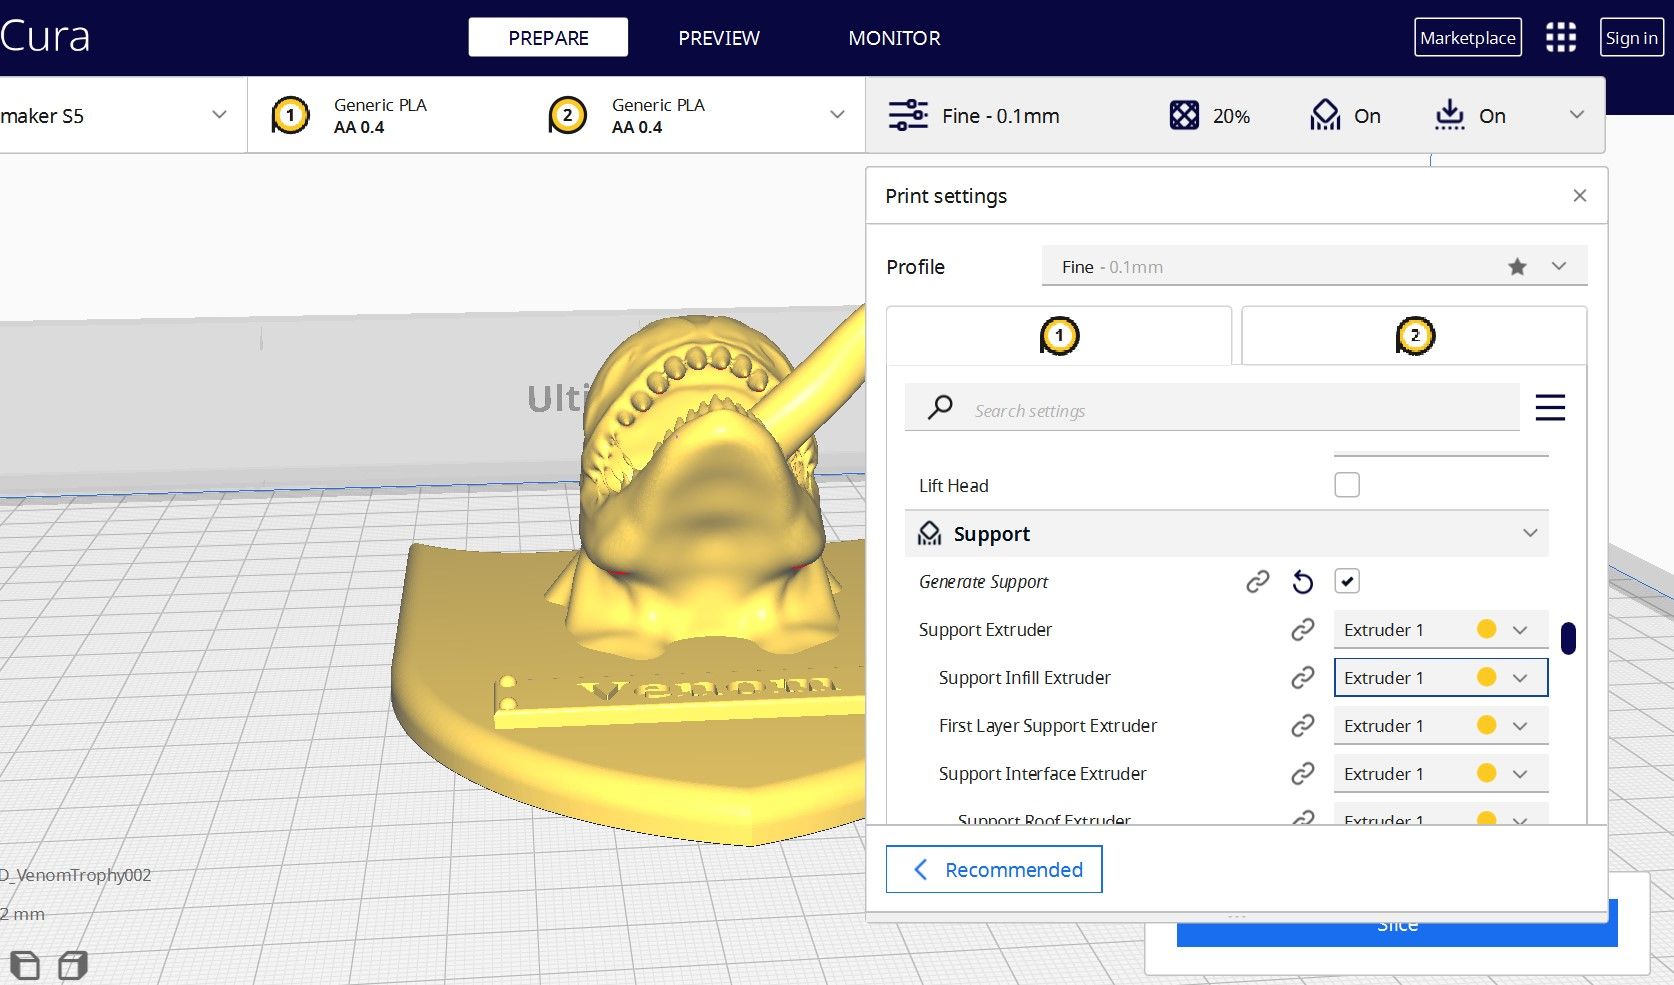
Custom supports are vital if you want more control over where your supports are placed.
To do this, clickCustom,and adjust the tweaks displayed accordingly.
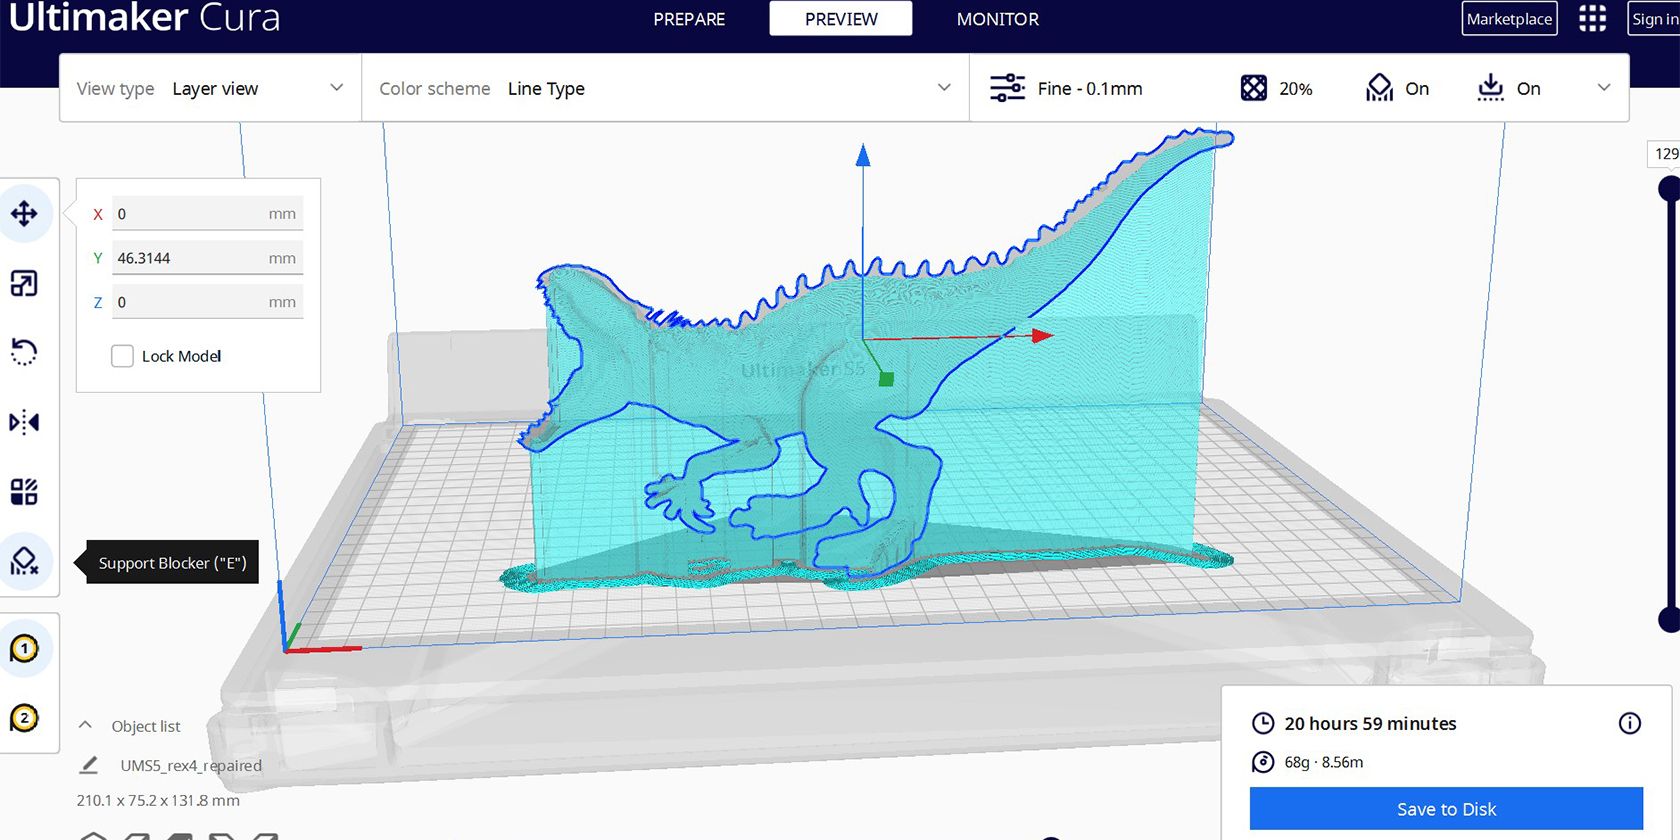
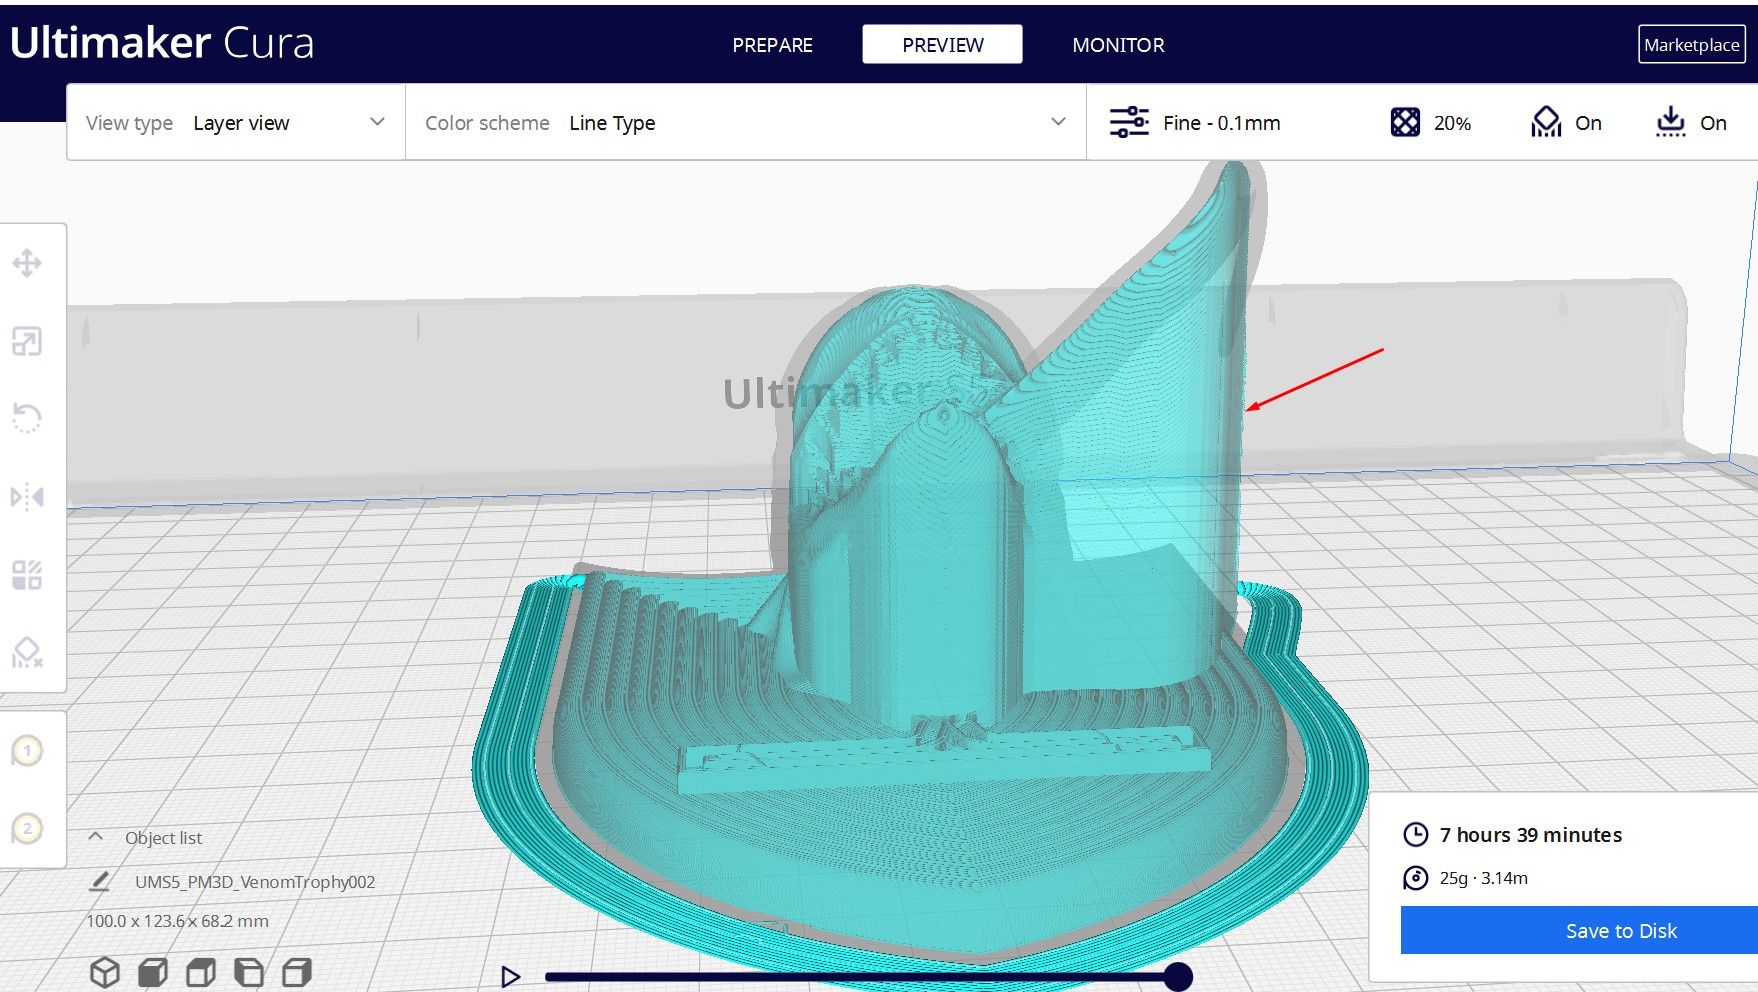
The figure below shows a preview after adding supports to the model.
you’ve got the option to also change the support patterns if you dont like the one displayed.
By avoiding these common issues, you’ll 3D print with fewer headaches and better results.
How to Remove Supports
There are a few different ways to remove supports from 3D prints.
The essential thing in the process is adjusting the3D printer slicersoftware prefs to make removal easier.
you’re able to weaken or lessen them.
Below are other key methods for removing supports easily.
Adding and removing the supports is not always complicated.
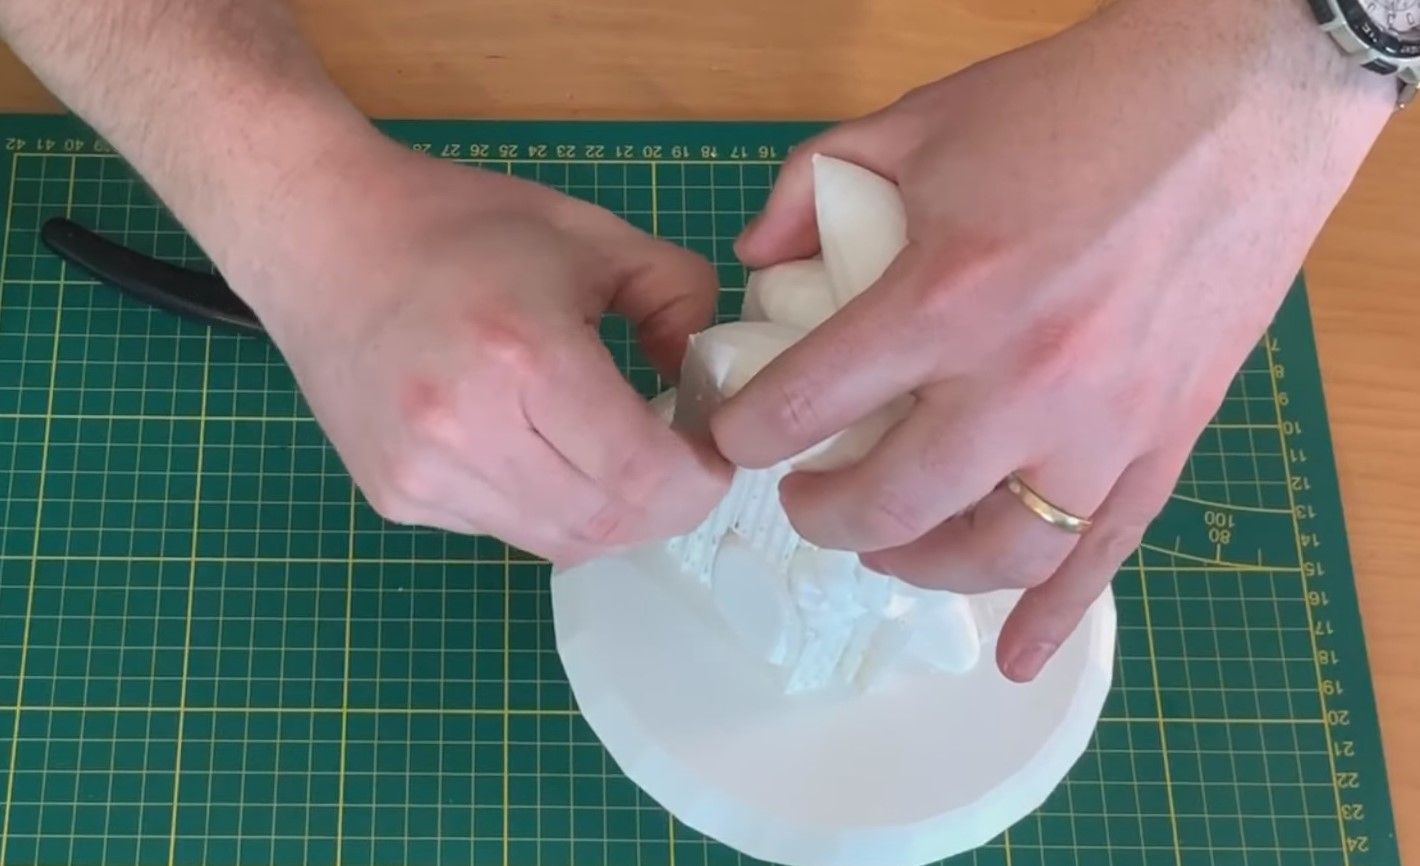
Image Credit: Zachary 3D Prints/YouTube
